Table of Contents
This is an old revision of the document!

EVO: Carburetor, Intake Manifold & Exhaust - Sub-01A
Rebuilding the Keihin CV Carb
Exploded view;
 1)
1)
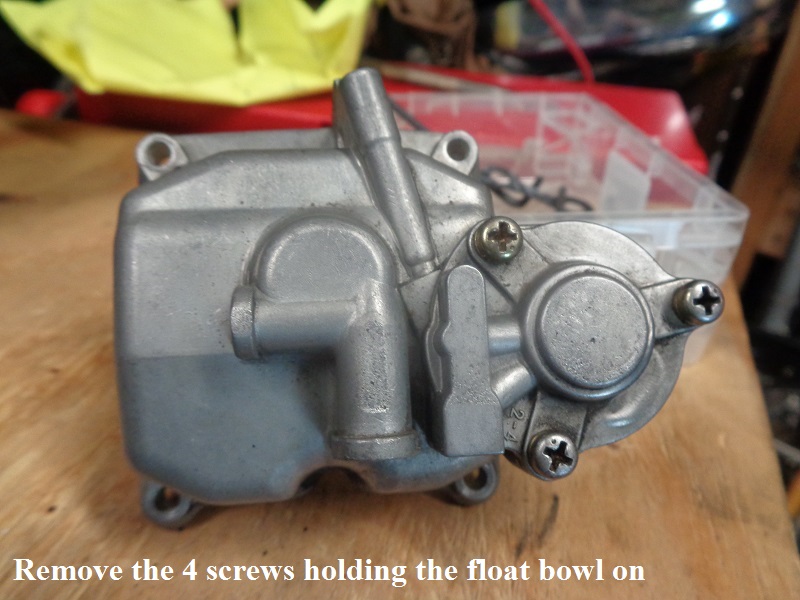
Disassembly
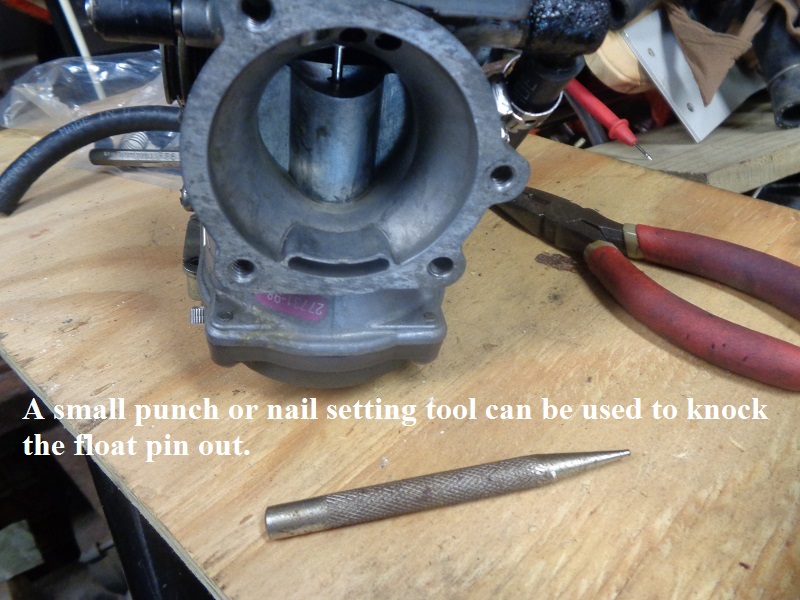
Float Bowl
Float

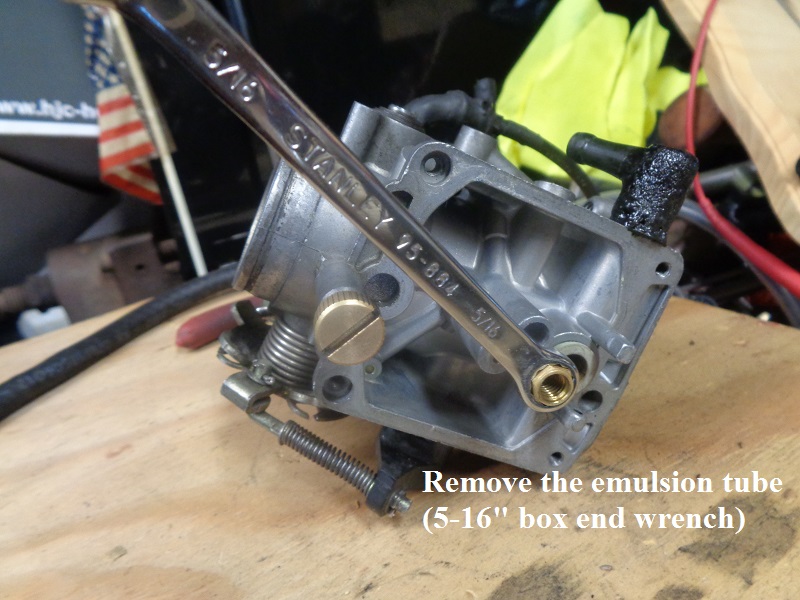
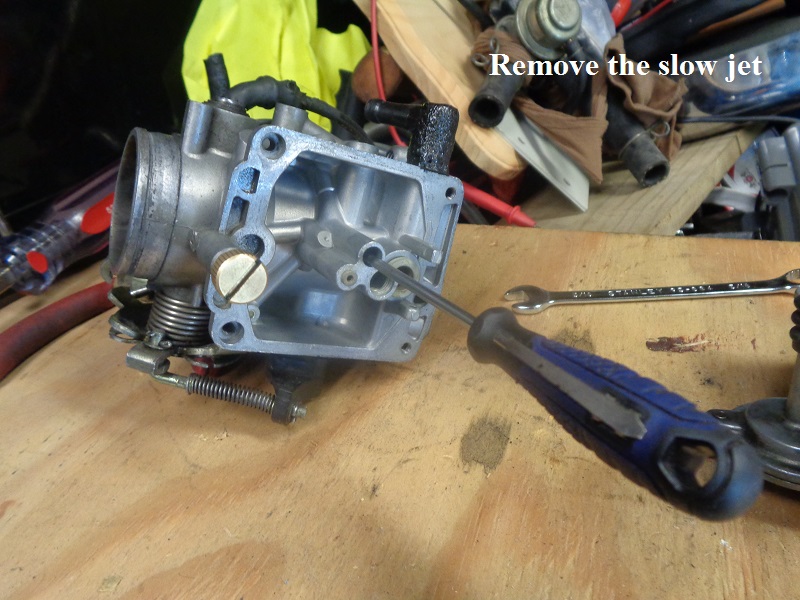
Jets

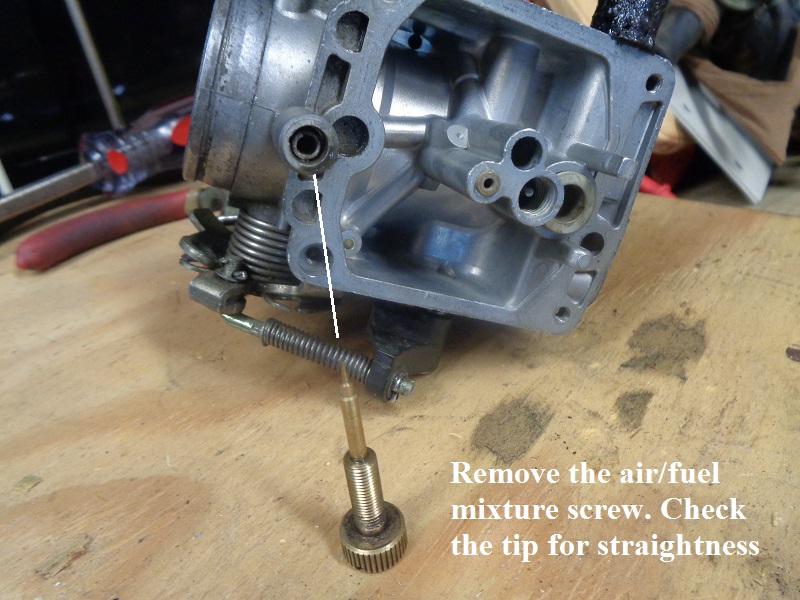
Air / fuel mixture screw
Accelerator pump
Cleaning & Inspecting
- Make sure to take everything apart, jets, needle, accel pump, all rubber components especially.
- Examine all parts for excessive wear, damage, distortion, etc.
- Cleaning solutions/sprays vary based upon your location, needs, budget, preferences and quality. Here are some ideas:
- An overnight soak in a solution of Pinesol and water followed up with a good brush down with a toothbrush then rinse and air dry. 20)
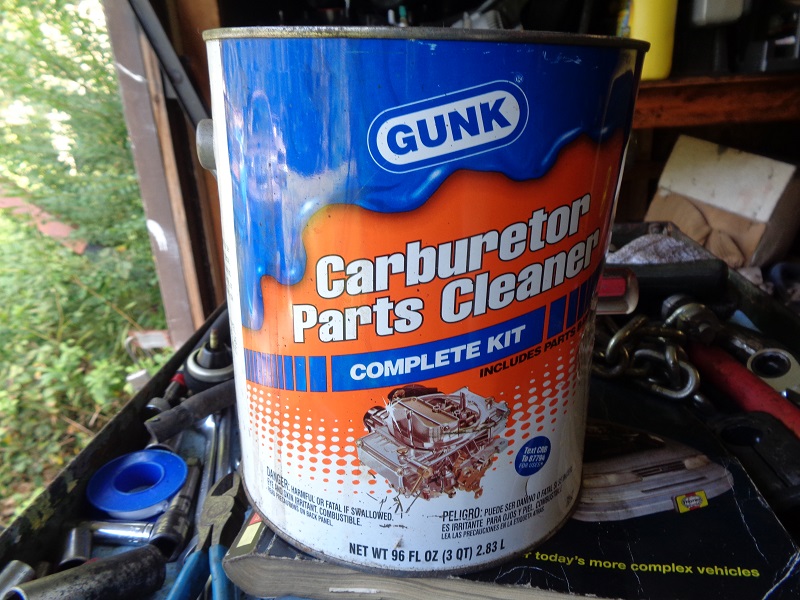
- A 20 minute soak in a gallon of Gunk (or other) Carburetor Cleaner that has a basket inside for small parts and lowers in the can with a handle, rinse, air dry, use.
- An aerosol spray carb cleaner will also work but may not loosen all of the build up in the jets or orifices in the carb body if they're not directly sprayed through.
A gallon of Gunk or equivalent is especially useful for soaking stuck gaskets and dried varnish.
A toothbrush dipped in carb cleaner can also be used to scrub gasket and outside surfaces to remove the grunge.
Depending on how old or how 'stuck' the parts are, soaking for a couple hours or even days may help to separate the old gasket in between.
Make sure to remove any rubber or plastic parts that will be reused before soaking.
Spray all soaked surfaces down with water afterwards to remove and de-energize the cleaning solution.
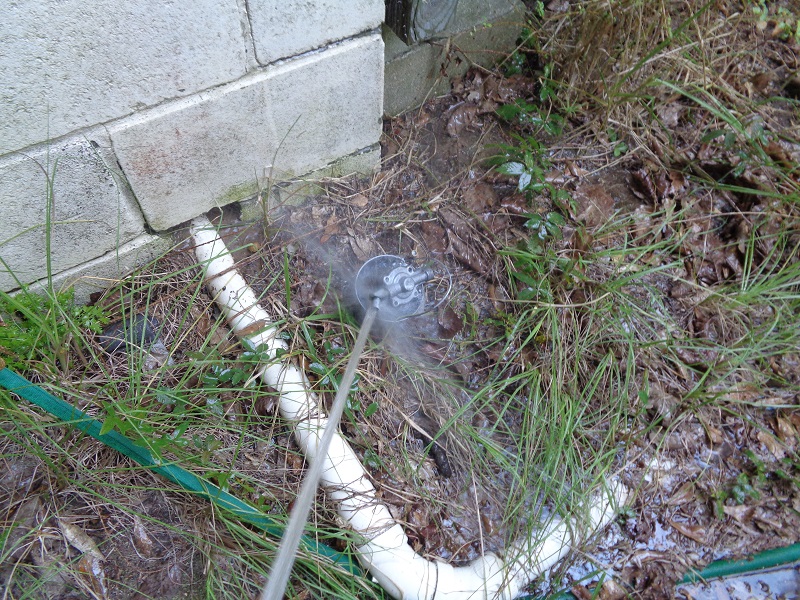
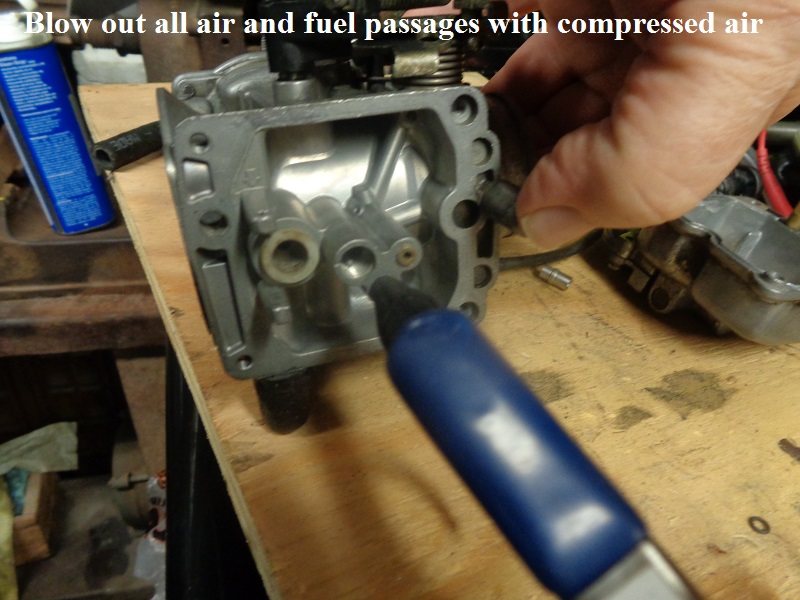
Also check the label for safety precautions. Blow out all holes, jets and orifices thoroughly with forced air after cleaning.
| Carburetor Cleaner 21) | |
 |  |
Carb body
Idle mixture circuit
Inside the CV carburetor there are a series of tiny passages. 22)
The idle mixture circuit connecting the mixture screw, pilot jet, and air intake jet located on the front face of the carburetor.
Dirt or old fuel that has become lacquer will clog these passages causing hesitation or lean popping.
Cleaning the idle circuit passages requires compressed air.
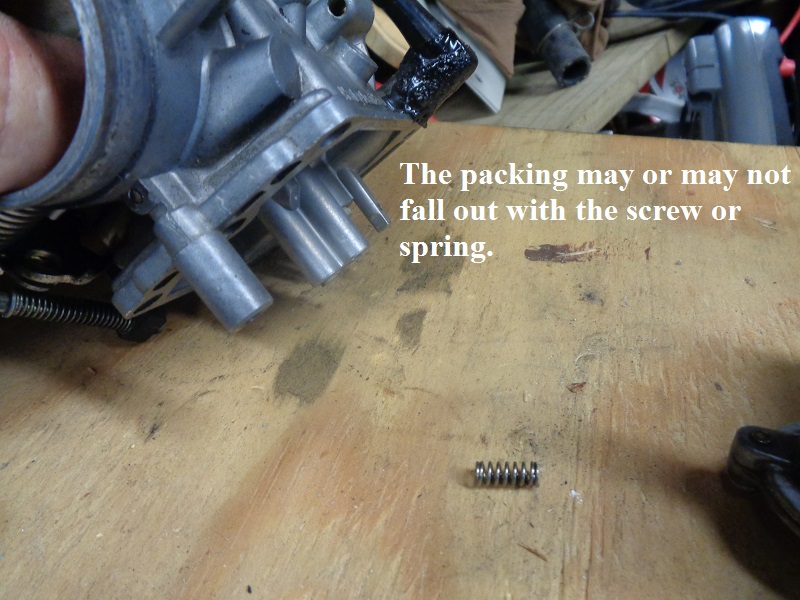
- Remove the pilot jet, mixture screw and packing.
- Spray a small amount of mild carburetor or fuel injection cleaner into the pilot jet and mixture screw passage.
- Do not allow any cleaning fluid to come in contact with the slide diaphragm (remove if needed) or the mixture screw O-ring.
- Use compressed air to clear the passages.
Cover the pilot passage hole with your thumb and use the nozzle of the compressed air on the mixture screw hole.
Air should come out of the air intake jet. Repeat the same procedure covering the mixture hole and using the air on the pilot jet hole.
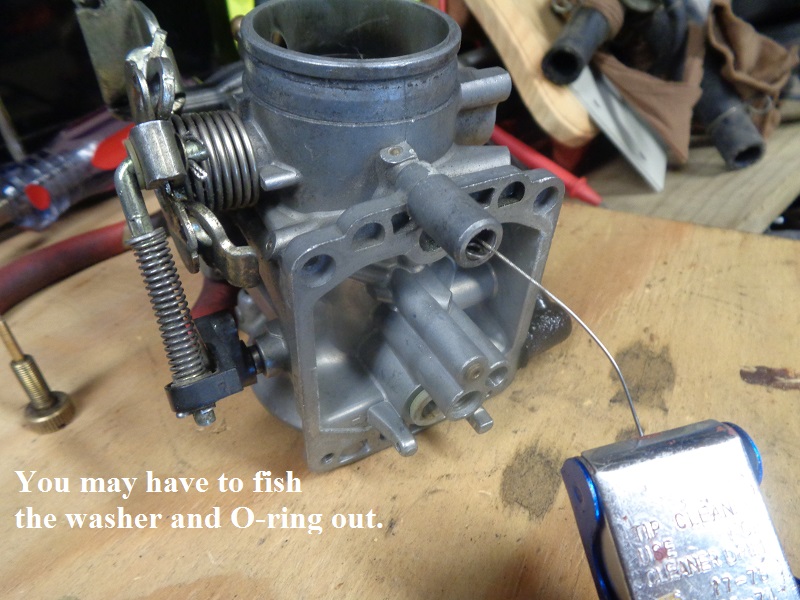
(this can also be done to remove the washer and O-ring stuck in the passage)
Inspect the pilot jet for any foreign material that could have become lodged inside.
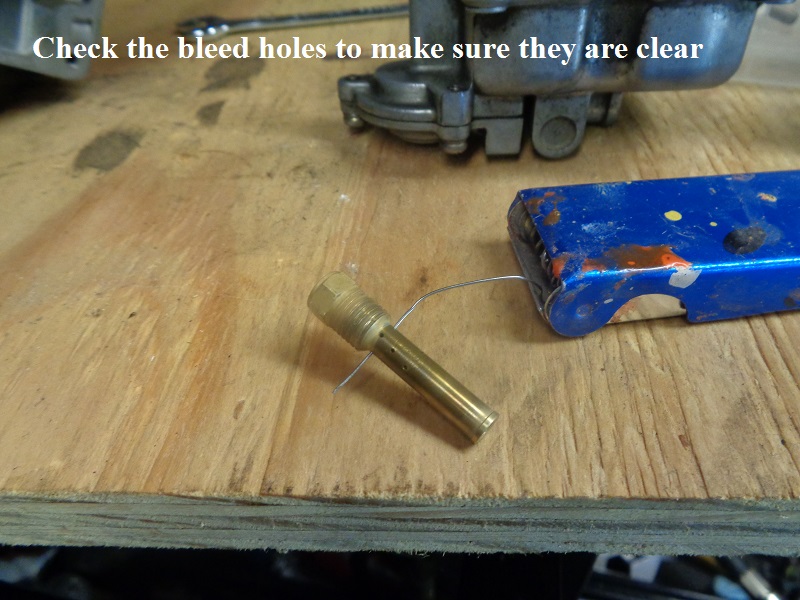
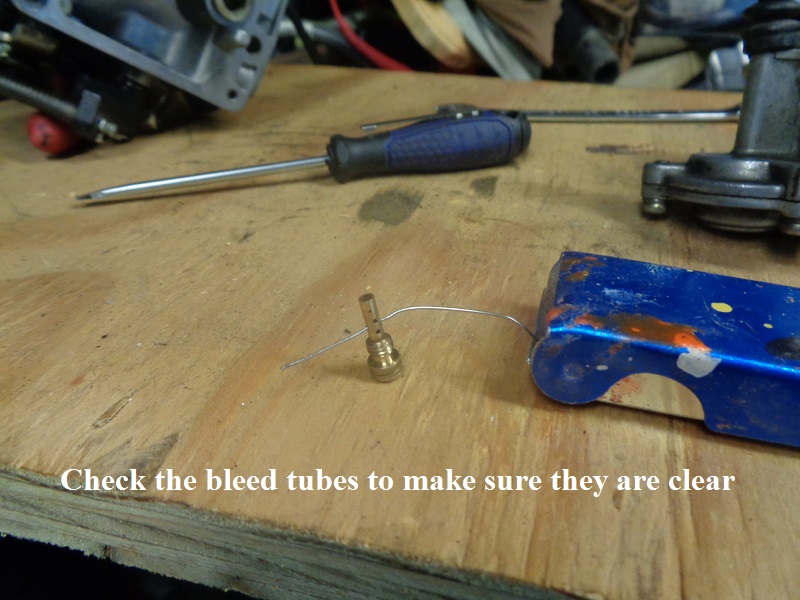
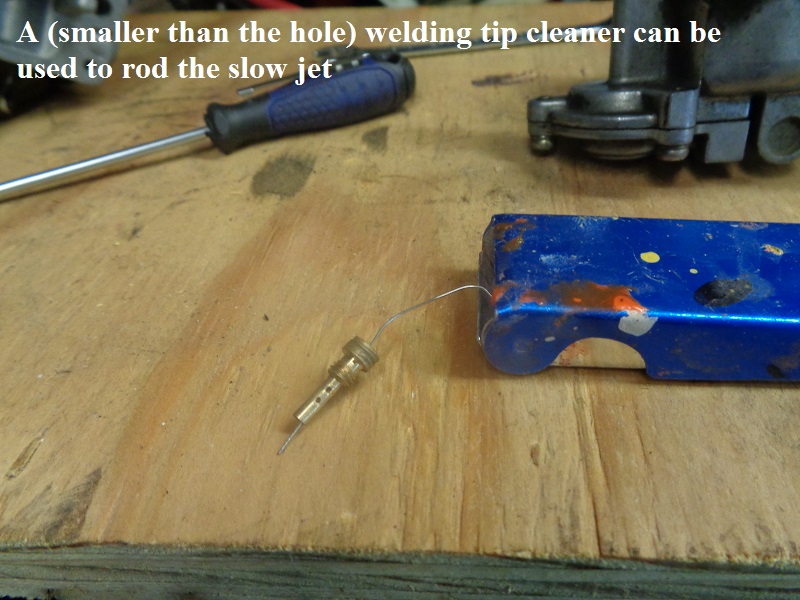
Jets
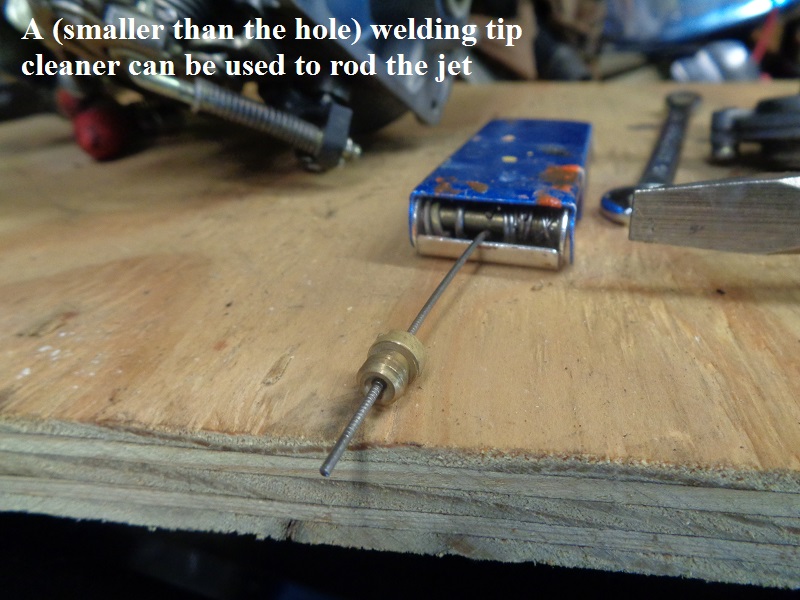
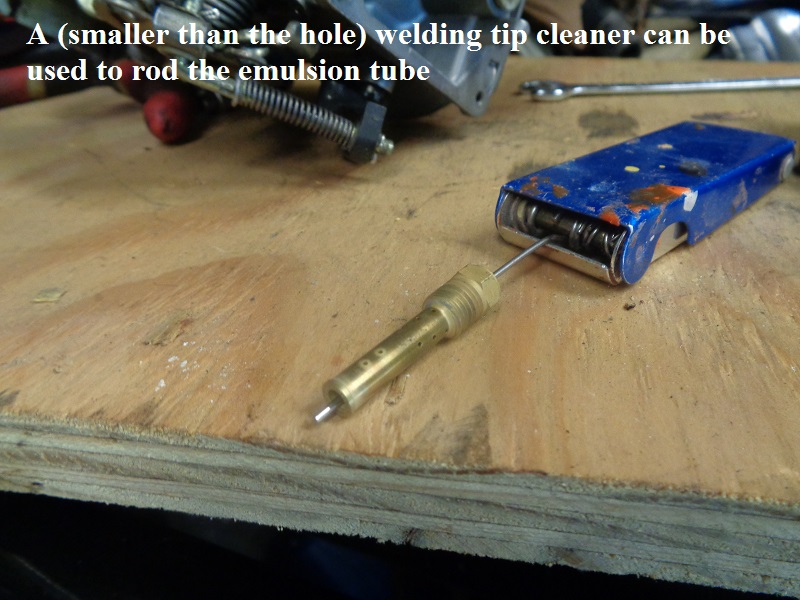
Generally, the jets can be blown out with compressed air unless they have been sitting for a few years getting gunked up.
If need be, you can run a welding tip cleaner into the holes to clear out varnish / debris that may be stuck there.
Caution: Only use a rod that is smaller than the holes being rodded and go very easy when inserting to keep from widening the jets.
 23)
23)  24)
24)  25)
25)
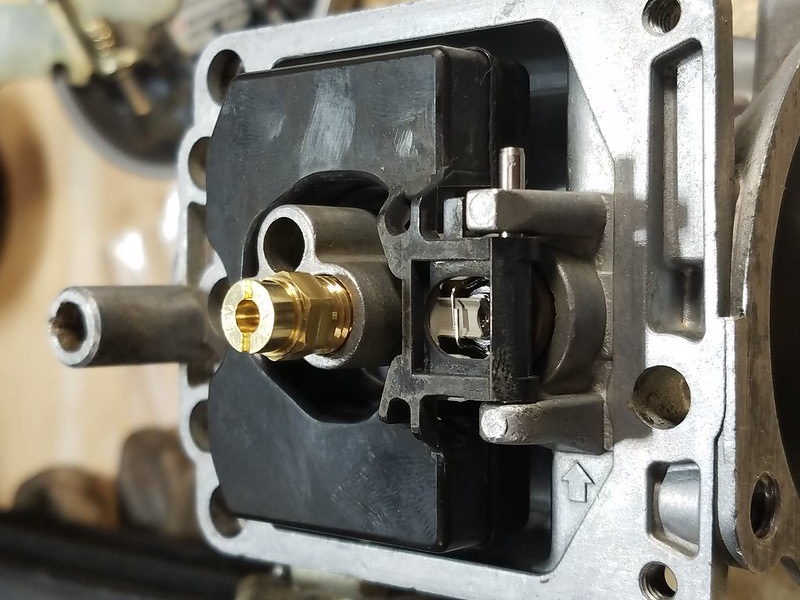
Air / Fuel Mixture Screw and Packing
Check the condition of the idle mixture screw to make sure the needle on the end is not bent or distorted.
Inside, under the screw, is a small rubber O-ring that seals inside the carb.
On top of that is a small washer and a spring and then the screw itself.
If the rubber is damaged / split or turned sideways, it could cause a leak.
Sometimes the screw gets over-tightened and gives a false reading when adjusting it.
Turning the screw out richens the mixture (adds more fuel to the mix). Turning the screw in leans out the mixture (adds less gas to the mix).
If the O-ring is not seating properly, adjustments to the A/F mixture will not be possible.
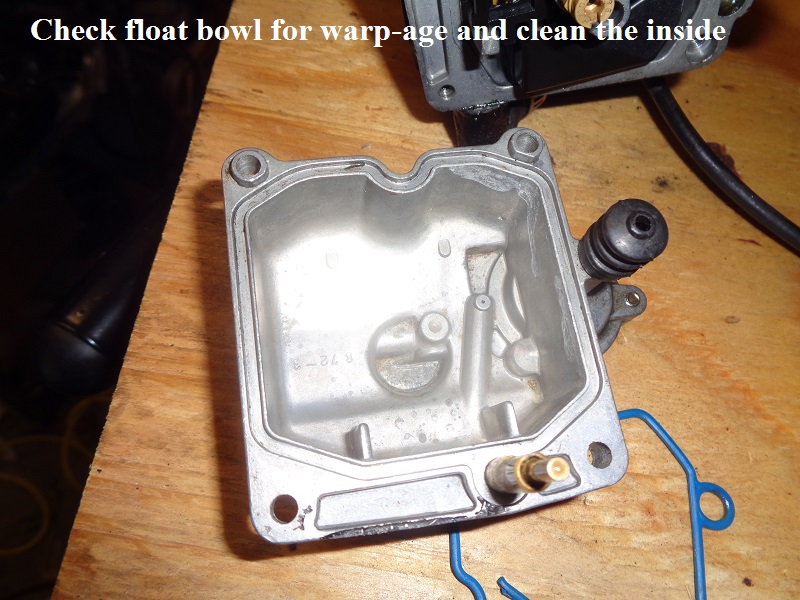
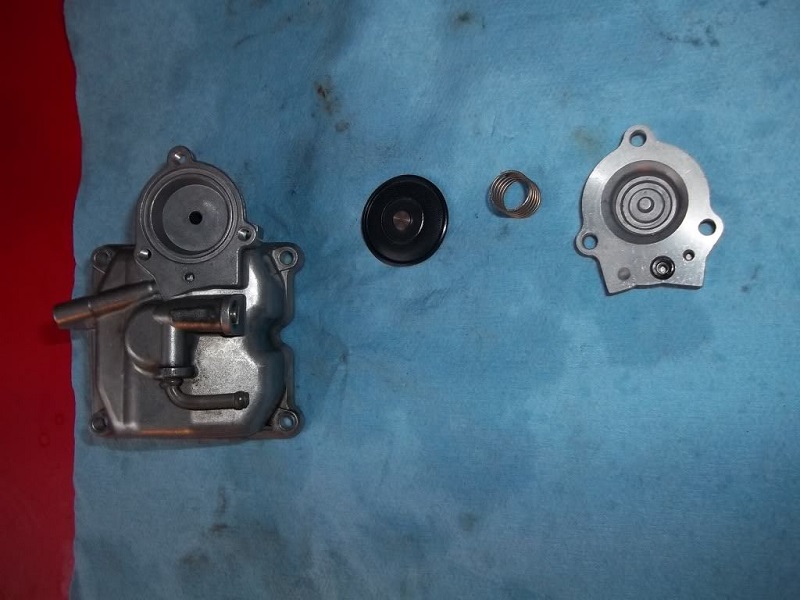
Fuel Float Bowl and Parts
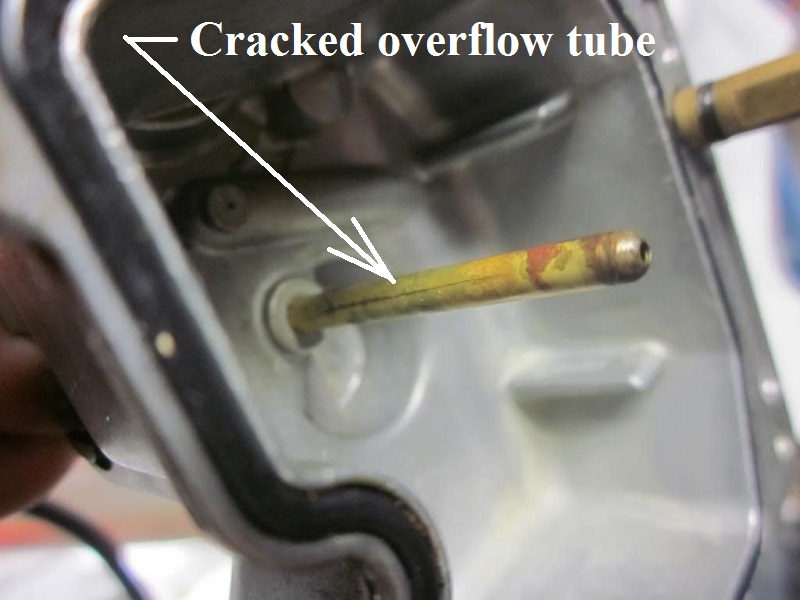
Check the overflow tube for cracks.
If found, either replace with a new / used bowl or if you can find the right OD brass tube, you can make a new overflow tube. 29)
As a repair, you could try to solder up the crack. 30)
You could go to a hobby store and buy a brass tube that just fits over the tube and then solder it all up.
Chances are your local indy has an old CV carb as lot guys replace their carbs and the shops end up keeping them.
You may find some good replacement parts there. 31)
 32)
32)
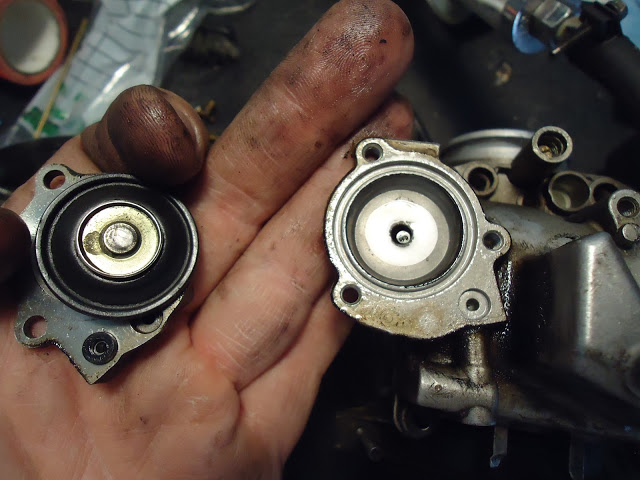
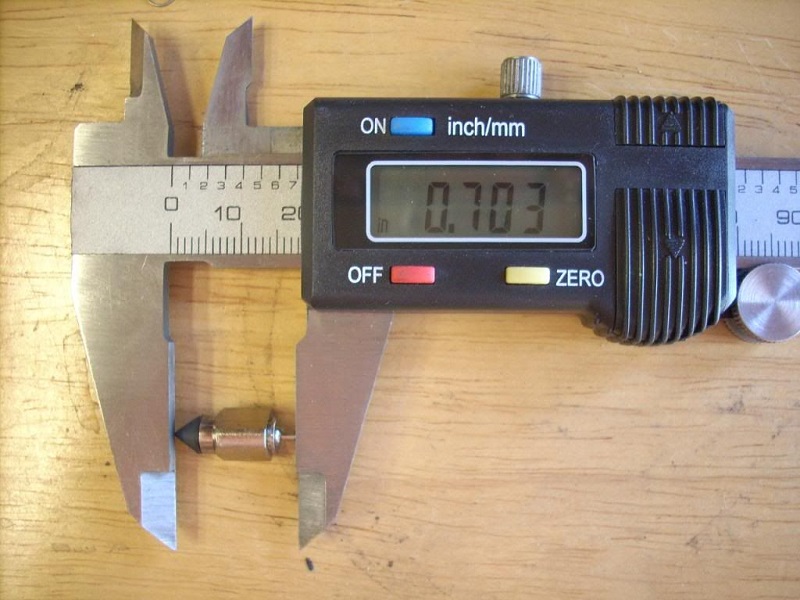
Check for a worn float valve. The float valve constantly meters the fuel level in the float bowl. 33)
If the neoprene valve tip becomes worn the carburetor is prone to flooding.
Also if the valve sticks due to a build up of lacquered fuel you may experience erratic fuel delivery.
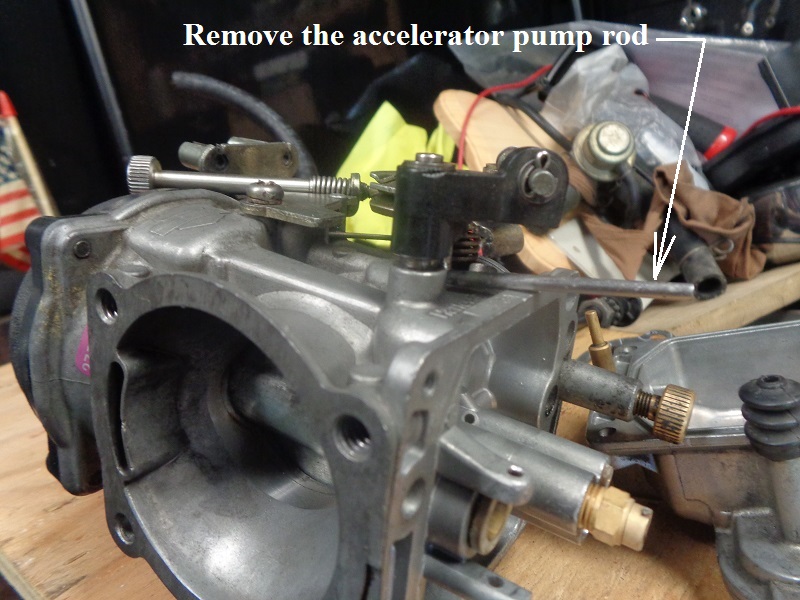
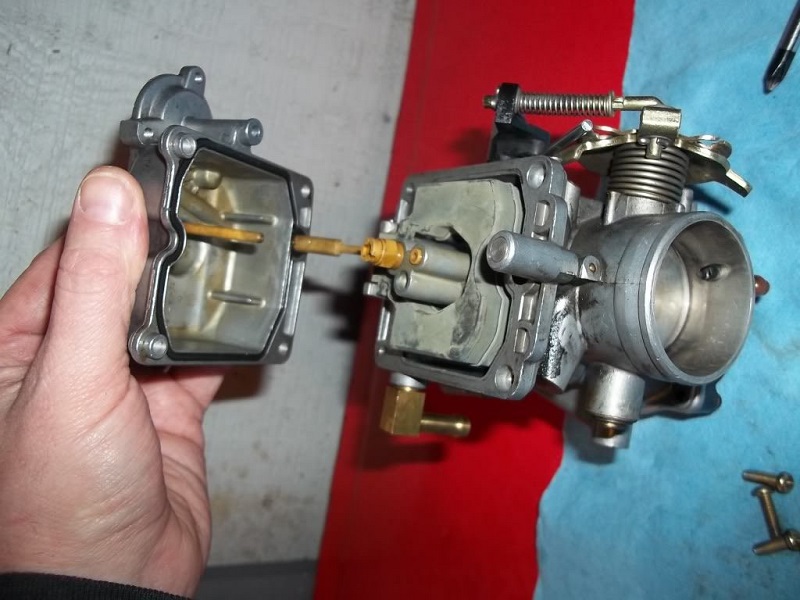
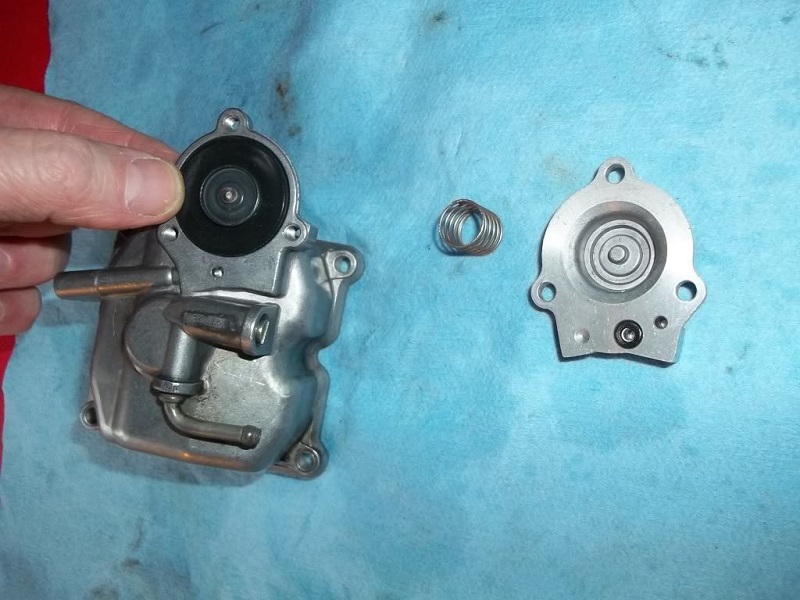
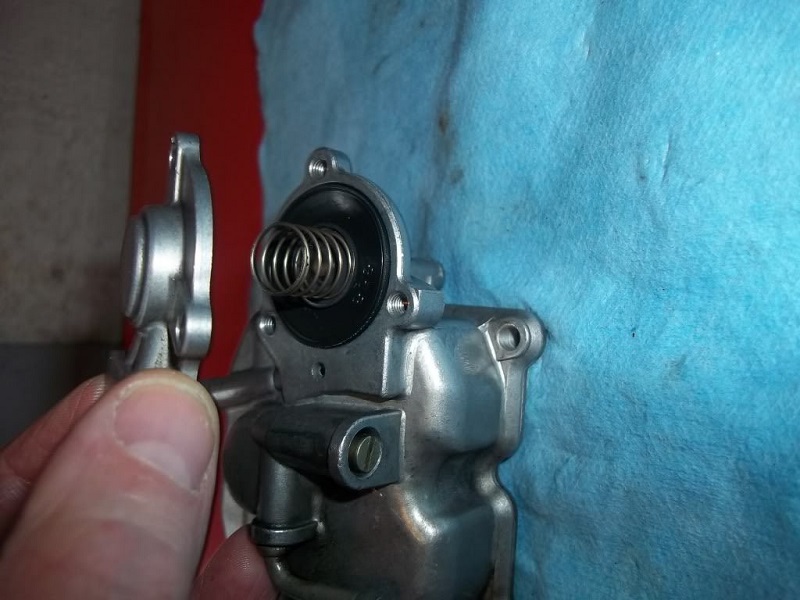
Accelerator pump
Check the diaphragm for wear, cracks and tears (especially if left to sit in a fuel filled carburetor for extended periods, it will eventually deteriorate). 34)
Check that fuel sprays from the accelerator pump nozzle when rolling on the throttle (test with engine off).
Also moisture can get inside the alloy housing in the pump body and bubble up, causing problems reassembling the pump. 35)
The tinniest bit of moisture / debris inside could cause the diaphragm not to fit right and cause a leak.
Make sure to clean both the housing and cover thoroughly.


Vacuum slide
See also To Drill or Not to Drill the Keihin CV Carb Vacuum Slide Hole
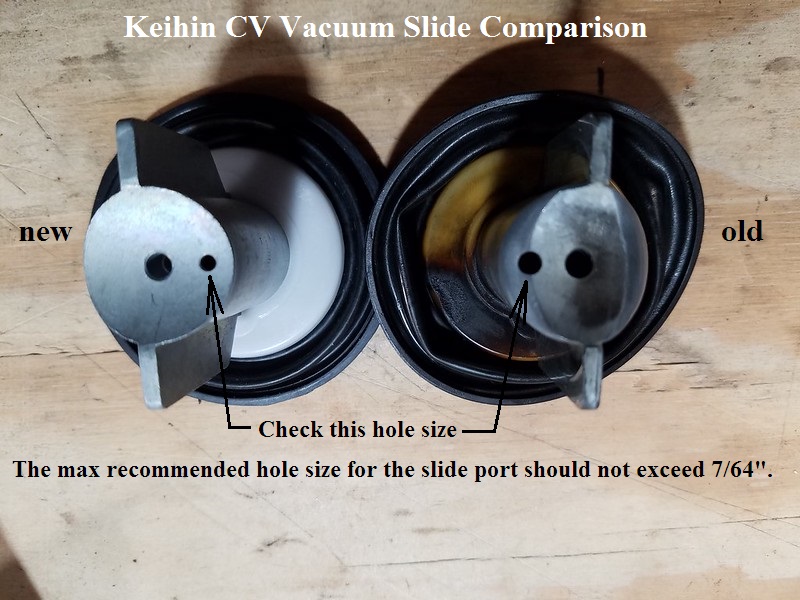
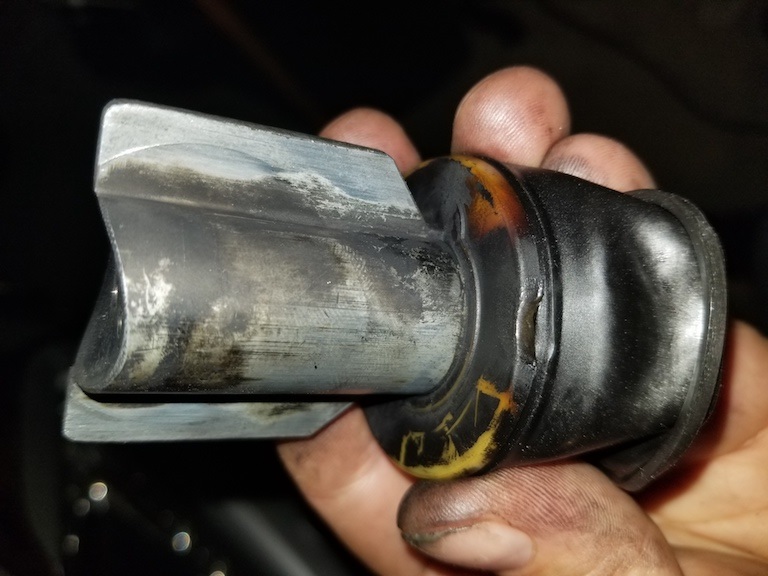
On the underside of the slide there is an offset hole used to displace vacuum/air as the slide moves up and down. 39)
The size of this hole can adversely effect the position and rate of travel of the slide.
For several years, many articles and companies promoted the practice of drilling the slide using a 1/8“ drill bit.
This was later found to harm performance and cause erratic behavior as the slide attempted to bounce and search for correct positioning.
Unfortunately those articles with the 1/8” recommendations are still widely published or found online.
Unsuspecting Harley owners perform that modification damaging the vacuum slide. The maximum recommended hole size for the slide port should never exceed 7/64“.
You can use a 1/8” drill bit as a gauge to check the vacuum port hole size.
If your slide has already been drilled at or larger than 1/8“ then complete replacement of the slide is recommended.
Check the hole size to verify it's not too big with the back side of a 7/64” drill bit.
If it won't fit or does 'just' fit, you're OK.
If you can wiggle it sideways a bit, the hole is too big. You can use an index drill bit kit to rod the hole with different size bits to be sure of the size.
If the slide diaphragm becomes pinched or is unable to seal, the slide will not function correctly.
Slide diaphragms for the Harley CV carb slide are not sold separately, so the only fix is to replace the assembly. 40)
Also check the diaphragm for rips / tears especially where it connects to the plastic on the assembly.
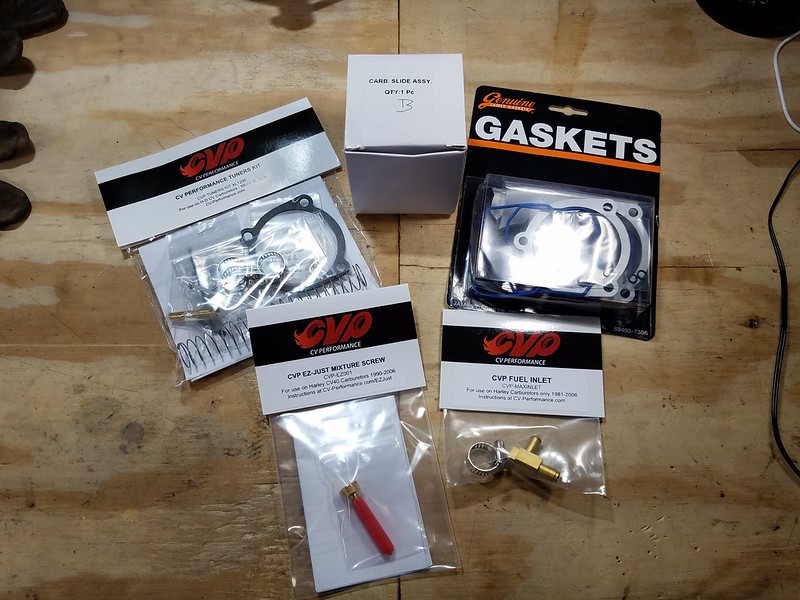
Replacement Parts
You can purchase individual parts or a rebuild kit. The kits will not have needles, jets or the spring, washer & o-ring for the Idle Mixture Screw.
The rebuild kits are usually less than $20 and include:
- Carb-to-Manifold Seal
- Carb-to-Air Cleaner Gasket
- Float Bowl Gasket/O-ring
- New Float Needle
- New Accelerator Pump Diaphragm & Spring
- Some Misc Parts/Seals
It's best to decide what all you need and any upgrades you want to do to the carb before ordering parts.
That way you don't have downtime waiting for them to arrive.
It's also a good idea to buy extra parts that may get damaged or lost during future removals for setting the float and other adjustments.
These extra items will come in handy later (float bowl gaskets, extra jets, one up and down size jets for tuning, A/F mixture screw packing and etc.)
It wouldn't hurt to have an extra A/F mixture screw also due to it being easy to drop and damage the tip.
See also the list of Keihin Carb Upgrades - Butterfly and CV Types in the REF section of the Sportsterpedia.

Assembly
- Do not lubricate the enrichment cable (misnamed Choke) on CV Carburetors - tension is needed. 45)
Main Jet
Check that the needle jet nozzle is installed correctly. Installing the jet upside down will adversely impact the fuel spray and needle metering. 46)
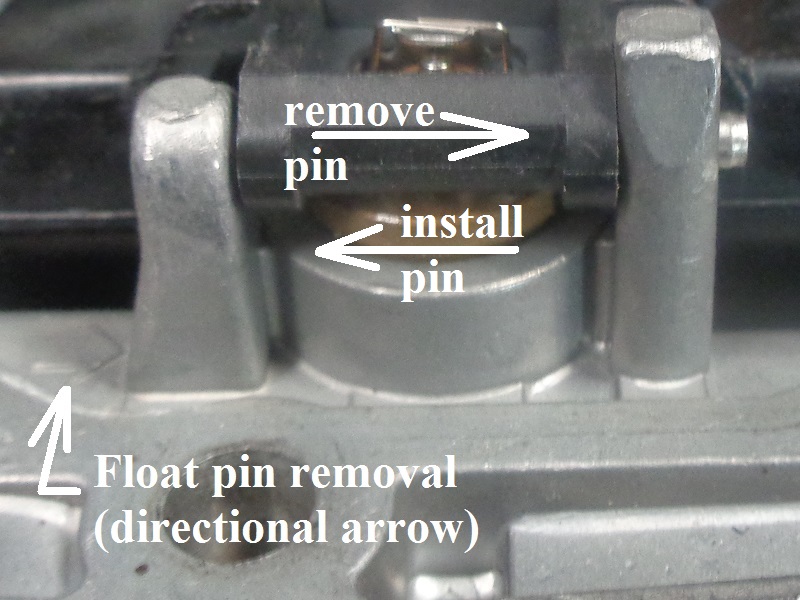
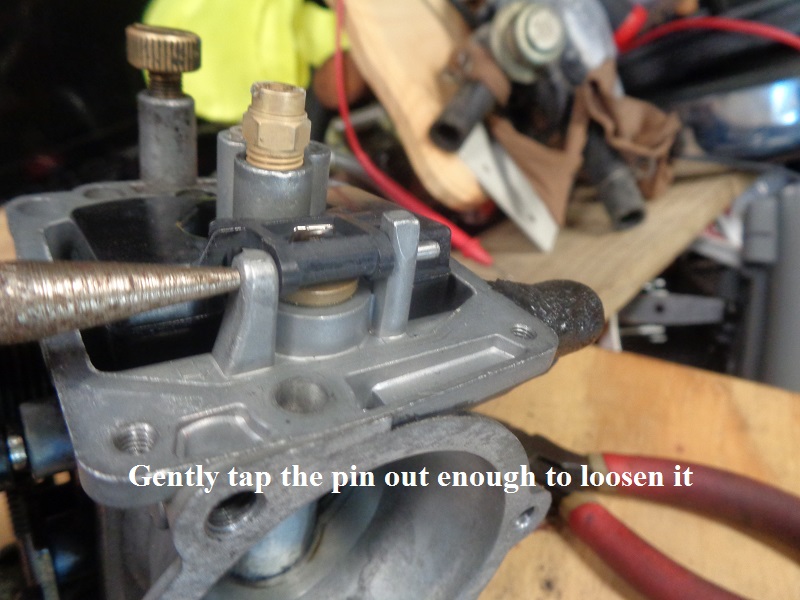
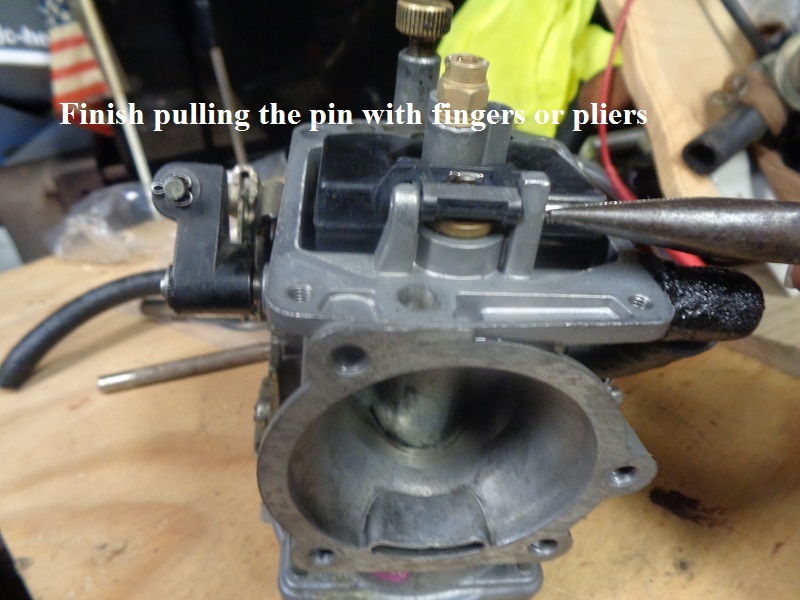
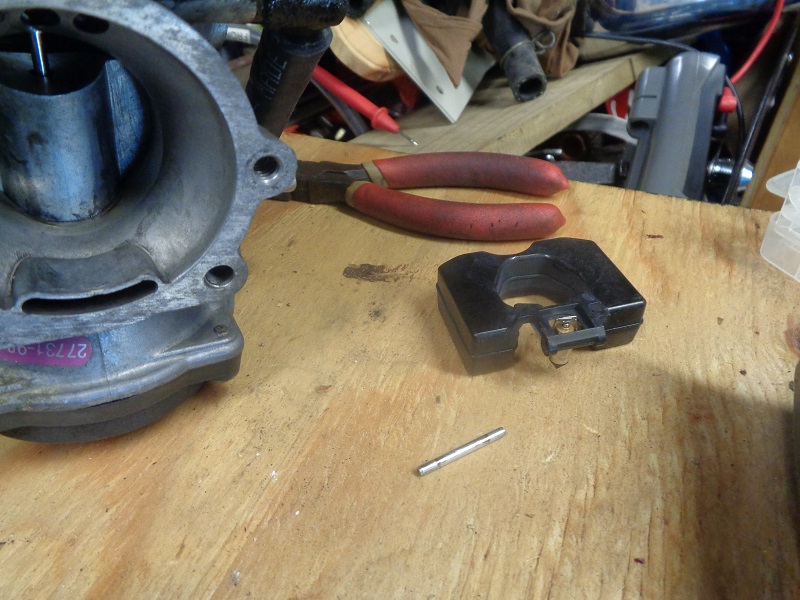
Float and Related Parts
The float needle should just kiss the seat with no extra pressure. The float valve has a spring loaded pin under the float tab.
So when the valve tip closes onto the seat, you can still push the valve down further.
The valve should 'just' close when measuring the float level. Pushing further in from there will not close the valve any further.
But it will cause you to set the float level wrong. The valve should be a light seat when measuring.
The angle the carb is set for measuring float level is critical. 49)
Some aftermarket needles are longer than the original and will really screw up the adjustment.
And some also have a defective neoprene tip on the other end, which does not seal even when set right. 50)
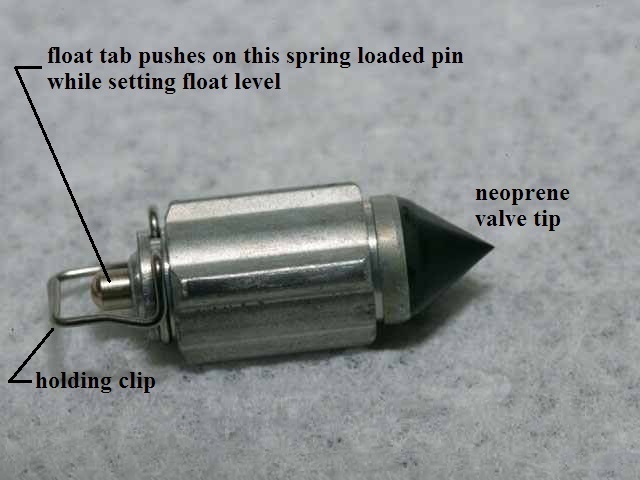

Both of these float valves will do the job. The stock valve is just a little easier to set.
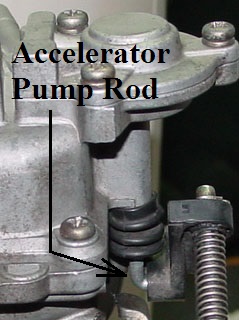
Accelerator pump
The accelerator pump rod simply slides into the plastic lever on the bottom and up into the boot to the pump.
It slides up pretty far inside the boot. This is what it should look like when installed.
 57)
57)
Add'l Info & Pics -
Accelerator Nozzle, Check Valve, Float Seat - http://xlforum.net/forums/showthread.php?t=1624208
Accelerator Nozzle & Check Valve - http://xlforum.net/forums/showthread.php?t=1775068
Carb to Manifold Seal
Apply a small amount of silicone grease to the inside of the manifold seal and make sure the carburetor presses firmly into it.
You can also use a spray bottle of water or run spit around the seal and carb throat to install the carb to seal.
The seal must be replaced periodically.
When the diaphragm is correct you can cycle the slide with a finger and when you release it you get a Darth Vader breathing kind of sound and the slide doesn't slam shut. 58)