EVO: Engine Control - Sub-03T
Replacing EFI Fuel Filter on 2013 883N
Base article by Blue Scoot of the XLFORUM
Caution: Do not use solvents or other products that contain chlorine on plastic fuel system components.
Chlorine can degrade plastic fuel system components, which can cause a loss of fuel system pressure or engine stalling and could result in death or serious injury. 1)
The fuel filter element is located in the fuel pump assembly inside the fuel tank.
Check the fuel hose and fittings for leaks.
The fuel filter kit from Drag Specialties was $39.99. The Harley kit, PN 75304-07a looks pretty much the same as the DS kit).
Parts from the MoCo were easily over $107. So, the Drag Specialties kit was used below.
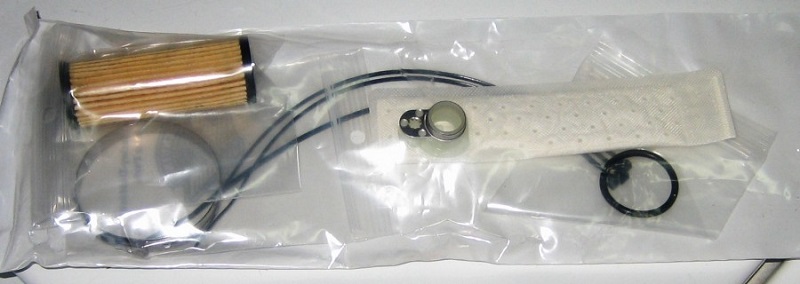
Drag kit center, left. OEM kit right. It came with everything needed to perform a maintenance on the OEM Fuel Pump shown below.
The one extra piece you will need to get from the dealer is the Gasket which runs about $20


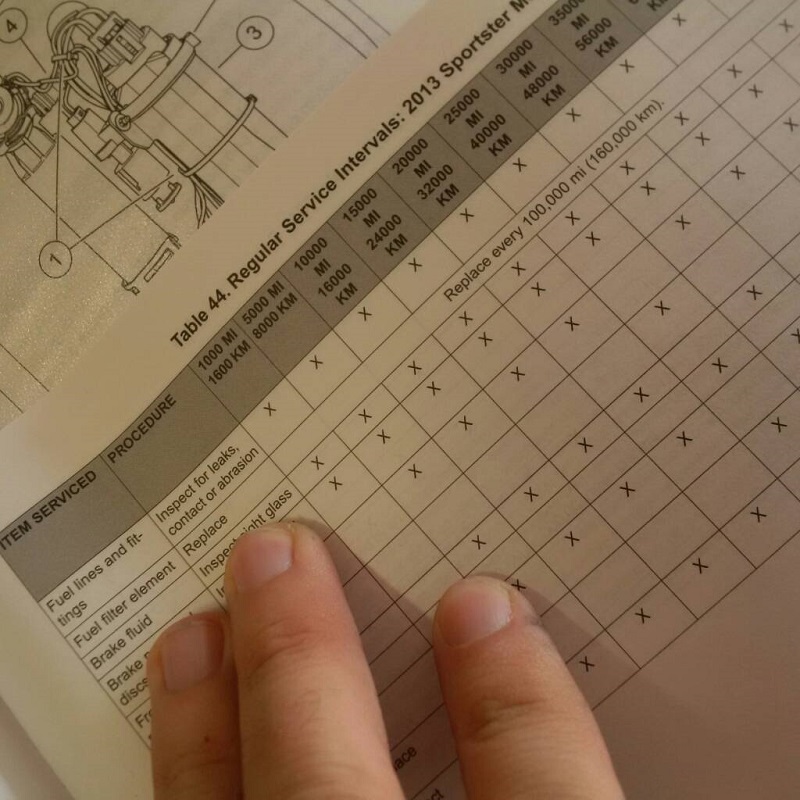
Here are the steps in the FSM to remove and replace the old filter: 5)
- Purge the fuel supply hose of high pressure gasoline and disconnect fuel supply hose from the fuel pump module.
To prevent spray of fuel, purge the system of high-pressure fuel before the supply line is disconnected.
Gasoline is extremely flammable and highly explosive which could result in death or serious injury. - Remove the seat. - Remove main fuse.
(From the FSM) To prevent accidental vehicle start-up, which could cause death or serious injury, remove the main fuse before proceeding. - Drain and remove fuel tank.
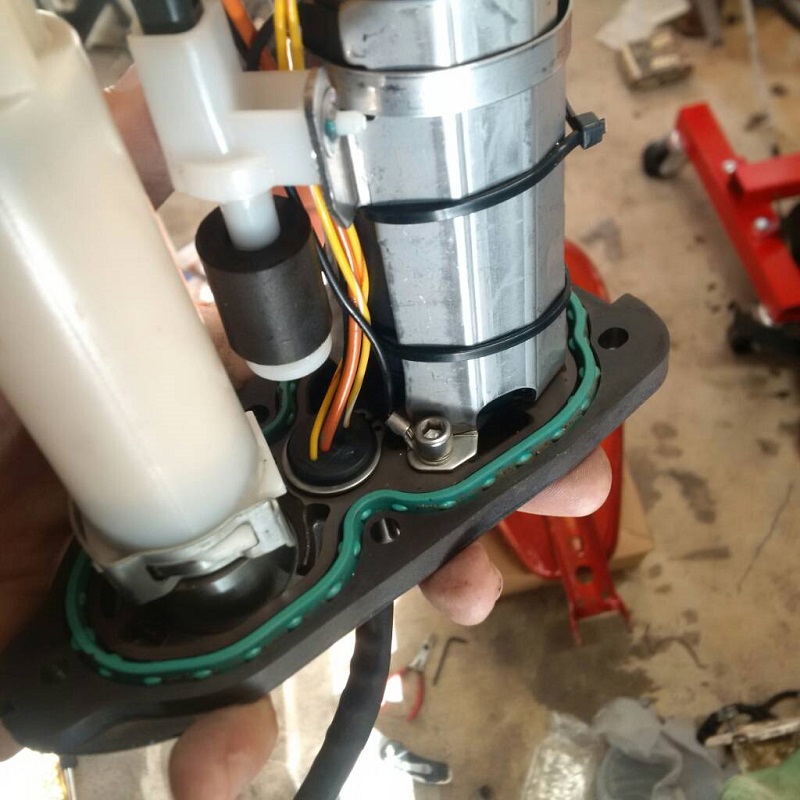
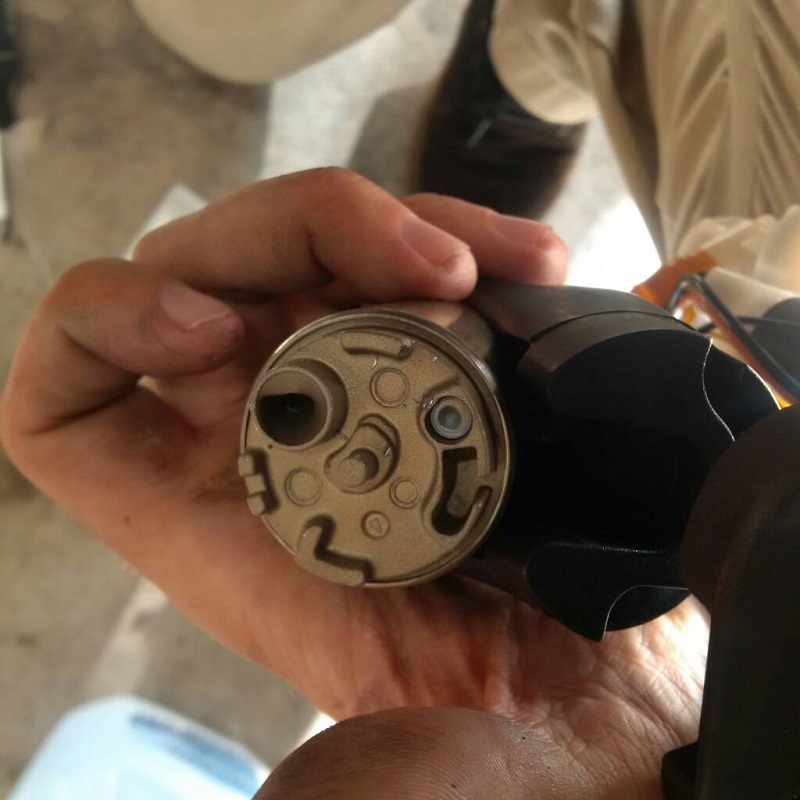
- Remove fuel pump assembly from fuel tank.
- Remove and discard the cover plate seal.
- Remove the retaining clip and lift the filter housing off the fuel pump assembly.
- Remove and discard the filter element.
And then to put it all back together:
- Install a new O-ring.
- Install a new filter element into the filter housing.
- Install the filter housing onto the base of the fuel pump assembly. Secure it with the retaining clip making sure that clip is oriented correctly (right side up).
- Install a new cover plate seal into the groove in the cover plate.
- Install the fuel pump assembly into the fuel tank and tighten the mounting screws in a cross pattern to 40-45 in-lbs (4.5-5.1 Nm).
- Install the fuel tank and reconnect the fuel hose. Fill the fuel tank and carefully check for leaks.
- Install the main fuse.
- Install the seat.
- Turn the ignition switch on and verify the fuel pump operates properly.
The FSM also says replace the fuel filter every 100,000 miles. Of course, you can change it at sooner intervals if you choose.
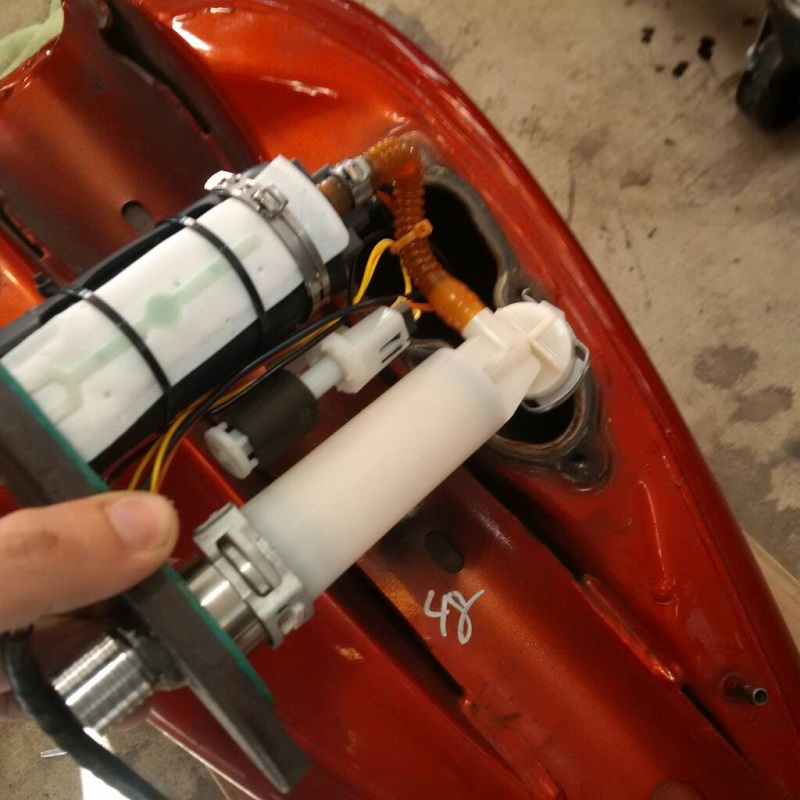
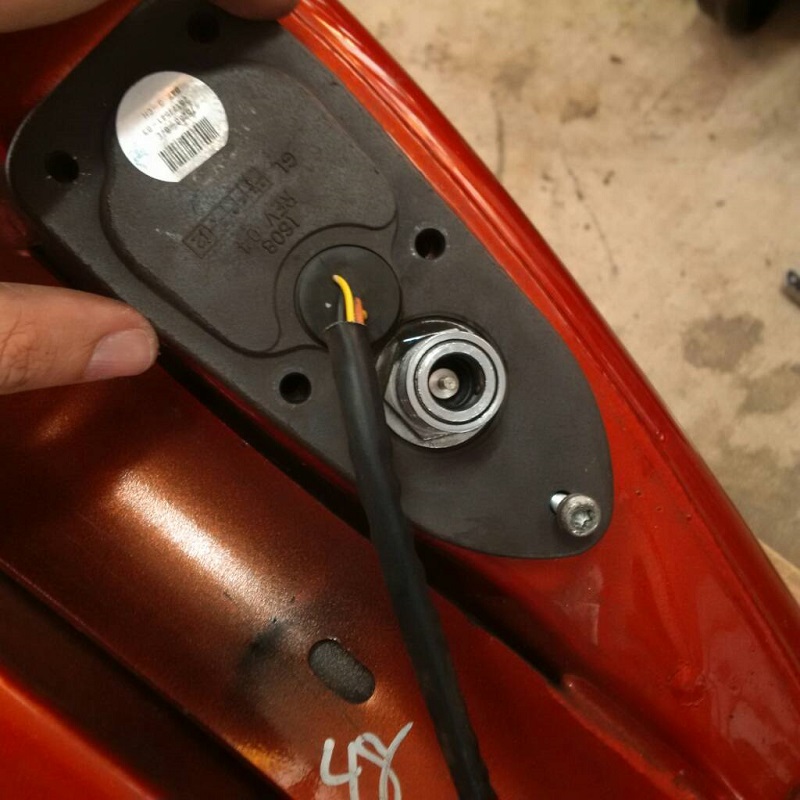
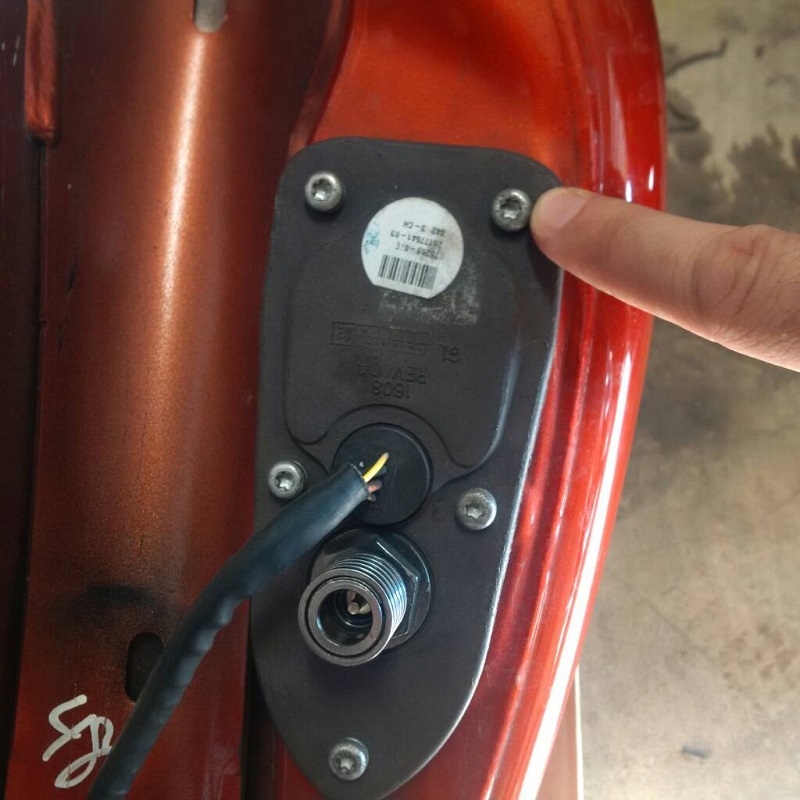
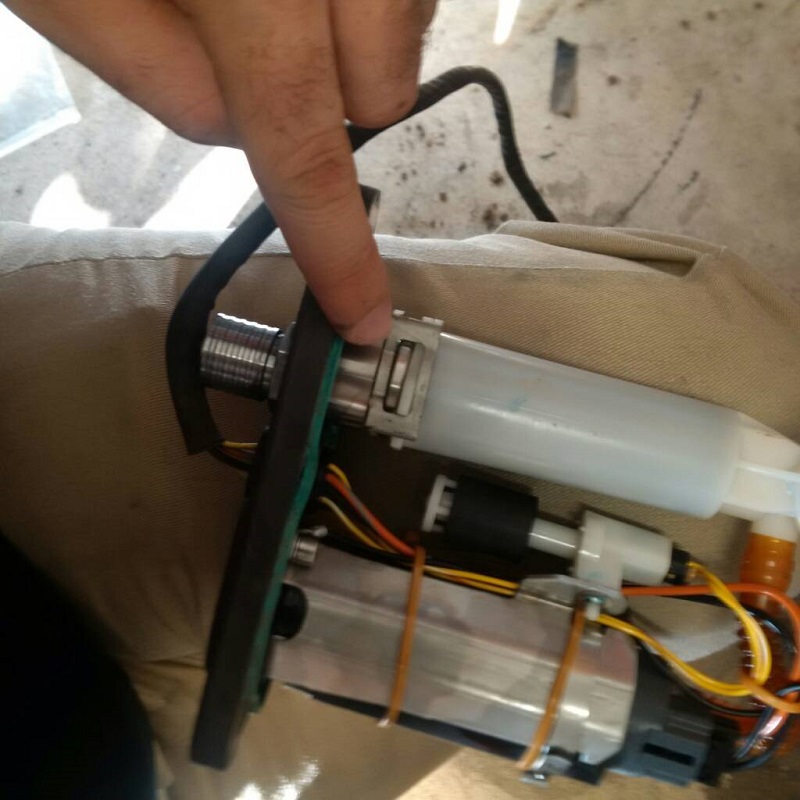
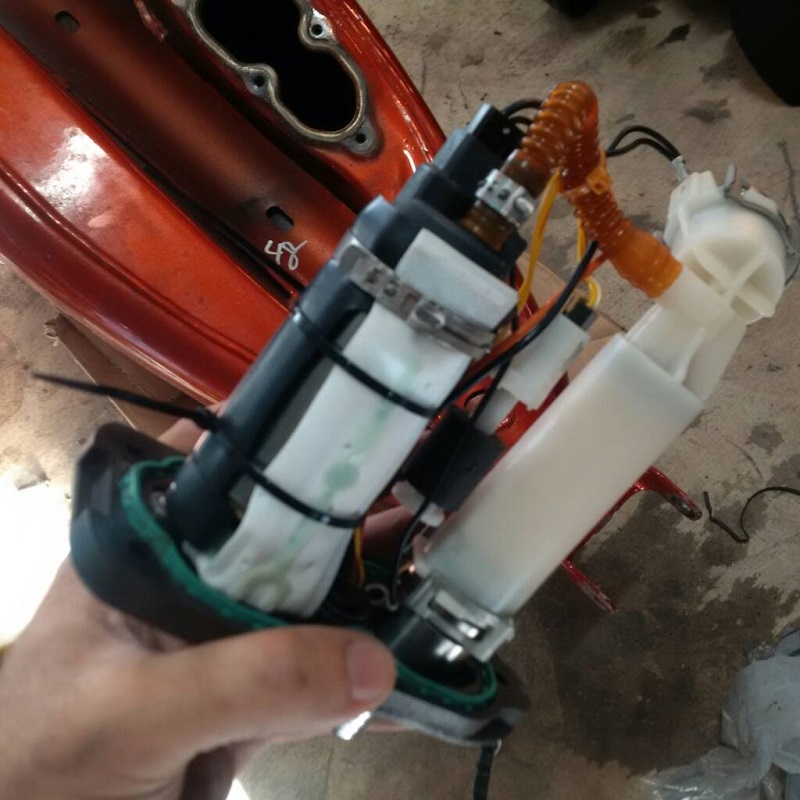
Remove the pump from the tank using a T25 Torx bit, there are 5 of them.
Once you have the screws removed, pull out the pump from the tank. You have to kind of wiggle it out and do a bit of tilting and twisting.
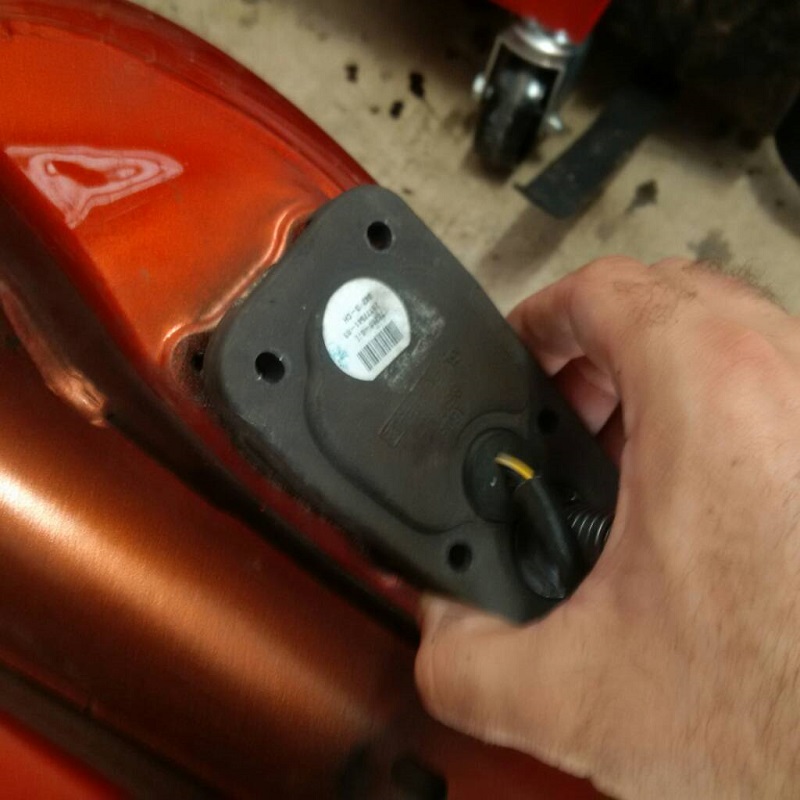
Once cleared then pull the pump out safely and you can begin the process of removing the filter.
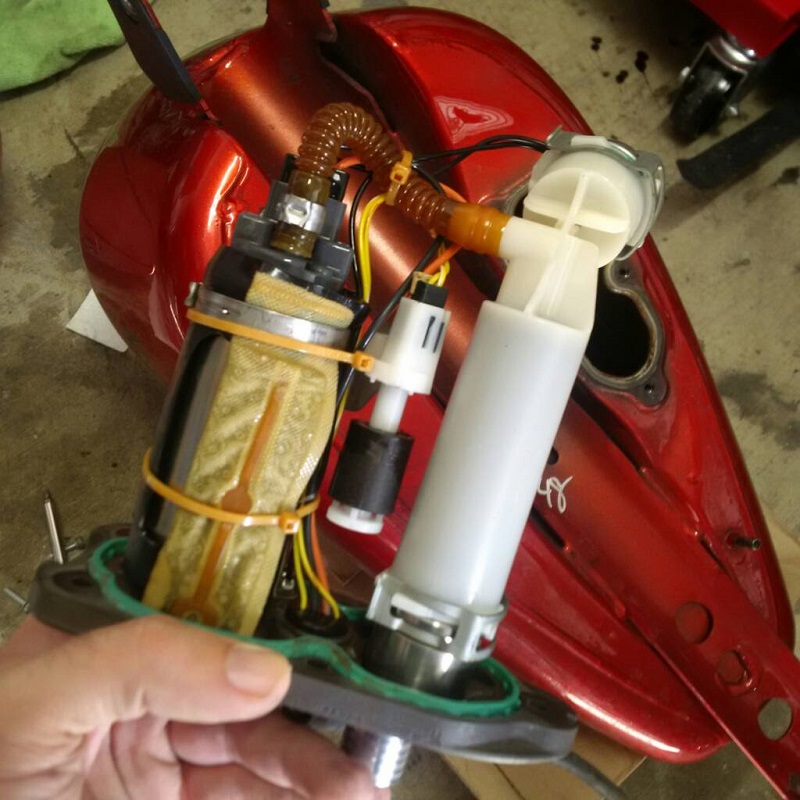
The filter is in the white plastic tube. You have to remove the clip that is holding it on.
Next pull the tube off of the frame and pull the filter out of the tube. A pair of needle nose pliers can be used to pull the old filter out.
Note the comparison of the new filter.
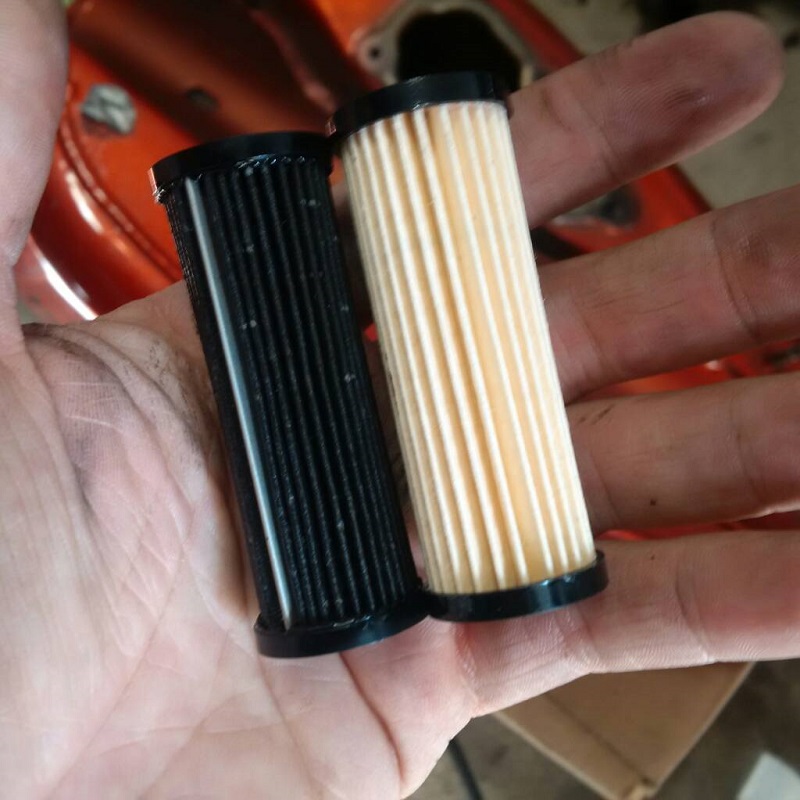
Put the new filter into the white tube and make sure to press it down firmly. Then replace the O-ring.
If all you want to do is replace the filter then you can bolt everything back together and you're finished.
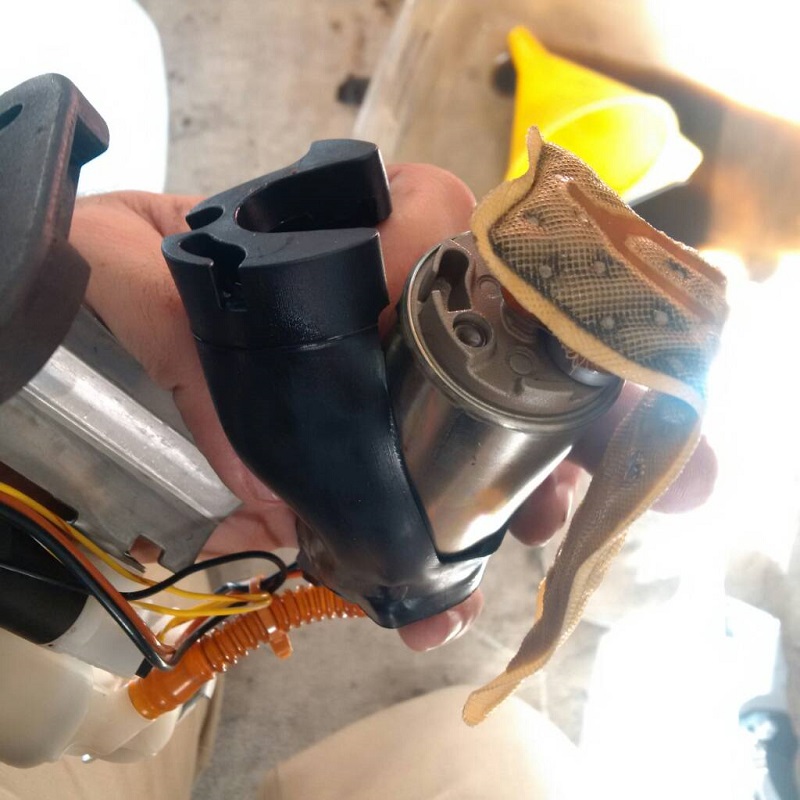
However, if you're in there and have the parts already, you might as well replace the pick up sock also.
Cut the zip ties holding the pick up sock onto the fuel pump and remove the crimp ring. Once those are removed pull the fuel pump up and off of the frame.
You can use a flat blade screw driver to pop off the sock from the pump pickup.
You can also pull back the rubber boot around the pump to give you an easier visual.
Note the comparison of the pick up socks.

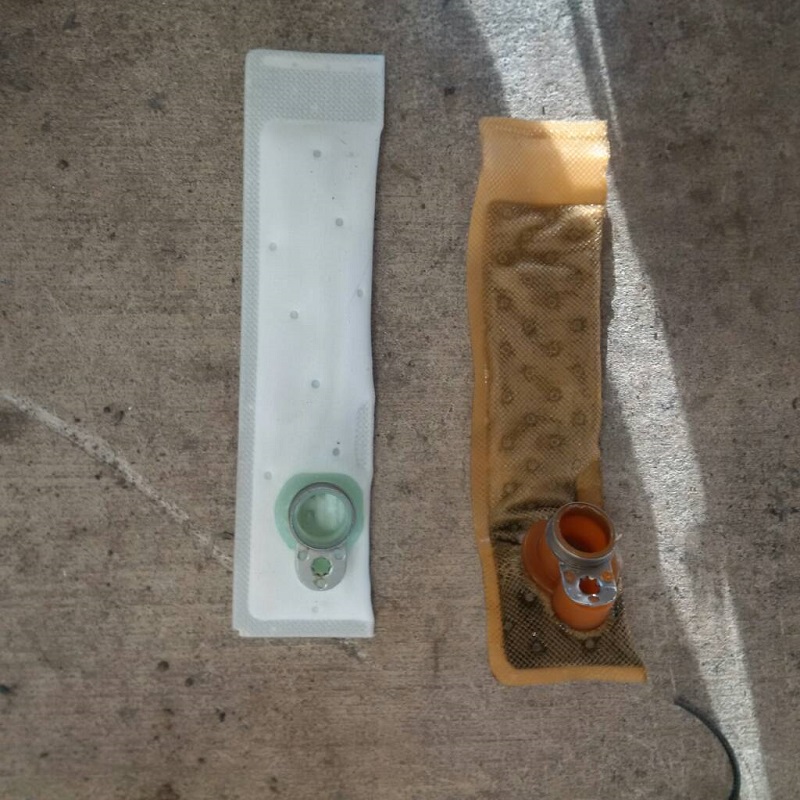
Make sure you line up the holes and push the new pickup sock on.
Then put the new zip ties on and the crimp ring to hold the new pick up sock on.

Now you're ready to put the pump assembly back into the tank. Make sure to trim the excess zip ties.
It takes a bit of wiggling and finesse. Just make sure to not force anything.
Then put the T25 Torx screws back into the tank, torque them to 40-45 in-lbs (4.5-5.1 Nm) in a cross pattern and put everything back together.