Table of Contents
This is an old revision of the document!

REF: Carburetor, Intake Manifold & Exhaust
FACTORY CARBURETORS Installed on Sportsters 1957 - 2006
Carbs Used on Iron Head Sportsters from 1957-1985 by Serial / Model Number
| Carburetor Serial # or Carb Model # | Year Model Sportster |
|---|---|
| Linkert DC (27155-57) was the first Sportster carburetor then replaced with (27155-57A) both introduced for 1957-1959 Sportsters 1) |
|
| DC-1 | 1957-1958 Sportster Early Style 2) |
| DC-1L | 1959-1960 Sportster 3) |
| DC-1M | 1959-1960 Sportster 4) |
| DC-2 | 1959-65 Servicar (smaller venturi, opposite float bowl)5) |
| DC-6 | 1961 Sportster XLH and XLCH 6) |
| DC-7 | 1966 Big-Twin FL and FLH (larger venturi) 7) |
| DC-10 | 1962 and mid-63 Sportster XLH and XLCH 8) |
| DC-12 | 1966 Big-Twin FL and FLH mid-1963 1964 1965 Sportster XLH and XLCH 9) |
| Tillotson HD (1966-1971) | |
| Mod HD-1A Mod HD-1B | Pre 1966 XLCH 1966 and later XLCH |
| 27162-66B10) HD - 1BC HD - 1C | Late '68 Sportsters (new check ball valve added to the accel pump passage)) 11) |
| 27155-66RA | (XLR) (27823-66R) |
| 27155-70R | (XR) (27823-66R) |
| Bendix / Zenith I6P12 (1972-Early 1976) | |
| 27155-72 12) | 1972- |
| 27155-72A 13) | 1972-Early 1975 |
| 27155-72B14) | 1975-Early 1976 |
| Mikuni (XR-750 Racing Engines Only) | |
| VM-36-1 VM-36-4 VM36/39 | 1972-1980 XR-750 / 36 mm with a round slide 15)16) |
| TM38-85 (47mm spigot dia.) TM38-86 (43mm spigot dia.) TM38-85 (47mm spigot dia.) TM38-86 (43mm spigot dia.) | 1989-2003 XR-750 / 38 mm with a flat slide17) |
| Keihin butterfly (non-CV)(Late 1976-1987) | |
| 27153-76 18) | Late 1976 XLH, XLCH |
| 27153-77 19) | 1977-1978 XLH, XLCH |
| 27469-78A B83A 20) | 1979 XL, XLCH, XLS |
| 27469-80A B83D 21) | 1980 XL, XLS |
| 27469-81A B83F 22) | 1981-Early 1982 XL, XLS |
| 27469-82 B83G 23) | Late 1982 XL, XLS |
| 27469-83C B83K 24) | 1983-1985 XL, XLS, XLX |
| 27148-77 B75A 25) | 1977-1978 XLCR 1000 |
Keihin Carbs Used on Evo Sportsters from 1986-2006 by Serial Number
- All data compiled from HD Sportster Parts Catalogs unless otherwise noted
- All CV models come equipped with accelerator pump unless noted.
- The Serial Number on CV carbs is labeled on the adjacent side to the accelerator pump linkage
| Keihin non-CV 1986 - 1987 | |||
| Carburetor Serial Number | Installed On All Models |
||
|---|---|---|---|
| 27501-86A (B83H | (86-87) - XLH 883 All Models Domestic and California | ||
| 27502-86B (B83H) | (86-87) - XLH 1100 All Models Domestic and California | ||
| Keihin CV 1988 - 2006 | |||
| Carburetor Serial Number | Installed On Domestic models Year - Model | Installed On California models Year - Model | Installed On Export models Year - Model |
| 27031-95 | (95) - HDI 883 Deluxe (95-97) - HDI 883, 883 Hug (99-2000) - HDI 883, 883 Hug, 883C (01) - Aust 883, 883 Hug, 883C |
||
| 27031-95A | (98) - HDI 883, 883 Hug (02-03) - Aust 883, 883 Hug, 883C, 883R |
||
| 27076-95 | (95-97)- HDI 1200 (96-97) - HDI 1200C, 1200S (99-01) - HDI 1200, 1200C (01) - Aust, Eng, Japan 1200, 1200C |
||
| 27076-95A | (02-03) - HDI, Aust, Eng, Japan 1200, 1200C | ||
| 27465-01 | (01) - HDI, Eng, Japan 883, 883 Hug, 883C | ||
| 27465-01A | (02-03) - HDI, Eng, Japan 883, 883 Hug, 883C, 883R | ||
| 27465-04 | (04-06) - HDI 883, 883C (05-06) - 883L, 883R |
||
| 27076-95A | (98) - HDI 1200, 1200C | ||
| 27480-97 | (97) - 1200, 1200C, 1200S (99-01) - 1200, 1200C | ||
| 27480-97A | (98) - 1200, 1200C (02-03) - 1200, 1200C | ||
| 27486-92 | (92-Early 93) - 1200 | ||
| 27486-92A | (93-94) - 1200 | ||
| 27486-92B | (95) - 1200 | ||
| 27487-92 | (92-94) - 1200 | ||
| 27487-92A | (95) - 1200 | ||
| 27488-92 | (92-Early 93) - 883 | ||
| 27488-92A | (Late 93-94) - 883 | ||
| 27488-92B | (95) - 883 | ||
| 27489-92 | (92-94) - 883 All Models | ||
| 27489-92A | (95) 883 All Models | ||
| 27490-96 | (96-97) - 883, 883 Hug (99-01) - 883, 883 Hug, 883C | ||
| 27490-96A | (98) - 883, 883 Hug (Late 98) - 883C (02-03) - 883, 883 Hug, 883C, 883R | ||
| 27490-04 | (04-06) - 883, 883C (05-06) - 883L, 883R | ||
| 27491-89 No Accel Pump | (89-90) - Swiss 1200 | ||
| 27491-96 | (96) - 1200, 1200C, 1200S | ||
| 27492-89 No Accel Pump | 89-90) - Swiss 883 All Models | ||
| 27495-96 | (96-97)- 883, 883 Hug (99-01) - 883, 883 Hug, 883C | ||
| 27495-96A | (98) - 883, 883 Hug (Late 98) - 883C (02-03) - 883, 883 Hug, 883C, 883R | ||
| 27495-04 | (04-05) - 883, 883C (05) - 883L, 883R | ||
| 27498-96 | (96-97) - 1200, 1200C, 1200S (99-01) - 1200, 1200C | ||
| 27498-96A | (98) - 1200, 1200C (02-03) - 1200, 1200C | ||
| 27501-88 No Accel Pump | (88-90) - 883 All Models | (89-90) - HDI 883 All Models | |
| 27501-89 | (89-90) - 883 All Models (90) - 1200 | ||
| 27501-89A | (91) - All Models | ||
| 27502-88 No Accel Pump | (88-90) - 1200 | (89-90) - HDI 1200 | |
| 27502-89 | (89) - 1200 | ||
| 27503-88 No Accel Pump | (88) - 1200 | ||
| 27503-88A | (89-90) - 1200 | ||
| 27503-88B | (91) - All Models | (91) - Swiss All Models | |
| 27503-92 | (92) - HDI & Swiss All Models | ||
| 27503-92A | (93-94) - HDI & Swiss - All Models | ||
| 27503-92B | (95)- Swiss All Models | ||
| 27504-88 No Acell Pump | (88) - 883 All Models | ||
| 27504-88A | (89-90) - 1200 | ||
| 27731-98 | (99-01) - 1200S | ||
| 27731-98A) | (98) - 1200S (02-03) - 1200S | ||
| 27731-04 | (04-06) - 1200C, 1200R | ||
| 27732-98 | (99-01) - 1200S | ||
| 27732-98A | (98) - 1200S \ (02-03) - 1200S | ||
| 27732-04 | (04-06) - 1200C, 1200R | ||
| 27733-98 | (98) - Swiss 1200S | ||
| 27734-98 | (98-2000) - HDI 1200S | ||
| 27749-01 | (01) - HDI, Aust, Eng, Japan 1200S | ||
| 27749-01A | (02-03) - HDI, Aust, Eng, Japan 1200S | ||
| 27749-04 | (04-06) - HDI 1200C,1200R | ||
PERFORMANCE OPTIONS
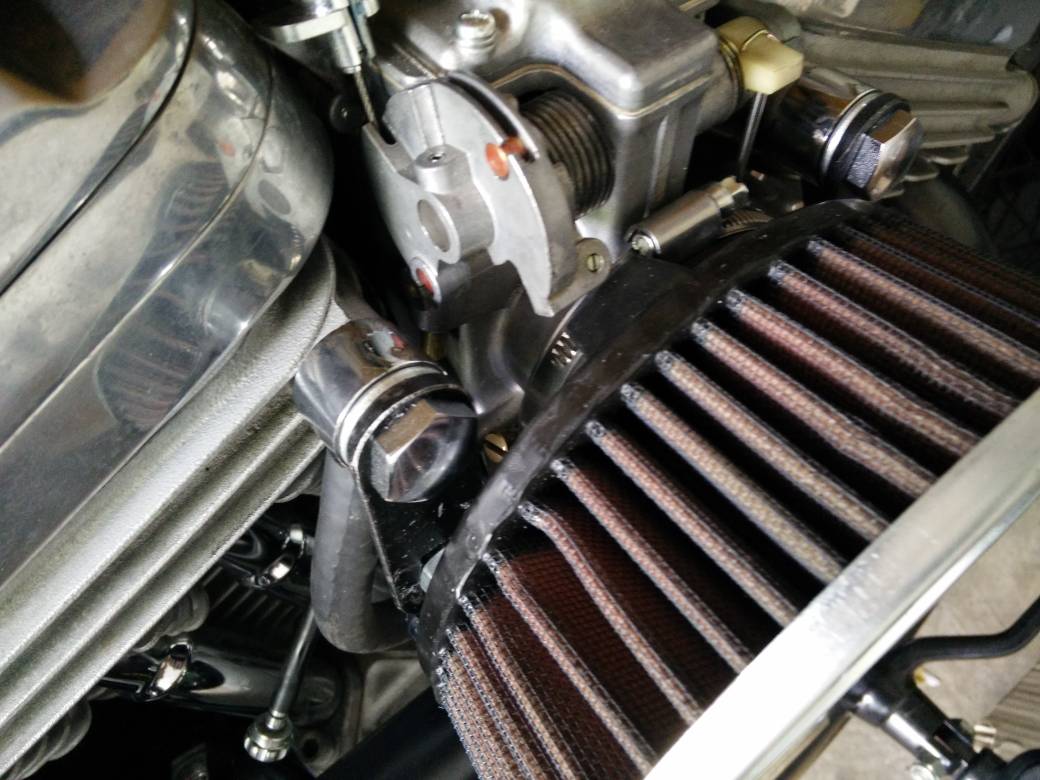
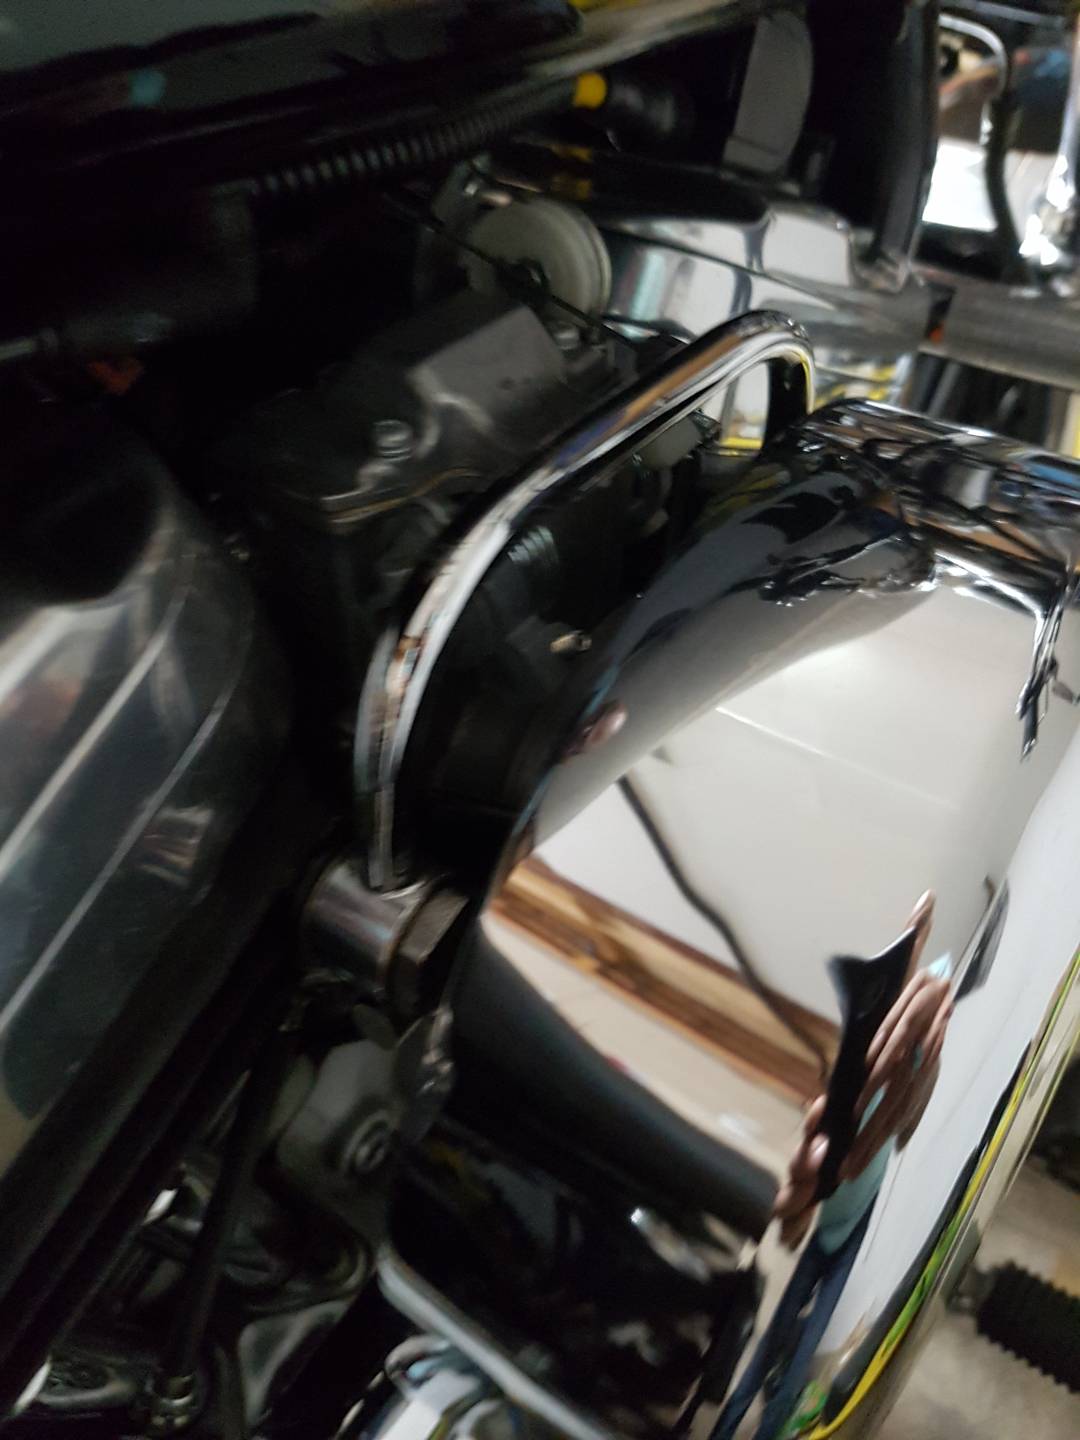
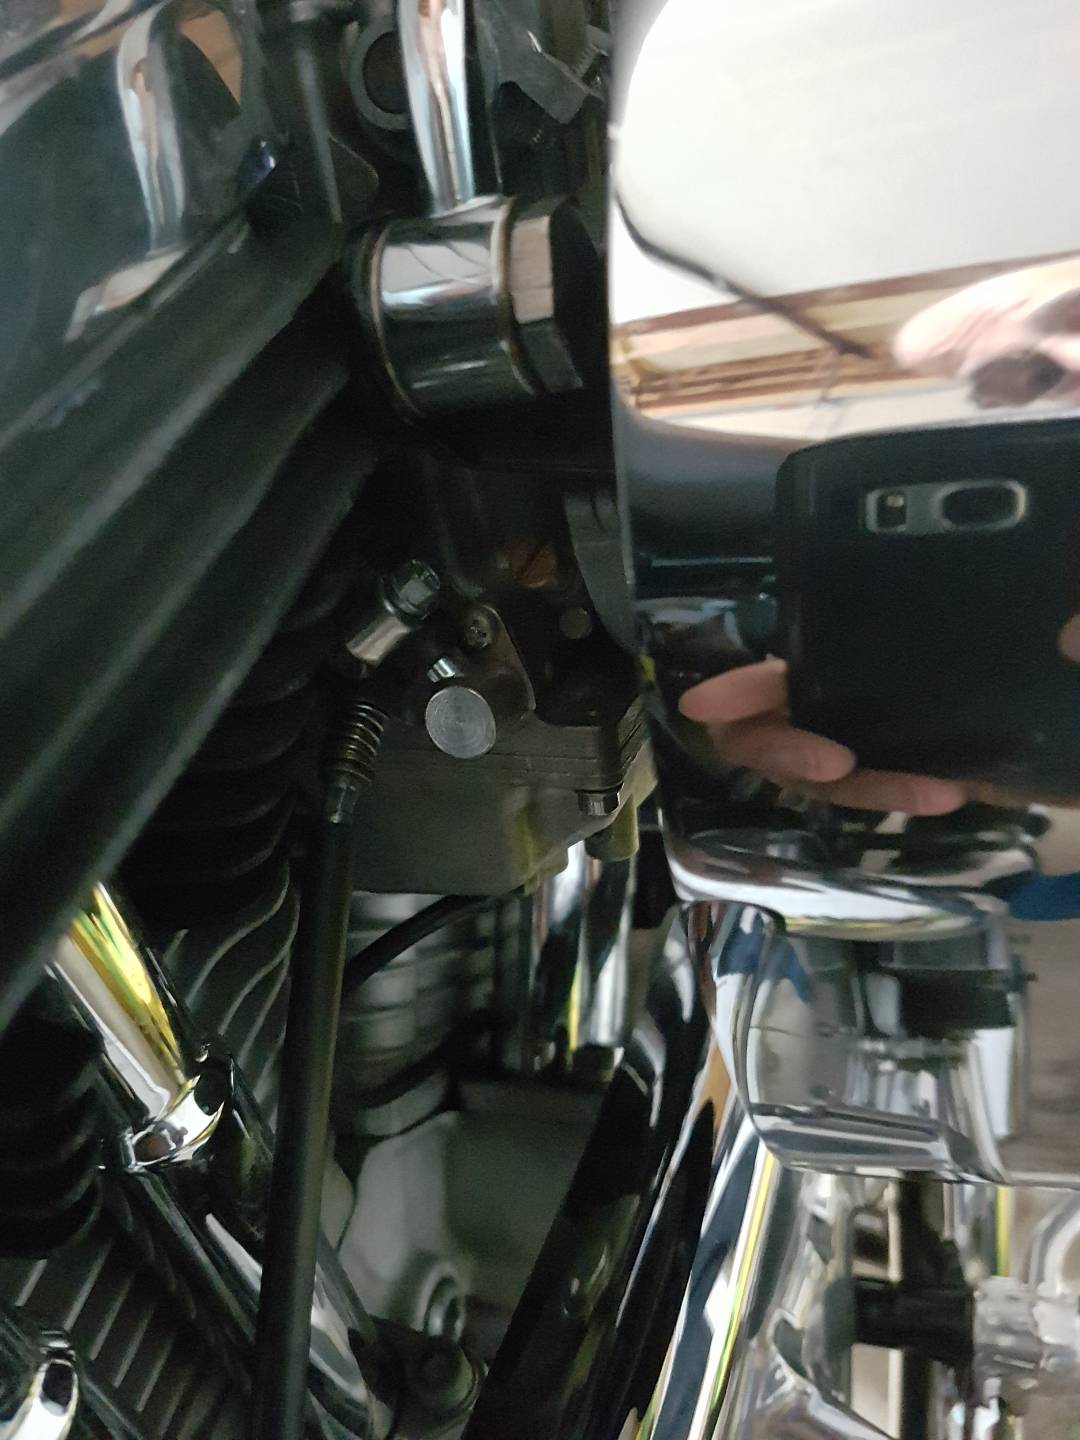
Keihin BD
- Used in the Screaming Eagle Package line from HD as an Evolution XLH HI-FLO Carburetor & Air Cleaner.
- Adjustable Accelerator Pump stroke
- Incorporated a special intake manifold to carb spacer that had to be drilled and tapped (1/4 x 28) in the side for included Voes connection adapter
- Required a 1987 replacement style intake manifold for 1988 and up models
- Required possible grinding of the right rear corner of the front cylinder head, due to interference with the carburetor throttle pulley and cable guides, for proper clearance 26)
| Carb #27001-88 | |||||
|---|---|---|---|---|---|
| Slow Jet Part No. | Size (mm) | Intermediate Air / Fuel Part No. | Size | Main Jet | Size |
| 27383-88 | 42 | 27113-87 | Blank* | 27106-85 | 1.30 |
| 27302-84 | 50 | 27109-87 | 55 | 27107-85 | 1.35 |
| 27329-83 | 52 | 27172-89 | 60* | 27149-85 | 1.40 |
| 27284-85 | 55 | 27110-87 | 80 | 27151-85 | 1.45 |
| 27310-85 | 58 | 27111-87 | 1.00 | 27150-85 | 1.50 |
| 27318-85 | 60 | 27112-87 | 1.20 | 27108-87 | 1.60* |
| 27283-85 | 62 | 27173-89 | 1.70 | 27119-88 | 1.65 |
| 27896-79 | 65 | 27134-89 | 1.70 | ||
| 27894-78 | 68* | ||||
| 27895-87 | 70 | ||||
| 27897-78 | 72 | ||||
*in carburetor
—-
Mikuni HSR 42/45/48 Carburetor
Mikuni Carb site http://www.mikuni.com/fs-carburetor.html
| Model | Rebuild Kit - Mikuni Part # | Std. Main Jet Size | Std. Jet Needle size | Optional Jet Needles | Std. Accel Pump Nozzle | Std. Accel Pump Nozzle | Optional Lean Accel Pump Nozzle |
| 42 45 48 | KHS-016 KHS-016 KHS-031 | 160 175 190 | 97 97 97 | 95, 96, 98 all models (95 rich - 98 lean) | 70 all Carb Models | 60 for Sportster Models | 50 |
(from the Mikuni HSR 42-45-48 exploded view diagram http://www.mikuni.com/pdf/tm42xview121801.pdf)
- When tuning, it's best to go by the Mikuni manual.Take your time, follow the Mikuni tuning guide carefully (including the throttle position tape) and you will get her close. If she is not as smooth at cruise, you may need to drop the needle back down and then switch it out for a different needle maybe. All needles are the same length and have the same taper, just different diameter of the straight portion. 96 is one richer than a 97. They only make a 95, 96, 97 and 98 needle. 165 main is probably close. But do the wide open throttle test in the manual to verify. 28)
- HSR 42/ 45/ 48 Tuning Manual http://xlforum.net/misc/hsr_tuningmanual_021003.pdf
- Also you can click on the discussion tab above or click here Tuning the Mikuni HSR for more information from the XLFORUM on tuning the Mikuni.
Breather Options
Aftermarket Carburetors
1970s Era- Lake Injector
- Originally made for airplanes, the Lake injector was a popular fuel delivery system in the 70s era. It was designed for the ultimate in performance with a minimum of tuning effort. Don't confuse the word “injector” with fuel injection, as these series of carburetors are not a fuel injector or a fuel injector body31). The body design, plus the velocity stack in unison with the throttle slide, forms a venture which enables the injector to achieve a good fuel/ air mixture. 32)
- The manufacturer claimed a 15% - 25% or more increase in horsepower, unequalled acceleration, immediate starts and instant tuning.
- Installation was a simple bolt on design with no modifications needed.
- Suitable for 883s as well as 1000 model Sportsters although could be installed on Shovels, Pans, Triumphs and Hondas.
- Body options for an extra price include, show chrome, bright anodized and 24K Gold.
- A true low head, nil pressure injector as does not depend on venture suction like a carb but just pure air mass flow, so it self corrects for great altitude manifold pressure changes.33)
- You wont fine tune this nail in a tube, they run rich when the tanks full, and get lean as the fuel drops.34)
- Many people have to plumb air supply to the tank with a 'pop off' to keep pressure head constant below 1 PSI.35)
- The unit is gravity feed instead of having a fuel pump for delivery and it was prone to leaking if you left the petcock open.36)
- Posa and Star are all very similar and found their way from small aircraft and onto bikes.37)
- POSA, Lake Injector, Revflow and Aero Carb are all float-less, diaphragm-less carburetors.
- These carbs do not operate well on more than .5 lbs of fuel pressure yes that is less than half a pound of fuel pressure. These carbs do not vent any fuel vapor that may form in the body to the venturi as there is not float bowl well or diaphragm vent.38)
How to adjust the carb for all throttle positions
- Tools needed: Screwdriver, #16 nail sharpened, small jar, syringe or breaker graduated in cc's or ounces, gloves, small wood throttle blocks (you'll make these), fire extinguisher rated for fuel.
- Instruments needed:39)
- Manifold pressure gauge, EGT gauge or air/fuel ratio gauge.
- So you have followed the manufacturer's directions to adjust your POSA style carburetor but find that you still have rich or lean spots across the range of throttle and you're frustrated. The following procedures to set the carb correctly takes about 4 hours of measuring and tuning.40)
- The fuel in the tank should be half full (a full tank of fuel will make the carb run richer and an almost empty tank will run leaner). Remember that you are operating on .022 pound of pressure per inch of vertical fuel column. For simplicity say our tank is only 6“ tall. If we have used a half a tank of fuel we now have used 3” of fuel and have a 9“ drop to the carb. So, 9 x .022 = .198 lbs of fuel pressure. Less than a quarter of a pound.
- You need to pick 6 throttle positions and be able to repeat the positions. Use idle, 1500, 2000, 2500, 3000, and wide open throttle. With the carb set as best as you can get it, make a stop block that you can put in the throttle so you can accurately repeat each position. The rpm will change when you adjust the carb down the road. We simply need to be able to repeat the position. You can use a piece of wood that has a hole drilled through it that is the throttle shafts diameter. Split the piece of wood in the center of the hole. The length of the wood will vary for each throttle setting.
- At each throttle setting, use the needle to adjust the carb so the engine runs that absolute best at each station, regardless as to how it runs anywhere else. Make note of the manifold pressure and egt/or air fuel ratio when the carb is set for each station. Once you have a single station set perfectly with the needle, turn the fuel on and let fuel flow out of the carb in to the bowl for 1 minute. Measure the amount and record it next to the egt/air fuel ratio and manifold pressure reading.
- Repeat step 3 for all 6 stations, recording manifold pressure and rpm along with egt/air fuel ratio. Measure fuel flow for each individual station and record the measurement. Note: this process will consume about 1 gallon of fuel. You need to keep the fuel in the tank as close to a constant fuel level as possible.
- Now that you have made a chart that show the fuel flow out of the carb at each station where you set the carb so that the engine ran it's best, you need to set the needle so the carb runs the best at idle. This will be the permanent setting for the needle. Idle position to about 1500 rpm is the most important throttle range.
- Now go back to each throttle position using your blocks of wood and re-measure the fuel out of the carb. In most cases it will be less than you originally measured it. So to bring the fuel flow up the same level you make a vertical mark along the flat of the needle where the needle goes into the fuel orifice. Just use a black fine line marker to do this.
- Remove the needle. Now use the sharp nail and make a scratch mark along the horizontal axis of the needle 1/8” on both sides of the vertical mark. When satisfied with the depth, reinstall the needle and measure the fuel flow. You want it to be equal to what it was in steps #3 and 4.
- This is the trial and error time consuming part of the job. Be cautioned that a little scratch for starters is better than a deep one. It does not take a very deep mark to allow a lot more fuel to flow.
- When you are done with each station you will have a series of scratched that are not connected. You may find that in some areas of the needle you won't have to do much and in others you will have to have a deep scratches and you may need to connect the scratches with another scratch.
- The top and bottom ends are critical. For the top end or wide open throttle, this is where the egt comes in handy. At wide open throttle, the engine should run about 50 to 100 degrees rich of peak. When you throttle back to 75% power the egt should rise.
- When set correctly, you should be able to see a steady rise in the egt from idle to just before full power. At full power, the egt should dip slightly.
- Note: in the event that the needle is rich at the bottom end instead of lean over the range, you will have to go to the next smallest needle and start the procedure again. It is very difficult to make a needle leaner without adding material to the needle.
- On POSA style carbs (Revflow, AeroCarb) equipped with mixture control, set the mixture control so that is just shy of being full rich when doing the above needle work. In the event that you need to make the carburetor slightly richer, you can do so without having to go through the entire measure, scratch, measure, scratch scenario all over again. As you burn off fuel, the fuel pressure is less so you may need to go “over rich” to compensate for less pressure at the needle.
- The air/fuel ratio meter should read as follows:
- Cold start to warm idle 800 rpm
- Idle 800-1000 rpm
- Mid range 1000-2500 rpm
- Cruise 2700-3300 rpm
- Wide open throttle41)
- This type of fuel delivery is still being used in aircraft. However, it has now evolved into more of a fuel injector that you are probably used to in principle. Although it is similar in looks, it has a slightly negative pressurized TBI with constant feed aviation fuel. So, unless your setup for jet fuel, these won't work on Sportys.
- This is from Ellison Fluid Systems:
- The EPA has required the oil companies to add oxygenates to auto fuel in many parts of the country to reduce pollution in the winter months. In most areas this additive is alcohol which will damage aircraft fuel systems. In addition to possible chemical incompatibility, the high vapor pressure of auto fuel can be a problem when used in aircraft, as it is much more likely to boil than aviation fuel. Unlike aviation fuel, the formula of auto fuel is altered as the seasons change, so winter grade fuel is even more likely to form vapor.
- Many of our customers have stated that they believe there is no chemical difference between aviation fuel and auto fuel. A dramatic difference can be demonstrated by pouring a sample of each into Styrofoam coffee cups. The aviation fuel will remain contained in the cup, but auto fuel will dissolve the cup and flow right through the bottom, as it will destroy rubber parts in the TBIs. 42)
Bendix Stromberg Carburetor Identification
- Bendix Stromberg used a unique identification scheme where a series of letters and numbers were assembled to identify and describe how a carburetor was constructed. The first two letters described the carburetor design, followed by a number that identified the size, and numbers and letters to identify specific design details and modifications.
- The first (two) letter(s) comprise a Basic Design Code that places the Bendix Stromberg carburetor in a design category, where:
- A – Pressure Injection Carburetors
- E – Pressure Injection Carburetors
- NA – Float-Type Carburetors
- P – Pressure Injection Carburetors
- Q – Pressure Injection Carburetors
- R – Fuel Injection Systems
- S – Speed Density Metering Systems
- Example: NA-R9G
- Prefix- “NA” – for float-type carburetors followed by a “-”(dash)
- The next letter indicates type, where
- S – Single venturi updraft designed for two, three and four cylinder engines in the 25~95 hp class. NOT fitted with economizer, acceleration pump or mixture controls.
- R – Single venturi updraft, designed for engines of all types in the 50-400 hp class. All are similar in design and incorporate needle valve type mixture control, accelerator pump and economizer. Some bodies are interchangeable in this series and deferent design economizers are used.
- D – Double updraft venturi, with the float chamber to the rear, was considered obsolete c.1930
- U – Double updraft venturi, with the float chamber between barrels. See specific models for details.
- Y – Double vertical venturi (updraft), with two float chambers fore/aft of barrels. See specific models for details.
- L – Inverted, down draft venturi.
- T – Triple venturi, double float chamber fore/aft of barrels. The NA-T4 series is the only known model. Designed for use on Wright J-5 and other 9-cylinder radials, where each venturi feeds three cylinders. It has float similar to Y series, but with back suction mixture control. No economizer or accelerator pump.
- F – Four-venturi with two separate float chambers. The last letter and numbers indicate a specific model.
Dellorto
1)
1952-1959 HD Spare Parts Catalog pg 16
14)
HD Sportster Parts Catalog (99451-78B)
20)
1979 Harley Davidson Sportster Parts Catalog
21)
1979-1985 HD XL Parts Catalog pg 23
24)
1979-1985 HD XL Parts Catalog pg 27
25)
1977 HD XLCR Parts Catalog pg 57
28)
Shu from the XLFORUM http://xlforum.net/vbportal/forums/showthread.php?t=14060&page=3
29)
photo by c53 of the XLFORUM http://xlforum.net/vbportal/forums/showthread.php?t=14060&page=16
30)
photos by jordan1200 of the XLFORUM http://xlforum.net/vbportal/forums/showthread.php?t=14060&page=16