Table of Contents

REF: Carburetor, Intake Manifold & Exhaust
Exhaust Leaks
You can put your hand near the pipes at likely places for leaks (exhaust ports, any joints) and see if you can feel air escaping. 1)
But, be careful not to burn yourself on the pipes.
Smoke Test
When oil is added to the combustion chamber, the result is smoke coming out of the exhaust.
The oil burns and comes out as smoke. 2)
The smoke should just come out the ends of the mufflers.
If smoke is coming out anywhere else, that's where your leak is.
Test one cylinder at a time.
- Pull a spark plug.
- Add a spoonful of standard motor oil in the cylinder.
- Reinstall the plug.
- Fire up the engine.
- When it starts to smoke put a rag in the exhaust pipe and look for leaks. It helps if you have a buddy hold the rag
Baffles, Torque Cones and Lollipops
Baffles
Drilling a Hole in the Baffle
A lot of people drill the baffle plug out of the standard mufflers.
But, use at your own risk.
Issues with doing this mod include;
Tuning:
It can create tuning issues due to “wave reversion”. problems. 3)
Unwanted noise:
Some say it will make a chirping sound if you drill the whole baffle plug out.
Others say it will only make the whistling / chirping sound if you take the whole 1-1/4“ inch baffle plug out. 4)
And a 3/4” hole through it won't make that sound. 5)
Overall sound:
Reportedly, the bike should sound better than the stock.
This mod adds volume, and more low end 'sound' than the stock version. 6)
Failed inspections:
Once the muffler baffles are drilled, it can easily be detected that you have 'tampered' with them.
Depending on where you live, your bike may not pass inspection due to this mod. 7)
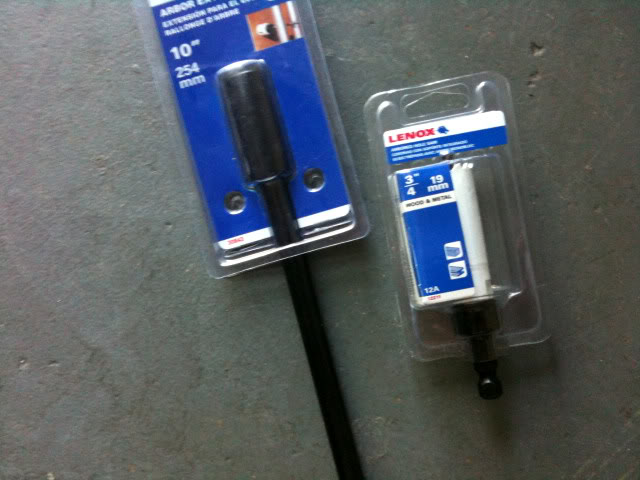
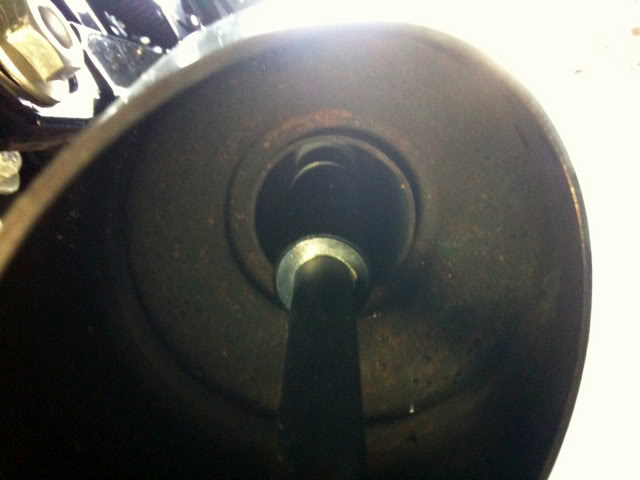
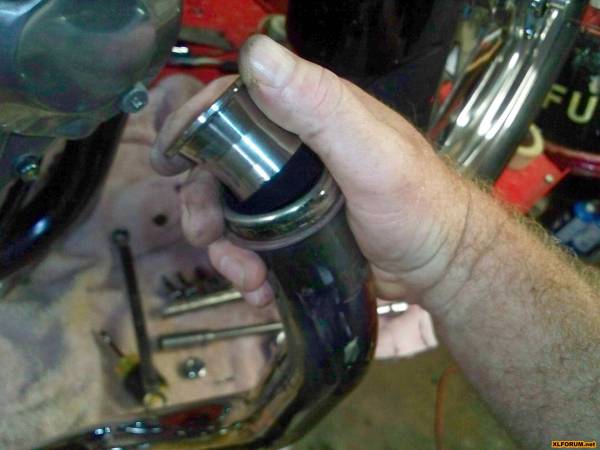
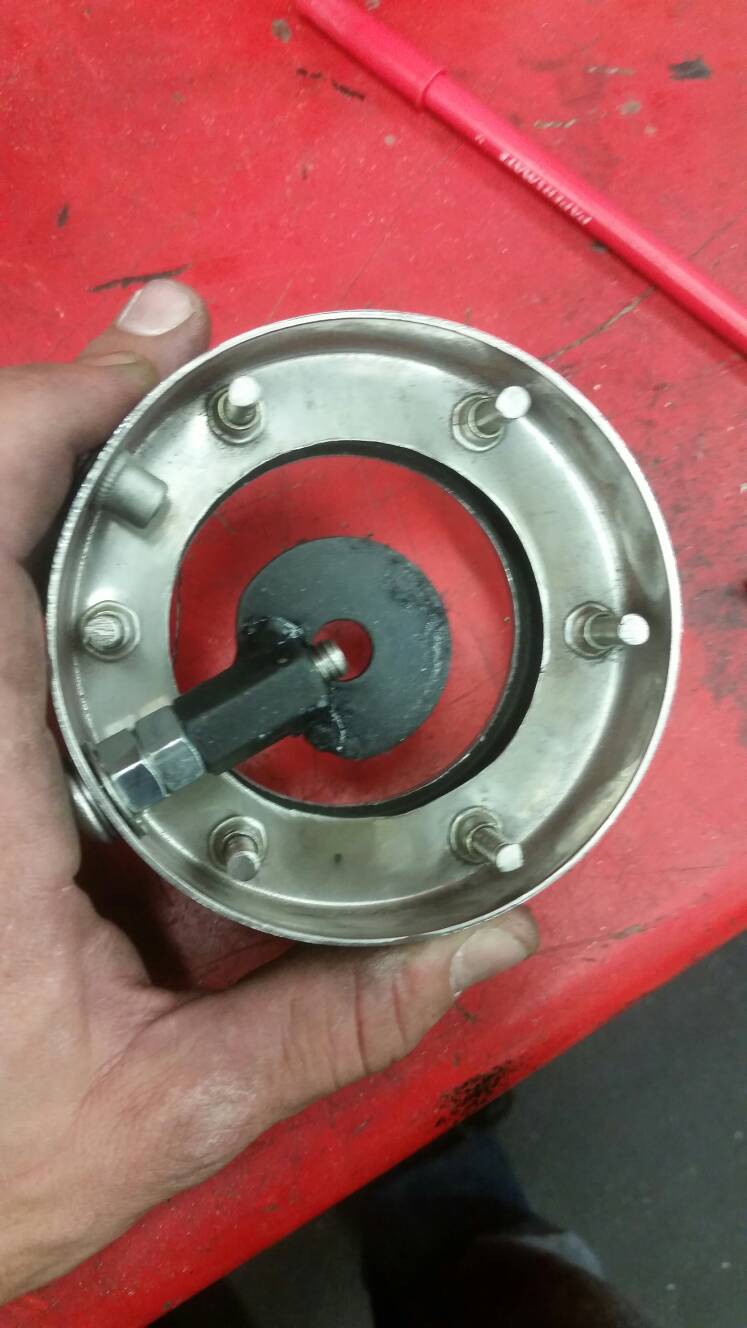
This was done with a 3/4“ hole saw on a 10” drill extension. 8)
| If exhaust is installed, make sure the set screw in the extension is tight so you don't drop the hole saw inside it. 9) | |
 |  |
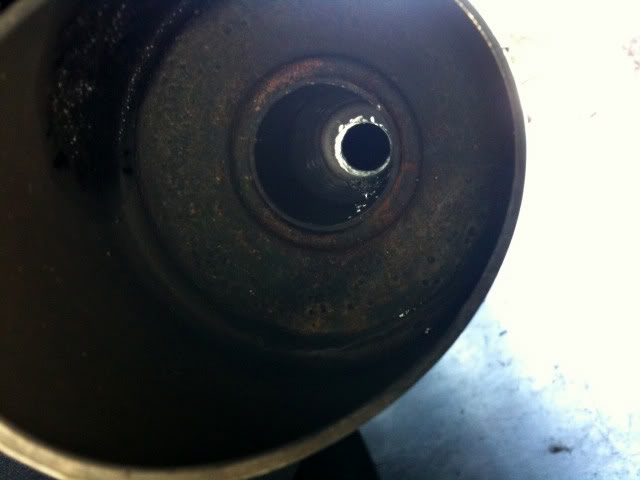
| Drill out the center of the baffle (3/4“ hole saw used here). 10) | ||
 |  |  |
Other variations:
| Holes drilled around the baffle 11) |
 |
Modifying standard mufflers for better flow and sound
The Gronk Muffler Mod
Article by gronk62 of the XLFORUM 12)
This mod is for when you don't like having loud pipes or the 'chuff chuff' sound the standard mufflers make.
The mod gives a great sound with zero metallic blat! 13)
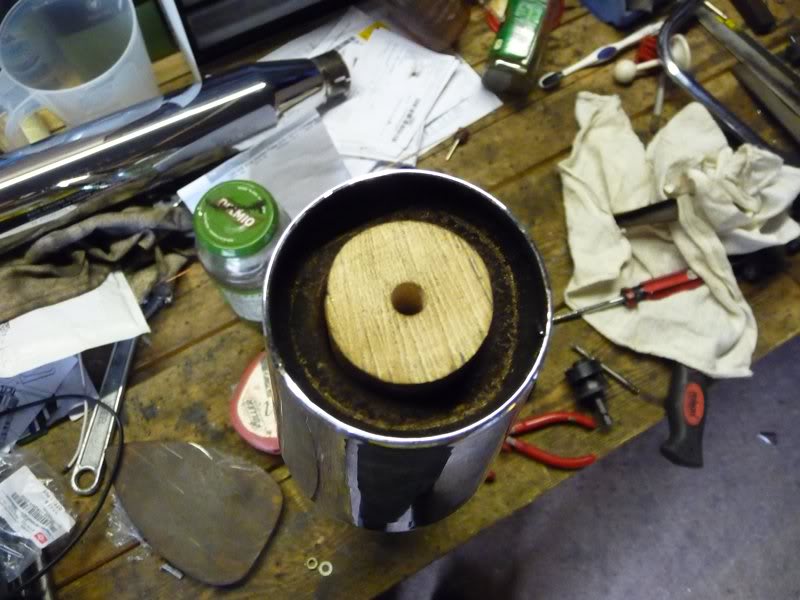
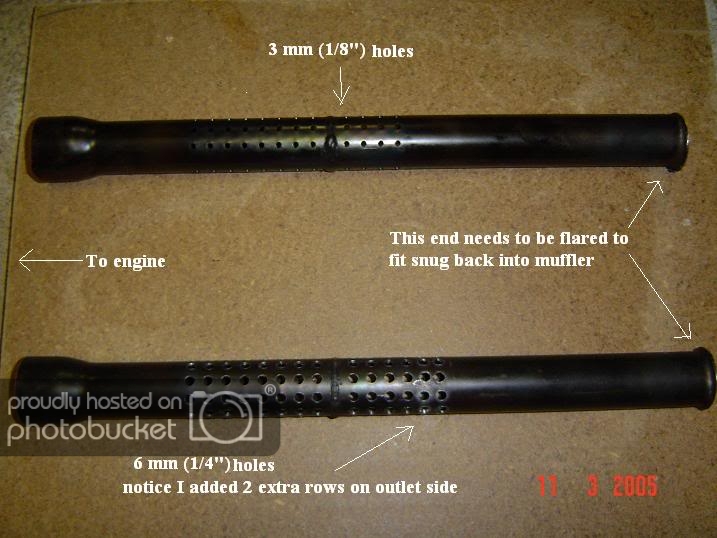
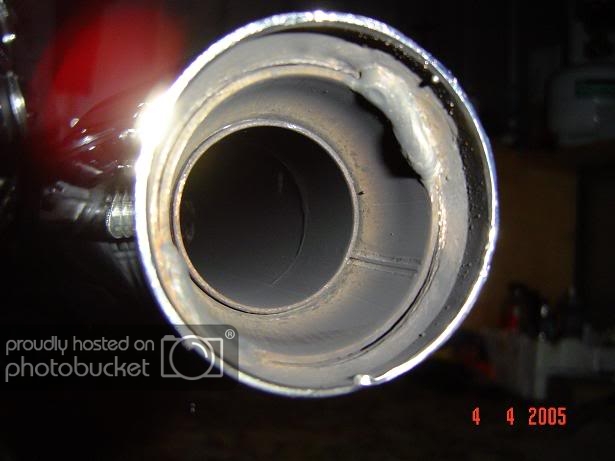
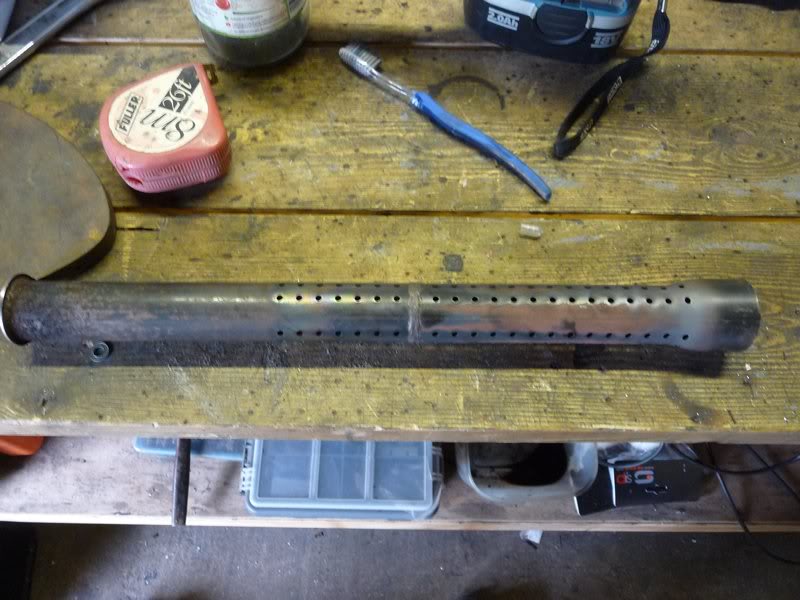
OEM mufflers are quite restrictive so the baffles were removed with a 1-3/4” hole saw and the holes were drilled bigger.
(enlarged to 1/4“ or 6mm and also added a couple of extra rows on the outlet side of the baffle plug).
The baffle plug must be left intact for the guide to sit on.
Doing this mod helps to increase the gas flow and allow a more fuller and deeper sound without being too loud.
But, it is unlikely to give much in the way of performance increase.
Although your bike may feel slightly stronger at low to midrange revs.
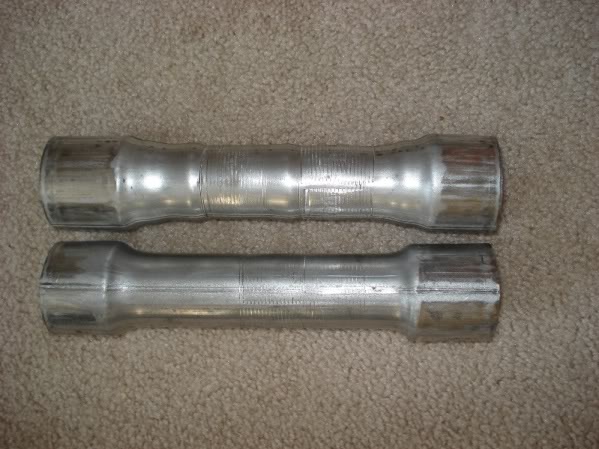
You'll need flare the ends or have a muffler shop do them for you so it fits snug back in the the hole made by the hole saw.
Then weld them in taking care not to blue the chrome.
It helps to wrap a wet towel around the area to be welded to keep the chrome cooler.

Removing the Baffle
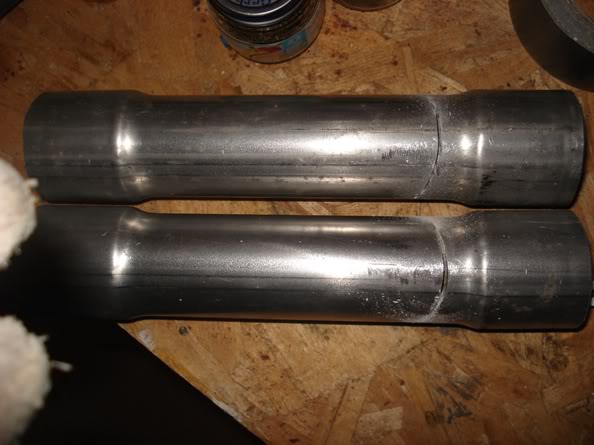
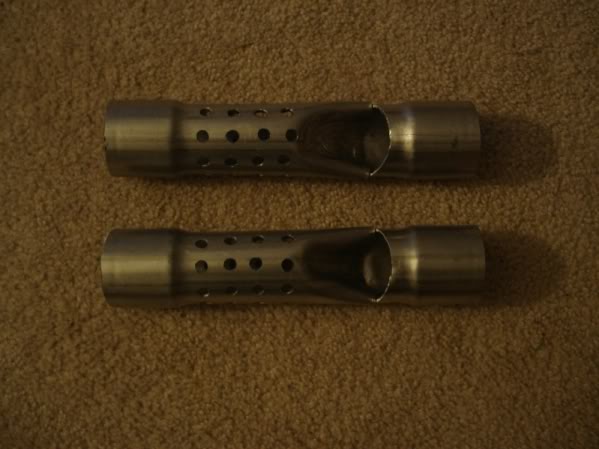
Making Your Own Baffles
Based on an article by chickenhawk of the XLFORUM 18)
This is an easy and cheap way to create some decent Cycle Shack & Screaming Eagle type baffles for a cost of around $7 per baffle.
With this type baffle allows for fine tuning for great performance.
If your slip-ons are missing the baffles, you can gain some midrange back and get a nice deep sound by adding baffles.
The ones below are adjustable so this is a good starting point.
Modifications / Fine Tuning:
There are so many ways you can mod these baffles. Here are some ideas.
- Bend diverter down to divert more exhaust through baffle holes , or opposite, bend diverter up to divert less exhaust through baffle holes.
- Drill baffle holes to 3/8” (starting with every other hole, then doing others as needed).
- Drill some more holes.
- CRIM mod: cut squares or rectangles out of baffle by cutting from hole to hole.
- Wrap baffles.
Note: Check the I.D. of your slip-ons to get the right size pipe to use.
Most pictures below are of a 2“ baffle/pipe that was later replaced with 1-3/4” pipe.
The 2“ pipe may not leave enough room between slip-on and baffle for air to be diverted and it may be a bit restrictive.
(if you don’t leave the diverter/tongue more open which reduces the fine tuning possibilities)
If you have very little midrange lag and just want less harsh sound of open pipes, then the 2” pipe should work fine.
Just leave the diverter more open and fine tune as needed. 19)
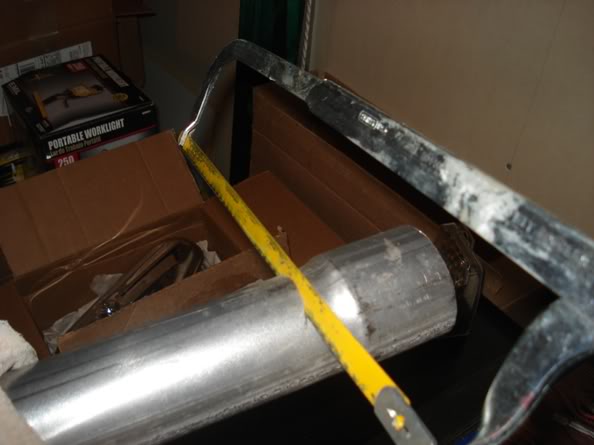
| Buy a short piece of pipe for the baffle. Auto parts stores or your local muffler shop (cheaper). Muffler shops can also flare the ends for you. 20) |
|
 |  |
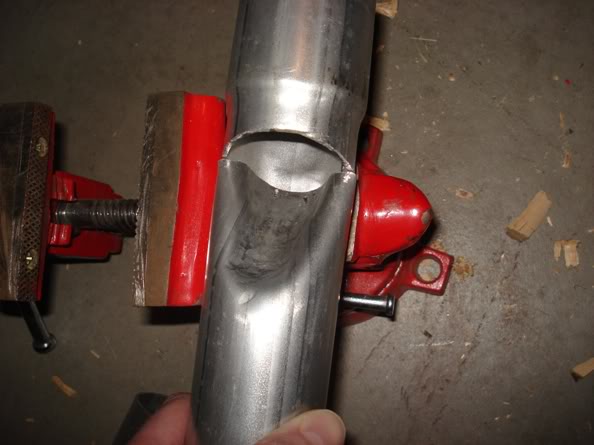
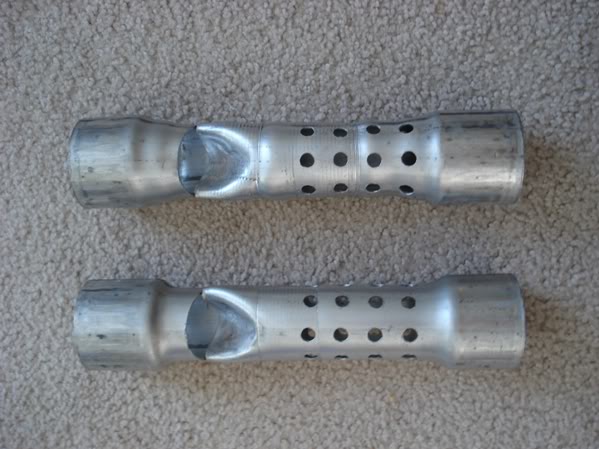
Cut the slot for the diverter with a hacksaw.
| Cut for the diverter/tongue. To get the rounded looking cut for the diverter, start about 1/2“ to 1” from one of the bends. Cut at an angle. Stop when you are around the half way mark. A rounded cut should help the diverter follow the contour of the inside of the baffle when it’s bent down.21) |
|
 |  |
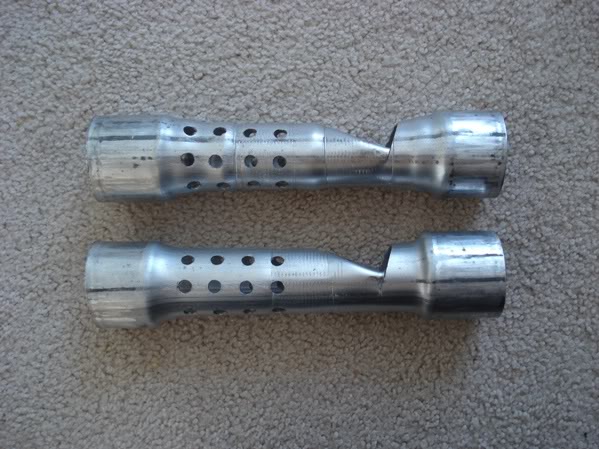
There are many ways to press the diverter down so use what you have at hand. But remember, this is exhaust pipe so it’s not the thinnest stuff to work with.
You can set the bending tool perpendicular with the diverter tab. Or, you can lay the bending tool horizontal with the diverter tab and hammer that down.
To get the bend started you can just hit the diverter tab with the hammer to start the bend. Hacking away with the hammer for the entire bend won't be any faster than using a dowel.
Start with the hammer to get the lip down below ‘level’. Then use the dowel for the rest (saves time and finished product looks less chopped).
Notes:
Placing the baffle on flat surface of a vice works good.
Hold the baffle down and against the back of the vice clamp and the baffle won't slide around. Keep checking the other side of the baffle to make sure you are not flattening it as you pound on it.
A piece of 2×4 also works good but requires more effort to hold it straight. Regardless of method, in the end result you want both baffles to match the amount of air getting past the diverter.
Also, If you try and 'mostly close' the diverter, but it seems to stop bending down, check your initial cut line.
You may need to get your hacksaw back out and cut a little further down the baffle.
And, on the 1-3/4“ baffle, try to bend the diverter down so there is about a 3/16” to 1/4“ gap between diverter and the inside walls of the baffle.
| Depress the diverter. The trick is to get the depression started. Then use a dowel or a small diameter pipe for the rest of the bending.22) |
|
 |  |
 |  |
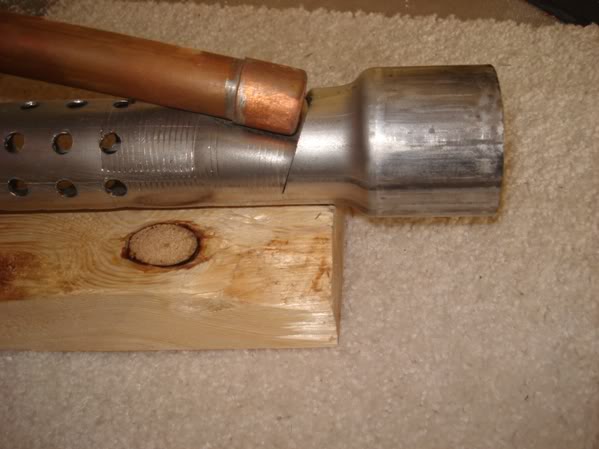
Drill holes in the baffle to let the diverted exhaust get back out.
Tape was used below to mark the hole locations.
The tape, along with a punch, also helps eliminate the drill bit from slipping when starting the hole.
The holes below are 5/16” (a little larger than the standard 1/4“).
But, they can be sized for your specific requirements.
However, you may want to start with 1/4” holes.
From there, if you want more sound or more air getting through (without affecting your current power in low to mid rpm range),
Drill a quarter of the holes, or every-other hole, out to 5/16“.
Drill more as needed after testing if you like.

Sound varies between bikes also.
Note: if your baffles have a 1/4” space between the outside of the baffle and the inside of the slip-on,
You may only be able to use a single layer (not overlapping) of the muffler packing or the baffles won't go back in.
Also, wrap the sheet of muffler packing as tight as you can get it.
8 columns of 4 holes around the entire 2“ baffle were drilled.
But, only 7 columns of 4 holes around the entire 1-3/4” baffle.
The holes are spaced apart about 3/4“ apart in each set.
Lastly, drill the mounting hole for the bolt that connects baffle to exhaust pipe.
Be sure that you drill this hole on the opposite end of baffle that the bend of the diverter is facing
(the exhaust needs to go up the ramp - or just remember the drilled baffle holes are towards the exit of the exhaust).
Make sure your baffle will mount fine where you drill this mount hole.
The drill size of the mounting hole is the same size of the mounting hole in your exhaust.
If you need to drill a mounting hole in your exhaust, then make sure the size of hole corresponds with the bolt you are using for mounting.
| Drill hole locations are easily marked using tape 25) |
 |
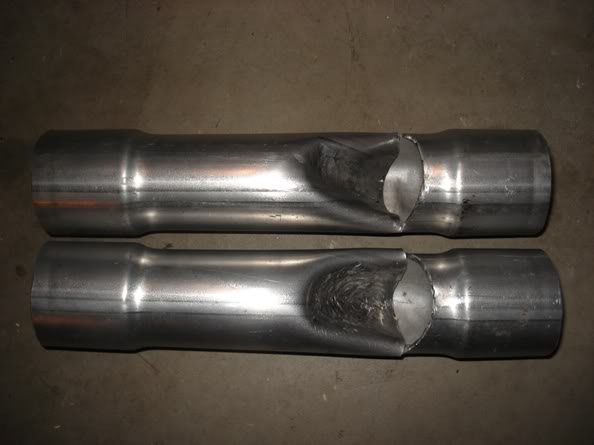
Finished Products:
| 1-3/4” Baffle 26) | |
 |  |
| 2“ Baffle 27) | |
 |  |
Torque Cones
Torque cones are basically (choke down venturi effect) drop in cones that go in the engine side of your pipes.
They rest against your exhaust port.
Prices can be from about $10 from Mid-USA, $30 kuruakyn and $85 from Sampson.
They give some bottom and mid range back as well as help to smooth out the sound. 28)
 |
| Torque Cones 29) |
Lollipops

- A “Lollipop” is a cheap simple way of achieving back pressure on the pipes and creating anti-reversion.
- The length of the headers determines at what RPM range the reversion (loss in torque happens). The shorter the pipe, the higher up in the RPM range it is. This is harmonics. There are two parts to the harmonics… the reversion wave reducing power, and the scavenging wave increasing power (higher RPM). The less restrictive the baffle is, the greater these effects. Drag pipes, being the least restrictive baffle (no baffle). 31)
- The lollipops reduce flow, thereby breaking up the harmonics. This reduces the waves… both the lower RPM reversion loss, and the higher RPM scavenging boot. Since a lot of people with drags don't ride at WOT 24/7 (unless its actually a drag bike), its often worthwhile to reduce the lower RPM torque dip, even though there's a slight decrease in top end. 32)
- This is why long drag pipes used to be popular with actual riders on the street. If the pipe is long enough, the reversion range is lower than general riding RPM. Of course, there's a little more restriction overall on the longer pipes too. 33)
- Lollipops were originally used on Ironheads with drag pipes and shorties although they will work on any model with straight pipes and no baffles. They will also work in addition of torque cones. You can vary the angle and feel performance changes 34) although generally 30-45 degrees seems to be the sweet spot.
- Officially, the use of this modification should be considered for 'off road' use. 35)
| Thunder Monsters (fancy lollipops) 36) |
 |
Results
The results of using lollipops are concurrent with each other for the most part:
- They don't have as much impact on sound as they do on torque although the sound does change just a little, you can tune your low end torque quite noticeably. I got the most low end with them at 90*, but ended up with them at about 45* (on my bike I lost some top end with them at 90*). But I can tell you that I don't need to downshift at lower speeds like I used to. 37)
- The sound stays the same when going to throttle, Gives you more torque overall to the motor as it quiets the decel noise overall by giving more backpressure to the pipes. As you decelerate, not only does it do away with the crackling sound but with shorter pipes, it tends to amply the popping sound as you roll off the throttle, and the lollipops reduce the pop in the shorter pipe chambers. 38)
- With mine I would'nt say it quieted the exhaust, but it definitly tones the raspy crackly how ever you want to put it sound down and no more deceleration noise. It has a more powerful bassy sound now.39)
- I can say that it undoubtedly gave me better low-end response, and quicker accelleration from stopped AND rolling in first and second gear. 40)
- I made a set an tried them out. Fully closed is pretty quiet, really too quiet and a struggle past 5,000 rpm or so, turned them about 1/4 closed and sounds good and it possibly may be torquier. 41)
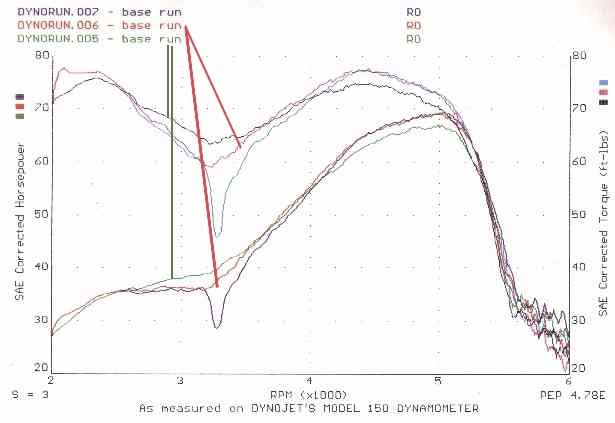
- This is a dyno chart from Nightrider.com where lollipops were tested at different angles, look at the dip in the powerband at 007, of course 007 run is 0° or straight through, 006 run is at 45°, and 005 run is at 90°. Even at 90° it seems you only lost 2 HP on top. Powerband dip range will vary with your specific pipe lengths. Click to enlarge
 Copyright Notice - 42)
- The author of this chart does not assume responsibility for damages or problems arising from changing or the modification of any vehicle due to information obtained from this WEB site 43) or technical questions posted through E-Mail for response. The use of these modifications is assumed to be for off road purposes only and the owner of the modified vehicle using this or similar information assumes full responsibility for changes made.
Some people are not at all sold on the idea of using lollipops. This gets into another one of those debates over using better pipes rather than drags for street use, although lollipops will give you better lower end torque which is a proven improvement for street use. Some are completely sold on running drag pipes which will have to be in another discussion.
Different Materials Used
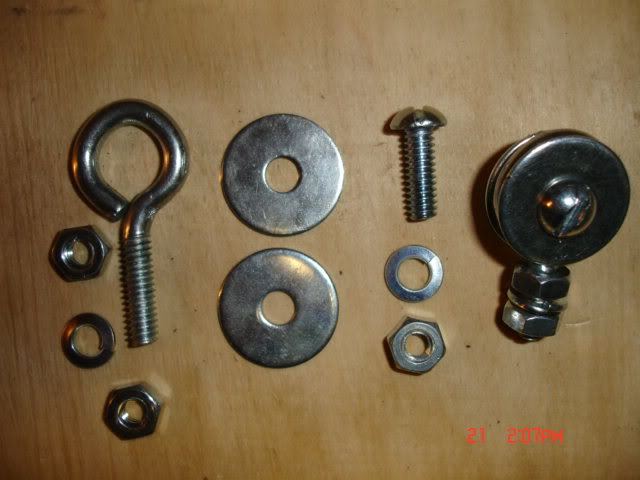
Several different methods and materials have been devised for lollipops all using 1/4” nuts/ bolts to secure them in the pipes. Click on an image to enlarge it:

 |
| Simple and easy but loud! 47) |
* Below is a list of some different materials used by XLFORUM members:
- (2)- 1“ 'I' bolts with 1/4” threads and 1“ washers. 48)
- 1/2 inch washers, coned them with a vise and welded them to the head of 1/4 x 1” bolts, installed them into 2-1/2“ SE slip-ons 49)
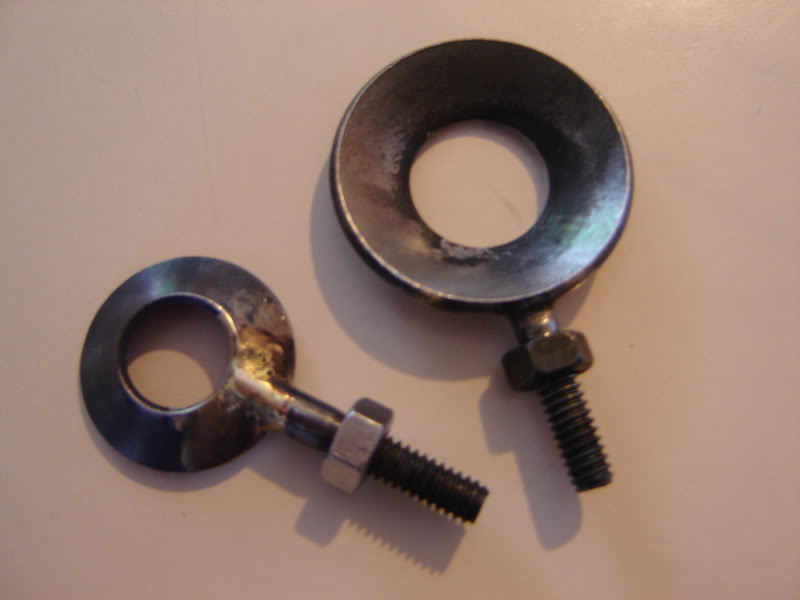
- Get some 1/4 x 24NC eyebolts, drill a hole in the end of your pipe, then bolt them in with the eye part sitting in the center of your exhaust pipe… 50)
- 1 is made from a 1/2” penny washer and the other a 3/4“ 51)
- First, you will need 2 washers that are 1.25” OD with 1/2“ holes in them, (2)- 1/4” bolts that are 1/2“ to 1” in length (this depends on the diameter or your pipes!), and either (2) or (4) 1/4“ nuts and lockwashers (again, whether you use 2 of them or 4 of them will depend on your pipe diameter). My pipes are 1-3/4”, so I only needed (2)- 1/2“ bolts and 2 nuts and washers…..2 inch and up will need all 4 nuts in order to space the cones in the center if the pipes. 52)
- The most efficient device would be a washer - 1-1/8” OD X 3/4“ ID having a 14 or 16 guage thickness with a 7/8” rod pushed completely through its center giving it the smooth bell shape. Then weld this conical annulus to a small bolt that affixes it in the center of the 1 3/4“ drag pipe about 2” in from the short side of the slash cut drag pipe(s). Such a device would be able to break up the Reversion packet on the way out AND slow its reformation when reflected back by compressing the fragments slightly. One can experiment with different size rods to push through the center if needed but I think this one would not need to be tilted to work and would be the least restrictive when going for the WOT scenario. 53)
- If one wishes to be really aerodynamically correct then take an oversized tube say thin walled 3/8“ I.D. and cut to length so it holds the washer in the center and then pinch it on each side when it is on the bolt or even just one side so it can act like a wing to lift the exhaust around the bolt and eliminate that inner nut by using two jam nuts on the outside to hold the conical washer vertically. 54)
- For those of you who are willing to experiment more, the size of the washer can be increased as can the size of the hole in the washer. A strong spring can be used to hold the washer in place in relationship to the pipe and a “wing nut” arrangement can be used to adjust the angle of the washer. 55)
Fabrication for 'Tunable' Lollipops
- The word, tunable, is synonymous with (angle change-ability).
- You can tune the baffle by changing the angle of the thumbscrew or washer to the exhaust pipe. For maximum torque, the washer will be at 90 degree angle to the pipe. For maximum horsepower the washer will be parallel to the pipe. 57)
- As you can see from the different materials list, it isn't necessary to 'have' to 'cone' the washers but this is another version is all. Each will have it's own result in each unique bike/ engine/ placement/ size and angle setup.
Placement of Lollipops
- The closer to the end of the pipe the better, but I prefer to place them up in the pipe a little bit to conceal them. Doing this mod will decrease top end horsepower by 2 or 3 rwhp, but the mid range will come alive & thats where it matters on the street. 58)
- I wrapped a dollar bill around the pipe and made a mark. Ended up being 2-1/2“ from the short end of the slash cut. 59)
- You want to place the Cones at least 2 inches inside your pipes (outlet end!) to achieve the desired results. To find 2” I simply used a short strip of 2“ duct tape, wraping it around the pipe, using the shorter of end of my 'slash cut' as a reference point. I then marked the spot where I wanted the hole with a pencil. I want the bolts to be 'hidden' (on the backside of the pipe)and not sticking out the bottom. 60)
Pics of Lollipops Installed
- Back side mounted Lollipops (hidden nut/bolt behind pipe)


Patriot Defender
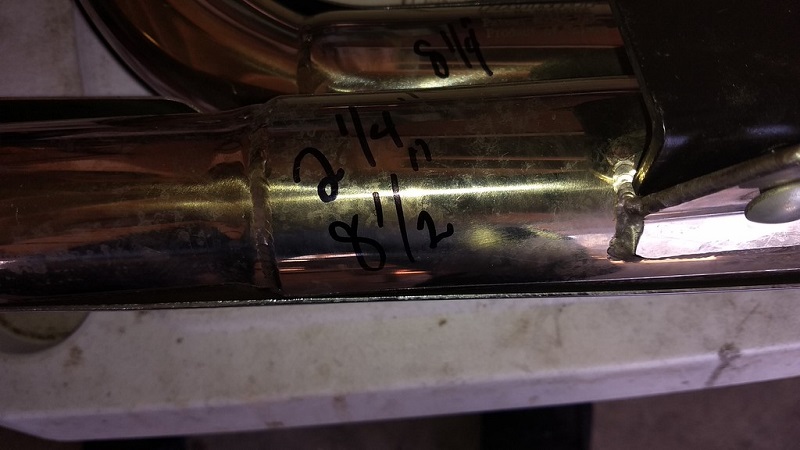
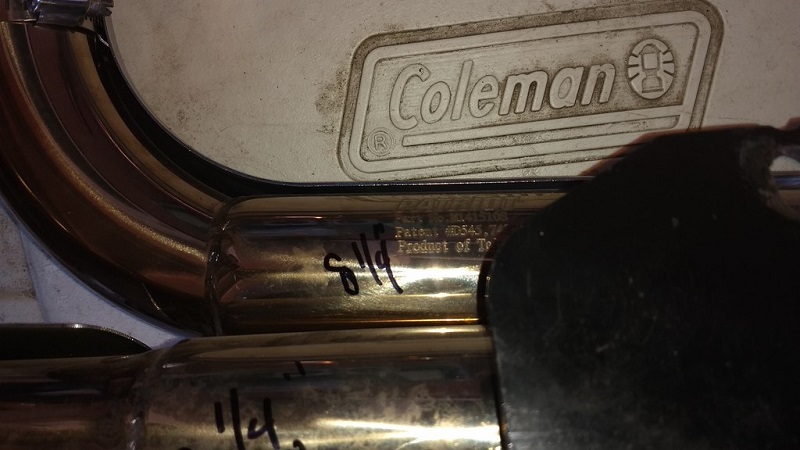
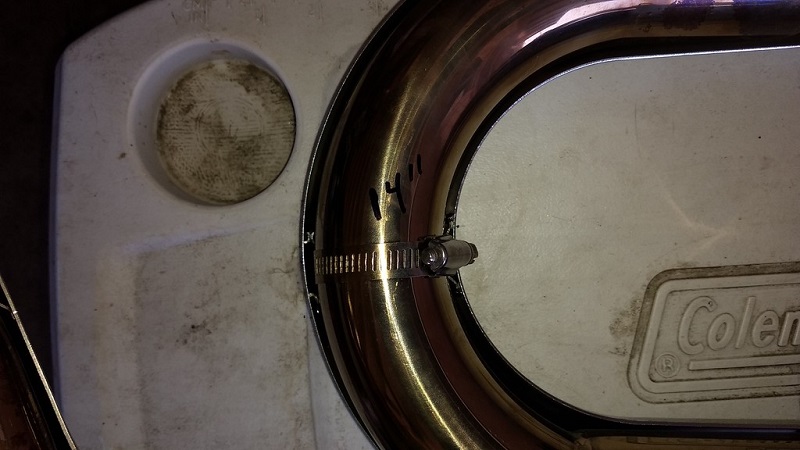
Dims: 66)
1-3/4“ diameter out of the heads.
Out to 2”.
Then 2-1/4“ to the collector.
The collector is probably 2-1/2” in a megaphone configuration.
| Patriot Defender Pipes Pics and Dims. 67) | ||
 |  |  |
| Patriot Defender Pipes Pics and Dims. 68) | ||
 |  |  |
Exhaust Bracket Mods
Exhaust brackets can be fabricated to fit just about any configuration needed.
(especially when using aftermarket pipes)
Mount the pipes to the heads with proper torque.
Allow them to gently sit on their own.
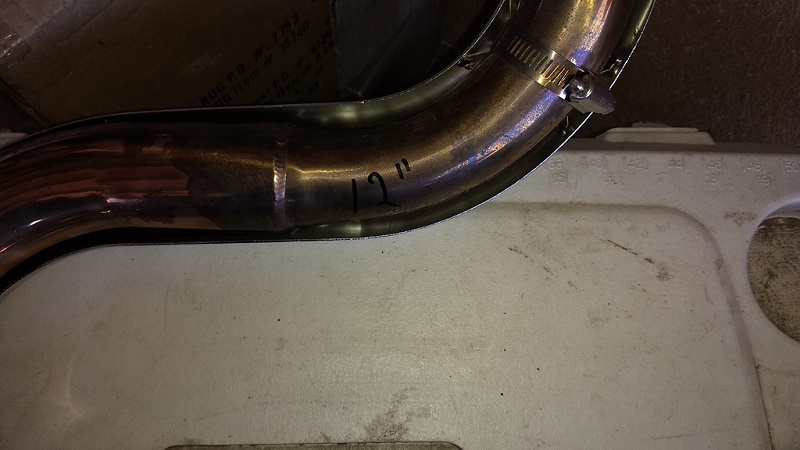
This allows for vertical and horizontal measurements to be taken from the point where the mount mates to the pipes.
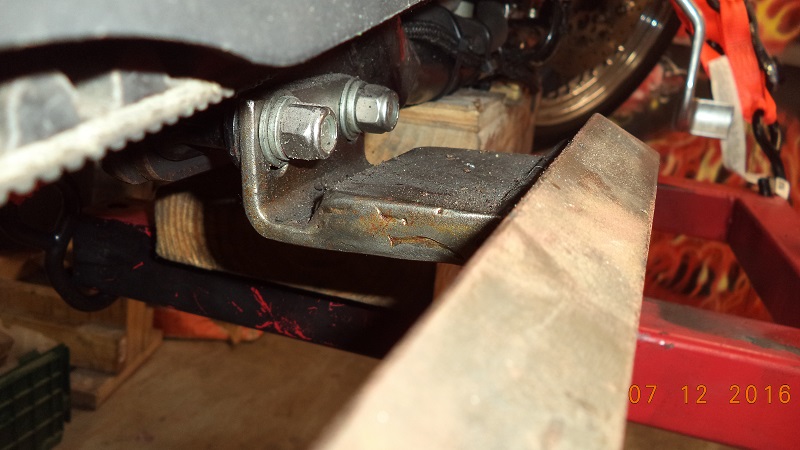
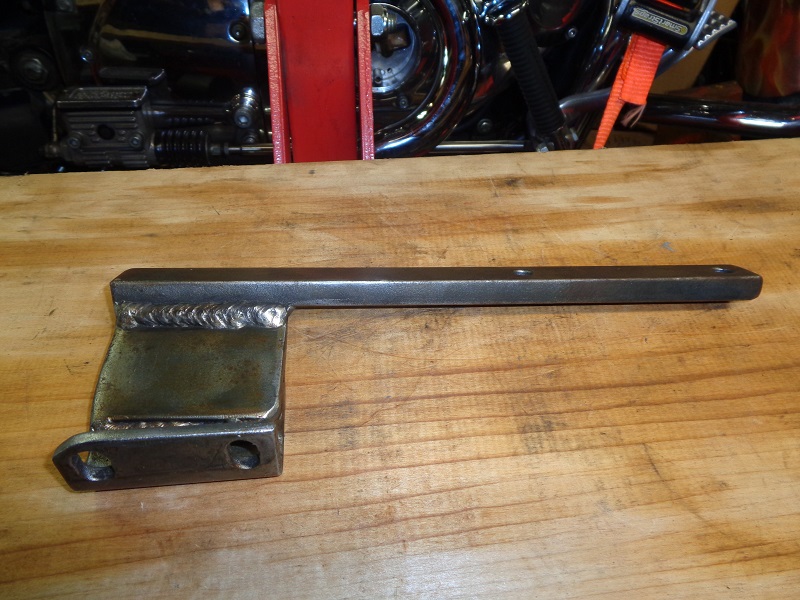
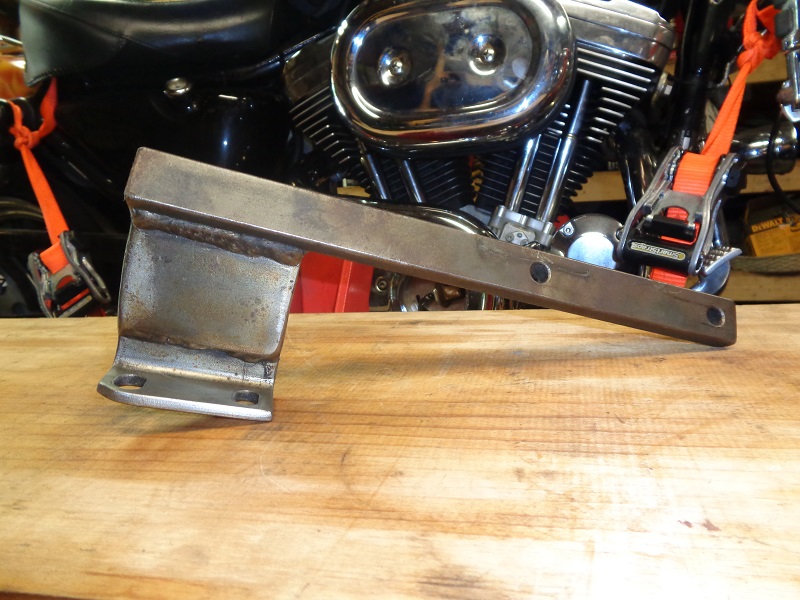
Below is the bracket that comes with the purchase of a set of Thunderheaders.
This particular bracket was slightly too low and recessed to fit on a 98 1250.
(it may have been fine for stock 1200 heads)
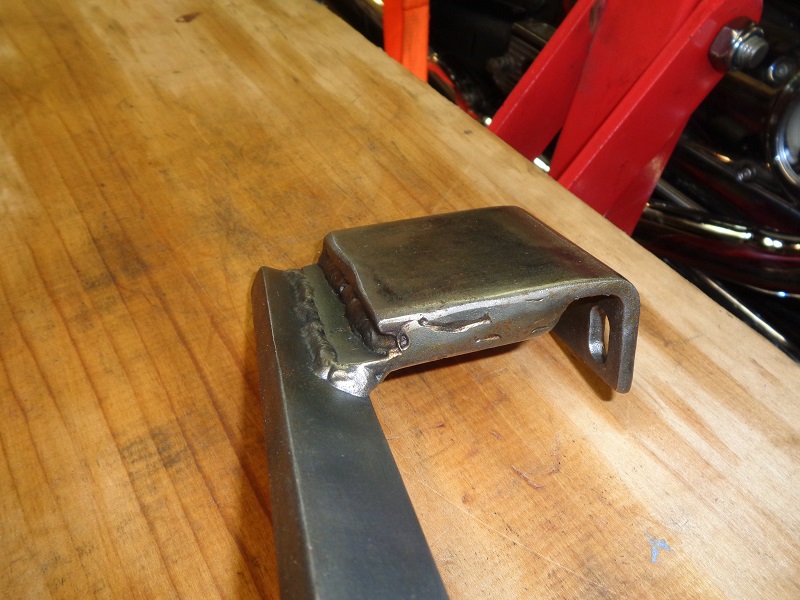
The plate on the bracket was cut into and another plate was welded to it to extend the mounting holes.
With the extra plate simply welded on top of the original one, the height worked out as well.
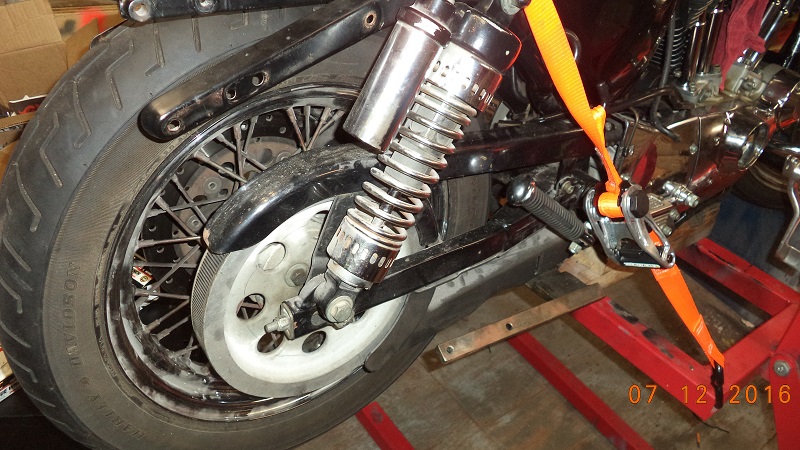
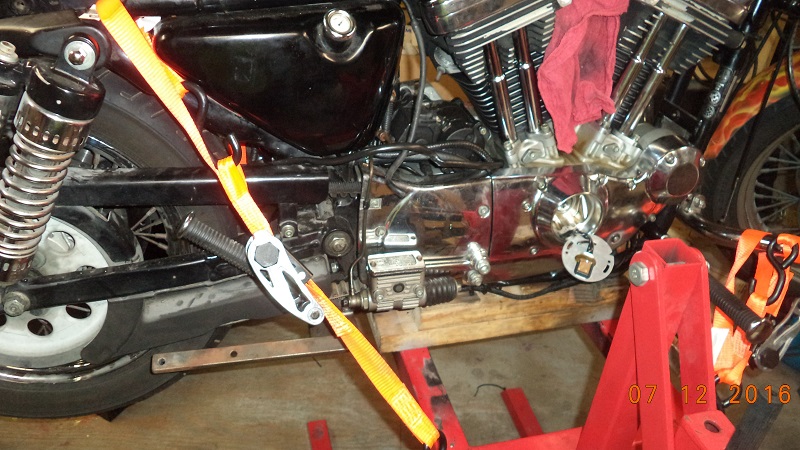
| Thunderheader bracket mod. 69) | ||
 |  |  |
 |  |  |
44)
eyebolt2_by_bass_thrasher
45)
lollipops_by_rooster77
46)
lollipops_made_by_xldaver
61)
photo by dave76 of the XLFORUM
62)
photo by fdny37 of the XLFORUM
63)
photo by smokerider of the XLFORUM
64)
photo by rooster77 of the XLFORUM
65)
photo by xllent01 of the XLFORUM
69)
photos by Hippysmack