This is an old revision of the document!
REF: Electrical System
Turn Signal Mods / Relocating
Front Turns on the Trees
The vwclogan Front Turn Signal Mod
 |
| 2007 XL1200N 1) |
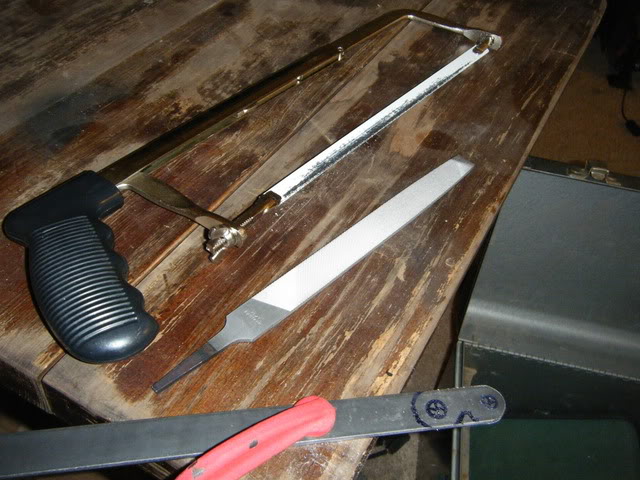
| Tools include a hacksaw, file and a drill. 2) | 1/4“ steel tubing, black 1/4” PVC tubing or a bunch of washers can used for spacers. 3) 4) |
 |  |
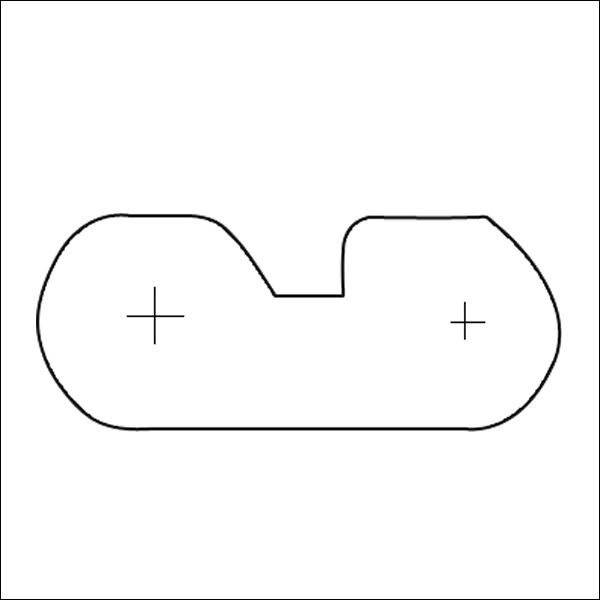
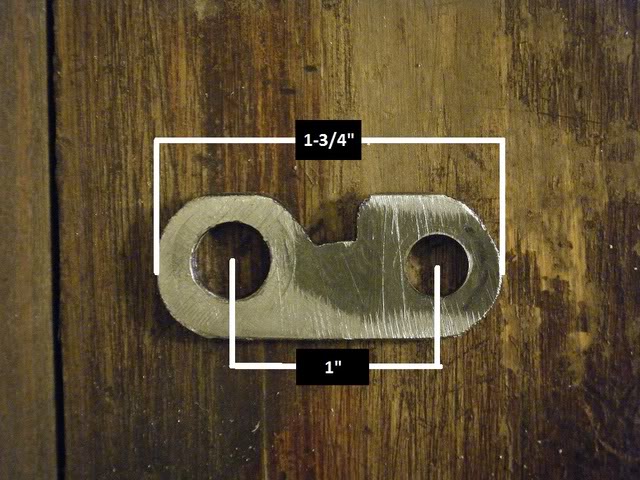
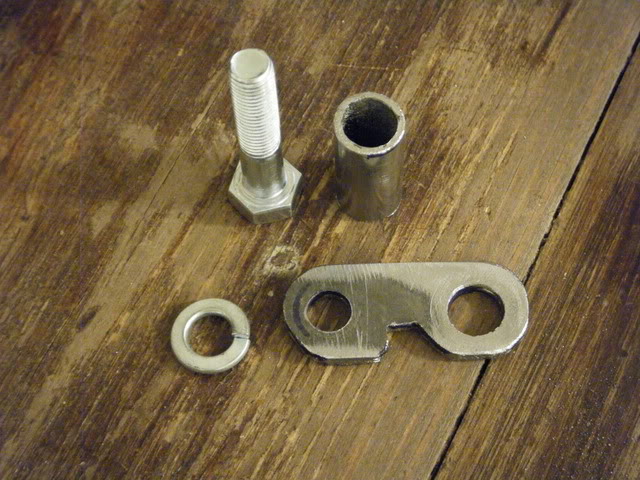
| Template for the bracket. Entire drawing should print out 2“ x 2”. (notched to get around a small edge in the tree) 5) | Holes drilled in 3/4“ wide bracket. Left hole (tree) - 3/8”. Right hole (turn) 5/16“. 6) |
 |  |
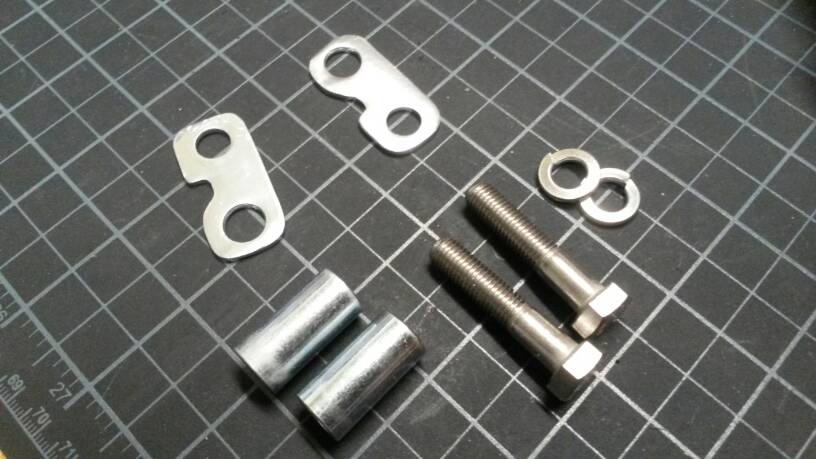
| Parts: (2) 5/16”x24x1-1/2“ bolt, lockwashers and spacers. 7) | |
 |  |
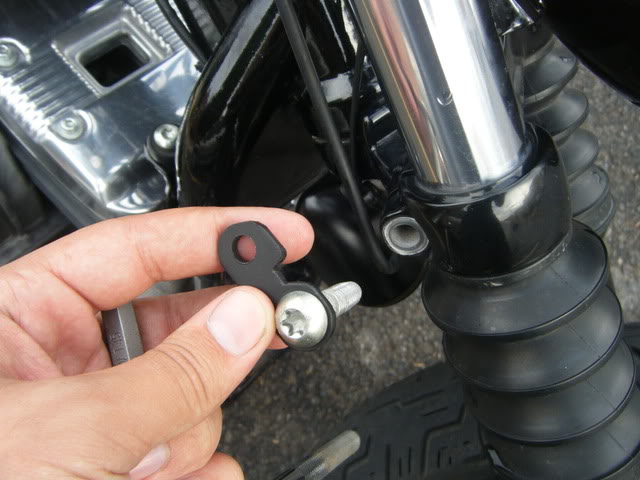
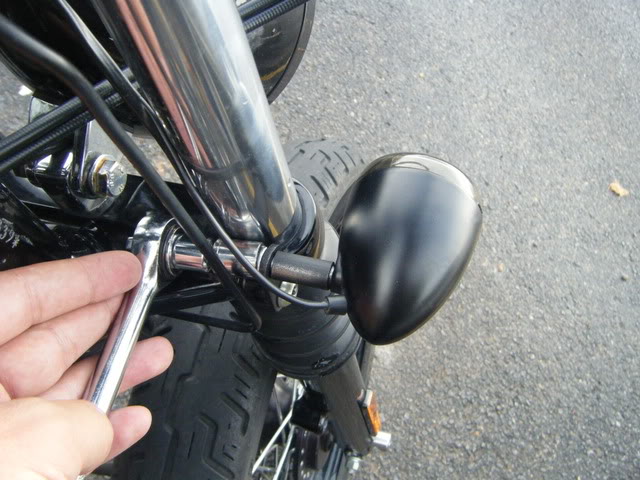
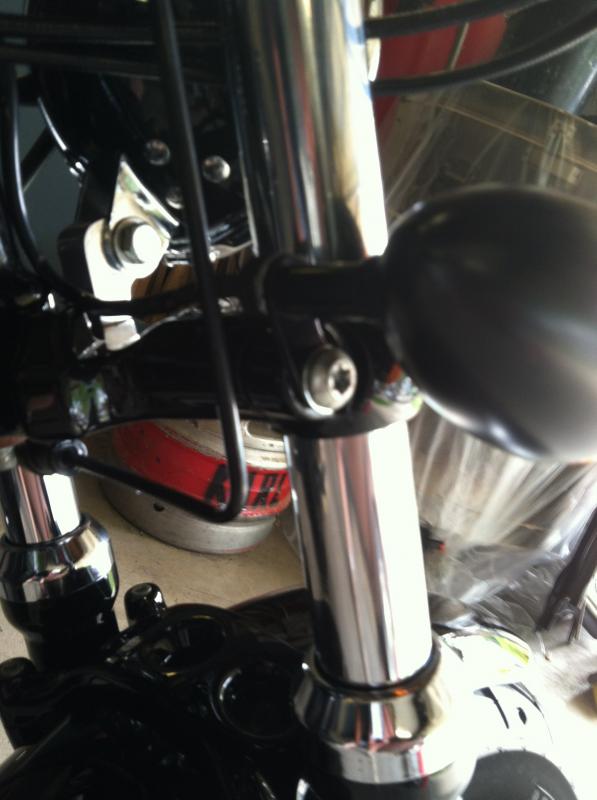
| Remove the lower tree bolt on the right side. 8) | Remove the rounded bolt from the signal with an Allen wrench. 9) |
 | 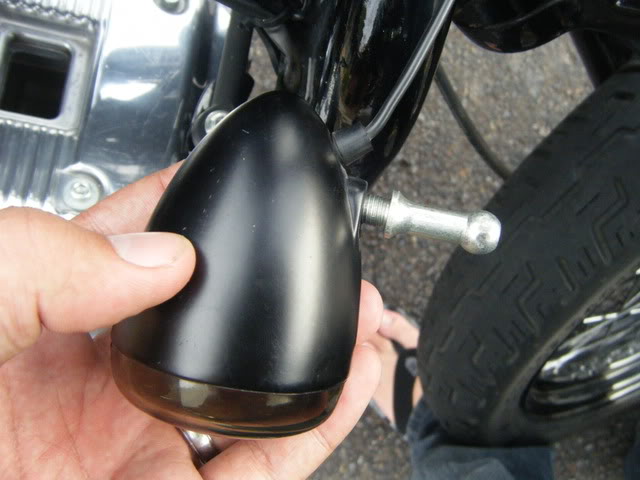 |
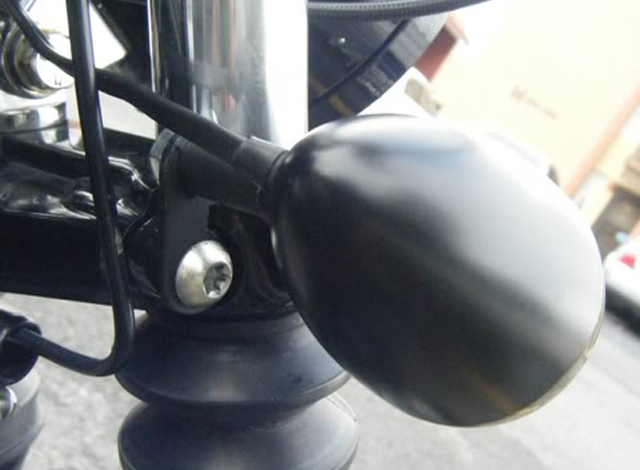
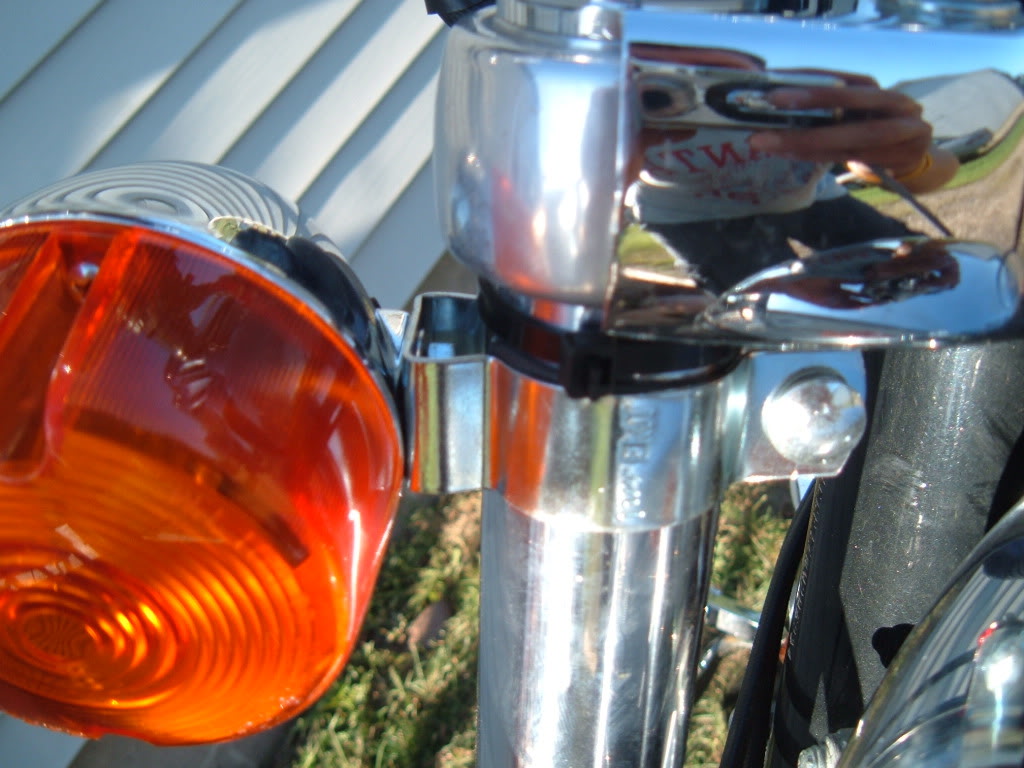
| Mount the new bracket to the tree. Torque the existing bolt (#45 Torx socket head) to 30-35 ft lbs. 10) 11) | Add a spacer on a bolt to extend the turn housing. 12) | |
 |  |  |
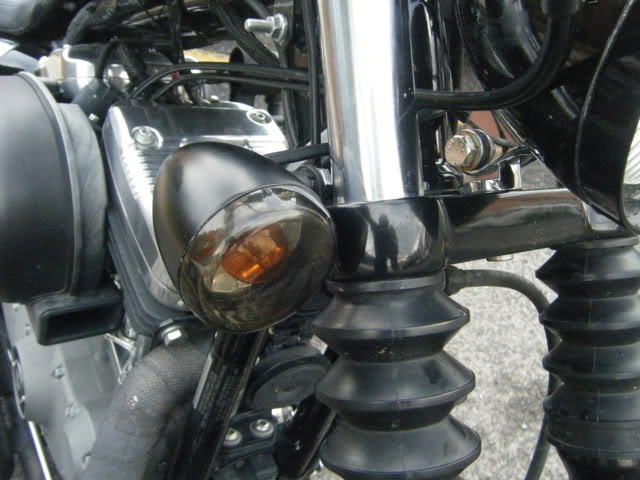
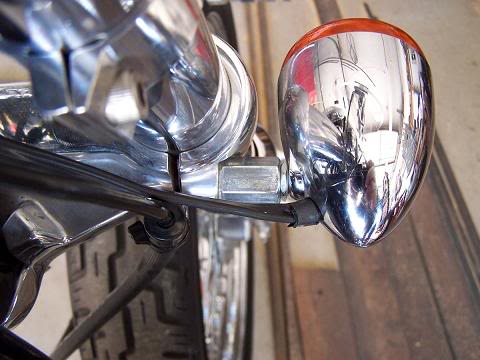
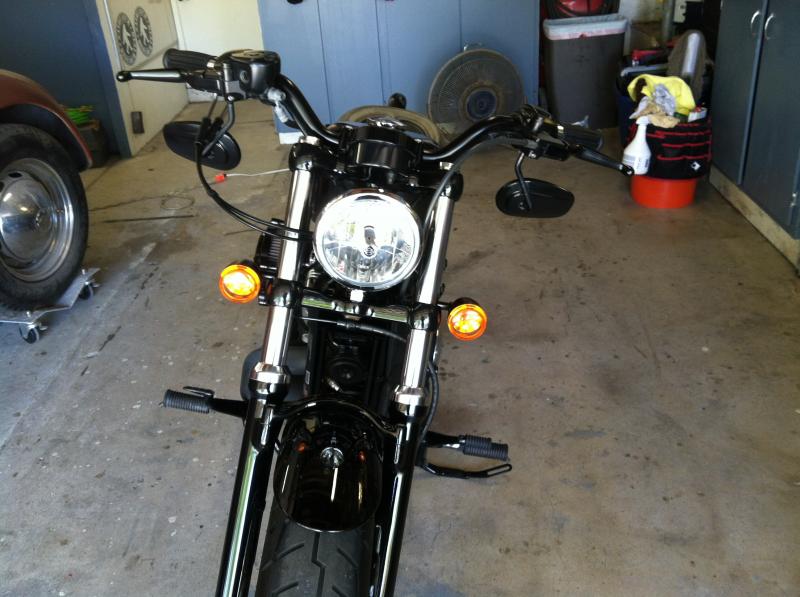
| Tighten the turn and zip tie the wires nice and neat. 13) | Reposition as needed and start on the other side. 14) | |
 |  |  |
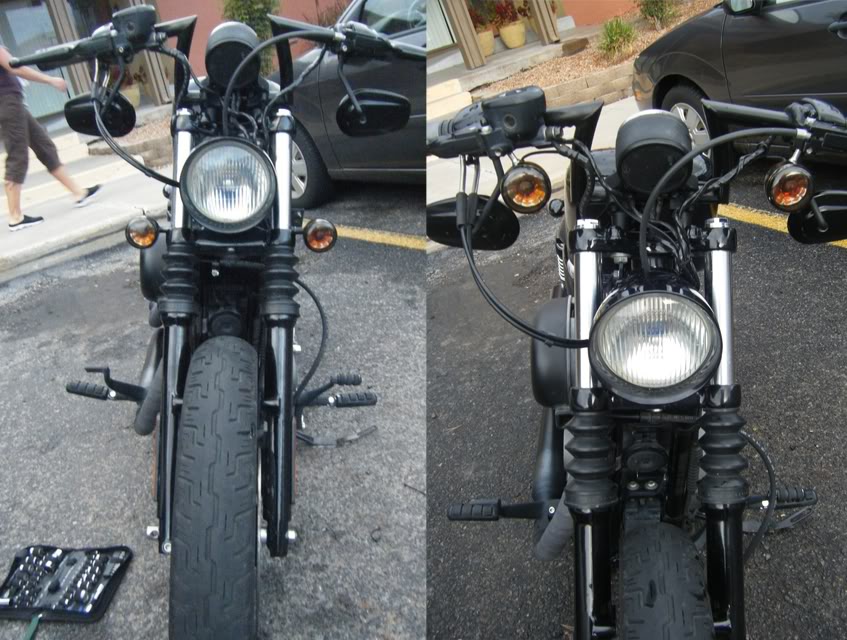 |
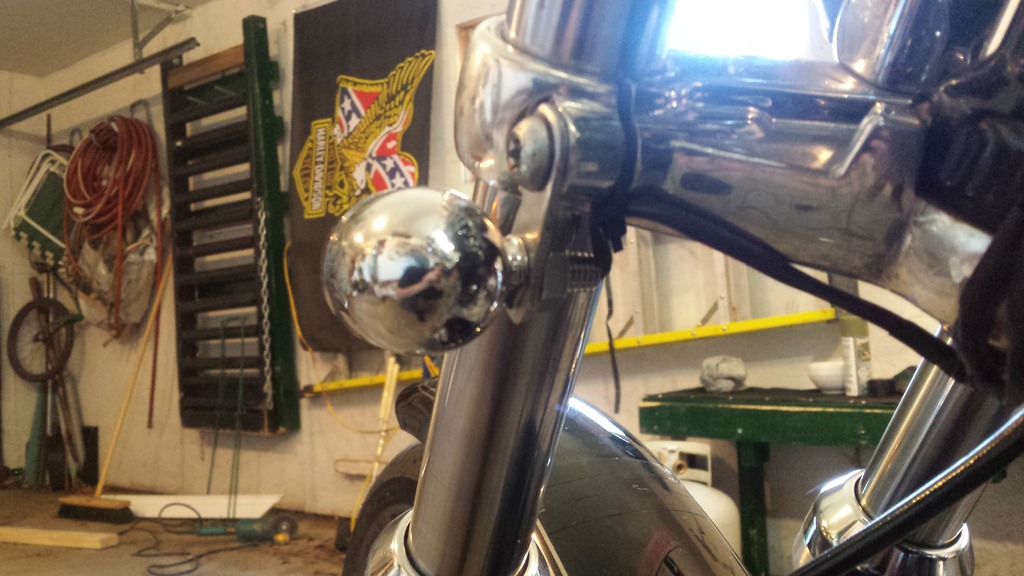
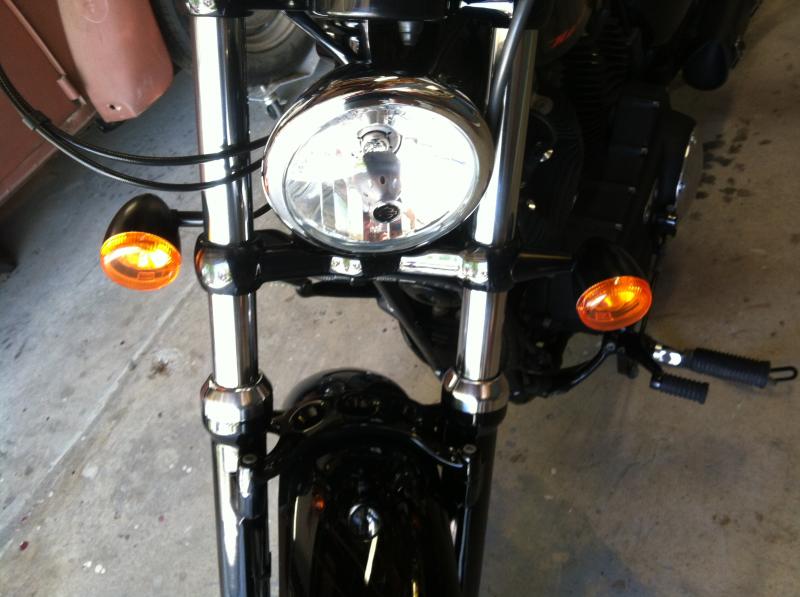
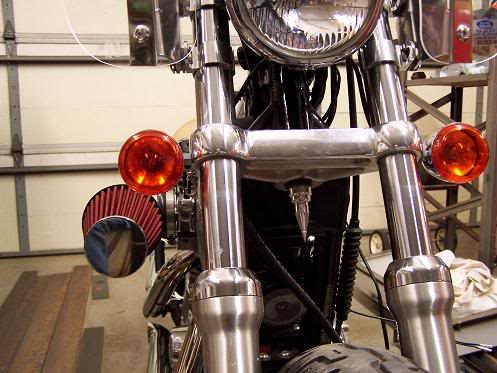
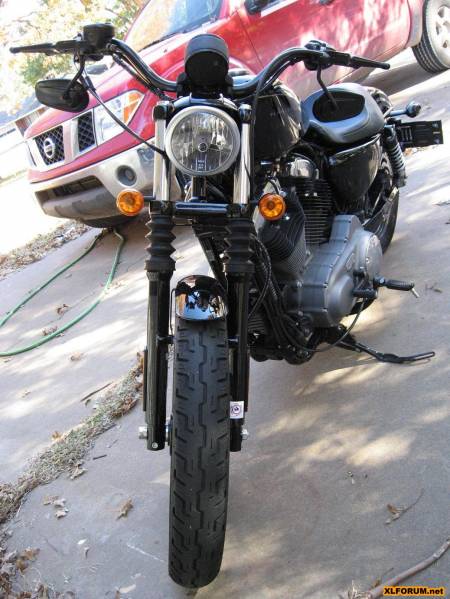
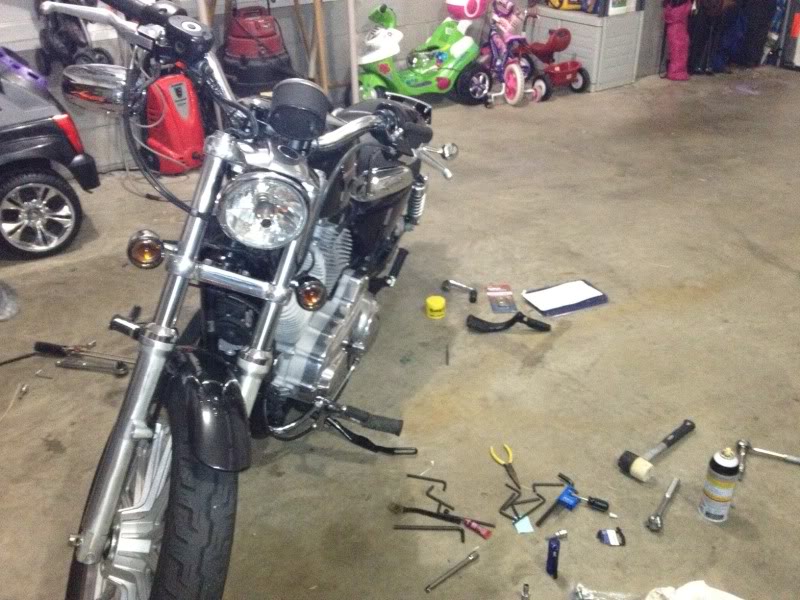
| After / Before Stock front turns on a 2007 XL1200N 15) |
Alternate Bracket Material
| Bracket made from aluminum flat bar 16) | |
 |  |
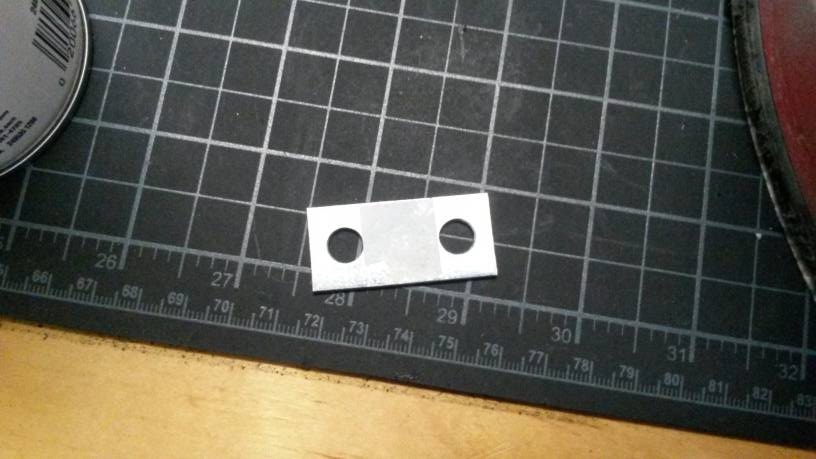
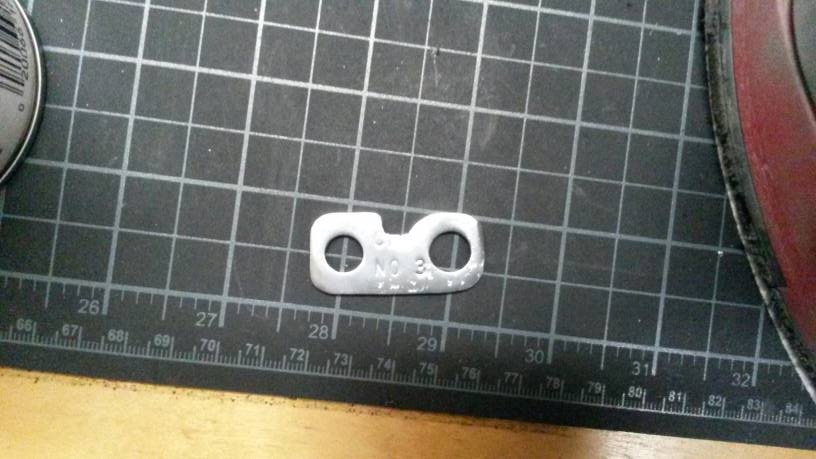
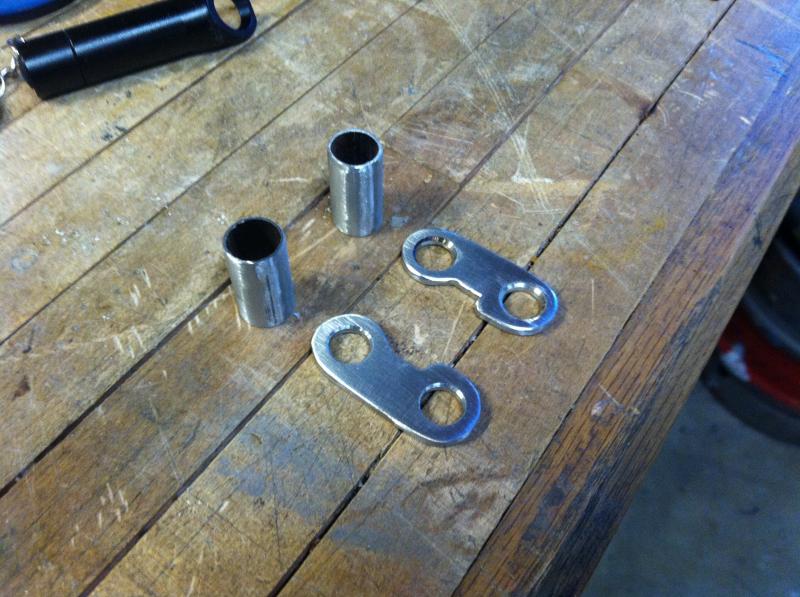
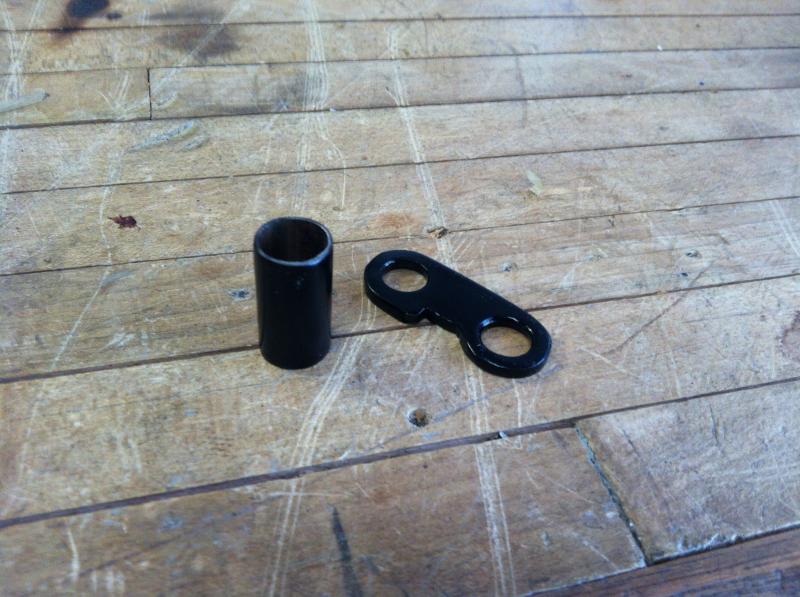
| These rectangular strips were bought from a hardware store. They are size 3 (CHGO NO 3) and the holes are 1” apart (center to center). You can also find stainless spacers in the correct size. Cut and shape the brackets, over drill one hole on each, paint them. 17) |
||
 |  |  |
| Use the original signal mounts, some flat metal stock and a bolt with the same thread as mirrors. Cut the stock to size and drill the 3/8“ holes for the tree mount. 18) | ||
 |  |  |
| Modification for 48's. The only difference is that you need to drill two 3/8” holes in both brackets and angle the brackets from the tree slightly to allow the nut to clear. The 48 turn signal has the wires running through the mounting stud rather than having them come out the back of the housing. The mounting stud is the perfect length to fit the new 1“ spacer and there is ample room to bolt the original nut and lock washer to the new bracket. 19) |
||
 |  |  |
 |  |
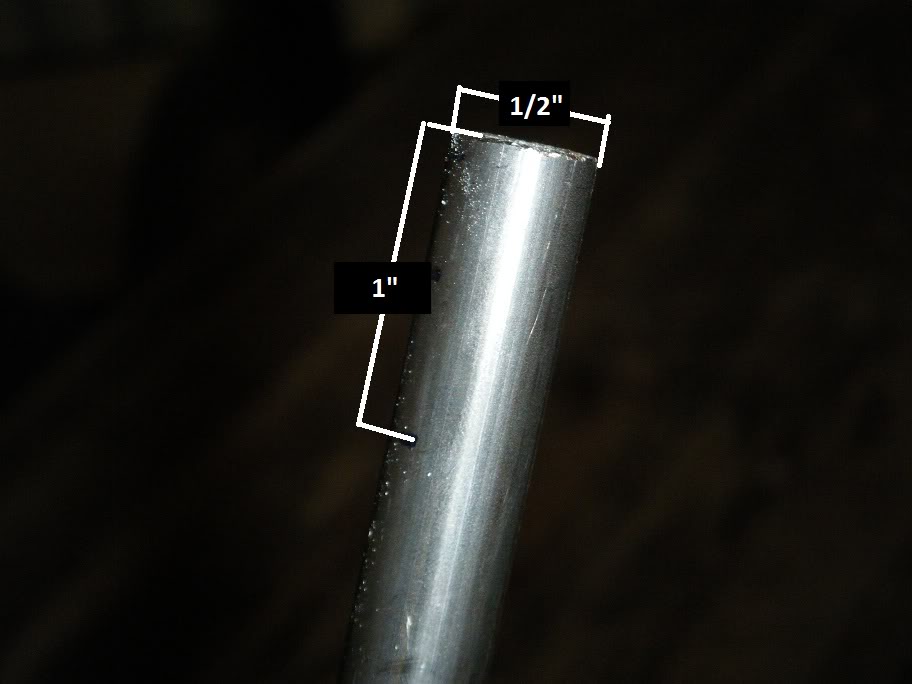
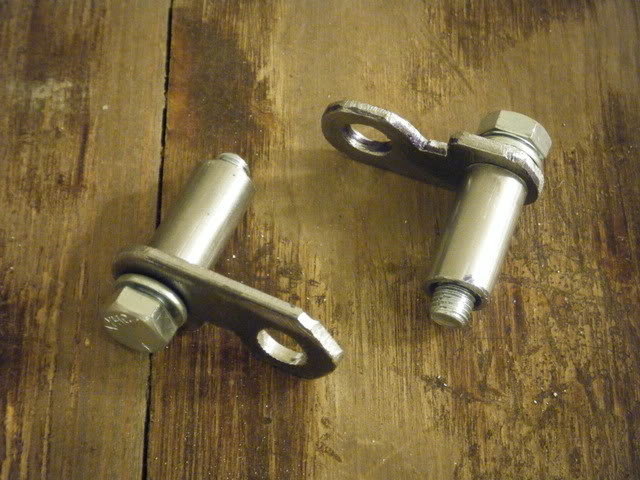
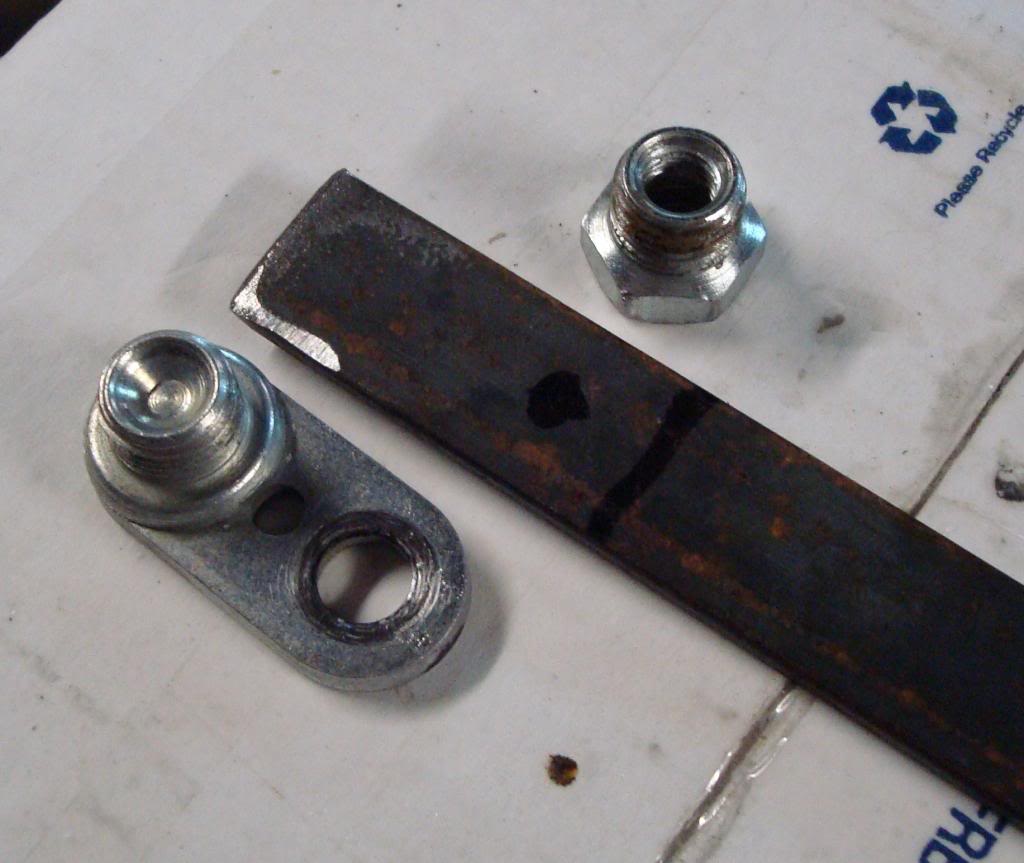
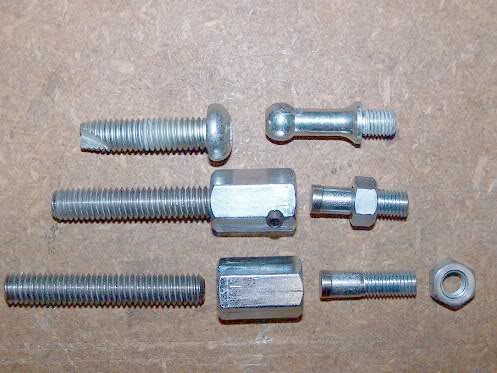
| All thread coupling: In the first pic below, the top 2 fasteners were removed from each side and discarded; (L) 3/8” x 18 pinch bolt and (R) turn signal stud. The 2-1/4“ threaded rod and coupling nut replaces the pinch bolt and provides for more threads in the tree. 3/8” rods can be cut from all-thread or a 5“ carriage bolt. The coupling nuts are 1-3/4” long or can be cut shorter (these were cut to 7/8“). The signal stud is replaced with a 5/16” x 24 bolt with the head ground down just enough to fit inside the coupling nut snugly. It is then cut so there is about 1/2“ of threads to screw into the turn signal housing with a jam nut threaded on it. The carriage end of the 5/16” bolt is then inserted into the coupling that has been side drilled and tapped for a #10×32 set screw to hold the signal bolt tight. The tree can be torqued back properly by use of a crows foot on a socket wrench applied to the coupling. 20) |
||
 |  |  |
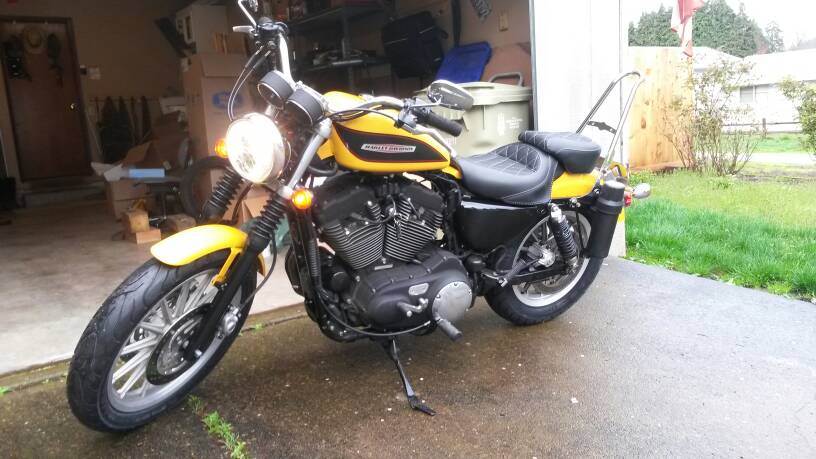
Bikes with this mod


Front Turns on the Forks

Rear Turns
Loose Rear Turn Signal - Fixes
Some times the double-ended stud that mounts the rear turn signal housing to the fender (thru a stand-off spacer) is not long enough to get a good bite on the threads in the housing. That eventually leads to the first few threads stripping out. Even though there are more threads in the housing, the stud will not reach deep enough.
Note that on some of the stock studs, the housing threads on the double-ended stud have a different pitch than the fender mounting threads.
SportyTrace suggested the following: 30)
I ended up fabbing up a replacement longer threaded stud that could get deeper into the indicator body to use the good remaining threads. I used all-thread rod. The trick was getting a nut fixed into place on threaded rod and making the stalk the correct length. I ended up purposely messing up the threads at the fixing point and added loctite too. Worked a treat, but was a bit fiddly. Shown below: original stock one on top and home-made replacement beneath.

The threads may be repairable using JB Weld (lightly coating the inside of the hole), then rethreading the housing. If all the threads in the housing are stripped, using the above extended stud might reach far enough to use a nut (or speed nut) on the inside of the housing.
