Table of Contents
This is an old revision of the document!

REF: Engine Mechanicals
Ironhead - Aftermarket Motor Mounts and Alternatives
Pingel Rear Motor Mount
Before quality TIG equipment was available, Pingel was the only real choice for an aftermarket rear mount. 1)
And a lot of early Ironheads needed them. The Pingel is a slightly different design and it can usually be installed with the engine still in the frame.
You will just need to loosen up all of the motor mounts so the motor can be shifted around a bit.
Today a lot of these cracked mounts can also be repaired (without pulling the motor) by a good welder though.
How you choose to go depends on how bad the cracking is and how good you want the repair to be.
The Pingel mount is substantially better quality than the stock part and is a widely popular replacement to the original mount.
From their website: 2)
“This 2 bolt rear mount is made of super high tensile alloy to be virtually indestructible.
Slips over studs and starter shafts on completely assembled motors and frames.
Gusseted on the top (rather than the bottom like stock mounts). Mount is heavily reinforced in all areas that tend to crack, even under normal stress.
Studs on the motor must be removed on split cases.
Harley-Davidson motorcycle frames were not perfect since they twist when welding and you may need to shim your motor in the frame because of this”.
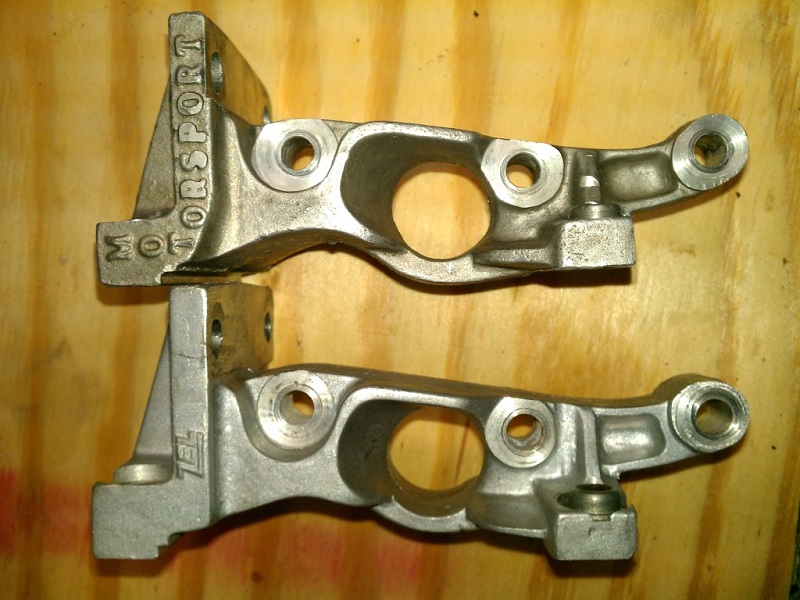
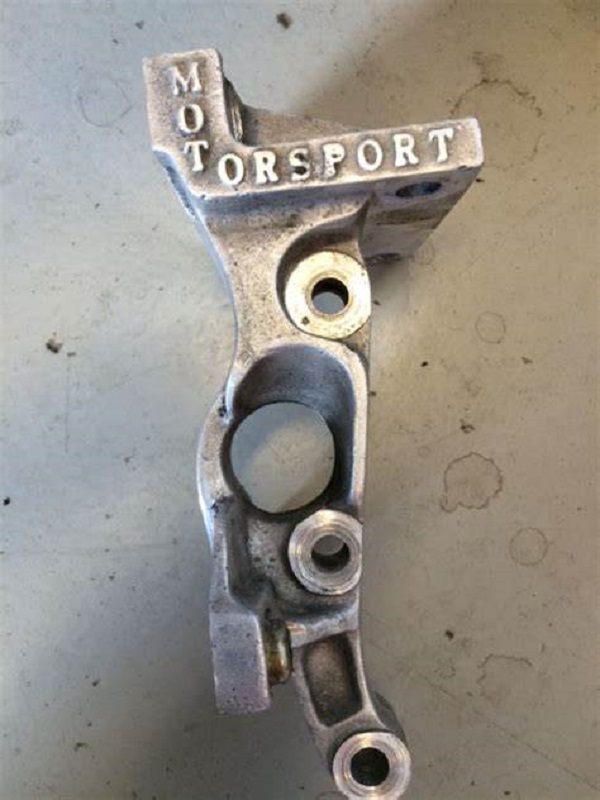
Pingel used to be Motorsport. Same product with the Pingel name now.
They bought out Motorsport back in the early 80s. The early mounts actually had Motorsport cast in. 3)
Pingle went on to make some neat parts dedicated mostly to the drag racing circuit including wheelie bars,petcocks, motormounts, etc.
Below are a few Motorsport rear mounts.

The old mount will need to be cut out, and the Pingle mount should slide in place.
Or you could try and take 2 nuts and turn them against each other removing those studs one at a time and then the motor mount will just fall out the back of the cases. 6)
However, those studs can be very difficult to remove properly.
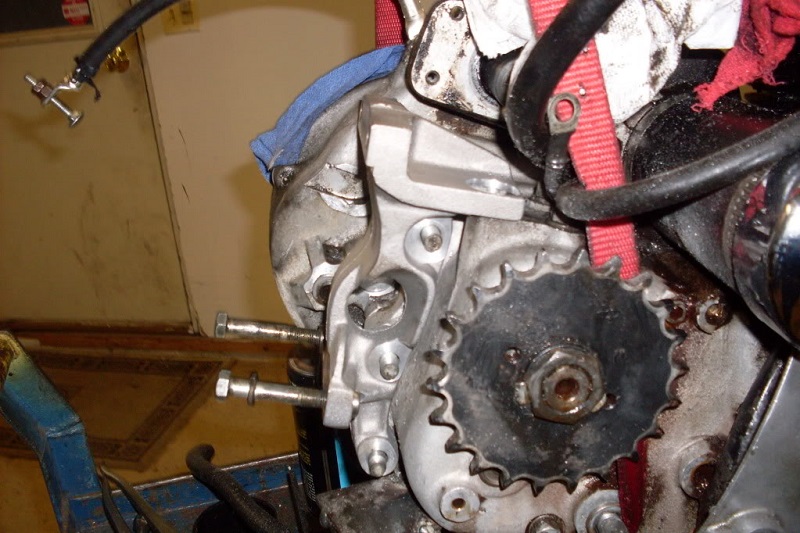
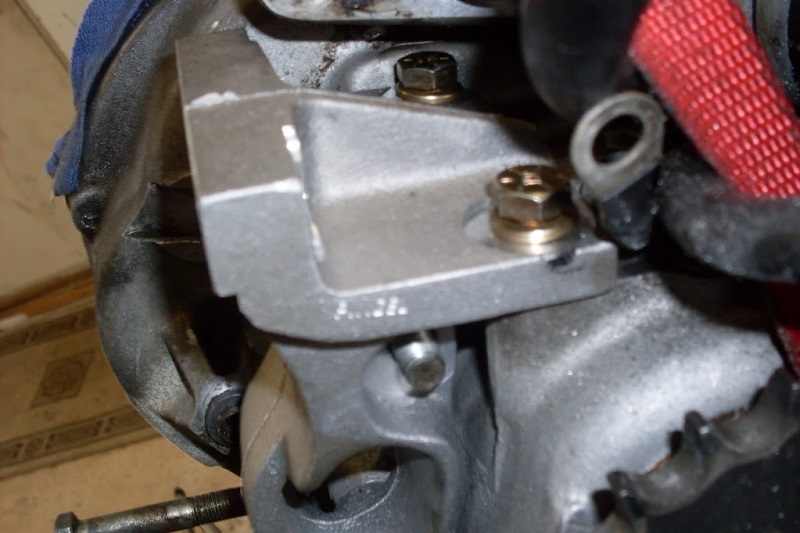
You can slide the Pingel on without splitting the cases. The factory one requires you to split the cases to install it. 7)
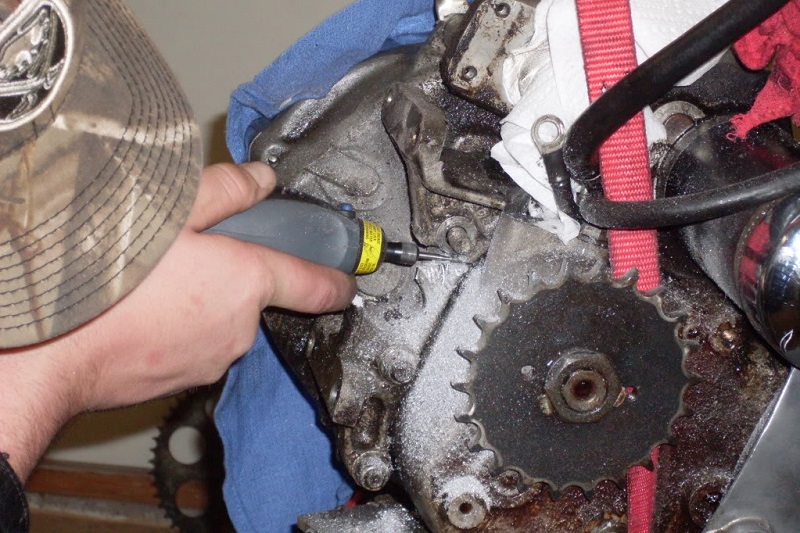
You can remove a cracked factory one without splitting the cases with a few well placed cuts with a dremmel drill and chisel.
You can also re-use the stock studs and it will slip over the studs and kick shaft. 8)
The only problem on 71 or newer XLCHs is the bottom oil tank bracket must be slotted to clear the rib on the mount. 9)
The kicker shaft and seal can be replaced with the mount in place.
Their current replacement model is a 2-Bolt Rear Motor Mount for Harley-Davidson 1952-1981 Sportsters.
Applications:
52-56 K MODEL (STOCK USES 4 bolt)
57-66 (STOCK USES 4 bolt) 4 bolt models may need some case grinding
67-81 (STOCK USES 2 bolt)
Price: $182.00
Instructions: 10)
This mount easily installs over studs on completely assembled motors. Bent kick-starter shaft can easily be replaced. This two-bolt rear mount is tough enough to replace the stock 4-bolt mounts but engine cases may require grinding for fitment. Before bolting mount to motor, make certain the machined area on the mount and frame match without any interference. If the mount will not lay flat on the machined surfaces, you should use a bit of modeling clay in the area where the interference is believed to be. Put the mount in place with the clay on the frame so the interference will leave it's mark in the clay to know where it has to be clearanced by filing or grinding. Very few of the Harley frames have this interference in their casting so preferably clearance the frame casting rather than the mount. You must file off the raised cast area around the left top motor boss on top of left case half (if present). This mount uses longer bolts for its mounting. Be certain the length of your bolts are long enough to secure the mount to the engine and frame using stock lock washers but not too long as to interfere with transmission gears. The bottom of frame to motor mount bolts should protrude through the nylon locking device on the mount. Oil tank brackets must be modified - do not modify rear mount.
Harley-Davidson frames are not perfect since they twist when welding and you may need to shim you motor in the frame because of this, so follow this procedure. Do not force front motor mounts into position. For proper engine alignment with front motor mounts, you may need to shim left of right - top or bottom for rear motor mount to frame. Install rear mount on engine and bolt assembly into frame. Check for left to right alignment of front motor mounts using a straight edge on motor and frame mounting pads. If straight edge does not lie flat across the surfaces of the pads, you must use a shim of proper thickness between upper or lower rear mount pads where they bolt to motorcycle frame. You can also use shims under the upper or lower rear motor mount pad to adjust the height of the front of the motor for the front mounts. Use shim stock that is available from local auto parts stores. You will need to notch the shim stock around the mounting bolts“.
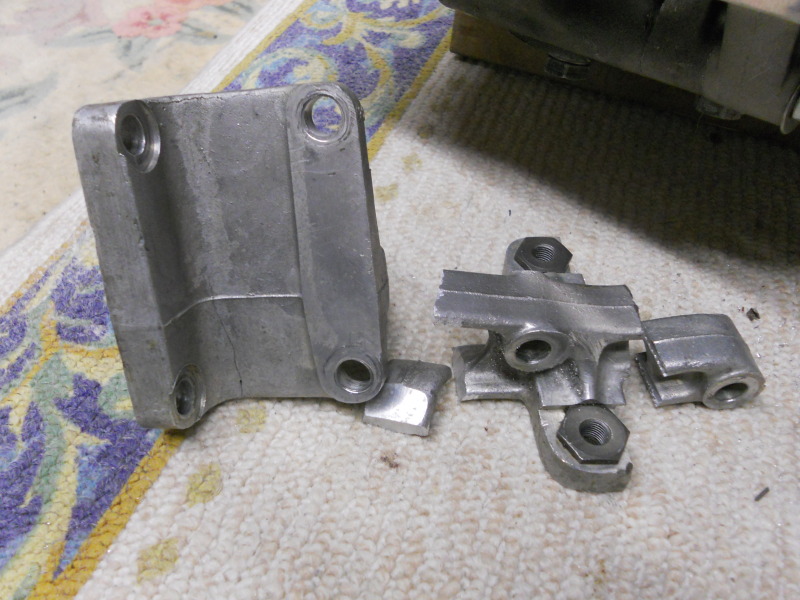
Examples of ways to cut the rear mount off without splitting the cases for a Pingel replacement mount.
| Killer CH used a Saws All to cut the mount. 11) | paraord used a Dremil tool and some elbow grease. 12) |
 |  |
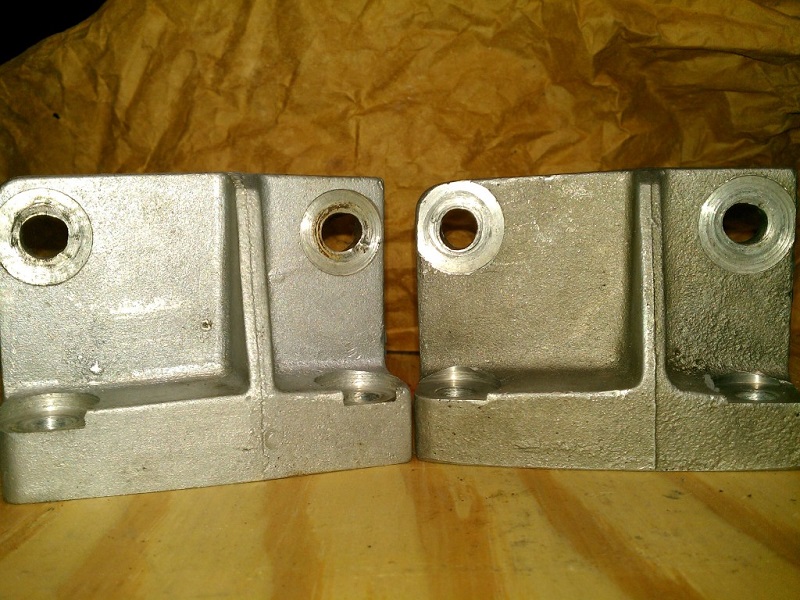
Fitment issues
The Pingel rear mount has been highly respected part for many years.
Most that have used it have nothing but good things to say about it.
However, as with most other parts, you can get one that doesn't quite fit right every now and then.
There have been imported parts that were of lower quality and workmanship than USA made parts.
Below are a couple comparison pics of ZEL and Motorsport mounts.