Table of Contents

REF: Custom Painting
General Painting Procedures
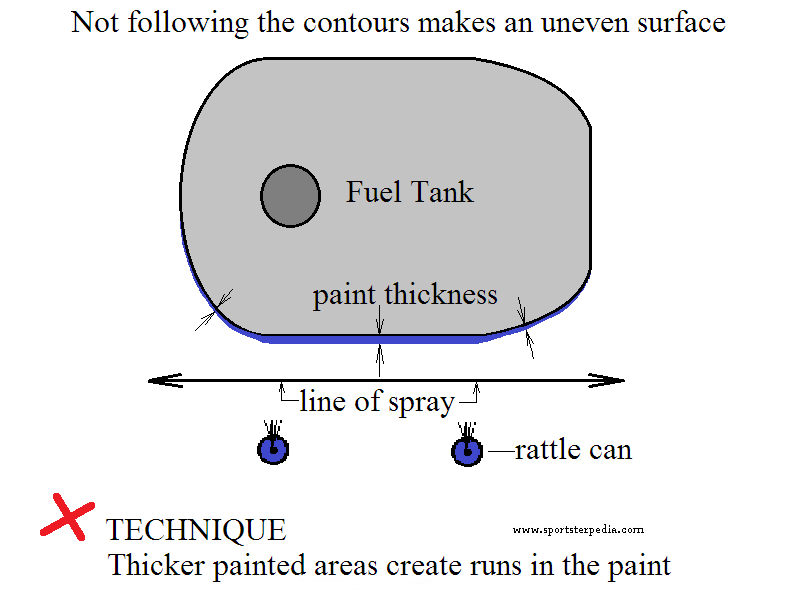
Spray Technique
- Full coat sprays should be even on all sides to avoid paint buildup and runs.
- Follow the contours of the piece you're working on.
- Keep the spray the same distance from the piece thru a pass.
- Decide ahead of time in where and at which direction you'll be spraying.
- Light winds.
If you're spraying outdoors, changes are there may be a slight wind.
Spray with your back to any wind. Spraying into wind will splatter the paint.
It may be necessary to turn your piece several times to keep the wind on the right side of the spray.
- Which side to spray first?
- Spray (carve out) hidden or obscure areas first.
Slight imperfections won't be seen or paid much attention to anyway. - Gravity pulls mist droplets down. So some may paint the top of a tank first and then the sides.
Others prefer to paint vertical areas first and let the top mist blend with the sides.
However, since the top will hold more paint buildup before running, it's good to keep spot sprays (to tidy imperfections) to a minimum on top.
This examples advice of painting the whole piece before any drying time has passed especially with topcoats.
While either way may work fine, the previous painted area needs to allow the new paint to blend in with it. Else, you end up with varying textures.
It's disheartening to lay down a slate glass finish only to spatter it with mist from the other side.
As long as the last passes are still wet, the new coat should blend mist in fine.
- Keep drying times in mind.
- It's difficult sometimes to spray one side and immediately move to other sides of the piece.
- If you're spraying primer or base coat, this is generally not a problem.
- With top coats / clears, the best scenario is apply paint to the entire piece at the same time.
And some paints react different than others.
You may see a variance in texture if you wait too long to spray other sides once the first side is done.
Usually these variances can be buffed out later.
But if you're not planning on it or are without buffing equipment, a good layer can be had by keeping the paint moving to keep the texture the same.

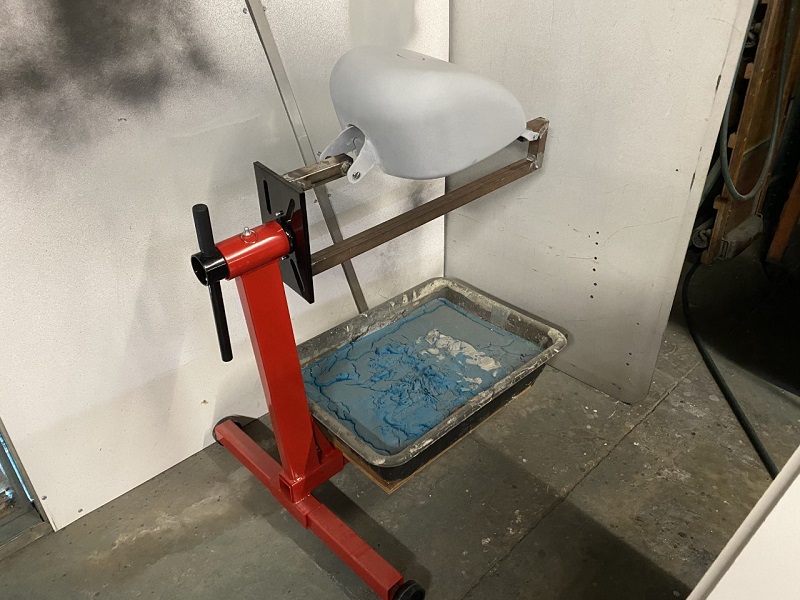
It may be easier to keep the same distance and spray pattern if you had a turn table of sorts to spin the piece as you're painting it.
Below is a homemade fuel tank rotisserie made from some welded square tubing mounted to an engine stand.
Something like this would allow you to keep your body posture consistent while turning the tank and keeping the paint evenly applied.
The last picture shows it in position with a shelf on the bottom to hold a drying tub.
You can put old paint in there to dry so it can be thrown in the trash. It also works to catch water from wet sanding, and it will also catch overspray some as well.


General Prep for Painting
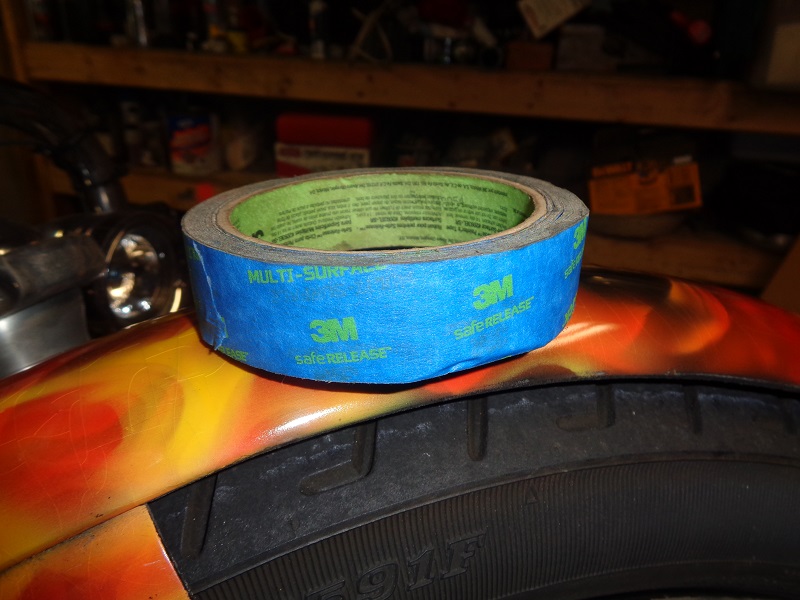
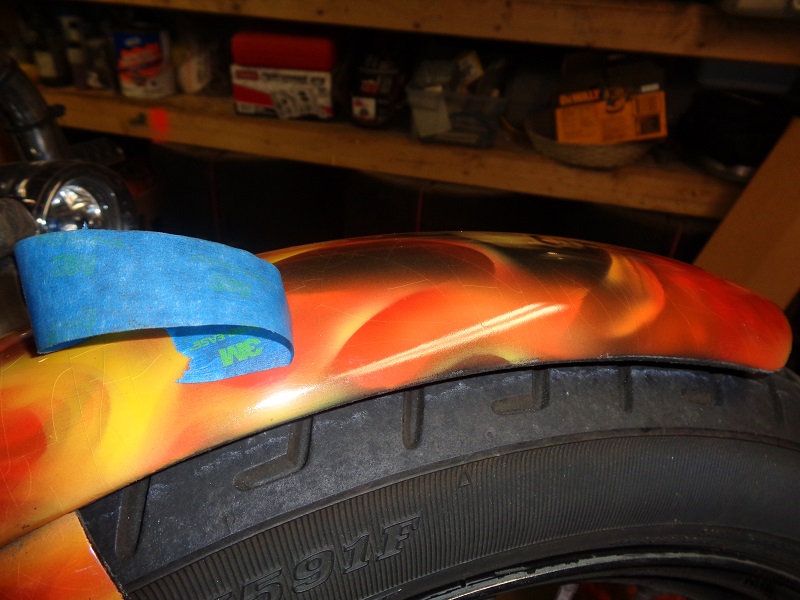
Taping off the work area
Use a tape that is made for taping over painted areas so it won't pull up the paint below it when removed.
However, whether you use tape, cellophane, paper or any other masking device, the paint below it needs to be dry enough not to stick to it.
| 3M painter's tape sticks well and won't remove existing paint. 6) | ||
 |  |  |
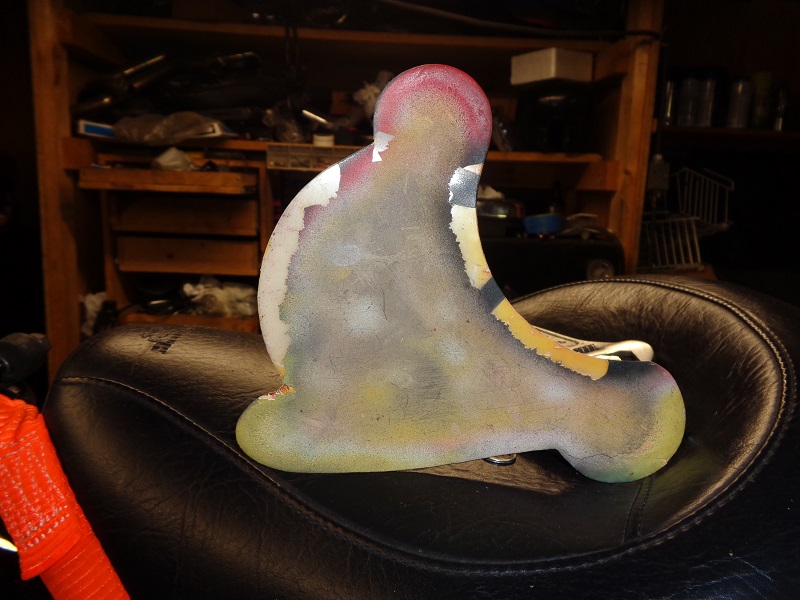
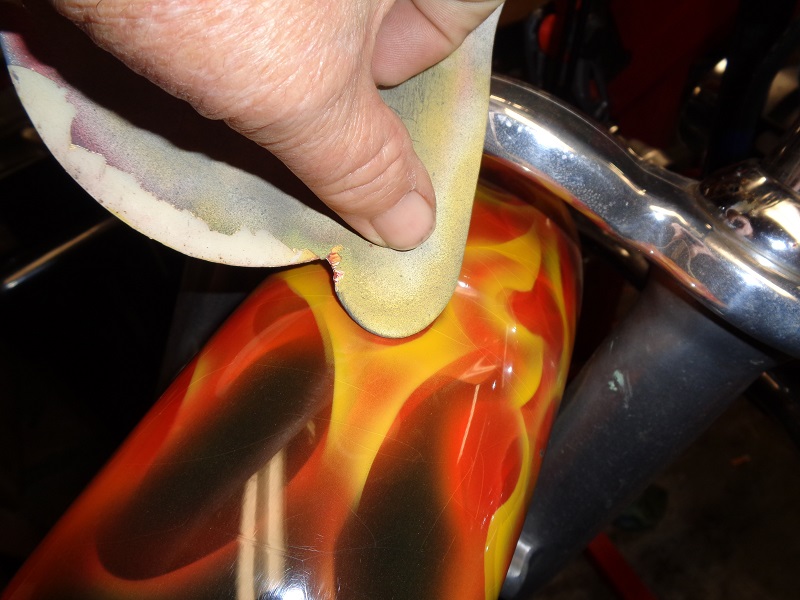
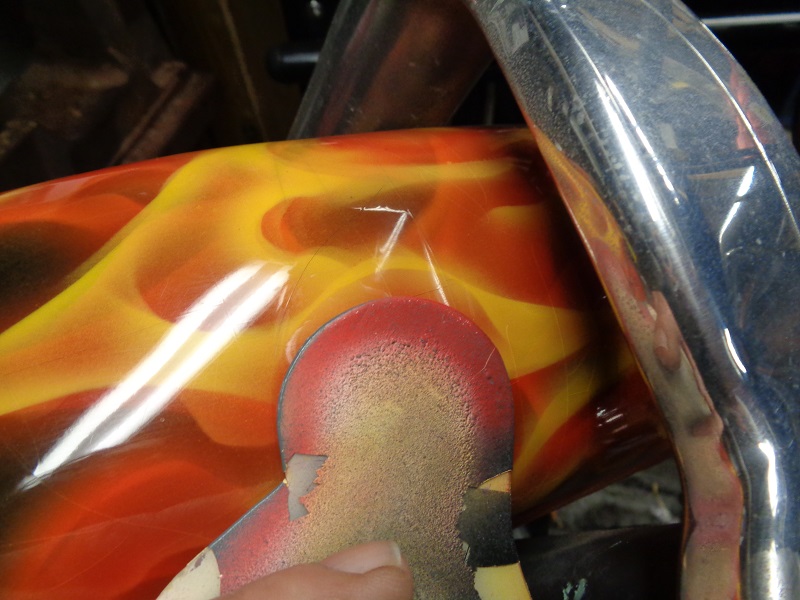
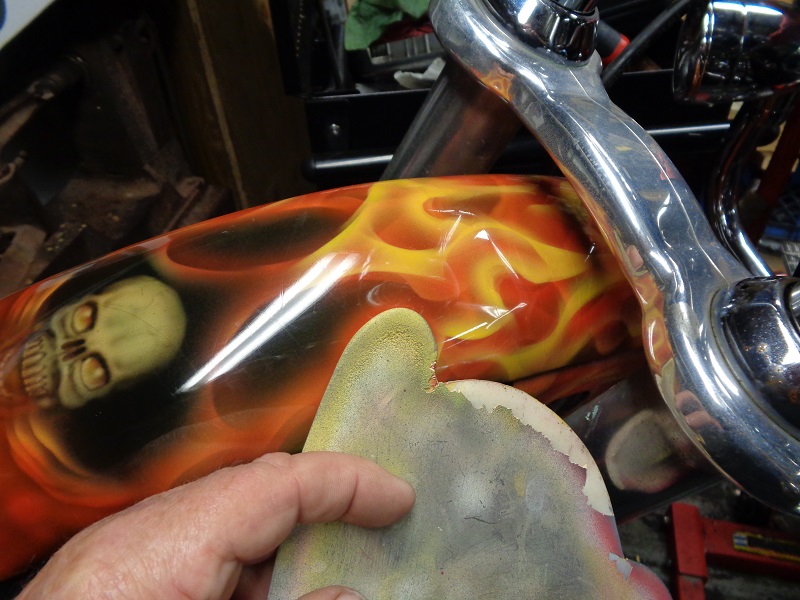
Templates
For free hand work, you can make your own templates for circles, corners and general lines.
The template can be an shape and size that is comfortable to you. Generally, circles and ovals are very helpful.
The template below was drawn and cut out of a thin plastic sheet. You can see where the template was used to create the illusion of fire.


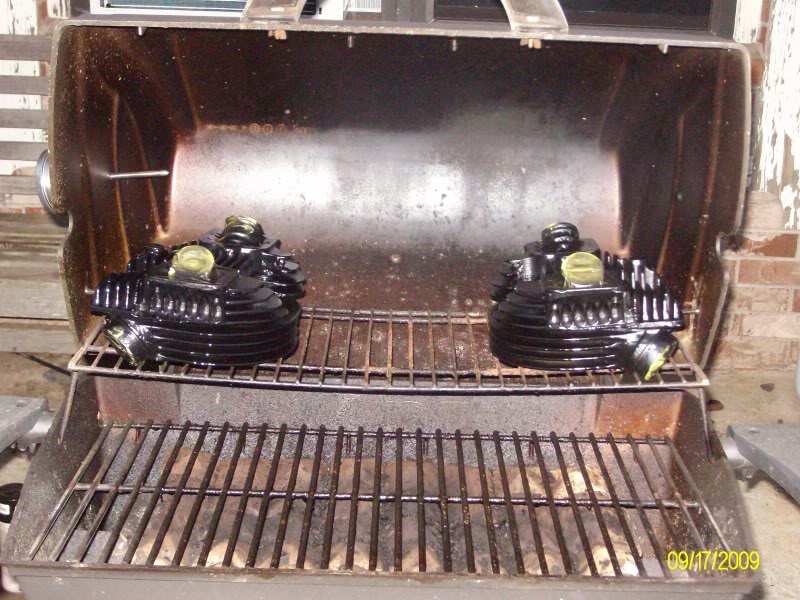
Curing (baking)
Guys have been using the BBQ paint for years with no problems. No curing process is needed. 7)
You can put painted parts in an oven or a BBQ grill and heat to 200° F to cure the paint. 8)
An oven thermometer was installed in the side of the grill below.
Propping the lid open kept the heat down.
Don't heat iron heads much more than that though. It could damage the springs. 200°F is plenty hot to cure the paint, but not too hot as to warp the springs.
Custom Tins
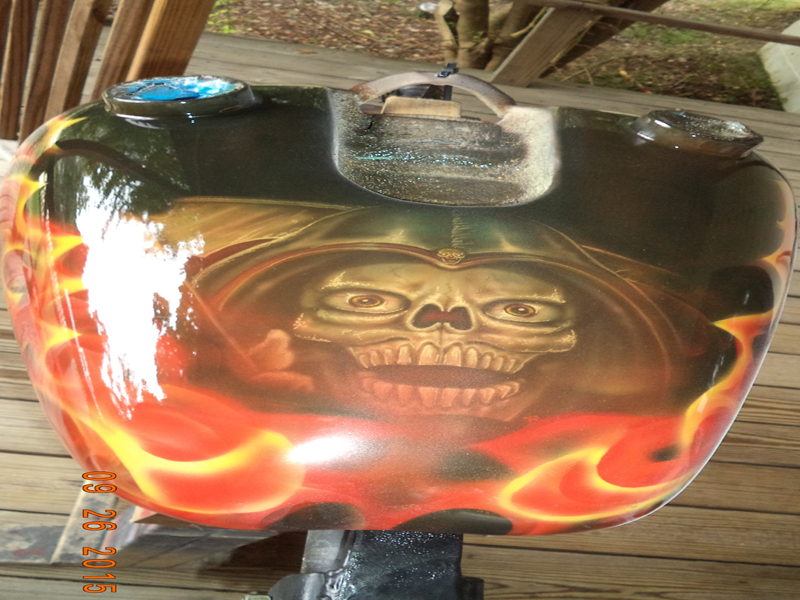

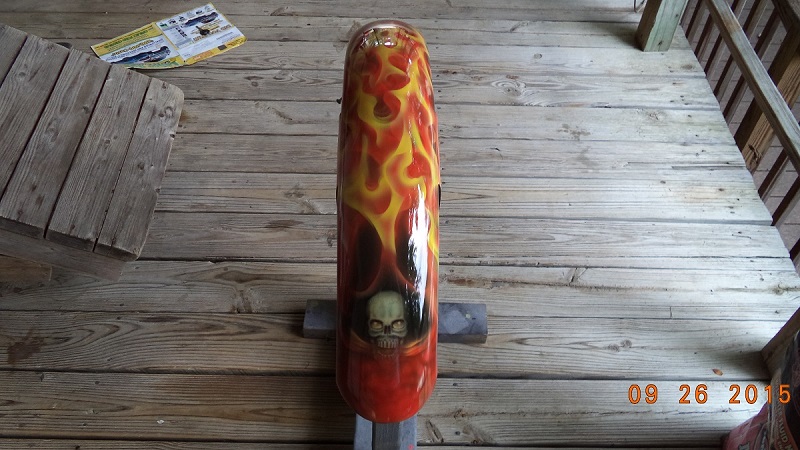
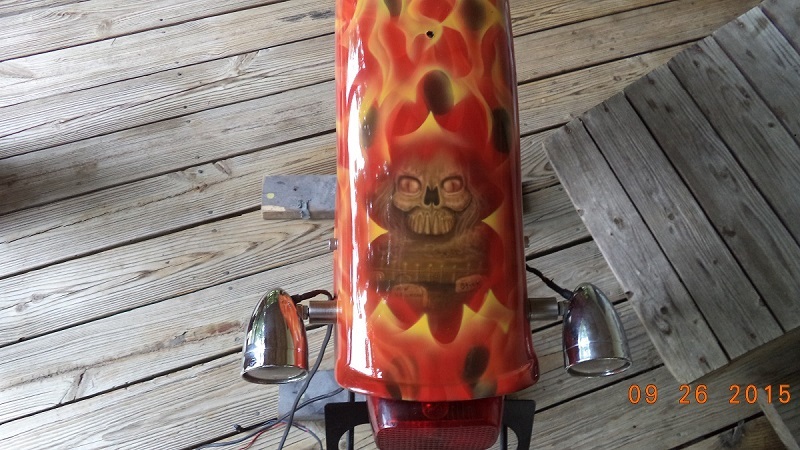

Custom Bike Paint


Pictures for your __Muse__ ment
- Below are pictures for the creativity of free-hand painting.
- Click on a pic to enlarge it


