Table of Contents

REF: Tools - 121
Tool Rests, Parts Holders and Containers
Magnetic Parts Tray
Click on a pic to enlarge:

Telescoping Magnets
These are available at most auto parts stores, are cheap and have plenty of uses.
They can be stuck to your metal tool box etc. and stored out of the way until needed.
However, it's best make sure the magnet is clean before using it on vital engine parts.
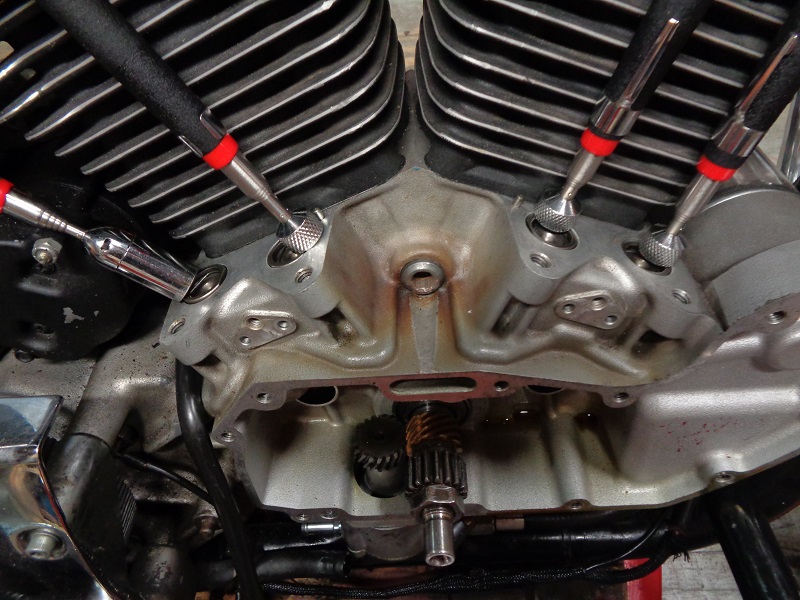 | 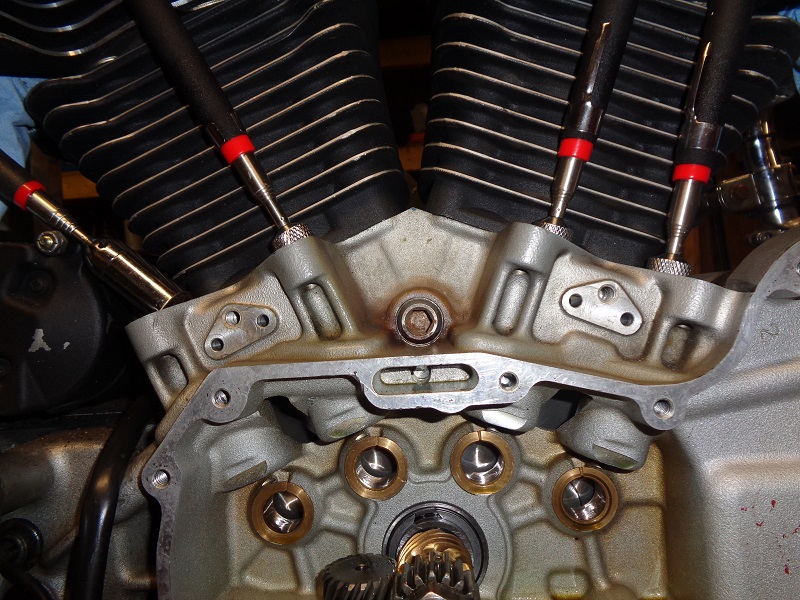 |
| Telescoping magnets make a handy lifter holder when installing cams on an Evo engine. 3) | |
Storage Buckets
Here's a good place to store some parts while using a lift table.
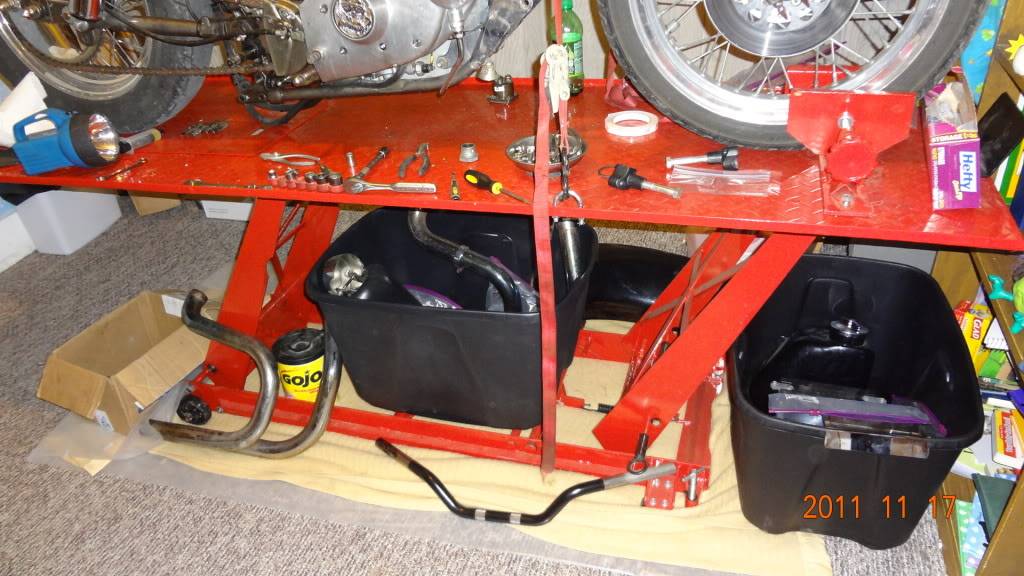 |
| Storing Parts 4) |
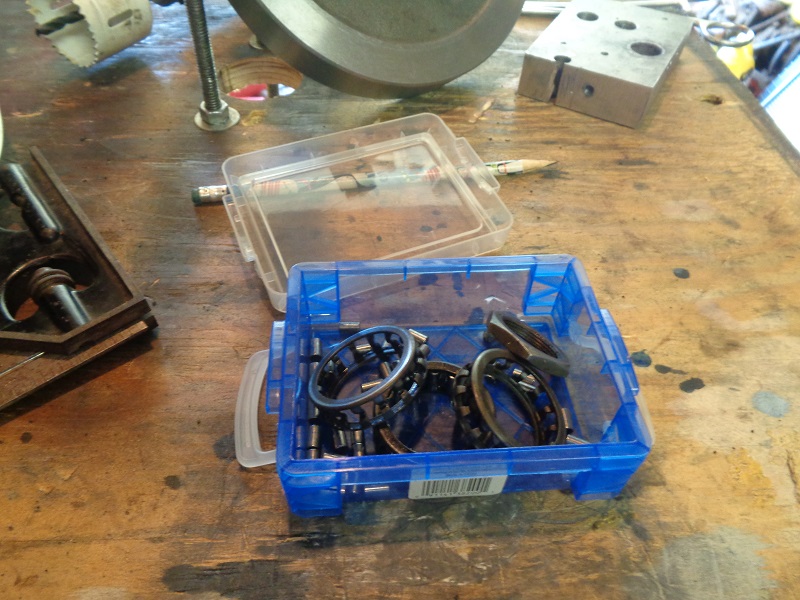
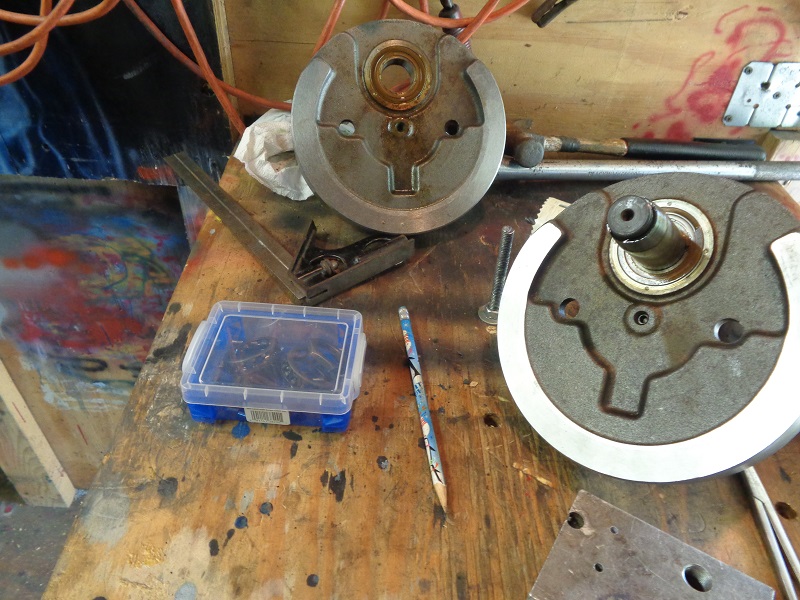
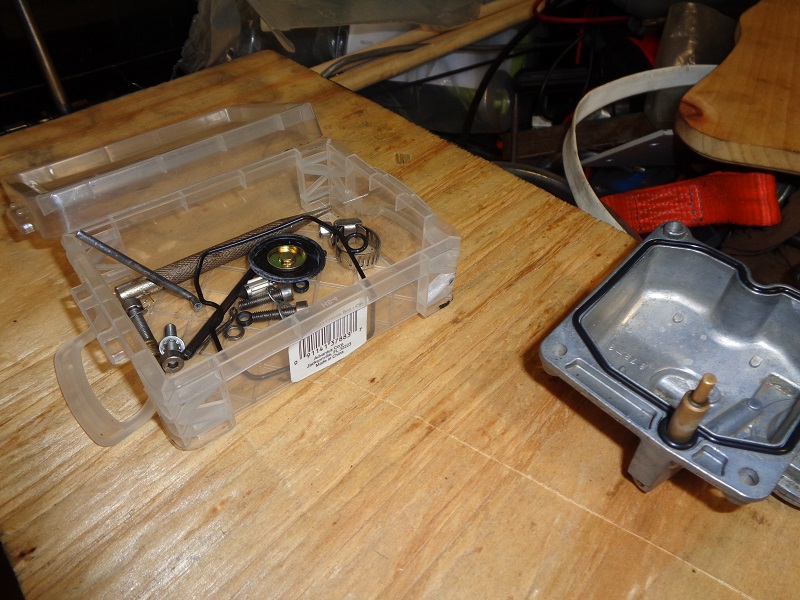
Storing Small Parts
These little containers can be found in the school supply section of retail or grocery stores.
They are stackable (with lids), small enough to pack away until and when needed and the best part is one costs a buck.
| Perfect little boxes for storing bearings, nuts washers and etc. 5) | ||
 |  |  |
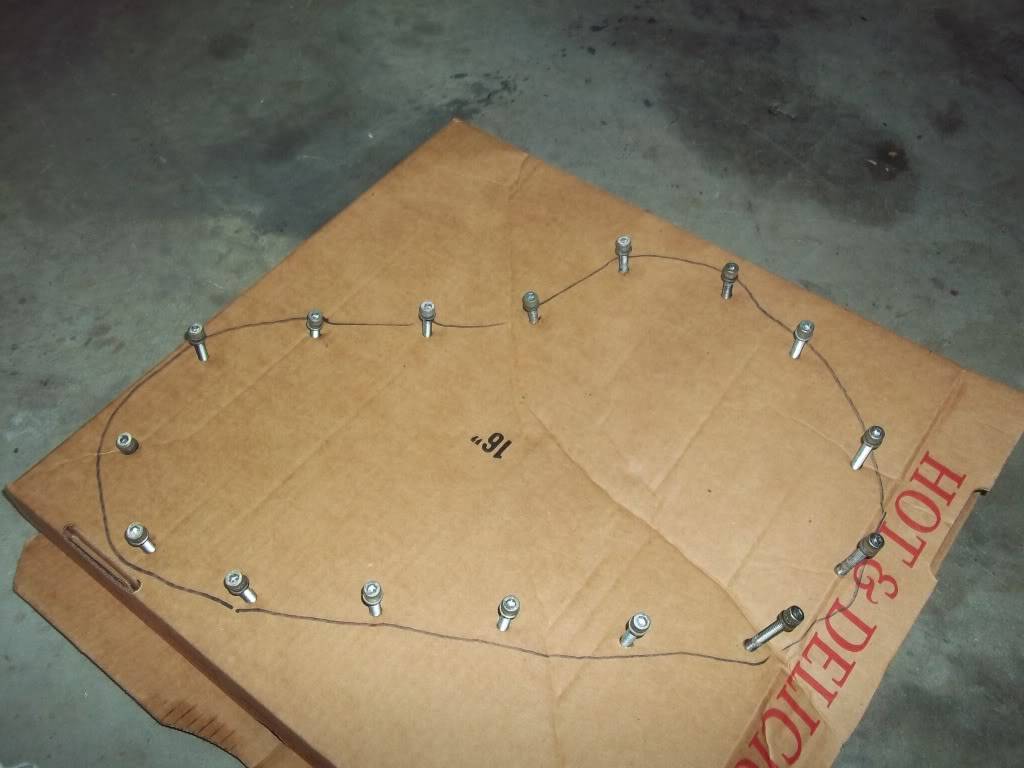
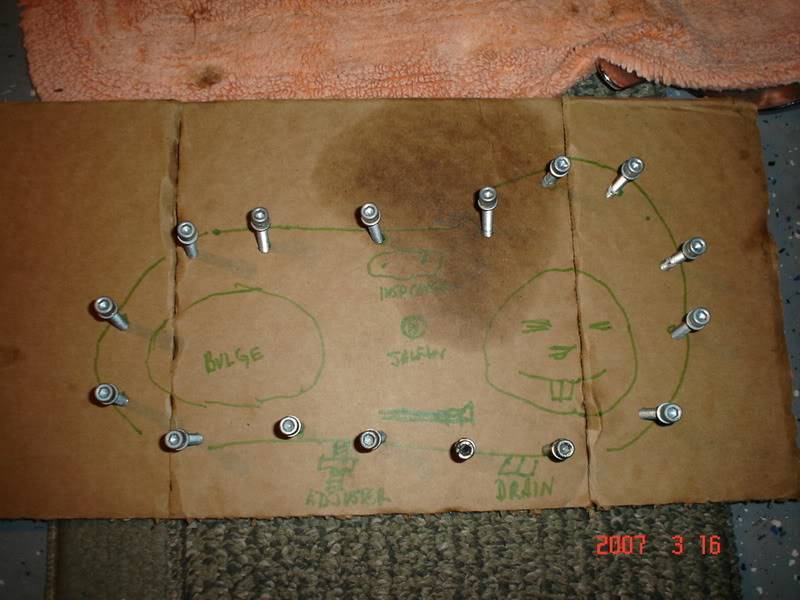
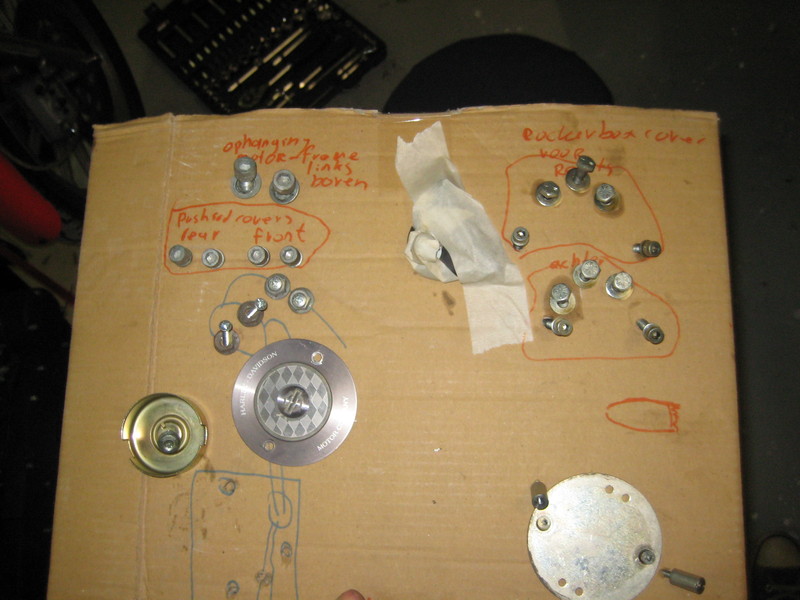
Cardboard Parts Holders
Cardboard can be very useful to hold bolts, tools and others.
You can use a piece of cardboard ripped from a mailing box or an old pizza box.
Choose a piece of cardboard that is not too big to safely store out of the way.
Cardboard is especially helpful when you remove screws of different lengths or sizes from the primary or gearcase cover.
Primary / Gearcase Cover
Keeping the bolts in order as you take them off saves time and headache of remembering which length goes where during installation.
Using the template as a habit, you'll never have to worry about where a bolt came from when reassembling anything. 6)
Make an outline on the cardboard using the new gasket, the cover itself or just wing it.
Write any notes on the cardboard that will help you remember things like sizes, torque value or whatever.
Poke the holes for the screws with a punch or Phillips screwdriver.


Rocker Box Bolts and Parts:
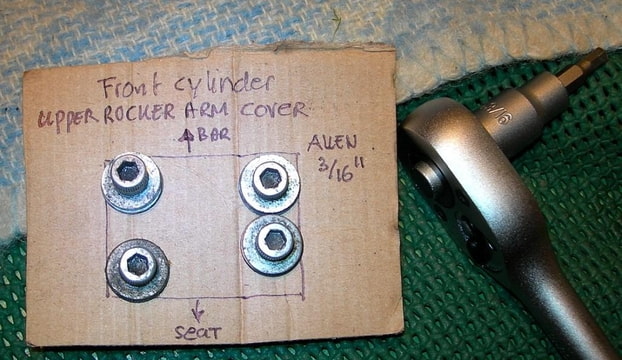
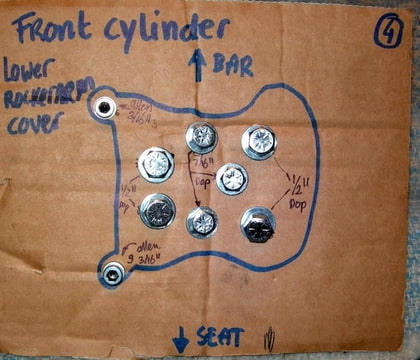
Head Bolts
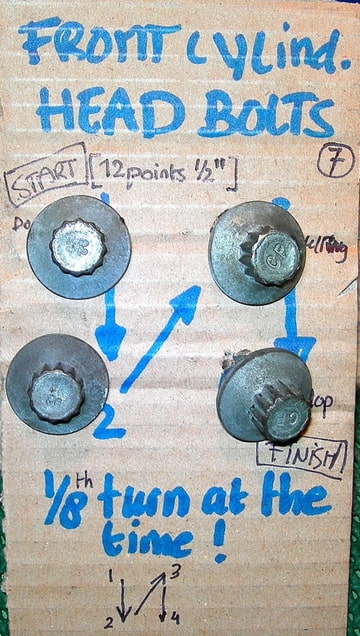 |
| Protecting Head Bolts 14) |
|---|
Spark Plugs
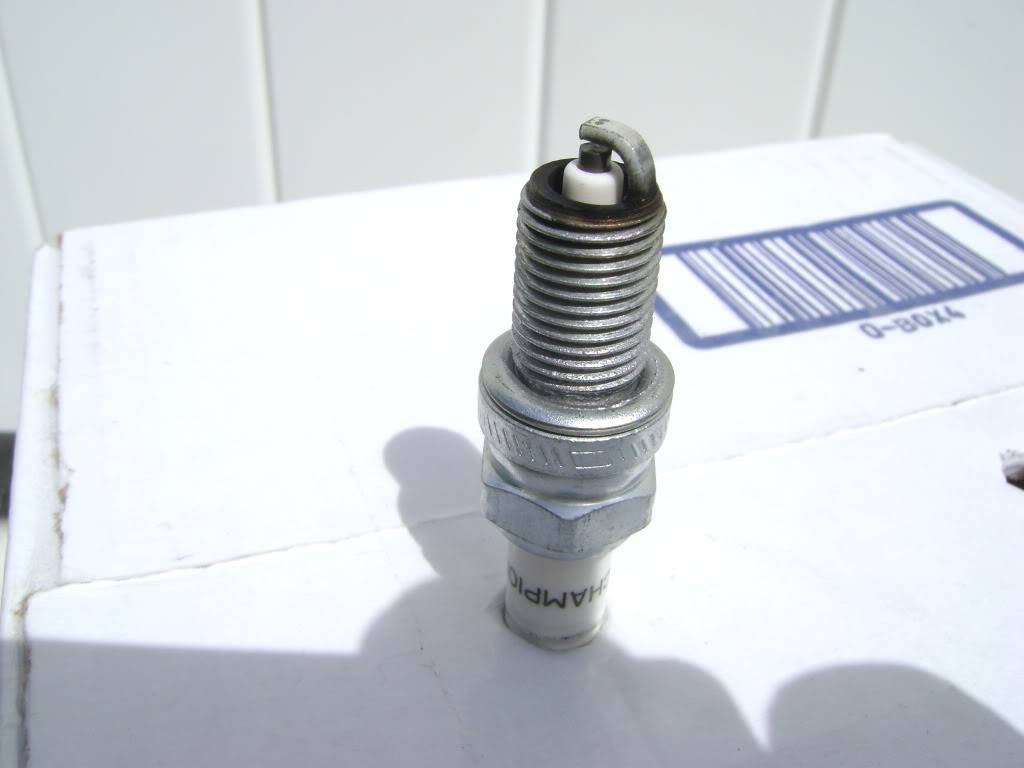 |
| Spark Plug Holder 15) |
|---|
Oil Pump Mounting Bolts
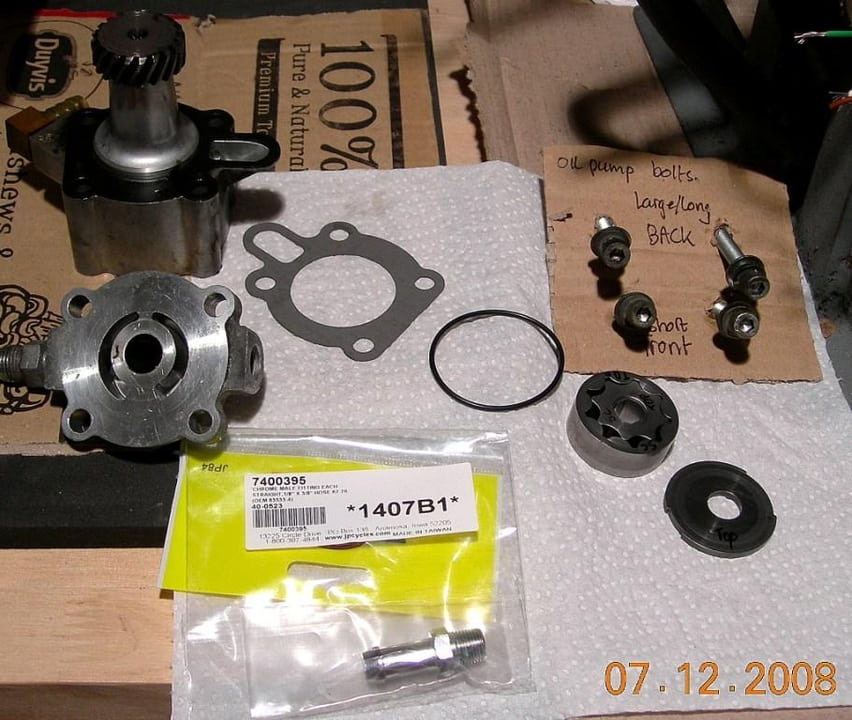 |
| Protecting oil pump mounting bolts 16) |
|---|
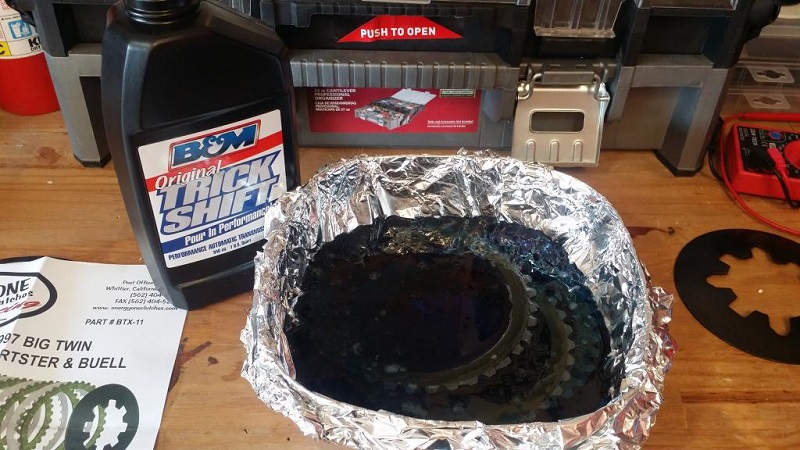
Soaking Parts


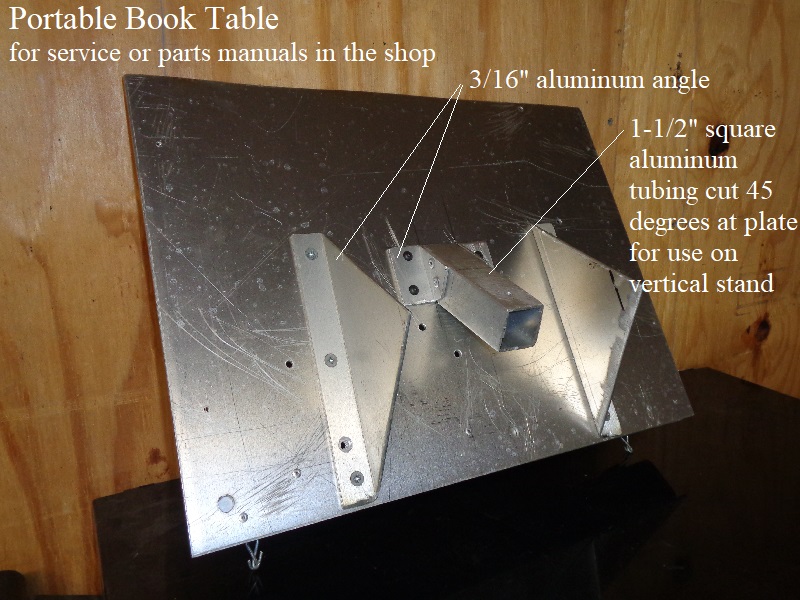
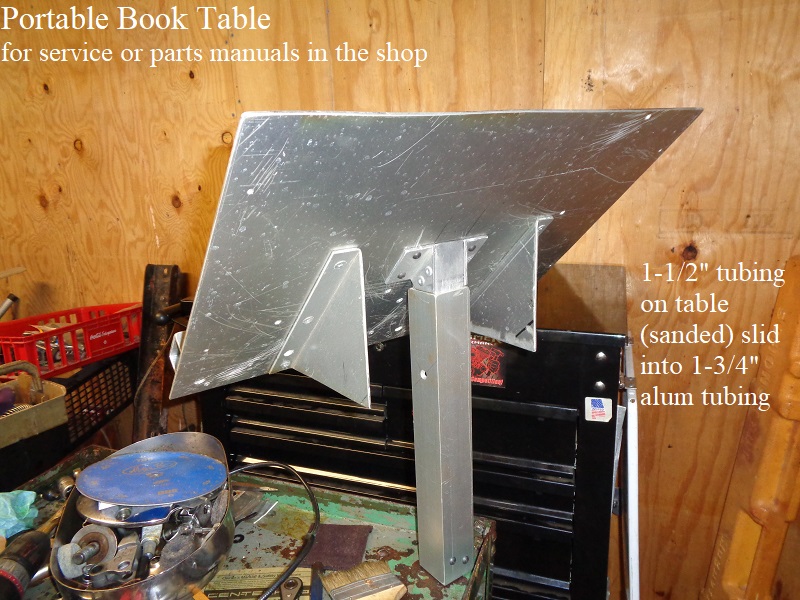
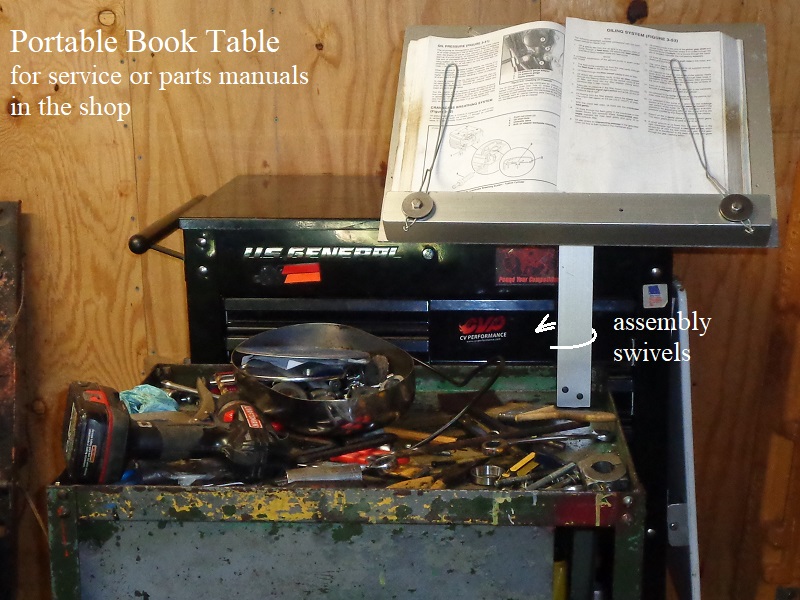
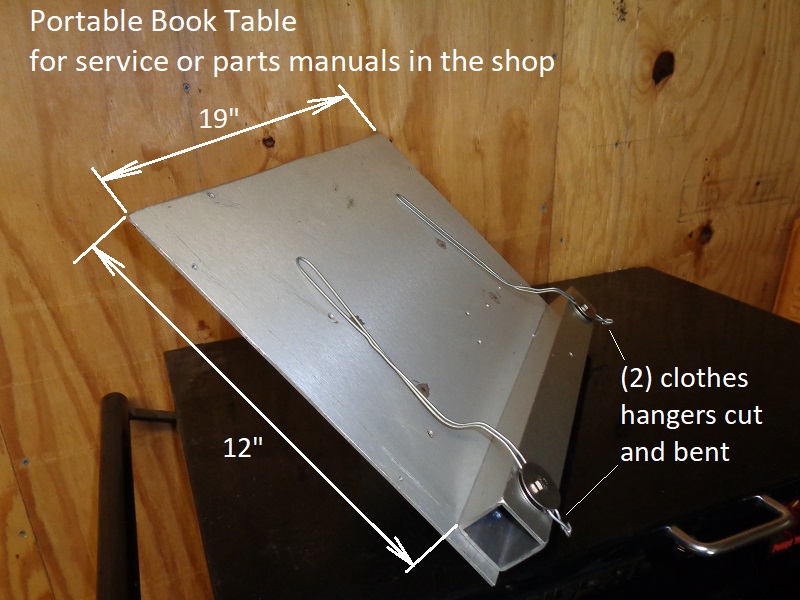
Book Table / Holder
If you are working in the heat and have a fan blowing on you, you know how fast the wind turns the pages of your service manual.
Below is a portable book table made from scrap aluminum. This can also be easily made from plywood and 3/4“ planks.
It simply sits on a table and is made so you can move it from one place to another.
The backboard (portion that the service manual sits against) measures 12×19”. It's actually 13-3/4“ tall due to the 1-3/4” book stop on the bottom.
The back legs are made from some scrap aluminum sheet with an angle end cap.
The page holders are made from 2 clothes hangers cut, bent, twisted and screwed to the book stop with fender washers.
They keep the wind from turning your pages and also keep the pages from turning themselves (new books not worn in yet) 20)
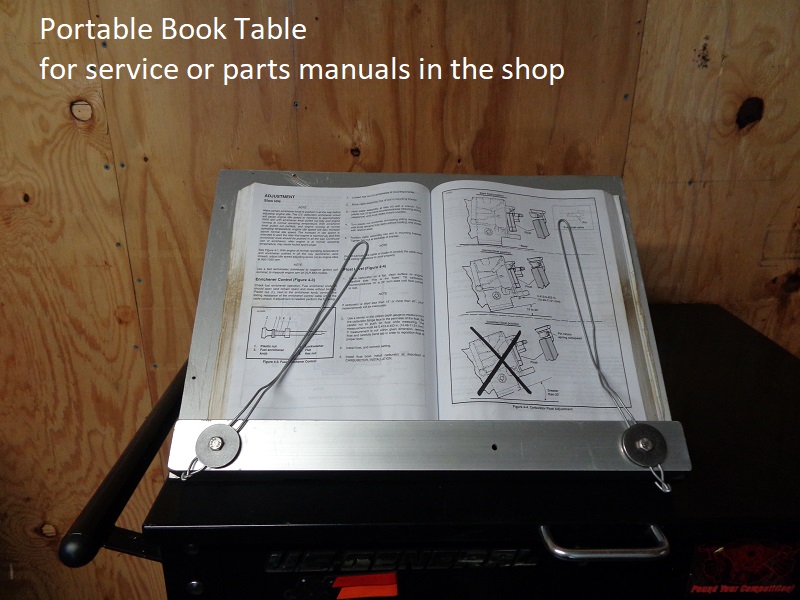

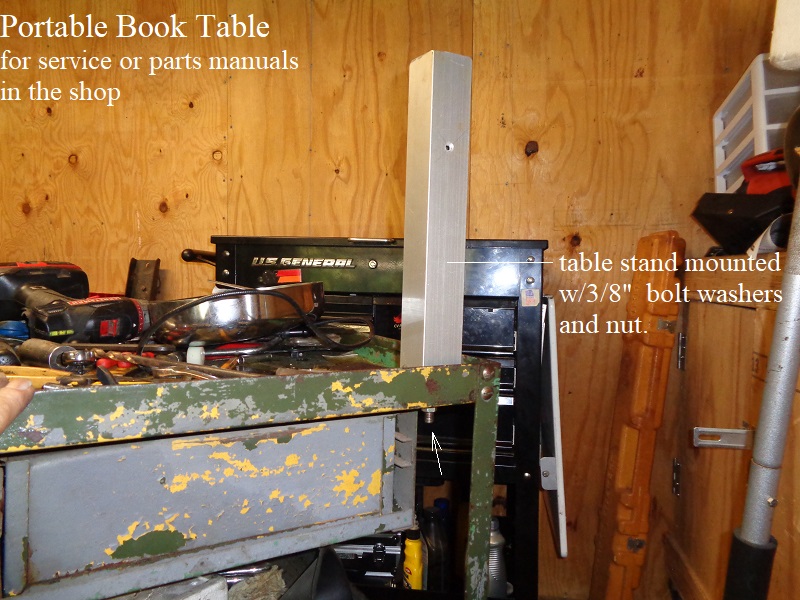
You can hard mount it to a table or your tool box with some creative 2×4 attachments and such.
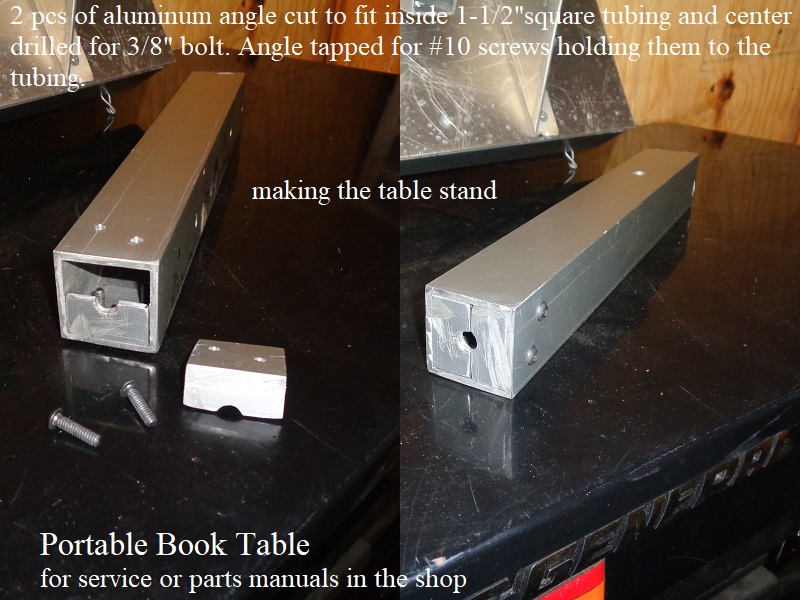
In that effort, an adapter was installed between the 2 legs to drop down into a stand.
The stand swivels so you can move the book where you need it or where it's most comfortable using it.
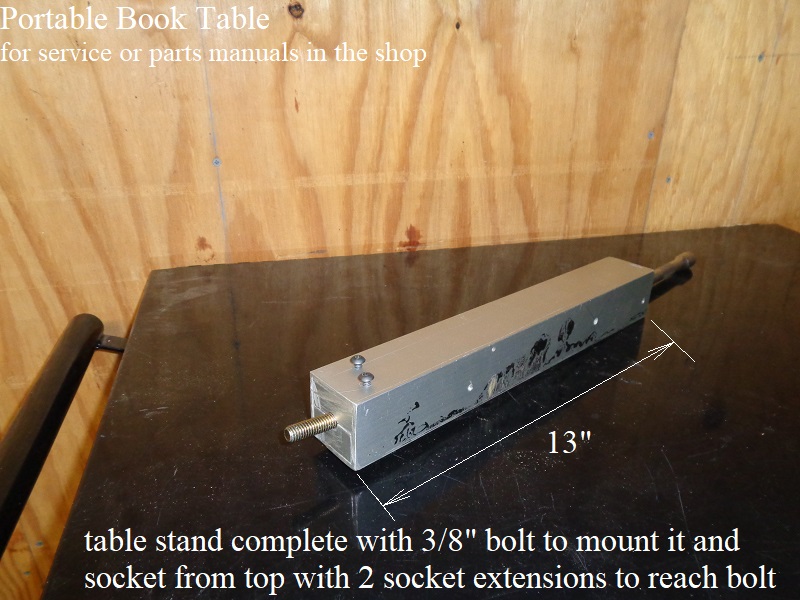
The table simply lifts off the stand to be stroed when not in use.
The stand is a 13“ tall section of 1-3/4” square aluminum tubing.
It mounts by way of 2 pieces of aluminum angle cut to go inside the bottom opening and screwed to the tubing sides by 2 #10 screws.
A 3/8“ hole was drilled in the middle of the 2 angles to mount the stand to the table and allow it to swivel.
A 3/8” hole was drilled into the top of the work table.
The 3/8“ bolt runs through the table and the nut has red Loctite on the threads so the stand won't loosen as it is turned.
The book table has a section of 1-1/2” square tubing cut at a 45º angle towards the table.
It is riveted to 2 aluminum angles to hold it to the plate.
All bolts into the plate itself were cut off flush to the front of the plate.
The majority of the 1-1/2“ tubing OD had to be sanded to allow it to slip into the 1-3/4” stand tubing.