Table of Contents
This is an old revision of the document!

REF: Tools - 139
Replacing Stator Magnets
Making a Template for Magnet Placement
Whether you have removed all of the magnets from the rotor or are just replacing some, the magnets need to be balanced around the rotor. The template shown is made with the assumption that all the magnets have been removed but will work (on unaltered stock configurations) while replacing 1 or a few magnets. 1)
- Materials Used: 2)
- 1 JB Weld mix
- Sandpaper
- Cleaner
- Cardboard
- Protractor
- Adjustable Circle Tracer
- Making the template: 3)
- Remove any residual glue and debris from any old magnet(s) to be replaced. It may take some work to get off. You can scrape it with a flat screwdriver and also use sandpaper. Then clean it up with carb cleaner and compressed air.
- You may also want to sand the inside of the rotor / clutch shell and cleaned it free of debris.
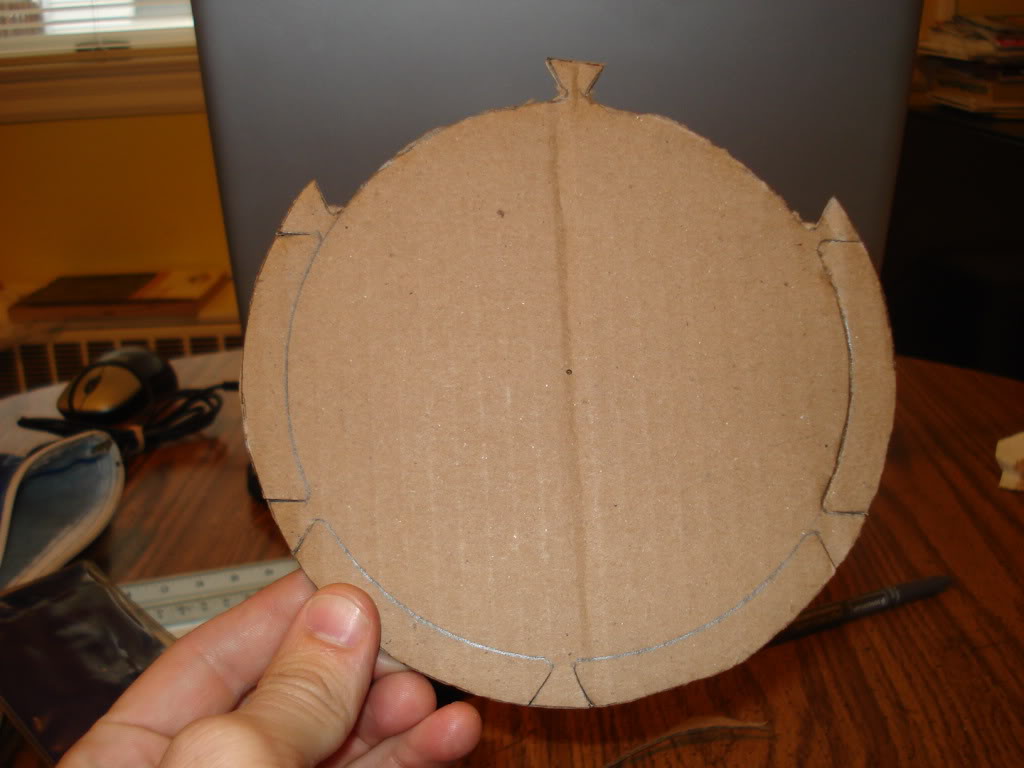
- Measure the inside diameter rotor where the magnets attach.
- Then with this dimension, trace a circle the same diameter on a piece of cardboard, cut out the pattern you just made and test fit it inside the rotor.
- The stator has six magnets, so use a protractor and divide the cutout into 60 degree angles, marking the outside of the cutout (360 / 6 = 60).
- Then with these markings, trace the magnets as they will sit in the basket using one end of the magnet at each mark that you made.
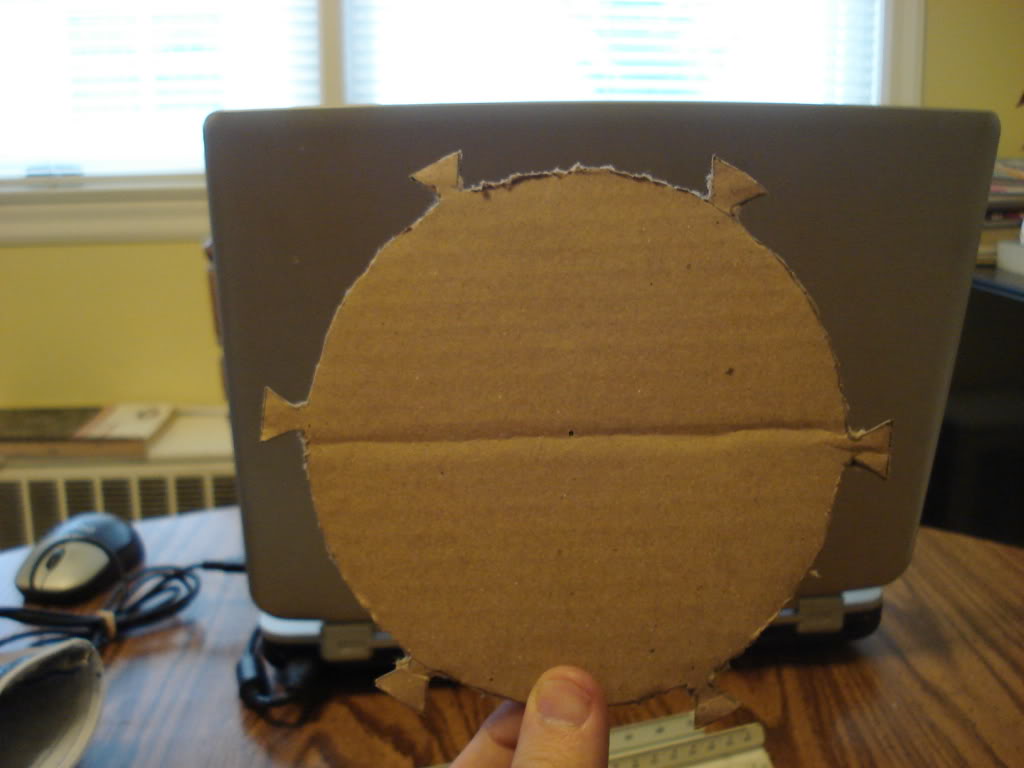
| Cut out the area where the magnets will be placed and your left with a template which would evenly space the magnets. 4) | |
 |  |
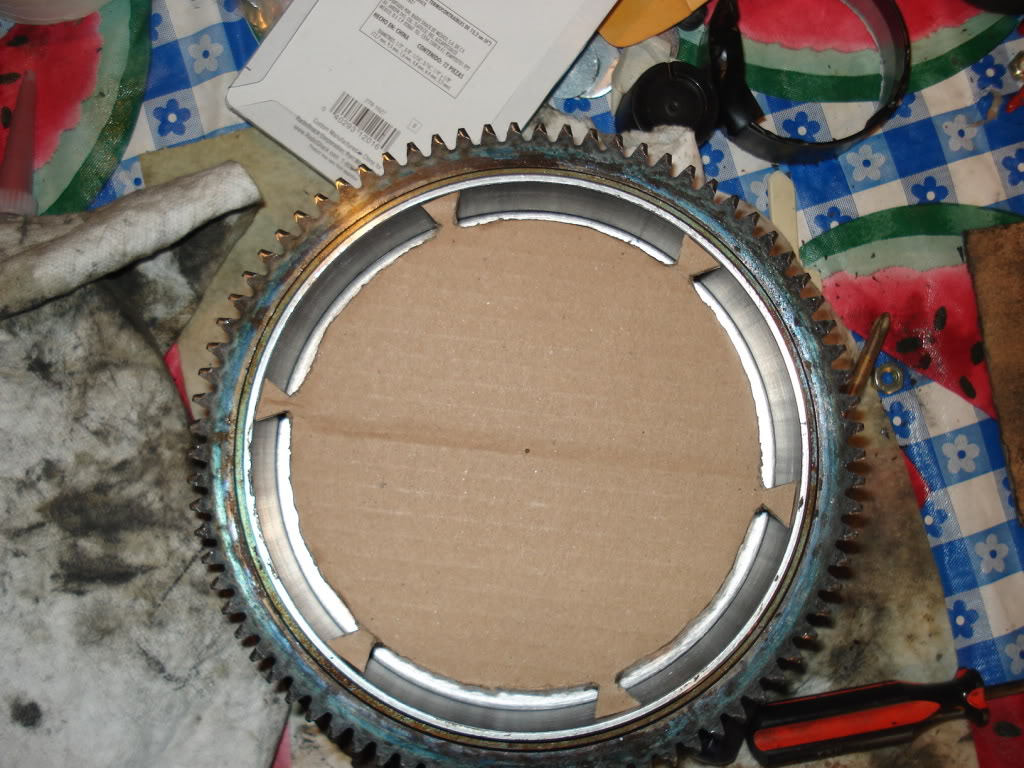
- Caution: Be sure to check the polarity of the magnets before placing them in the basket (each positive (+) end adjacent to a negative (-) end).
| Place the template in the rotor / clutch basket. Mix the JB weld and apply it to the back of the magnets. Once you get them in the template, they pull themselves right into the basket. 5) |
|
 | 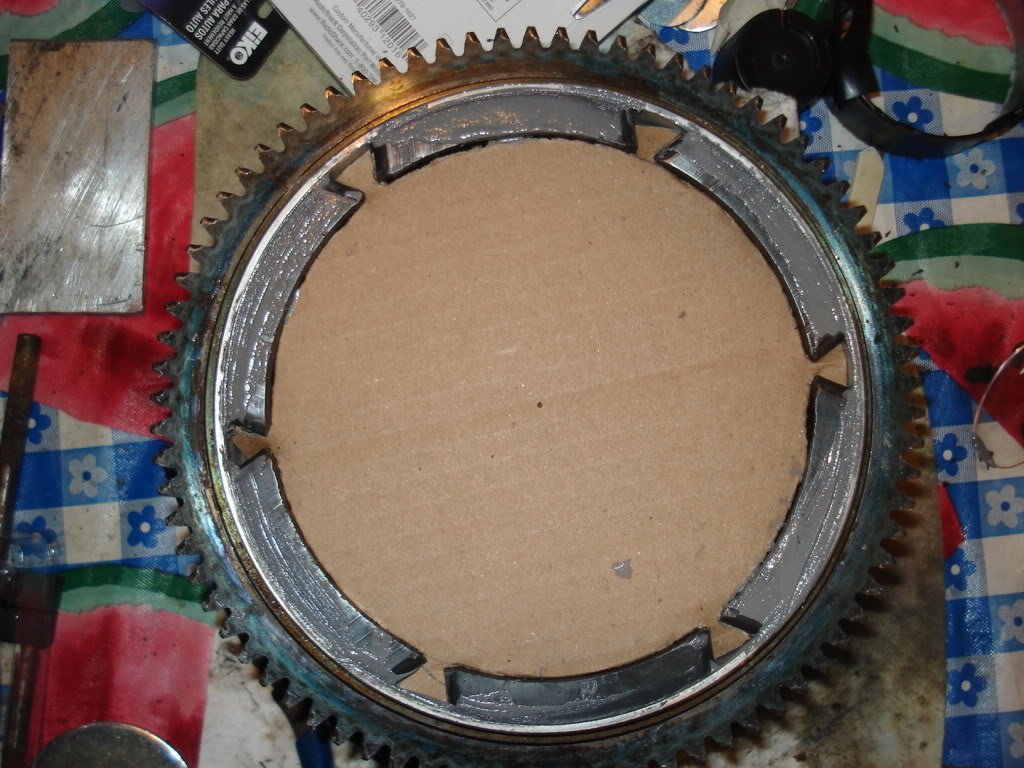 |
- Let it sit a few hours and then pull the cardboard out (making sure it doesn't get stuck in the glue).
- To beef up the magnets, let the whole cluster reinforce itself by way of epoxy bridges between the individual magnets. 6)
- It would be hard to fill it all with the JB, for one because it has steel in it and gets pulled by the magnets. This helps pull it into seams, but if you put too much in it will pull over the magnet onto the inner diameter of them. You will then have to sand it off to keep from interfering with the stator windings. Since the steel in the JB Weld will pull towards the magnet, it's not a good filler between the magnets. 7)
1)
, 2)
, 3)
misterMagoo of the XLFORUM http://xlforum.net/forums/showthread.php?t=900913&highlight=stator+rotor&page=2
4)
, 5)
photos by misterMagoo of the XLFORUM http://xlforum.net/forums/showthread.php?t=900913&highlight=stator+rotor&page=2
6)
CharlieB of the XLFORUM http://xlforum.net/forums/showthread.php?t=900913&highlight=stator+rotor&page=3
7)
misterMagoo