Table of Contents

EVO: Engine Mechanicals - Sub-01F
Removing, Inspecting and Installing the Cam Cover
Removal
- Checklist:
- You'll need to bleed down the lifters and loosen or remove the rocker boxes:
See Removing the Rocker Boxes in the Sportsterpedia prior to removing the cam cover.- Pulling the cover without first loosening the rocker boxes to take the pressure off is generally a bad idea.
It's hard on the cam bushings to have valve spring pressure pushing down on them while the cams are only supported on the inboard side. 1)
- The rocker box puts downward pressure thru the pushrods / lifters to the cams and subsequently the cam bushings.
- The bushings are then pressed hard against the cover in which the bushings reside. Kinda like holding your arm down on a table and let someone push down on your arm.
Then try to pull your arm away. It's harder to do. - Without relieving that pressure, pulling the cover off can let the front of the camshafts fall down.
- This throws all that weight on the bushings inside the case that the other side of the camshafts are in.
- At this point, the camshafts are sitting in there at an angle waiting to tear into the bushings.
- This can destroy the bushings in the case.
- To bleed the lifters respectively on each cylinder:
- The first side, say the front, spin the engine around by rotating the tranny in high gear until you see both valves come up and back down.
- Pull the spark plugs.
- Rotate the engine through the intake cycle:
- Watch the pushrod end of the intake rocker arm as you're rotating the engine forward.
- You'll see the intake rocker move up and open the valve.
- Then you'll see the rocker lower and close the intake valve.
- When the intake valve closes during rotation, both valves will stay closed for a bit on further rotation.
- As long as you stop on a point where both valves are closed it's fine.
- That puts the lifters at there lowest point (on their base circle) and their least amount of pressure against the bushings.
- You can also have a helper watch for the TDC line to appear in the center of the timing hole with the plug removed (if applicable).
- Now, walk away for 20-30 minutes while the oil slowly gets pushed out of the lifters at this point.
——————— waiting ——————— - Then remove the lower rocker box on the front head.
(you can leave the rocker box sitting on the head but remove the pushrods to move that aspect off the cams) - Place the pushrods away in a safe place and mark which lifter each came from.
- You can remove the pushrods before removing the lower box so you don't have to pick it up over them.
- Next, repeat the above for the rear cylinder.
- Now the pressure is off the cam bushings and it's a lot easier and safer to remove the cover.
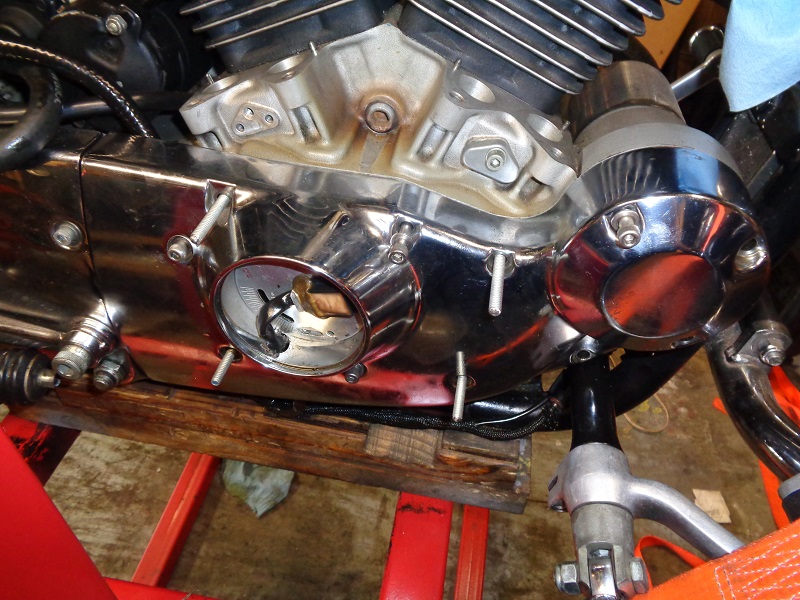
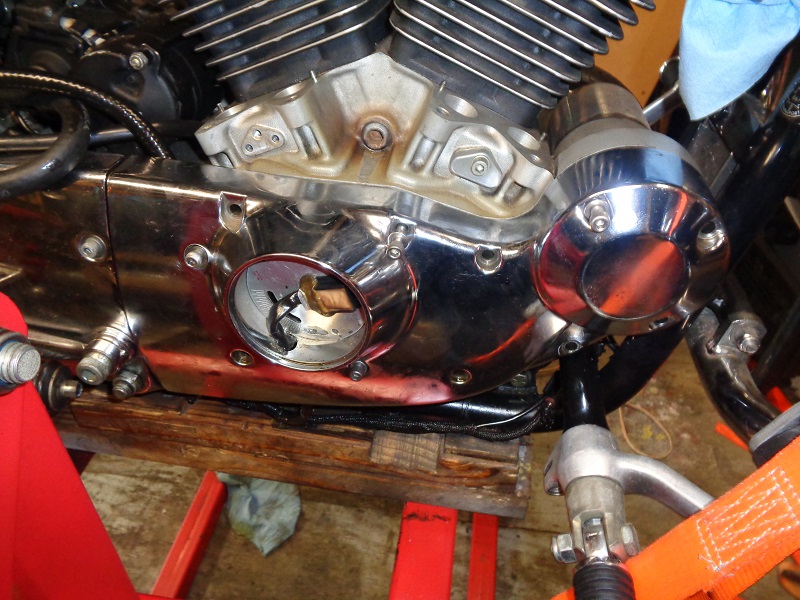
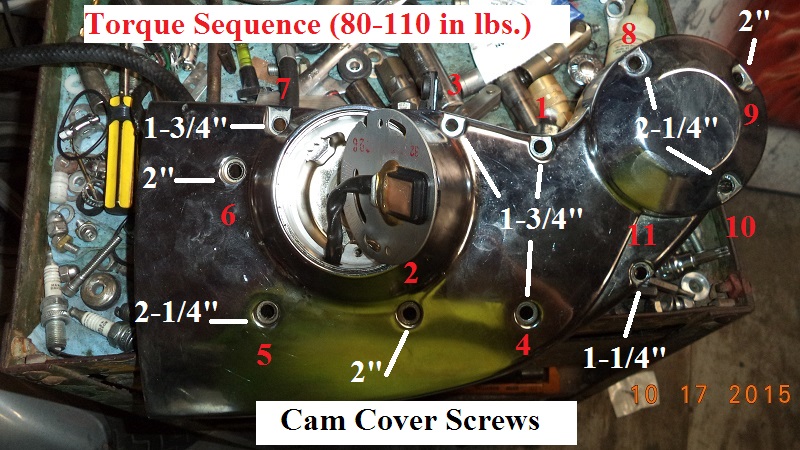
- The cam cover has 11 Allen head screws of various lengths.
They will need to be replaced back in the same holes from which they were removed.
So, their proper location will need to be marked upon removal.
You can make a drawing of the cam gear case on a piece of cardboard.
Then put them into the cardboard in the proper orientation as removed from the cover. 2)
- Although it may not be necessary and depending on your foot control setup;
You may have to remove the foot peg / foot brake pedal support or brake rod to fully remove the exhaust or cam cover.
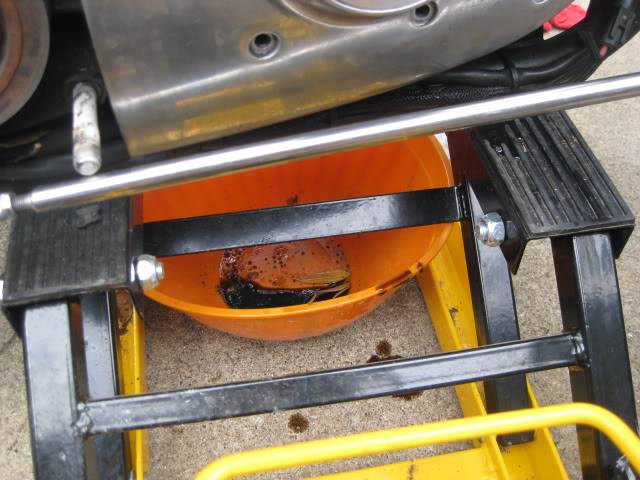
| Remove the exhaust. 3) | Place a flat drip pan or container under the engine to catch any oil leaking out. It will leak oil when the cover is removed. 4) | Remove the Allen screws holding the cover on and place them in holes cut into a piece of cardboard for safe keeping and sorting of various length screws. 5) |
 |  |  |
- Pull the cover out slightly so that it un-attaches itself from it’s gasket and the engine case.
- Note: The bushing alignment with the camshafts has a VERY close tolerance.
That means that the cover will need to come straight out.
There will be no side-to-side or up-down play in the cover.
- You may need to lightly tap the sides of the cover with a rubber mallet to break the seal between the case and the cover.
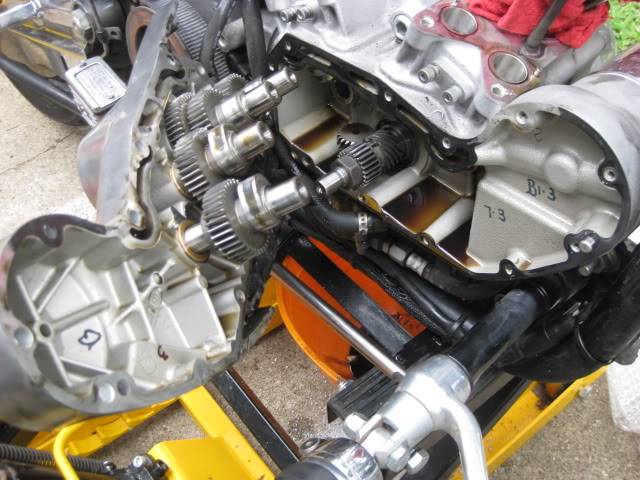
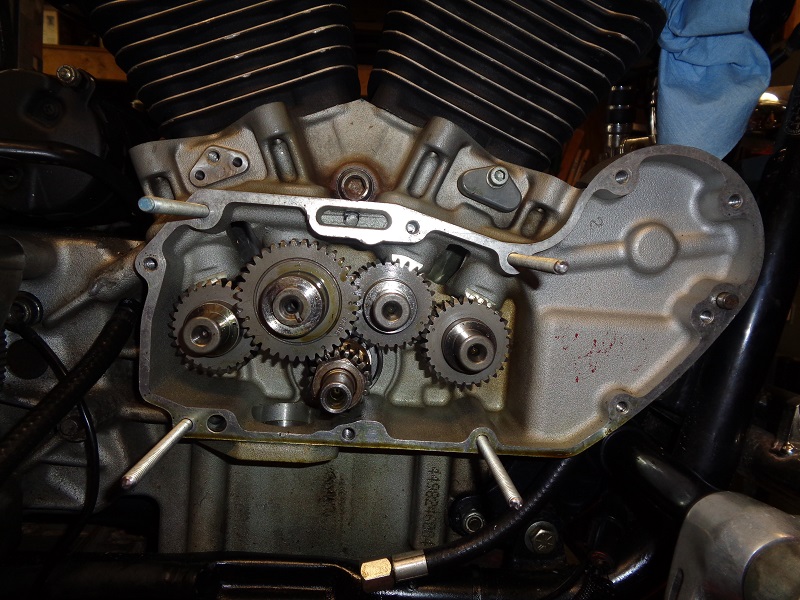
- Note: It's best to try and keep the cams in the gearcase while removing the cam cover.
- It's possible that the cams will stay in the engine when removing the cover.
However, more often than not, they will come out with the cover in various ways.
The alternative to not paying attention to them may end up with the cams hitting the floor.
Or worse, them hitting something on the way down causing damage to them. - Nicked journals will destroy the bushings, nicked lobes will destroy lifter rollers and both will create extra heat, destroying the cams and other internal parts.
- With the cover out far enough to get a small screwdriver or putty knife between the cover and the case,
Continually push the cams back in towards the engine as you slowly edge the cover off starting with #2 cam. - #1 and #3 cams are behind #2 and will go back when you nudge #2.
- Don't forget about #4 which is independent and can come out on it's own.
- Once the cover bushings are clear of each cam, the case can be slightly rotated out of position.
- Also, you will need to remove a rubber oil line that attaches to the rear area of the case before the case can be completely removed.
Since the clamp holding this oil line cannot be reused, you will need to purchase a new hose clamp when the case is re-installed. - Remove and discard the gasket. Clean the case with brake cleaner.
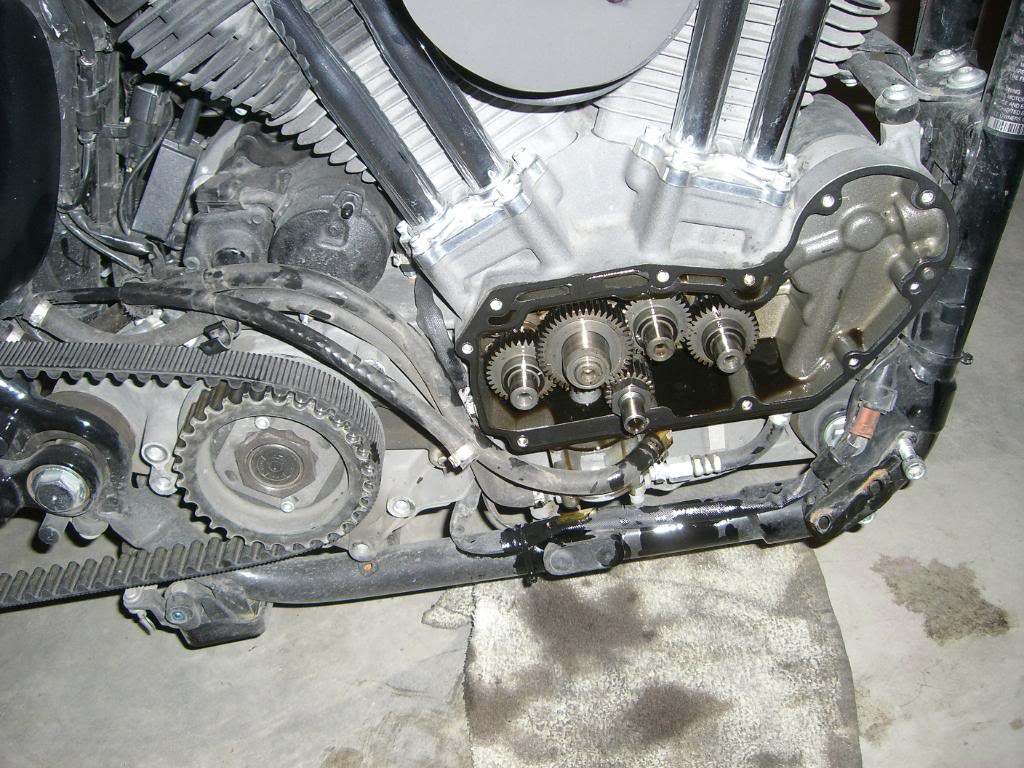
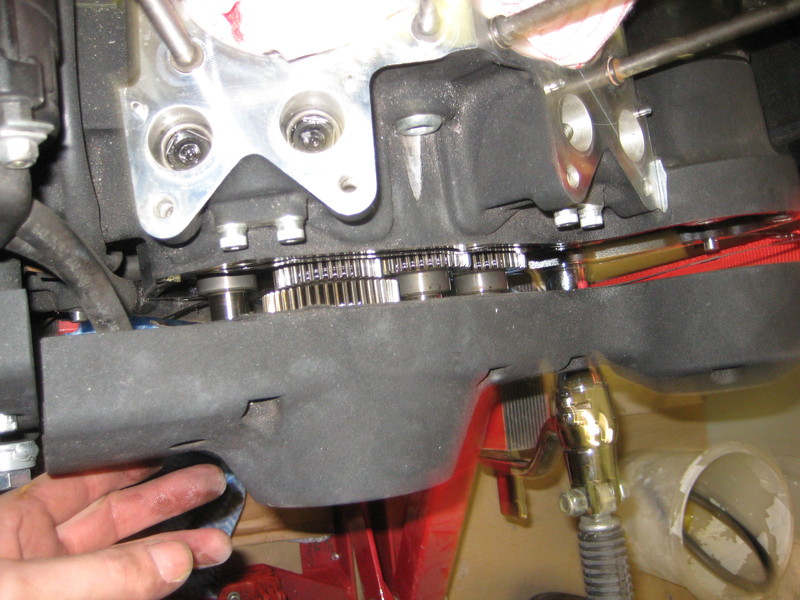
| The cover should come off slow with even pull applied and all cams safely in the case. 6) | At this point, you can use a screwdriver or putty knife to push the cams back in the case 7) |
|
 |  |  |
| This is what happens if you don't remove the inspection cover and / or the rotor cup bolt from #2 cam before removing the cam cover. 8) | This is what can happen to the cams positioning if you try to re-install the cover with the cams still attached to it. 9) |
 |  |
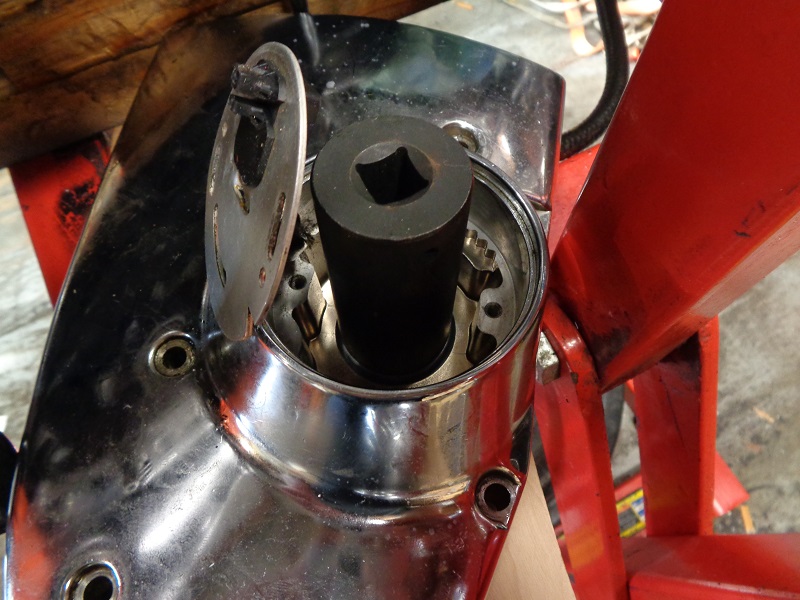
If you plan on leaving the cams in the case while working,
It's a good idea to secure the cams with string or rubber bands across #2 and #4 cams to keep them from falling out.
 |
| Securing cams with rubber bands 10) |
Inspection
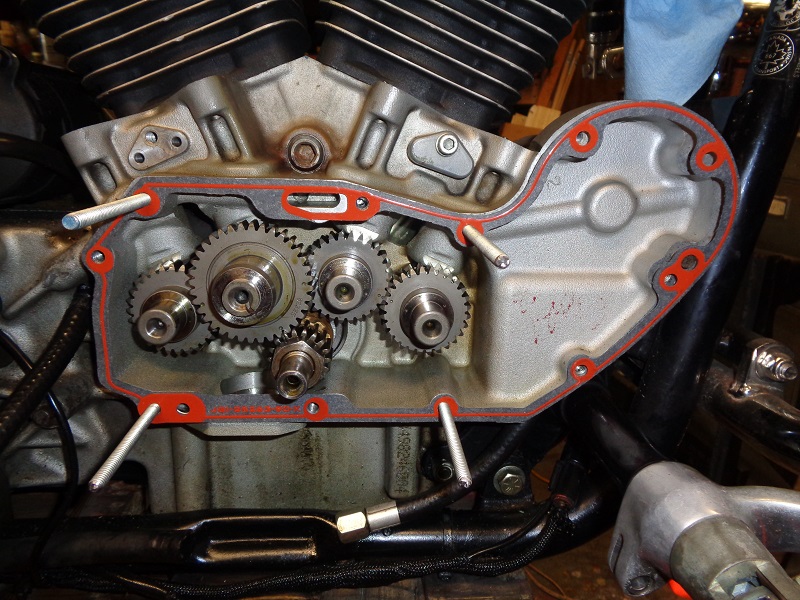
Before installation, use a straightedge diagonally across the corners to check for warp-age of the cover.
Check the FSM for the 'out of service' spec for warp-age. The thickness of the gasket will compensate for a certain amount of warp-age.
Installation
The cover gasket only has a hole for one of the dowel pins so it will slip down if you're trying to place it on the case first.
Put the gasket on the cover and install the screws through the cover and the gasket holes while maneuvering the cover on the case.
Hand start all the screws and leave it loose enough to nudge the gasket, if needed, for a good fit.
This will keep the gasket from sliding down during the process.
Or you can use a few plastic straws inserted into the case threads and put the gasket on the case over the straws.
You can also buy a short piece of 1/4“x20 all-thread at the local hardware store and use it the same way as the straws.
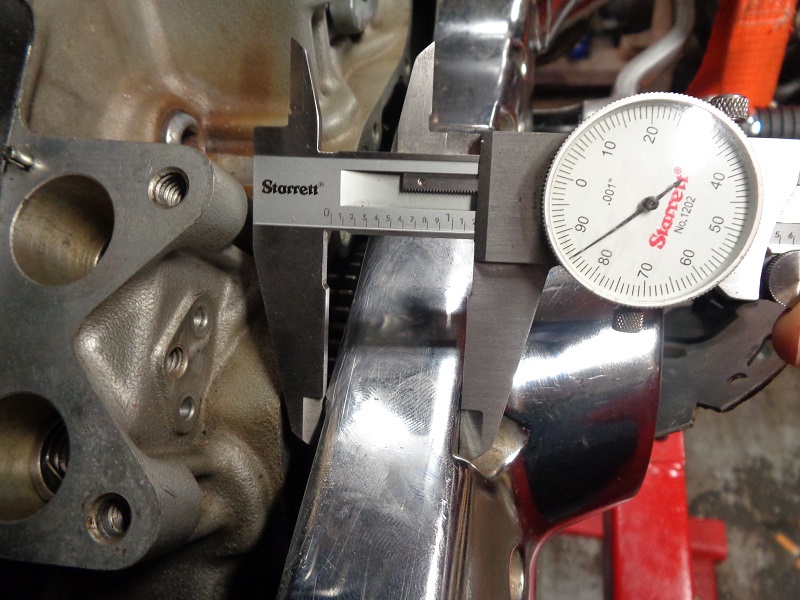
The cover is app. 1-1/4” plus about 1/4“ of threading into the case would be 1-1/2” lengths just to get the shafts flush to the outside cover.
(which won't help you remove them.
So you'd need to cut off about four pieces at least 2“ long. 2” bolts with the heads cut off would also work.
| These are app. 3“ long sections of all-thread. 11) | |
 | 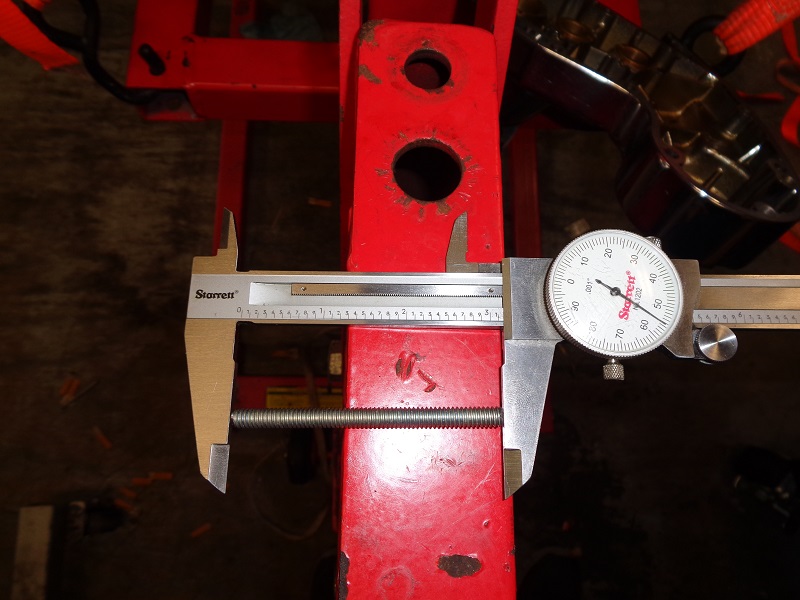 |
| Install them into the case, hang the gasket on them and install the cover. The longer length pieces will allow you to center the cover bushings up to the cams easier for a straight push home. 12) |
||
 |  |  |
| Once the cover is on, install some 1/4” mounting bolts and pull the all-thread out. Then install the remaining bolts and torque to proper specs using a cross pattern. 13) |
||
 |  |  |
Gaskets / Seals
Cover Gasket
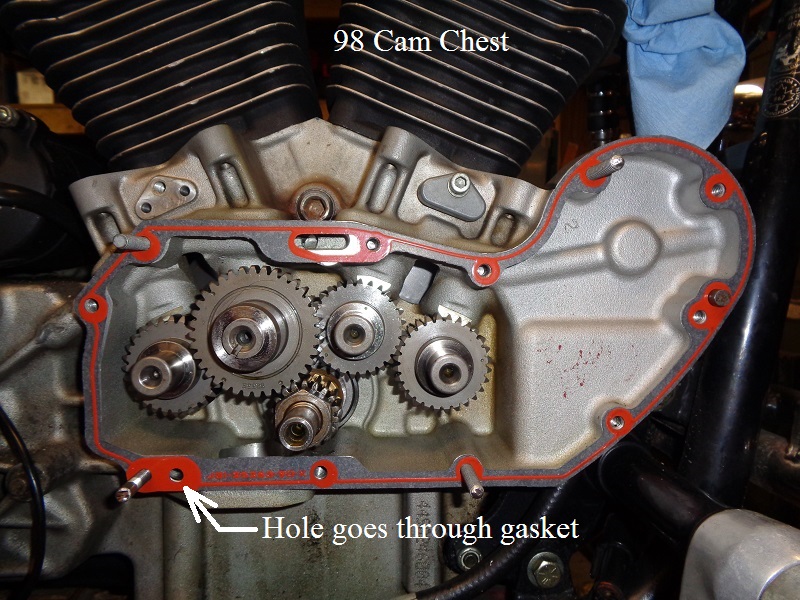
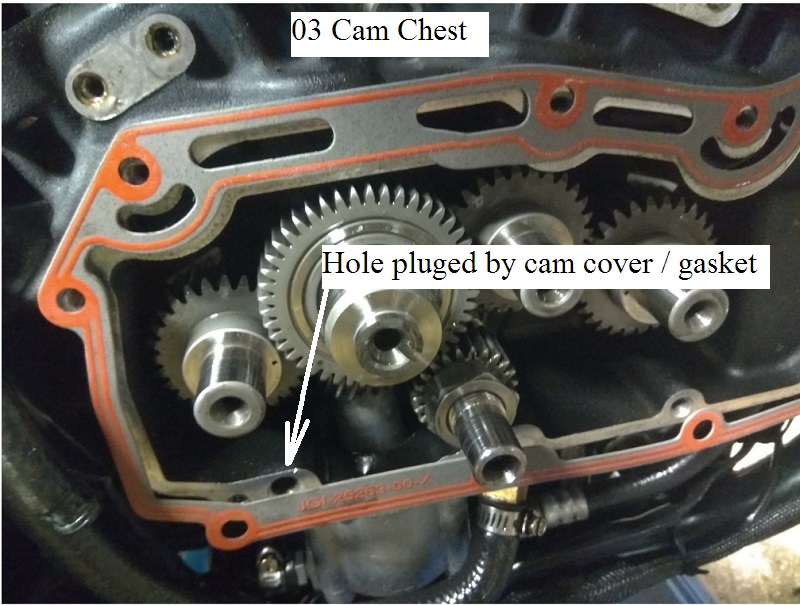
91 and up Sportster engines have an internal rifling hole drilled into the lower left side of the case running past the left side of the oil pump.
That extra hole (in the picture below) is benign and doesn't need a hole in the gasket to match.
That hole is purely an artifact of how they connected two passages for routing crankcase oil up to the oil pump's scavenge section.
They drill that hole to connect the two passages, and then it gets blocked off naturally by the cam box cover and gasket. 16)
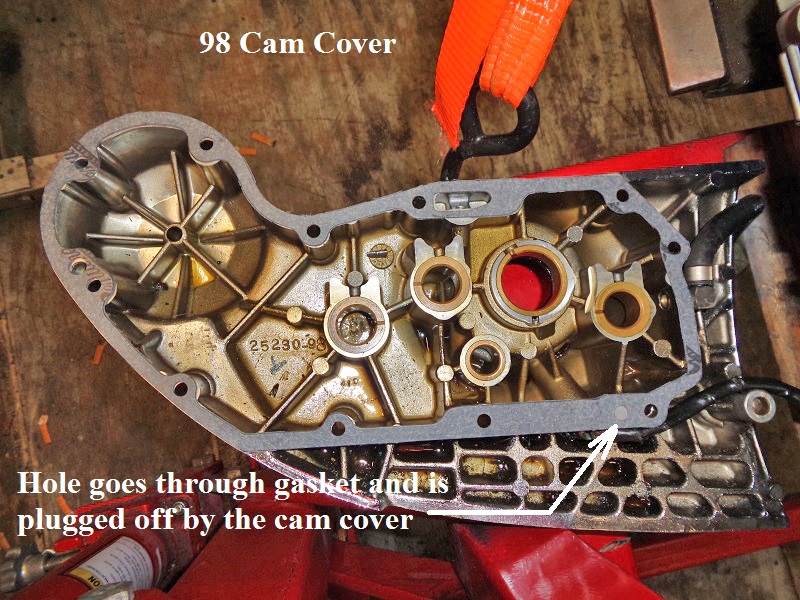
Also, in 2000, the factory changed the oil routing to the lifters to make manufacturing the cases easier.
The newer cam cover on the left in the pic below and has two extra grooves along the top.
These grooves let oil get to the lifters.
If you have an older style gasket, it will not have cutouts for the grooves and you won't get oil to the lifters.
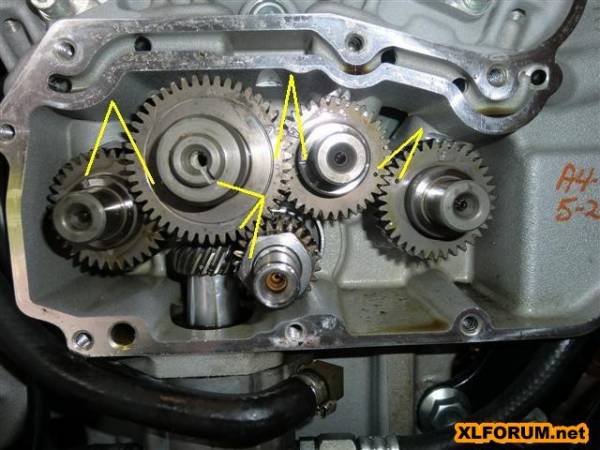
| Rubbermount Evo vs Rigid Evo Cam Cover Internals 17) |
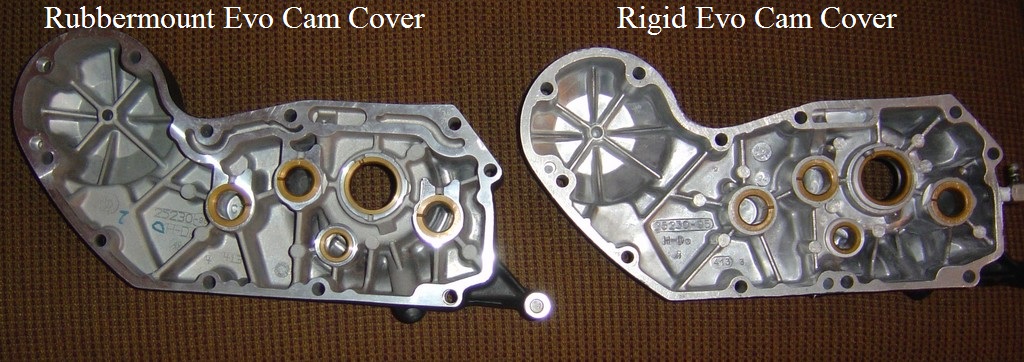 |
| Both have been chopped on the outside but the gearcase perimeter is intact on them for reference. |

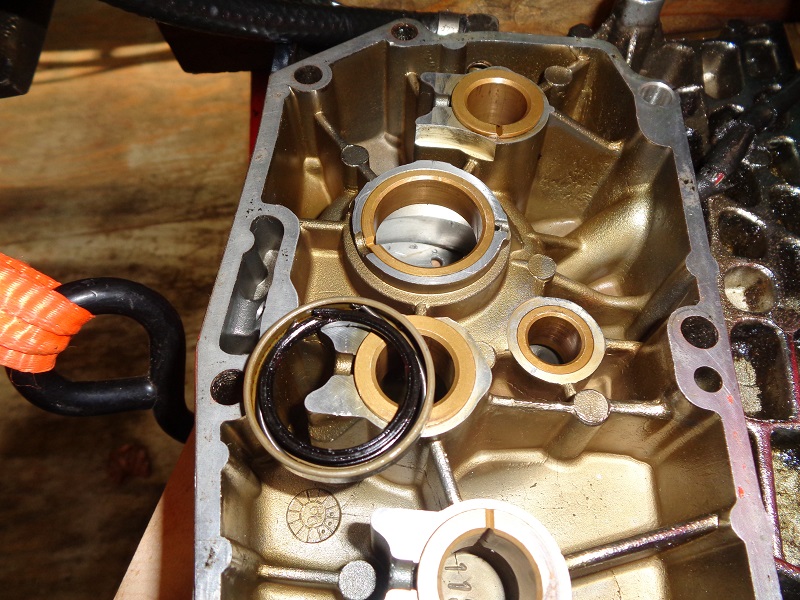
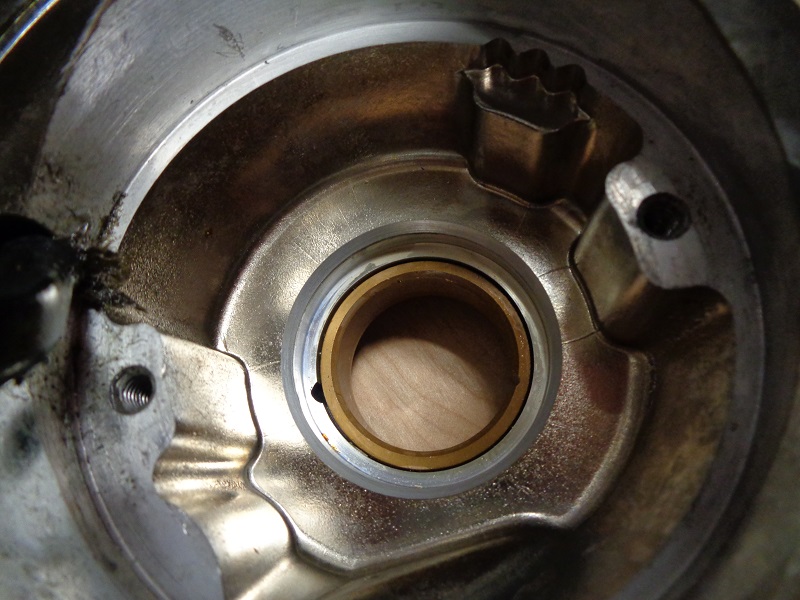
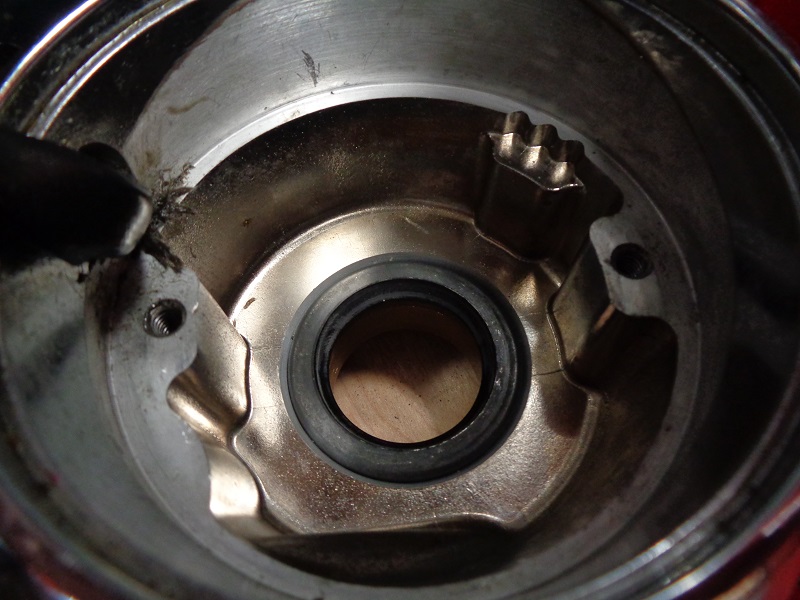
#2 Cam - Cover Seal (86-03)
Seal number (11124):
This surrounds and seals #2 cam when the cover is installed.
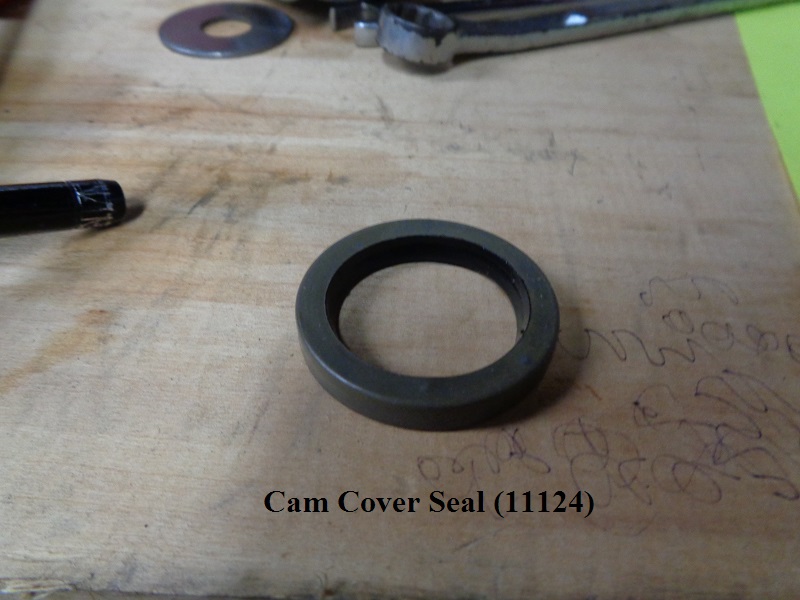
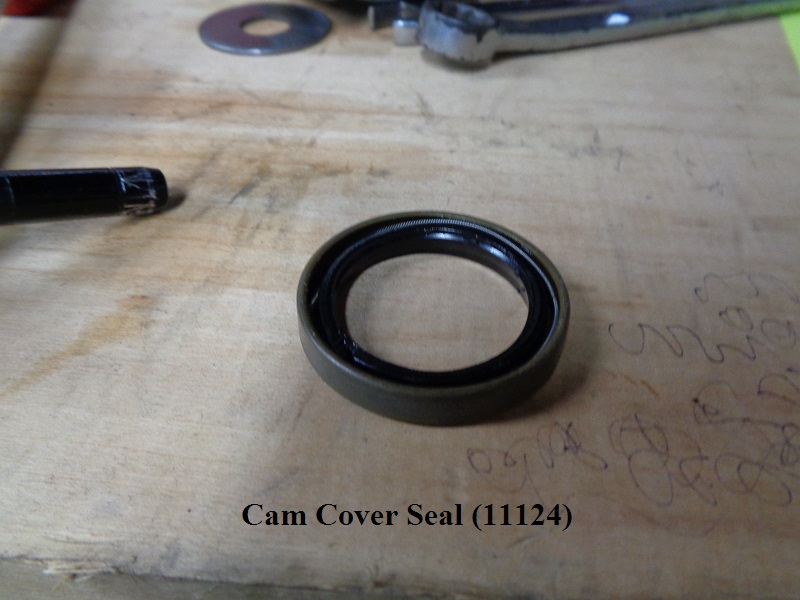
Check the #2 cam seal for damage. It's always best to go ahead and replace it while you have the cover off.
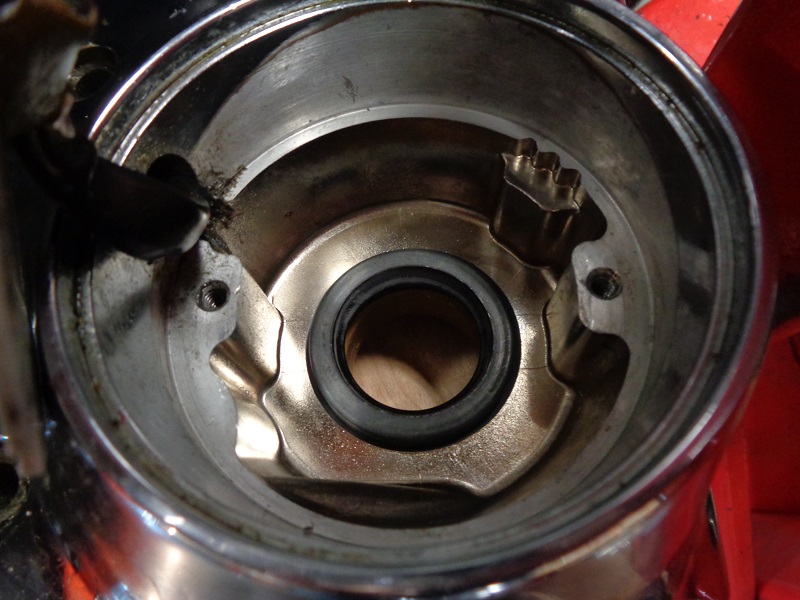
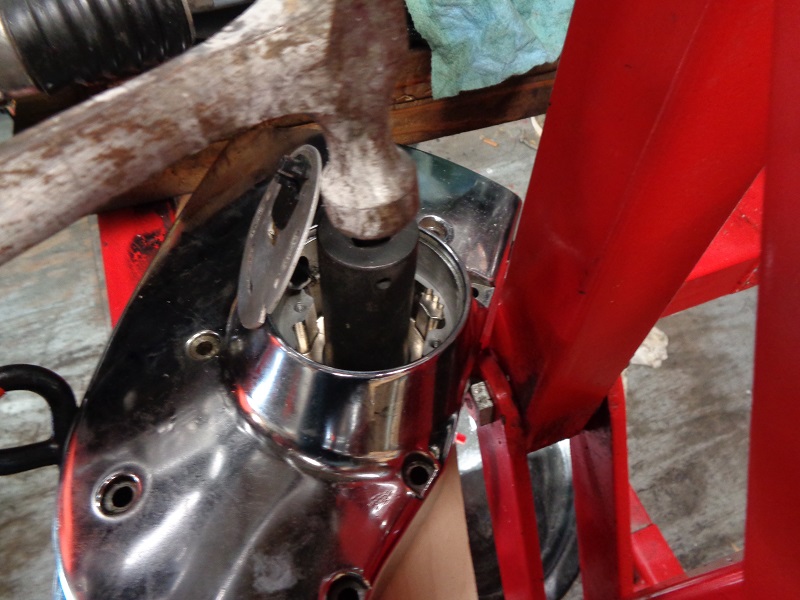
Using a screwdriver and hammer, insert the screwdriver inside the lip of the seal from the rear of the cover.
Knock the seal out of the cover. 24)
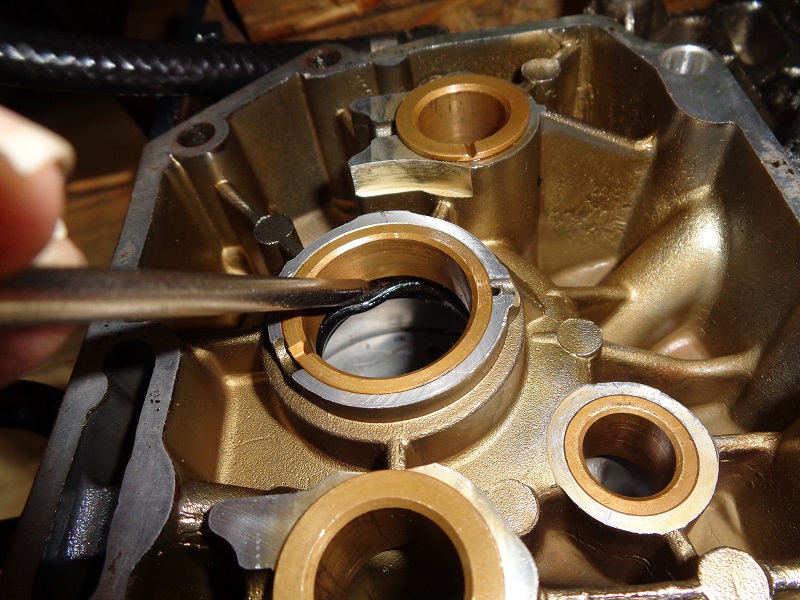 |  |
Clean the recessed area for the new seal thoroughly.
You can use compressed air or brake cleaner (cover the ignition if still installed).
Set the new seal over the hole aligning it as straight as possible. 25)
 |  |
Use a socket and a hammer to drive in the new seal straight to the cover.
The socket O.D. needs to be just smaller than the seal.
Make sure the seal is flush to the cover when done. 26)
 |  |  |
3)
, 5)
photo by goinsideways136 of the XLFORUM https://www.xlforum.net/forum/sportster-motorcycle-forum/sportster-motorcycle-styles/chopper-bobber-talk/63036-chopped-up-cam-cover-pics?t=385092
6)
photos by goinsideways136 of the XLFORUM https://www.xlforum.net/forum/sportster-motorcycle-forum/sportster-motorcycle-styles/chopper-bobber-talk/63036-chopped-up-cam-cover-pics?t=385092