Table of Contents

REF: Service Procedures 21
Cylinder Leak-Down Test
An engine (any engine) is essentially a combustible air pump. It takes air in through the air cleaner & expels air out through the exhaust. This requires that the valves open when the cylinder is going down & properly close, completely, when the cylinder is coming up on the compression stroke.
The compression chamber must be sealed well to work efficiently. The piston rings create a seal between the piston & the cylinder wall. The valves seal tightly on the valve seats. The head gasket provides a tight seal between the head & the cylinder.
The Cylinder Leak-Down Test uses air, injected thru the spark plug hole, to evaluate how well the piston rings, valve seats & head gasket are sealing the combustion chamber. No engine seals perfectly, so some leak-down is expected, even on newly built engines. But if the sealing operation is leaking profusely, this test will help identify which seal is failing - rings, valves or head gasket.
When an engine top end repair is needed, it's not always possible to determine if the repair can be made to only one cylinder or a complete top end teardown needs to be done. 1)
A leak-down test:
- is probably the best method to evaluate the condition of the motor top end from the outside. 2)
- is not designed to diagnose oil leaks but will tell you the condition of your rings, valves and head gaskets.
- will apply a known pressure to the cylinder and see how quickly it “leaks down”. 3)
- should include checking both cylinders and comparing the results, which should be similar.
Leak-Down Test vs Compression Test
- These are both fancy names for a deceptively simple process (installing an air gauge in the spark plug hole and noting the results). 4)
- A compression test checks the cylinder's maximum pressure ability. A low reading reflects poor sealing of the chamber.
- See Performing a Compression Test in the REF section of the Sportsterpedia.
- Generally if a compression test shows anything suspect, the next step is a leak down test. 5)
- A leak-down test checks the cylinder's ability to hold pressure (seal) and will reflect where the leak is occuring.
A leak down test is the best way to check the mechanical integrity of the motor without tearing it down. 6)
When to Perform a Leak-Down Test
- A good way to keep track of the progression in engine diagnostics is to take this pressure reading when the engine is healthy.
Then, when you take it later as the engine life is used up, you would notice a lower pressure on the second gauge, indicating an increase in leakage. 7) - A leak-down test should be done:
- when you notice the engine performance dropping off.
- after taking a cylinder compression test showing low compression.
- before tearing down the top end. This can provide important data of what to look for once you have the top end apart.
Engine Prep
Remove the spark plugs: This is your test point.
- This will also allow you to turn the engine over to get the piston at TDC.
- Clean the area around the spark plugs before removing them so dirt / debris doesn't enter the hole when they are removed.
- Only remove one plug on dual plug heads.
Piston position:
- You can leak test a cylinder at any position so long as the valves are closed. However, TDC on Compression stroke is the accepted practice for this test.
- On a worn cylinder, the most wear is usually in the top inch or so, that is why there is a noticeable ridge there on a worn jug. The least wear is at the bottom inch or so.
So if you want the acid test of how the rings are sealing, it should be done at or close to TDC. Put the bike in high gear to stop piston moving. 8) - The test takes only a few seconds to repeat so you can also test several locations as long as both valves are closed.
Valves must be closed:
- The period of time when both valves are closed is from about halfway up on the compression stroke to about halfway down on the power stroke. 9)
TDC on the compression stroke is about halfway between where the intake valve closes and the exhaust opens so this is a good point to set your piston. 10)
During overlap TDC, both valves are slightly open, so you can't do your leak down test in this position with usable results. 11) - For the most consistent results, remove the pushrods and the valves will stay closed regardless of the piston position.
In this case, you can put the piston at any position you want.
However, this would be easier for Iron Heads since you don't have to remove the rocker boxes like the Evo's do unless you're tearing down the top end.
Remove the pushrods: (suggested for IH engines) 12)
- It is not difficult on Ironhead engines and takes only a few minutes.
You do not need to remove the rocker covers as you do on the Evo Sportsters with the hydraulic push rods. - This is also a good idea on Evo engines also if you're already at this point in a top end teardown.
- This will ensure that both valves are and will stay closed.
The bike will still move however as the piston is forced downward so you still may need to hold the brakes (unless you're testing with the piston at BDC).
Remove the timing inspection plug (57-03) from the crankcase: This will be a listening area.
Remove the air cleaner: Another listening area.
- Set the carburetor choke and throttle to the wide open position (if applicable).
The engine must be warm to get accurate results:
- Temperature plays a role in the results of this test.
It's best to do it with a warm motor 13) although cold tests are also valuable. - On a warm engine, the rings, pistons, cylinders etc. have expanded closer to actual dimensions than on a cold motor.
Performing this test at this point will be more accurate than when everything has gotten cold and contracted.
Testing a cold engine:
- The test results should be slightly lower than on a warm engine but still all relative to each other.
This can still be very helpful if you're tearing down the top end anyway. - Before tearing down the engine based off a cold test, it may prove helpful to re-try the test after warming up the engine.
Put the transmission in high gear and hold / lock the rear brakes:
- During the leak-down test, when you apply the air pressure to the cylinder, the piston will try to be driven downward.
If allowed to move, it can quickly turn the engine over, while turning the rear wheel. (How much the bike will jump depends on the gauge/pressure you're using.) - Therefore, secure the wheel by applying the rear brakes or it will just turn over the engine and open the exhaust valve. 14)
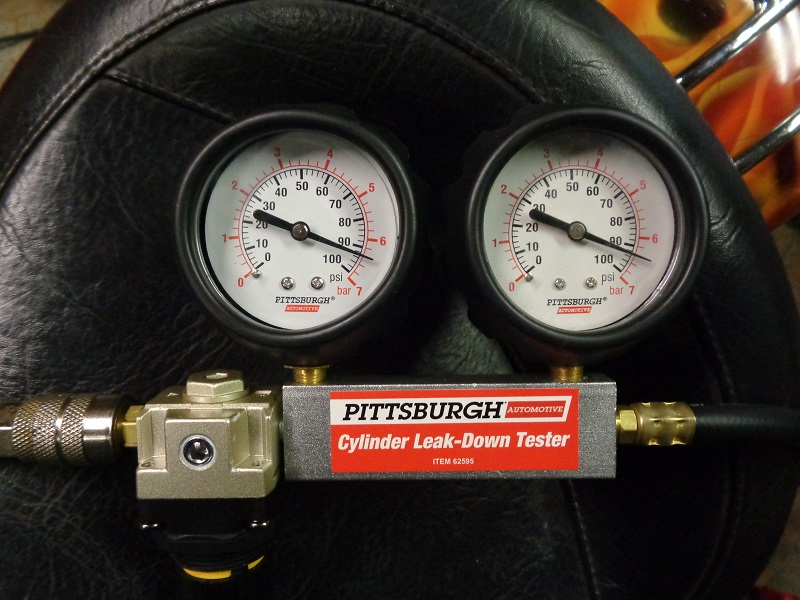
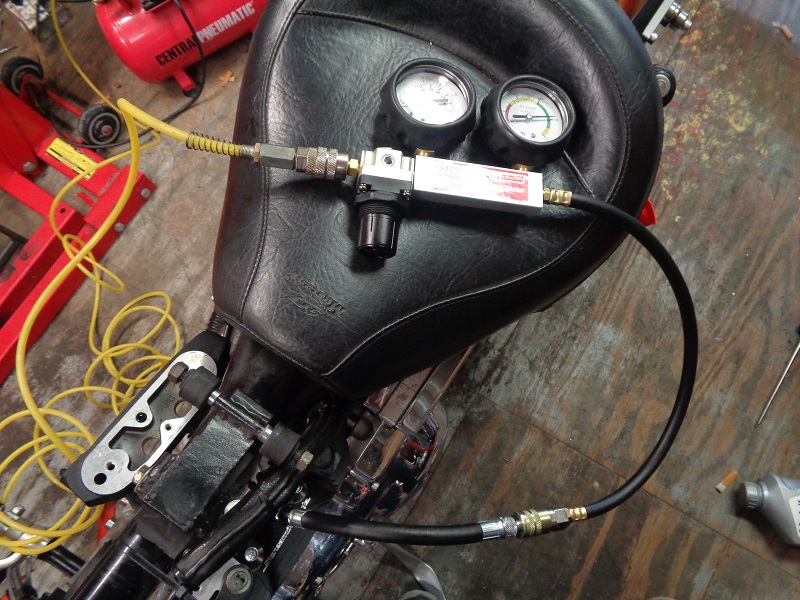
Using a Differential Pressure Gauge
This is basically a flow meter showing the differential pressure between the two gauges.
Simply put, the left gauge measures incoming pressure from the air tank and the right gauge measures the pressure lost thru leakage in the cylinder.
There are many brands out there and for the most part, they accomplish the same goal.
However, all are definitely not the same.


- When using the differential pressure gauge set, 17)
- The gauge on the left shows the regulated pressure.
- Then, the air passes thru an orifice (a smaller hole inline between the two gauges to restrict the flow between them) to the second gauge.
- The air then leaves the second gauge to the cylinder via the spark plug adapter.
- This pressure (end to end) would, in a perfect engine, be the same with no cylinder, valve or head gasket leakage. No engine seals perfectly.
Setting up the Gauge
- Before attaching the gauge to an air supply: Turn the regulator all the way to the left (off).
Failure to do so can result in damage to the gauge(s).
- Most gauges are subject to damage from dropping / abuse.
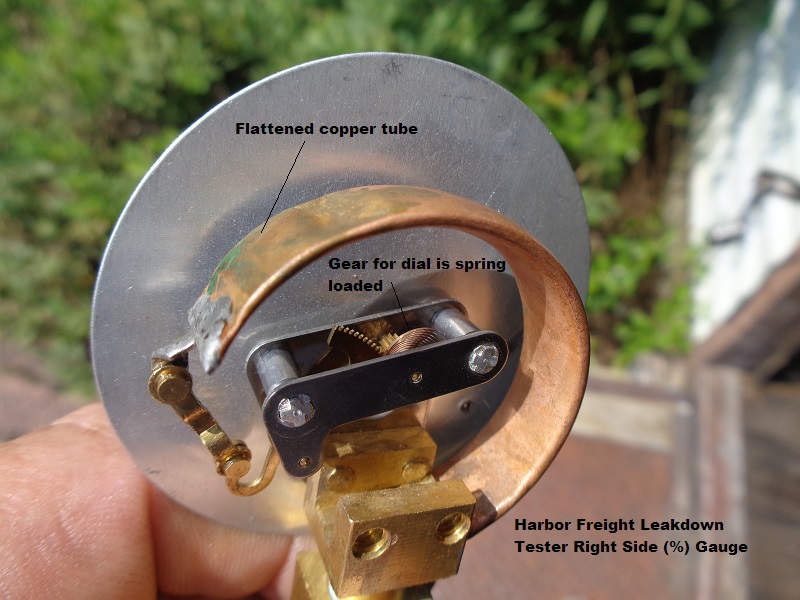
- The pic below demonstrates how easy this one from Harbor Freight can get out of calibration.
The face dial is driven by air pressure thru a flattened copper tube with down-weight from a long armed gear that actuates a spring loaded mechanism to the dial.
The copper tube lifts up on the end under pressure while actuating the gear arm.
One good hit and the weight can ping the spring out of calibration.
Driving the air pressure past zero and enough to ping against the dial stop can also damage the spring.
The gauge will still appear to work, but the dial will stop at various unusable locations.
 |
- Slowly, turn the regulator valve to the right to increase the pressure thru the tool.
- Stop turning the valve when the right gauge reaches '0'.
The regulator gives air to both gauges at the same time.
Both gauges will increase together. However, these two gauges are not calibrated the same.
The right gauge will increase all the way to the zero mark before the left gains much pressure.
With this particular tool, the left gauge will be near 1 bar (14.5 psi) although it may vary slightly.
 |  |  |
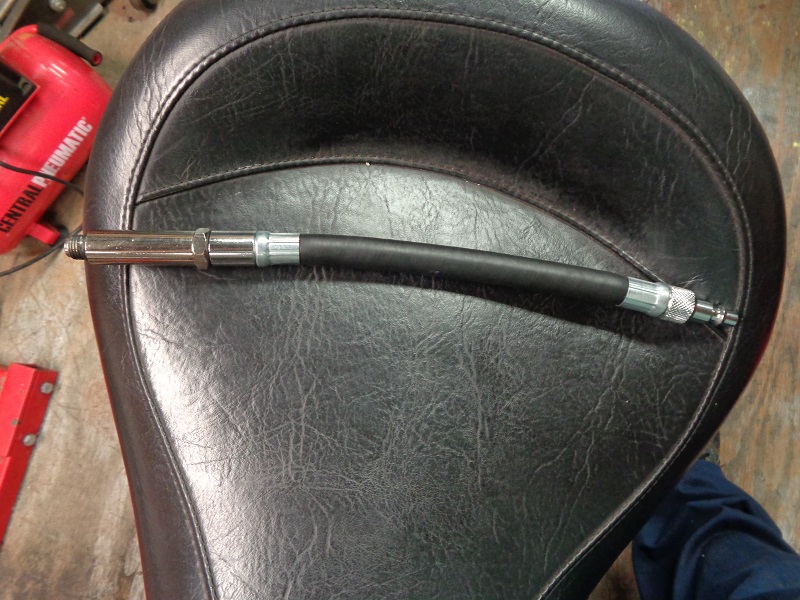
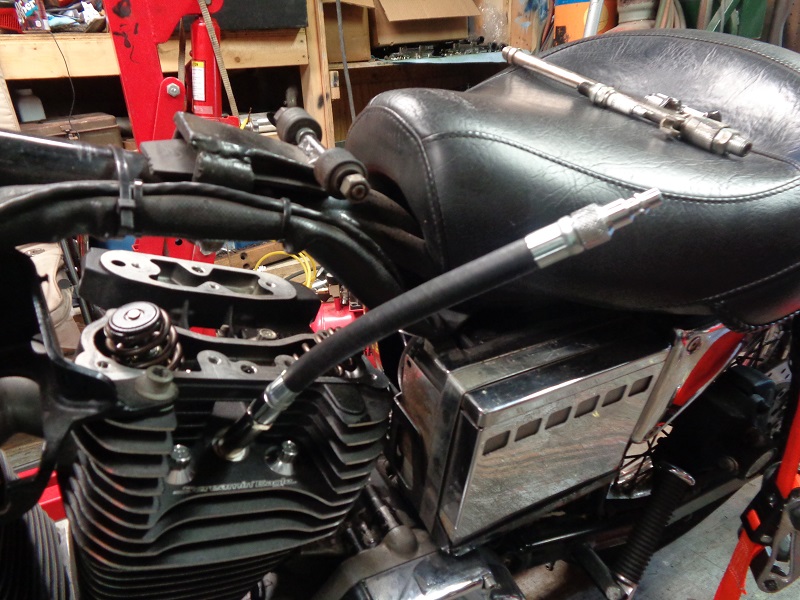
- Install the short air hose via a 12mm adapter into the spark plug hole.
| The short air hose and a 12mm adapter comes in most kits. | Attach the adapter to the hose. Make sure the O-rings are in place. | Screw the assembly into the plug hole just tight enough for the O-rings to seat. |
 |  |  |
At this point, test your equipment for leaks.
Verify the tester itself is free from leakage by spraying a solution of soap and water around all hose and gauge connections.
Then watch for any bubbles to appear indicating a leaky connection.
Now, your ready to start the test.
Test the Cylinder for Leaks
- Note the pressure reading on the left gauge during set-up by memory or by making a mark or with a piece of tape.
You'll need to adjust the pressure later back to this point. - Attach the engine side hose to the gauge and watch the readings.
Both gauges will have lower readings due to the tool filling up the cylinder.
The closer the piston is to TDC, the less area to fill and the gauge will rest at it's static residual pressure on the gauges.
Likewise, the lower the piston, the more volume of air is needed to fill the chamber.
Then, more pressure will drop but it will catch back up when the cylinder is pressurized and you'll see the gauges bounce back up to a static number.
 | 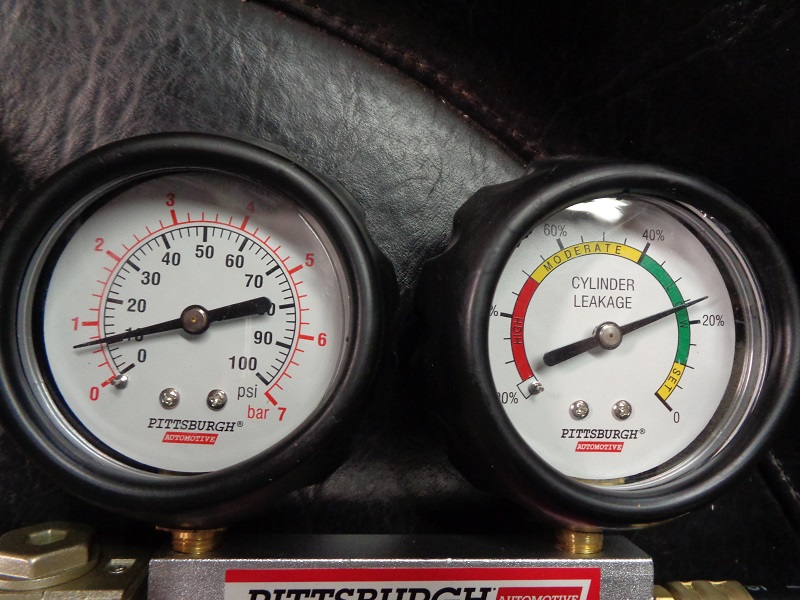 |
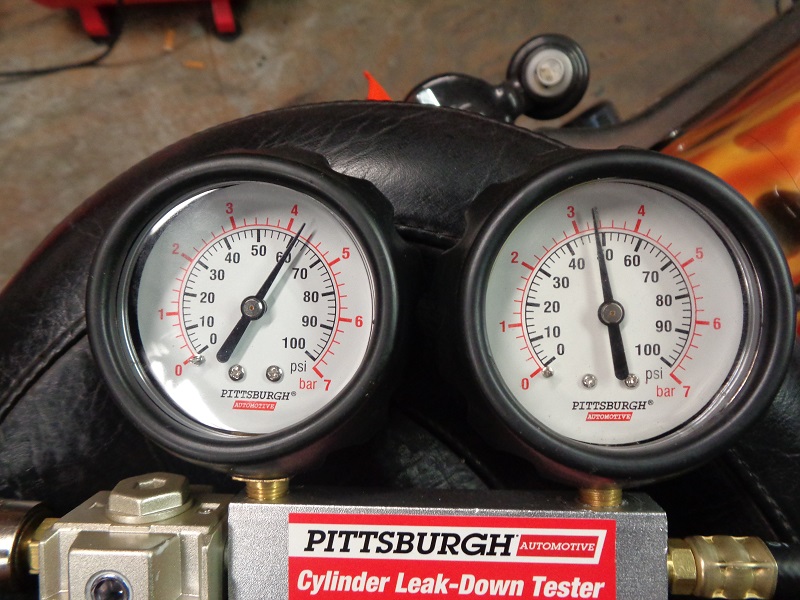
- Now increase the pressure. Turn the regulator valve up to get the pressure on the left gauge back to the same point as before it was attached to the engine side hose.
(in this case, near 1 bar) - Note the right gauge reading: This gauge should now show a lower reading than it did when the tool was set up:
| Before testing | After testing |
|  |
| This is a cold test done on a 1250 engine with less than 1,000 miles | |
Interpreting the Readings
- The amount of air determines whether or not a repair is needed. 18)
- A fresh motor will generally show 4% - 6% with conventional rings and 1% - 2% with gapless rings.
8% - 10% is not unusual for a motor with some miles on it. 19) - In general, 10% leakage at 100 psi is well within limits especially if you have a lot of carbon build-up. 20)
- Generally less than 20% is acceptable with most engines…unless you are racing (2% percent is ideal racing spec to gain HP). Although, that much does show plenty of wear.
Horse power loss will start at about 25%.
If the two cylinders are within 5% of one another and under 20% individually, it's not really an issue. 21)
| Motor Condition | Expected Percent Air Loss |
| Fresh Motor | 1-2% with gapless rings |
| 4-6% with conventional rings | |
| Used Motor | 8-10% |
| Less than 20% acceptable for pre-86 engines 22) | |
| Less than 12% acceptable for 86 and up engines 23) |
- The actual numbers are not as important as the relationship of each cylinder. As long as both jugs are close to each other, don't sweat the actual readings. There are lots of variables that can affect those readings. 24)
- Make a note of the reading and the date you took it, check it again after a few rides and see if it reads the same using the same equipment. 25)
Hunting Down the Source of a Leak
If you've determined you have too much leakage, then it's time to deduce where the leak is going.
The location where the air escapes tells you what the repair is. 26)
A mechanics stethoscope [with the probe removed for this test] makes a good listening device, as does a length of oil / gas line hose.
There will always be some audible leakage, especially past the rings and even on a healthy engine.
Greater leakage results in a sound of lower pitch. 27)
- Listen at the exhaust pipe or exhaust port on the head. 28)
- Excessive hissing here indicates the respective exhaust valve is not sealing.
- Listen at the A/C intake or intake port of the head. 29)
- Excessive hissing here indicates that the intake valve is not sealing.
- Listen at the timing plug hole with the plug removed. 30)
- Excessive hissing here indicates the rings are not sealing.
- Also, this could be an indication of leaking, worn or broken rings, worn piston and / or cylinder. 31)
- Listen around the cylinder to head connection. 32)
- Excessive hissing here indicates the respective head gasket is not sealing.
- Listen around the spark plug hole(s).
- Check to see if the O-ring seals properly on the plug adapter.
- On dual plug heads, check for leaks where the second plug mates to the head.
The hose can be installed in the opposite plug hole to check both areas for plug sealing.
- Listen around the crankcase vents (those hollow bolts in the Evo heads). 33)
- Excess hissing here indicates poor ring sealing.
Static Leakage
These are areas that should be leak free.
- Leaking Valves:
- Try pulling the rocker cover off and tap the valve ends with the wooden handle of a hammer.
That will identify a sticking valve.
If it keeps blowing that could indicate that the edge of the valve could be burned, a bad seat or a bent valve stem.
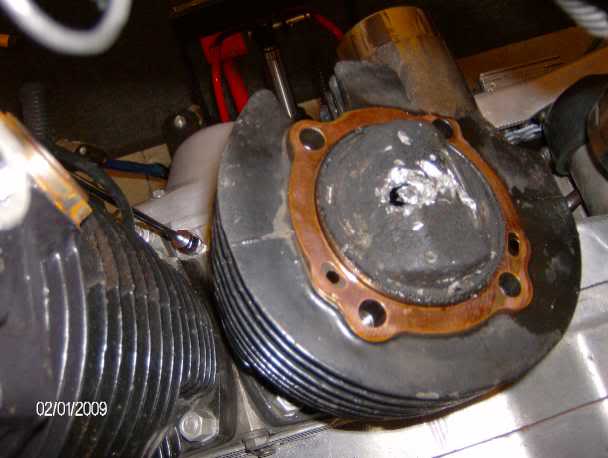
Really short pipes, pinging, carbon slathered valve edges, and such will cause burned valves. 34) - If air is escaping through the valves:
 |  |  |
| Excess carbon between valve and seat causing a leak on this 73 XLCH. 37) | ||
- Blown Head Gasket:
- A blown head gasket is usually accompanied by a chirping noise that keeps time with the pistons. 38)
Dynamic Leakage (into the crankcase)
Rings, by design, will allow air seepage even on a fresh motor so there will not be an instance where there is no air leakage past them.
This leads to the term “expected leakage” (or expected results).
If “substantial” (other than expected) air is going into the crank case, then there is an issue with the cylinder to piston relationship and / or integrity. 39)
It is not uncommon to have a normally running engine show lower than expected compression during scheduled inspection or maintenance. 40)
Several factors need to be considered and some technical background is helpful in assessing the proper course of action.
Cylinder differential compression tests are conducted using up to 100 psi.
During actual engine operation, higher cylinder pressures force the rings against the cylinder.
The actual running dynamic seal will be different than the static measurement.
If the test readings are low enough to warrant a tear-down, chances are that is the next step.
Below are some considerations before dis-assembly for clues on what to look for.
If the readings are on the borderline of a tear-down, these may help in some understanding for proper diagnosis.
- Ring Gap:
- Conventional ring gaps should have been originally installed in an equidistant around each piston.
However, the rings will rotate as the piston moves up and down which changes the position of their respective gaps. - When the gaps on separate rings are spaced apart (vertically);
- Air moves into the top gap and has to circle around the ringland to move down into the gap in the second ring and so on.
- This creates a restriction in the speed that the air can escape and gives higher psi test readings.
- When the gaps on separate rings line up (vertically);
- Air into the top ring has a faster outlet as it can move straight down through each ring without as much resistance.
- Running and re-testing the cylinder may rotate the gaps out of alignment and yield higher psi readings.
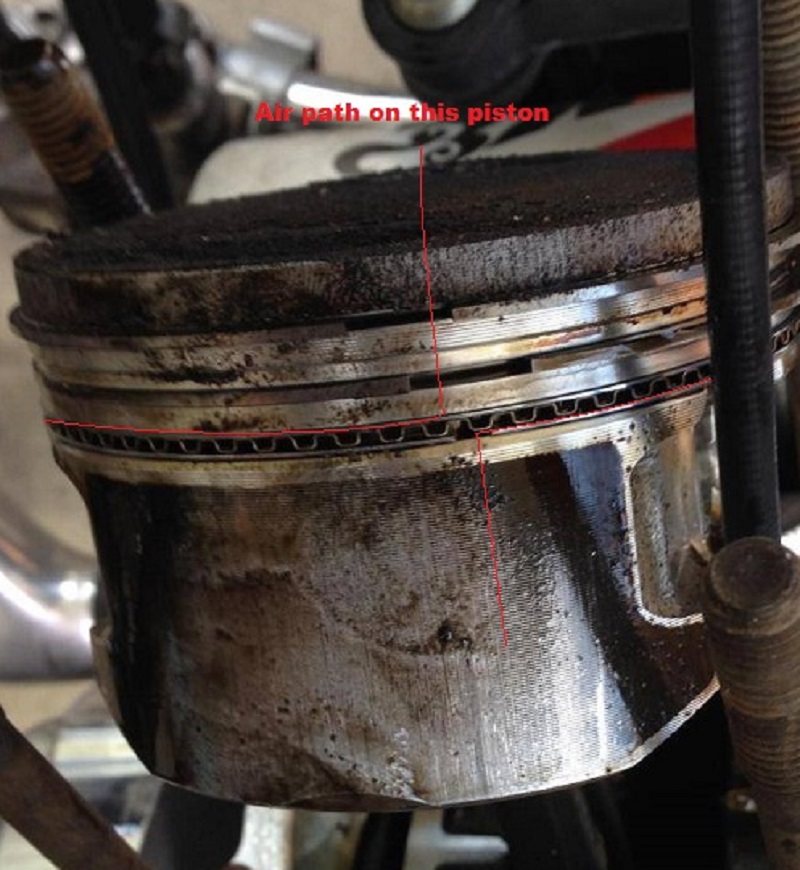 |
| Top 2 rings are lined up vertically on this piston 41) |
- Ringland Failure:
 |
| This piston is just about to break from too much cylinder pressure. This is from a race motor using Nitromethane 42) |
- If either cylinder seems to be a bit over (20% or 12% respective to your year model)
and you are certain that the valves are closed, add a dose of oil and see if it bumps up a bit to verify a ring condition for certain.
Oil won't seal a sticking valve, but it will seal the ring clearance for a short duration. 43)- Air that gets past the rings into the crankcase needs to vent somewhere. Normally it will go out the breathers.
If it is coming out past the pushrod tube seals, that indicates it can't make it out the breathers and it's finding a different path out. 44)
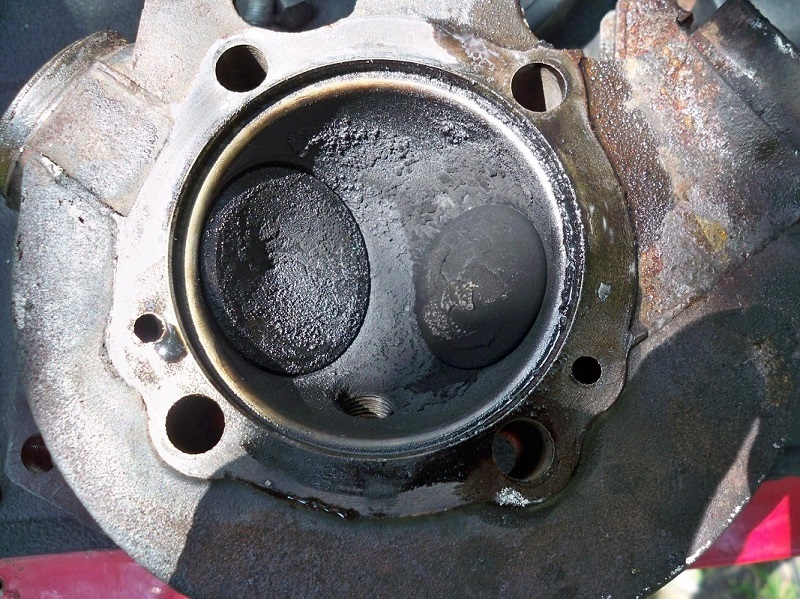
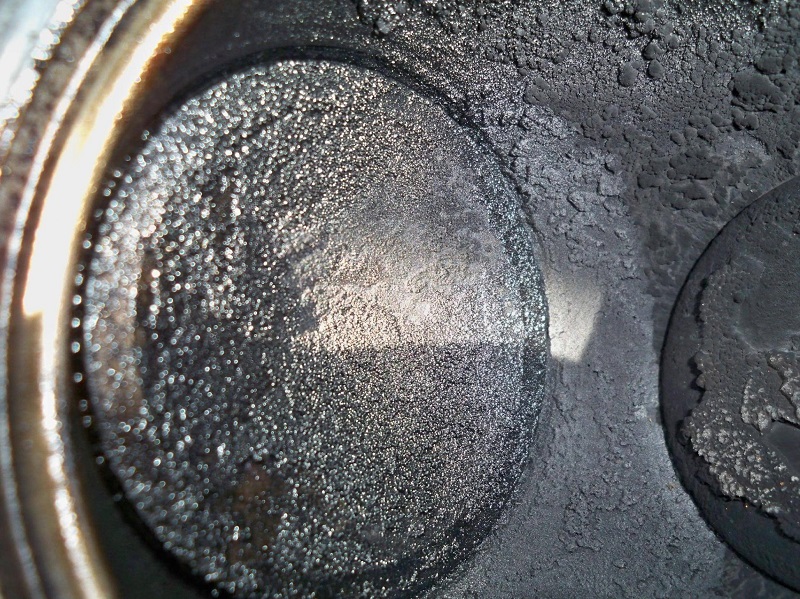
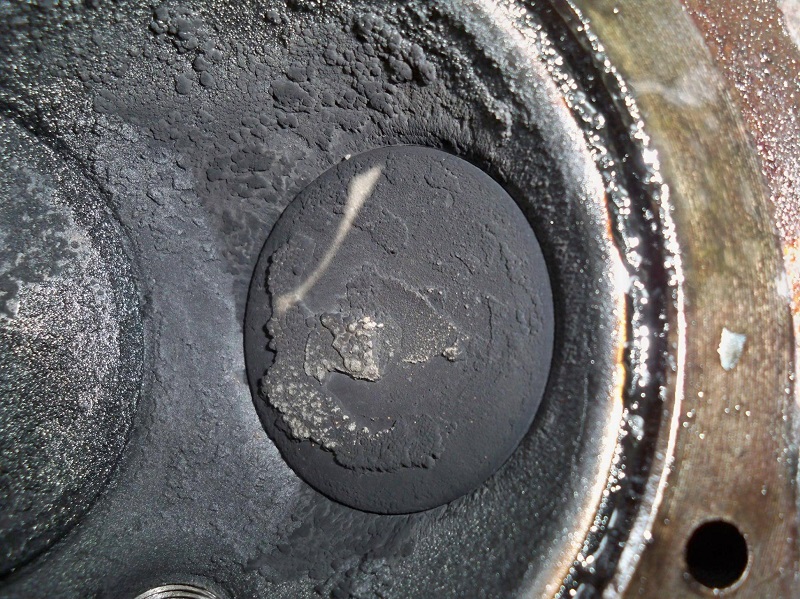
- A hole in a piston would probably tell on itself as in the pics below.
A dual psi gauge was set up at 92 psi, then the outlet was opened up, full hose, with the readings recorded in the second pic.
This left an inlet side 60 psi and outlet side of 48 psi while flowing from a small peanut air tank. It was more of a high pressure sound than a hiss.