Table of Contents

EVO: Engine Mechanicals - Sub-04J
Rocker Arm Inspection and Servicing
See also in the Sportsterpedia.
The forgoing is a compilation of maintenance and clearancing advice from the XLFORUM.
Most of these aren't mandatory unless you notice a problem upon inspection.
If problems are found, below are some examples of how those have been addressed.
The rocker arm shaft is not supposed to rotate from it's installed position.
The shafts have a notch in them that the bolt is supposed to butt up against which locks the rocker arm shafts in place. 1)
However, the bolt hole is too large which leaves a gap there.
This gap allows the shaft to slightly rotate and hit the bolt which causes an annoying ticking/tapping noise.
See the link above on Stabilizing Noisy Rocker Arm Shafts for more information in the Sportsterpedia.
Normally what should rotate is the rocker arm itself.
The bushings in the rocker arm pivot around the rocker arm shaft.
The shaft runs through bushings on both ends of the rocker arm.
These bushings can expand due to normal wear.
The FSM suggests visual inspection and measuring of specific clearances as outlined below as a guide to when to replace parts.
Ultimately, it's an individual judgment call as to replacing parts that are within measured specs.
Rocker Arm Specs
Service wear limits are a guideline for measuring parts that are not new.
Replace parts when their measurements exceed the wear limits below.
If wear limits are not given for a part, refer to the new install specs. 2)
 |
||
|---|---|---|
| Rocker Arm Specs | New Install | Used Service Wear Limits |
| Shaft in bushing (loose) | .0005“ - .0020” (.013 mm - .051 mm) | .0035“ (.089 mm) |
| End play | .003” - .013“ (.08 mm - .33 mm) | .025” (.64 mm) |
| Bushing fit in rocker arm (tight) | .004“ - .002” (.10 mm - .05 mm) | No variance |
| Rocker Arm Shaft Specs | New Install | Used Service Wear Limits |
| Shaft fit in rocker cover (loose) | .0007“ - .0022” (.018 mm - .056 mm) | .0035“ (.089 mm) |
Inspection before removal
Check the end play of each rocker arm
The ends of the rocker arms can wear down the area where they touch the lower rocker box.
- Push the rocker arm to one end.
- Check the clearance between the other end and the cover with a feeler gauge.
- The FSM suggests to replace the rocker arm or lower cover or both if the end play exceeds .025” (.63 mm). 3)
| Checking end play 4) | |
Check Arm Contact at Valve Spring
Inspection after removal
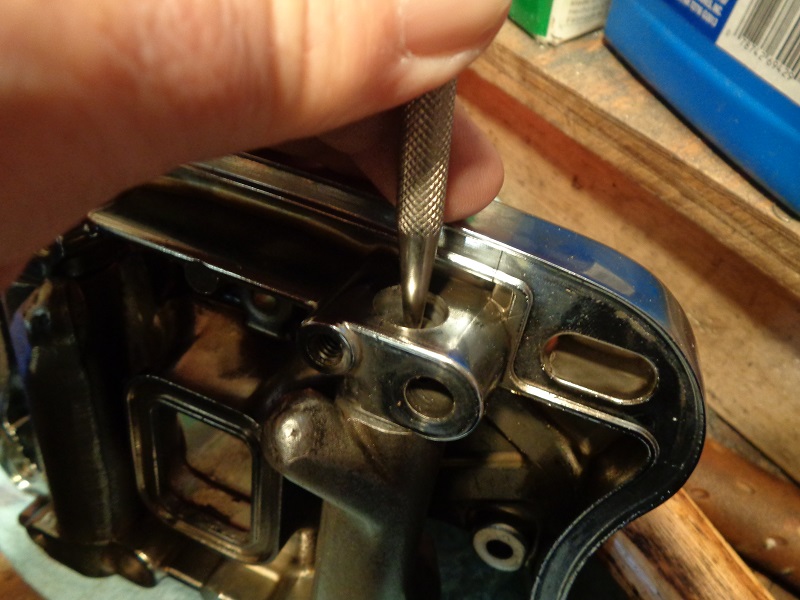
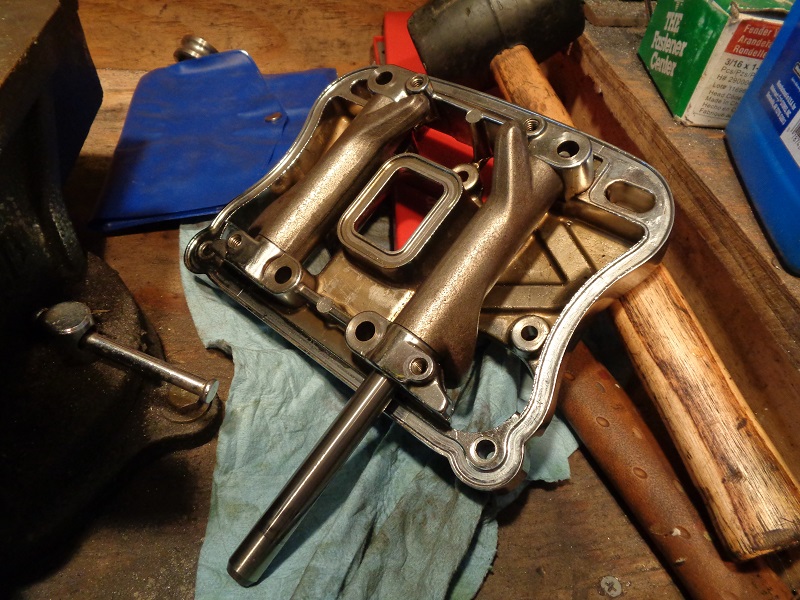
If the rocker arm shafts will not slide out on their own;
You can remove them by tapping them out using a hammer and a soft metal punch. 7)
 |  |  |
You'll be measuring for an 'out of round' condition of the rocker arm and associated parts.
Most of the wear in the rocker arm shafts and bores results from up and down movement of the pushrods and valves. 8)
This can result in an out of round condition on either or all of these parts.
(more wear in the top and bottom than the sides)
When measuring the rocker arm shaft end, it's bushing or cover bore when new,
Take a measurement and then turn 180° and take another measurement.
The two measurements should be the same in newly installed parts.
Subsequent wear will happen from top to bottom and need replacement.
This could induce noise and expedite wear on the parts.
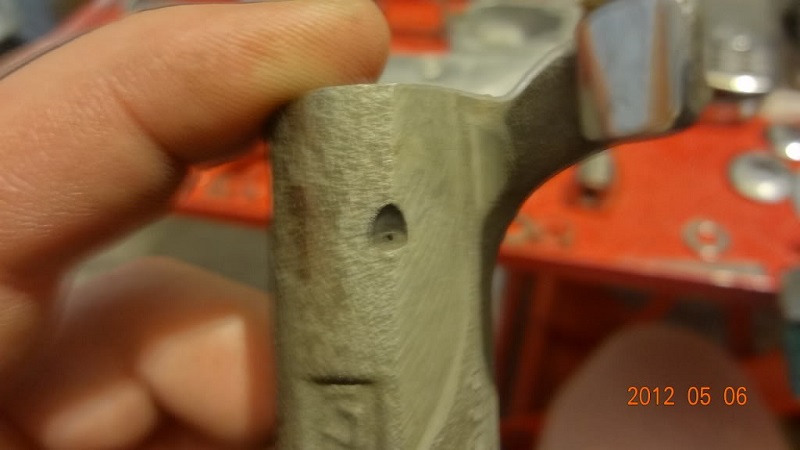
Check the shaft in bushing clearance
Click Here to reference the Rocker Arm Bushing Replacement page in the REF section of the Sportsterpedia.
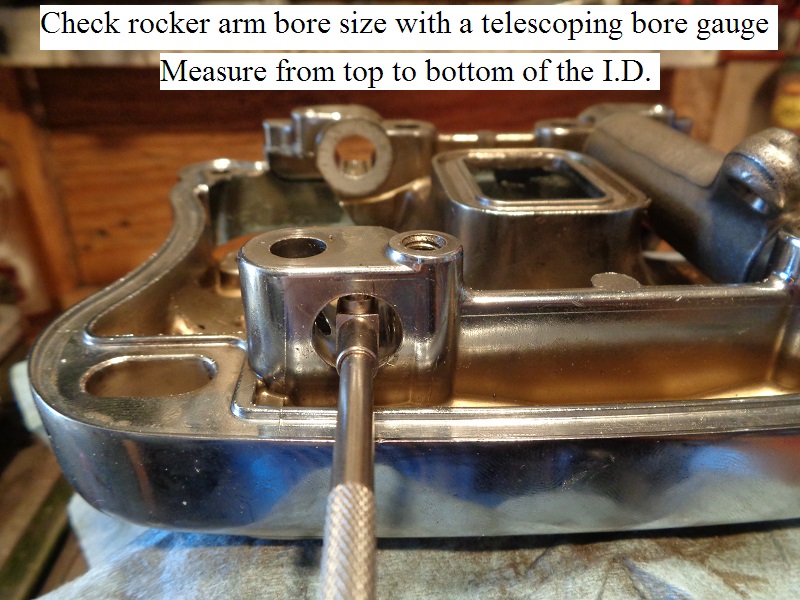
All measurements should be taken from the top to bottom position as each part sits while installed as per the FSM.
Both arms on each rocker are being pushed upward during operation.
The load side is on the bottom. That is where most of the wear will be as in the pic below.
 9)
9)
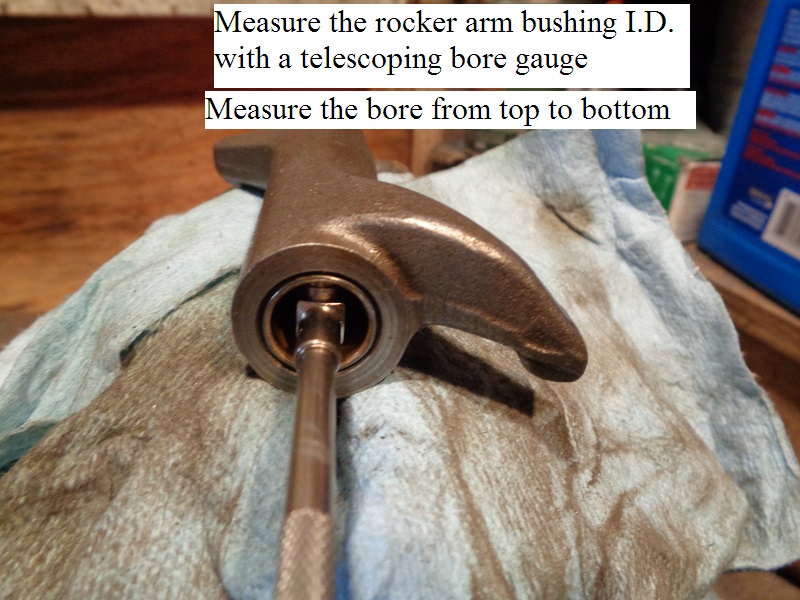
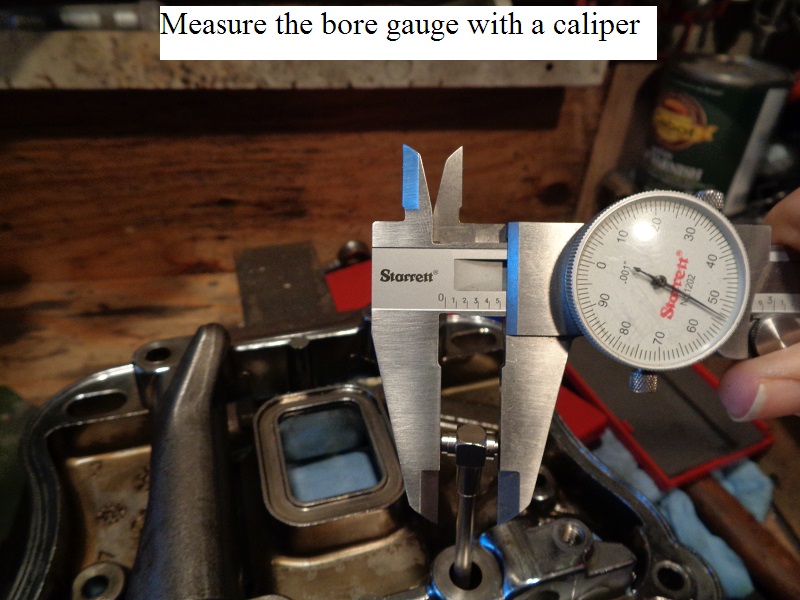
- Measure and record the rocker arm shaft dia. at each bushing area with a caliper.
- Measure and record the I.D of the rocker arm bushing with a telescoping bore gauge and caliper.
- Subtract the shaft dia. from the bushing I.D. and match that number against the wear limit specs.
- If the bushing is within service limit, install the rocker arm as is.
- If the bushing is at or past the service wear limit:
- Proceed to the “Rocker Arm Bushing Replacement” page in the link above.
- If you choose not to replace the bushing, it is advised to replace the entire rocker arm.
New rocker arms come with new pre-sized bushings.
 |  |  |
Check the shaft fit in the rocker cover
An assembly bolt runs through the gap near the end of the shaft.
The gap is wider than the bolt.
This allows a slight movement of the shaft in it's rocker cover bore.
You can check for slight movement there on a running engine: 10)
With the covers off, draw a straight line with a felt marker on the end of the shaft from the cover bore and down the shaft.
Then fire up the engine. At idle, if you see any back and forth movement of that line, you have movement of the shaft.
Checking the shaft fit is the same as checking the bushing clearance;
All measurements should be taken from the top to bottom position as each part sits while installed as per the FSM.
That is where most of the wear will be as mentioned above.
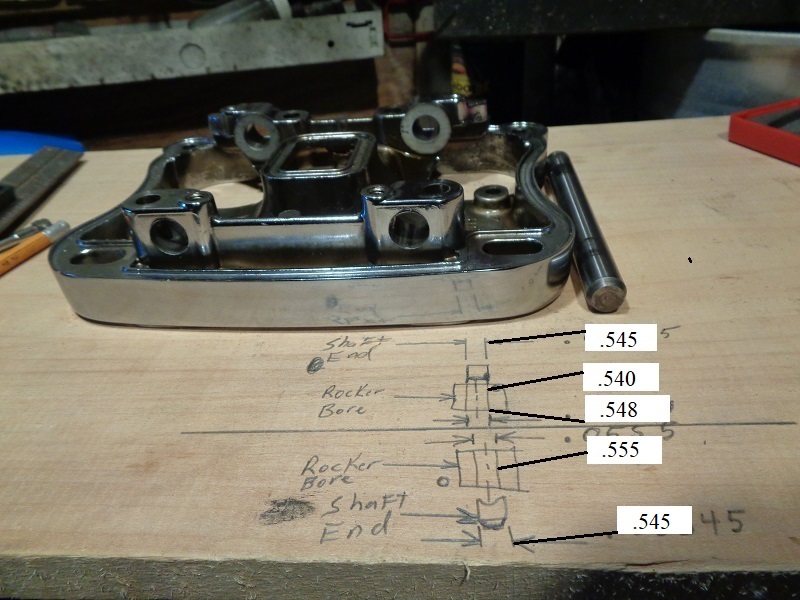
- Measure and record the dia. of the rocker arm shaft at each rocker bore with a caliper.
- Measure and record the I.D of the rocker box bore for the shaft with a telescoping bore gauge and caliper.
- Subtract the shaft dia. from the rocker box bore and match that number against the wear limit specs.
- If the either are at or past the service wear limit,
- Check the dia. in the middle of the shaft against the dia. at the end. Both places should be the same.
If the shaft is smaller in dia. on the end, replace the shaft and recheck the measurements.
(this is cheaper than replacing the lower rocker cover) - If the shaft mic's out OK, then replace the lower rocker cover.
 |  |  |
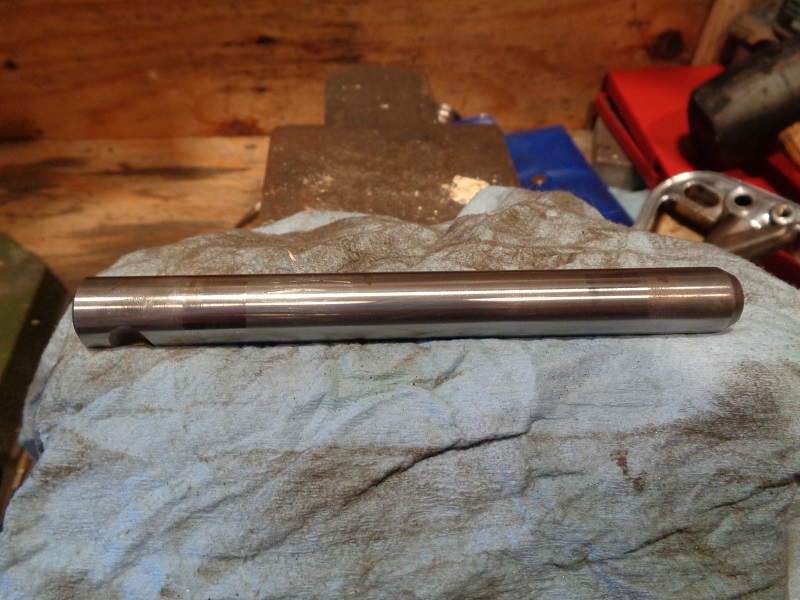
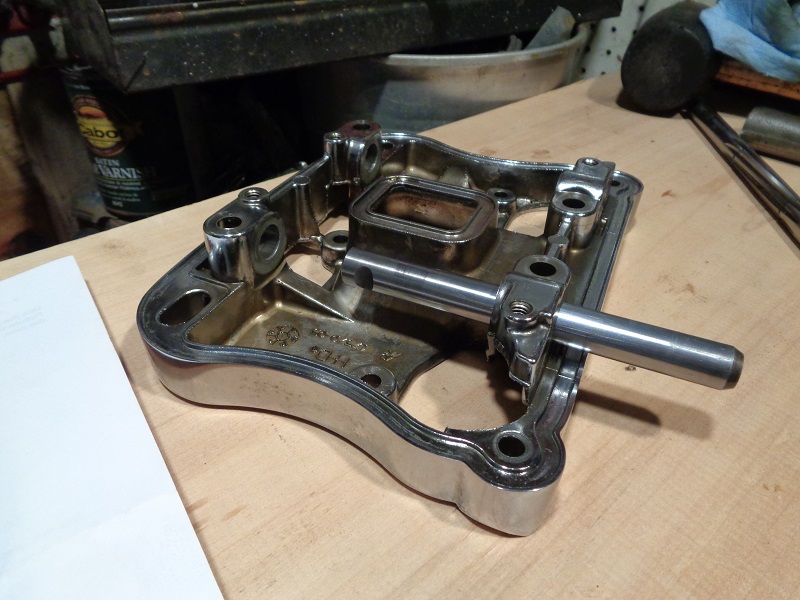
- The shafts below were test fitted to find where the binding was happening.
One end of each shaft slid in easily on one side but would bind up going into the other end. - There was app. .001“ clearance on the chamfered end and a press fit on the other.
- Per the specs in the FSM;
Shaft fit in rocker cover (loose)
New Install .0007” - .0022“ (.018 mm - .056 mm)
Wear Limits .0035” (.089 mm)
There was not enough clearance on one side (as the dims show in the pic below).
 |  |  |
- The Jims reamer (94804-57) was used to run through the loose side to square up the hole for reaming on the other.
A 12-point 12 mm socket was used as a finger hold to turn the reamer in by hand.
(turning slowly by hand to let the reamer do the cutting) - Continue until the reamer makes it to the end and push it out.
- Then clean the shavings and run it back thru to make sure you got a uniform cut.
 | 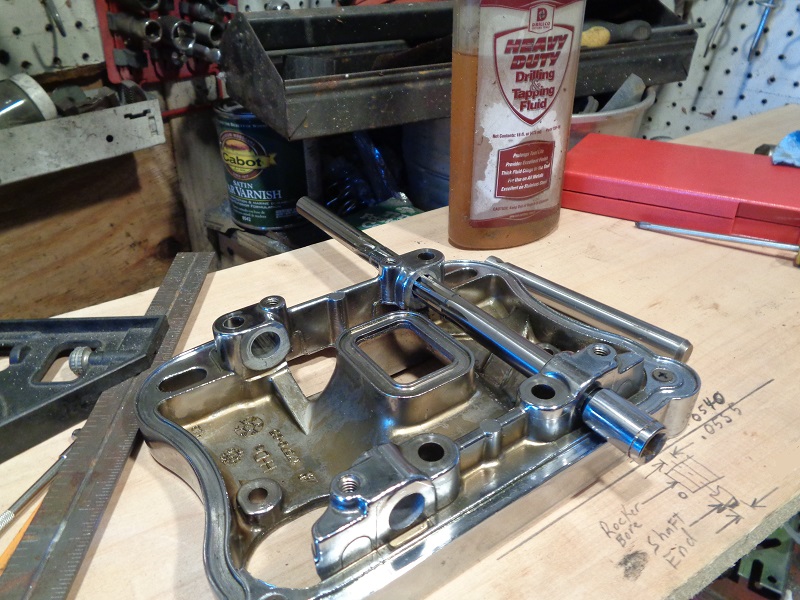 |  |
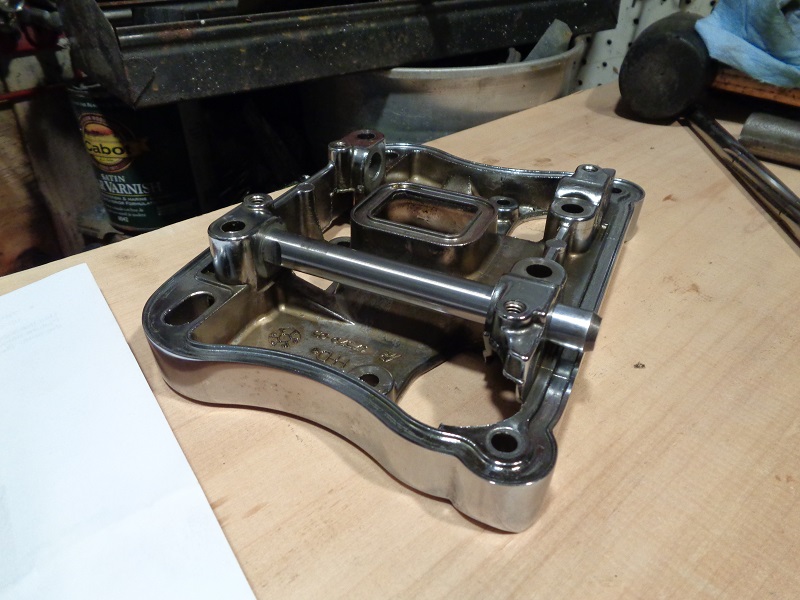
- When done, the shaft slid into both ends evenly with no slack.
The smaller bore mic'd out to .555” which is the same as the other side now. - At ambient temperature of 54°F, the shafts would not slide out on their own with the rocker box turned vertical.
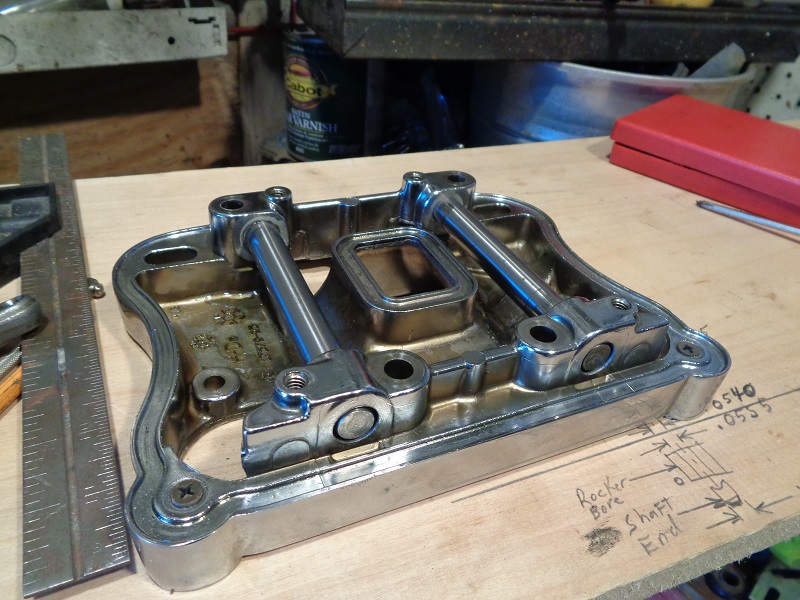 | 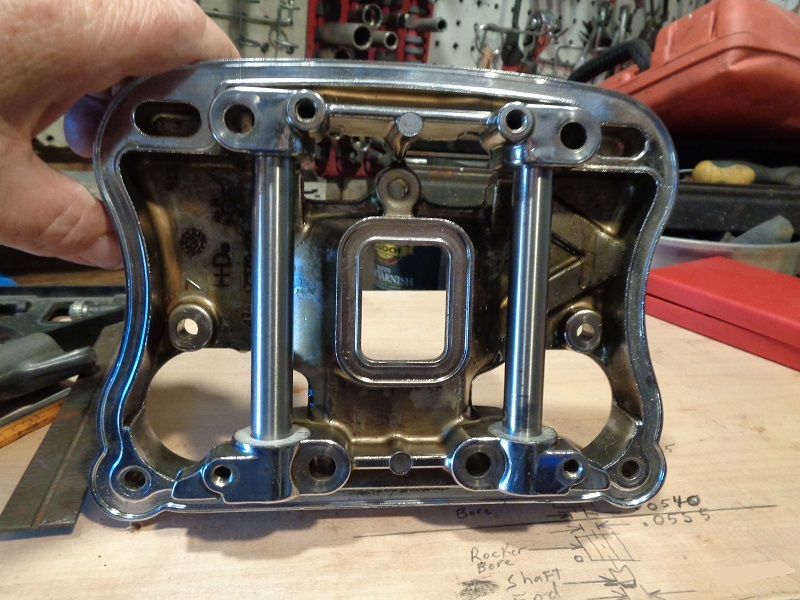 |
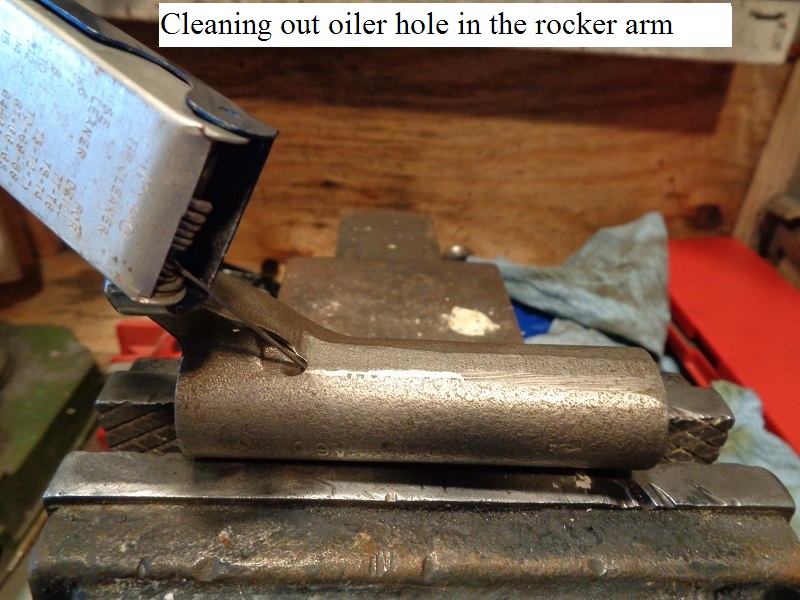
Check the valve oiler hole in the rocker arm
The valve side of the rocker arms have one tiny little hole that sprays oil on the valve for extra cooling.
While you have the rocker arms out,
You can use a welding tip cleaner or other small wire to poke down this hole to clean or verify the hole is clear.
Visual Inpections
Inspect the valve stems
- Look at the condition of the valve stems in the heads.
This will give you an indication of how the rocker pad is wearing against the valves.
Check for pitting or uneven wear.
 |
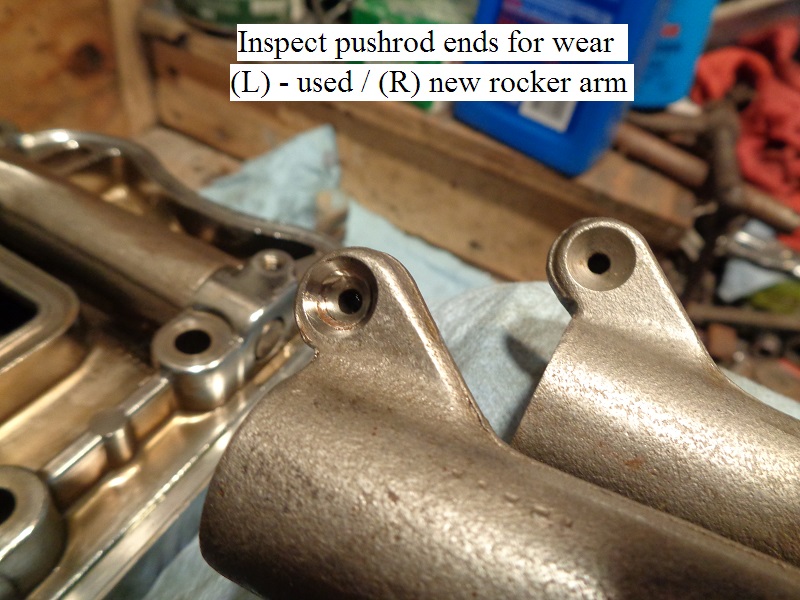
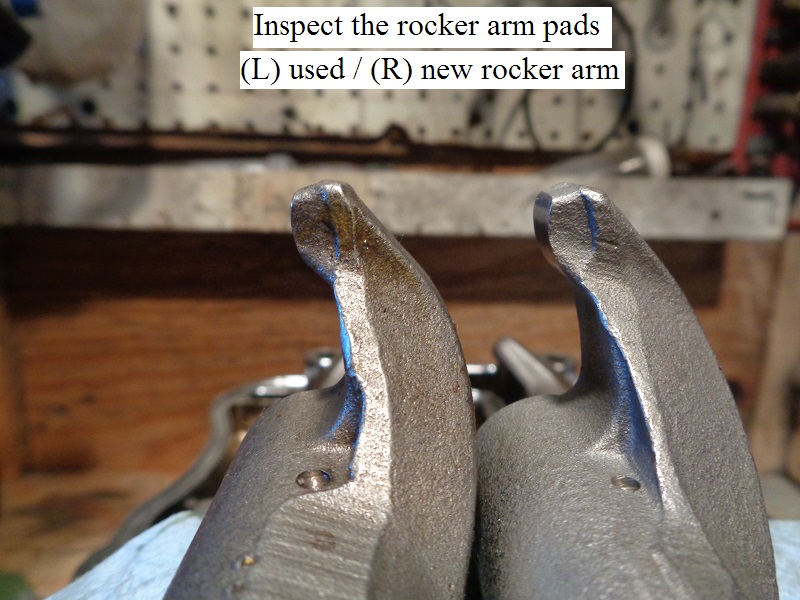
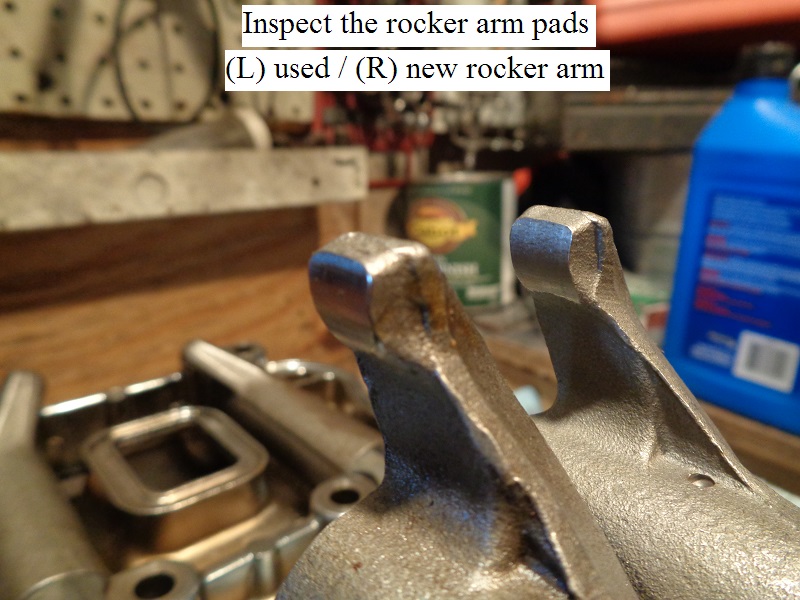
Inspect the rocker arm ends
- Inspect both the rocker arm pad and pushrod end for uneven wear or pitting.
Replace the rocker arm if either exist.
 |  |  |