Table of Contents

IH: Engine Mechanicals
Cam Gear Selection for Quiet Operation
- Timing gears for 1000, 1200 and 1340 models are originally installed and are supplied through parts order in matched sets to provide the proper gear lash (tooth clearance) for quiet operation. Select gears were also made for all models (1954-1979) 1)
- Gear Measurements:
- Cam gears for late model 1200, 1340 and l000 engines are color coded according to their diameter size as measured with special gauge pins.
- The gear diameter is measured with a micrometer across .105“ diameter gauge pins (95632-79) on opposite sides of the gear. The pins fit between the contacting surfaces of the gear teeth (laid longways). Gear diameter should be measured in at least 2 places and 90° apart.
- Original gears may be different sizes, (different color codes) to produce a properly matched set at the factory in any one engine while parts order matched gear sets are of one color. These were not happy-go-lucky dimensions.
- Replacing worn gears:
- Although all gears in the same engine (from the factory) are matched for proper fit, instances may occur where gears become worn and (excessive tooth clearance) produce a rattling noise particularly noticeable at the gear case cover at low RPMs. In such cases, a larger gear size can be selected to reduce the tooth clearances between the mating gears for quieter operation.
- Procedure:
- In 1000cc engines with 4 matched cam gears, it is recommended to increase the size of gears 1 and 3 by one color code (but no more than two size increases should be made before also increasing the pinion and intermediate gears). Then, run the engine to check for noise. However, if a gear whine or howl is produced by a size increase, it indicates that there is not enough tooth clearance and the size of the affected gears must be reduced.
- With gear noises, in general, an increase in gear size will reduce rattle while a decrease in gear size will reduce gear whine or howl.
- It is possible that gear whine or howl may be present to some extent in a new engine and may not disappear during break-in. A mild whine is acceptable, but if excessive, the gear train can be “fine-tuned” by using smaller size gears as described before.
- An Alternative Method of Gear Selection requires removal of the push rods, tappet blocks and spark plugs. Check for gear tooth tightness by moving gear back and forth with a screwdriver and noting the resistance to movement. Do this for several positions (rotate flywheels). On the average, there should be a slight drag. The gear should not be too tight at any one spot which would indicate that the gear is out of round.
- Color coding system:
- Different gear (including cams, pinion, intermediate and generator drive gear) diameters were cut to a specific dimension with a base dim and an oversized dim for each color (0.001” apart). The base dim of the next color up was the same as the oversized dim for the previous color.
- Some gears were cut to a standard dimension while specific gears were duplicated in multiple dimensions as the chart below shows. These specific gears were selected for different year models and design went all the way back to 1954 K models. Each Sportster year model selected had a color code starting with brown and ending with black:
| Gear Dimension Changes by Color Code | ||||||
| Brown → Black denotes ranges starting with the smallest and increasing in size to largest dimension. | ||||||
| Brown | Blue | Red | White | Green | Yellow | Black |
| .000 - .001 | .001 - .002 | .002 - .003 | .003 - .004 | .004 - .005 | .005 - .006 | .006 - .007 |
| Brown ← Black denotes ranges starting with the largest and decreasing in size to smallest dimension. | ||||||
| Brown | Blue | Red | White | Green | Yellow | Black |
| .000 - .001 | .001 - .002 | .002 - .003 | .003 - .004 | .004 - .005 | .005 - .006 | .006 - .007 |
| Gears Manufactured with Multiple Dimensions including Ranges | ||||||
| 1954 → 1985 | ||||||
| Pinion | 54-76 (24011-37) | Range Brown ← Black - 1.2681-1.2611 | ||||
| 77 (24015-74) | ||||||
| 78-85 (seven part #s-74) (Standard 24059-74 - Green 1.2641-1.2631) 2) Replacement for 77 models | Range Brown ← Black - 1.2681-1.2611 | |||||
| 1957 → 1979 | ||||||
| Idler | (25576-57) | Range Brown ← Black 3.0223-3.0153 | ||||
| 1959 → 1979 | ||||||
| Rear Exhaust | (25504-59) | Range Brown → Black 1.8893-1.8963 | ||||
| Front Intake | (25501-59) | Range Brown → Black 1.8893-1.8963 | ||||
| 1971 → 1979 | ||||||
| Rear Intake Inner | (25485-71) | Range Brown ← Black 1.8953-1.8883 | ||||
| Rear Intake Outer | Range Brown → Black 2.3902-2.3972 | |||||
| Front Exhaust Inner | (25503-71) | Range Brown ← Black 1.8953-1.8883 | ||||
| Front Exhaust Outer | Range Brown → Black 2.3902-2.3972 | |||||
| 1980 → 1985 3) | ||||||
| Front Intake | (seven part #s-80) | Range Brown → Black 1.8893-1.8963 | ||||
| Rear Exhaust | (seven part #s-80) | Range Brown → Black 1.8893-1.8963 | ||||
| Late 1984-1985 4) | ||||||
| Front Exhaust | (seven part #s-84) | Range Brown - Black | ||||
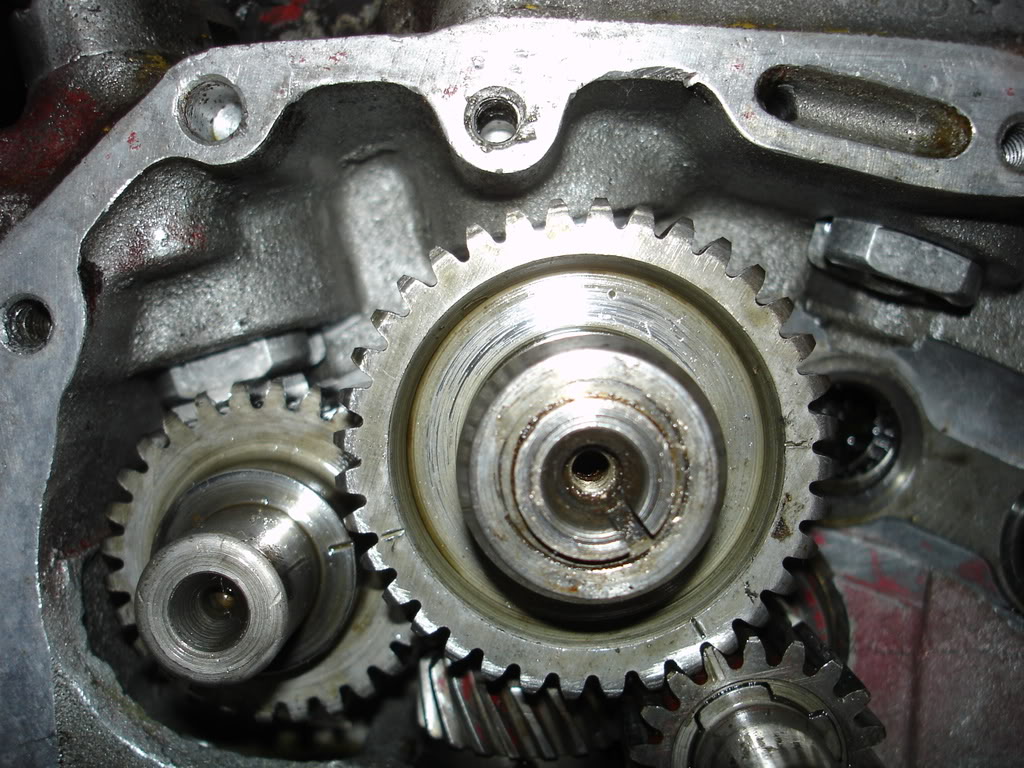
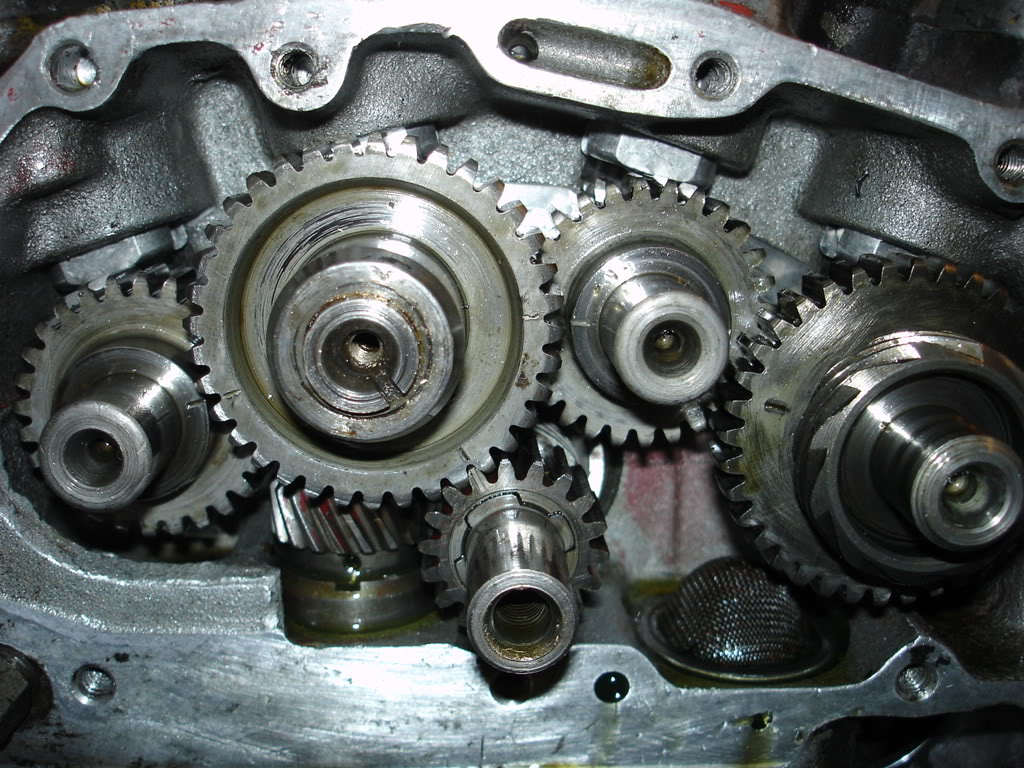
Removing Cams
- Slow and steady as she goes. That mind set will be very helpful in keeping problems to an absolute minimum. 5)
- Get a good helper
- Get a magnet on a stick ( and pray you won't need to use it).
- Pull the gen idler out.
- Hold cams in place so they stay put in the torrington case.
- Have your helper lean the bike over to the right while you hold the cams in.
- Remove #4 (front exhaust) cam.
If the rollers fall out of the worn torrington, they will now fall into the cam cavity (not into the crankcase).- If this happens, use the magnet to pull the remaining rollers from the torrington before you stand bike back up.
- Then, stand the bike back up with the 3 other cams still in place.
- Pick the rollers out of the cam chest, count them and set them aside as a set.
- Shove a paper towel in center of the oil pump breather gear before removing the #2 (rear intake) cam and repeat steps 1 thru 6.
- To remove #3 cam (front intake), repeat 1 thru 6 again.
- To remove #1 cam (rear exhaust), repeat 1 thru 6 again.
Gearcase Cover
| 68 Gearcsae Cover 6) |
 |
Cam Bearings / Bushings
Sub Documents
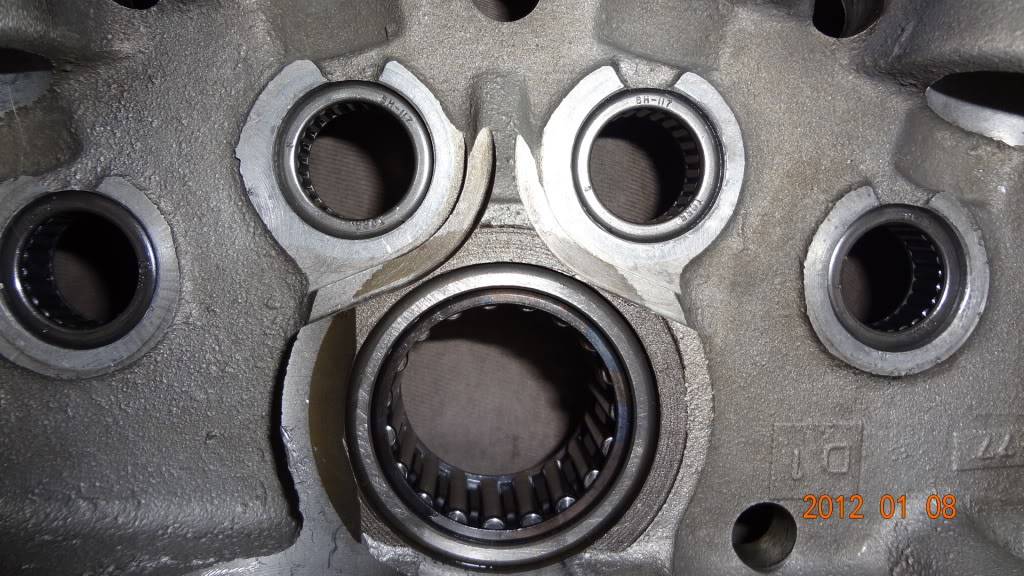 |
| 78 Cam Bearings 7) |
Camshaft Timing
There is no relationship between the timing of the cams and the position of the crankshaft timing mark in the hole. Just line up the cam marks and the pinion gear mark and you are done. 8)
Installing Cams
| Use some clothes pins to hold the lifters out of the way 9) |
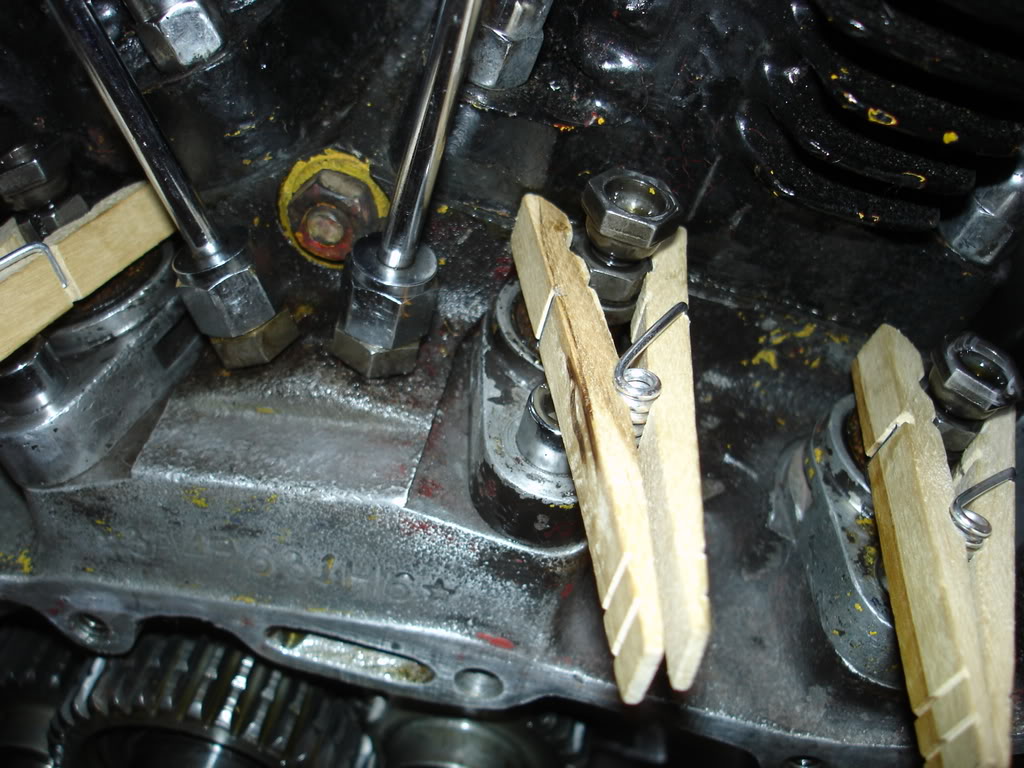 |
Camshaft Shims
- Per Service Bulletin #M-860, the shims for the cams are no longer suggested for use by the MoCo. 16)
- Camshaft shims (Part No. 6769 and 6770) used to control maximum cam gear shaft end play have been discontinued in production engines.
Engineering testing has determined that an increase in the maximum allowable cam gear shaft end play does not contribute to an increase in noise.
Nor does it prove to be detrimental to component operation.
When reassembling engines after service or repair, it is not necessary to reinstall camshaft shims.
Cam gear shaft end play should be measured following the procedure in the latest applicable Service Manual.
Observe the minimum end play specifications of .005“ for all cam gears, except rear intake which is .004” minimum end play.
It is not necessary to measure maximum cam gear shaft end play. - Click here to go to the TSB page in the Sportsterpedia. Click on the “Y” next to M-860 to download the service bulletin.
Gearcase Cover
Sub-Documents
* . . . Gearcase Cover Removal
- Caution: Improperly intermixing components can cause loss of top end oil pressure and subsequent damage. After replacing any of these components, check top-end oil circulation to ensure proper operation.
- Late 1981 and Early 1982 engines may have one of two different types of gear case cover and crankcase set combinations. 17)
- The early style cover, of course, was designed for use with the early style crankcase using the required early style gasket. But, it will also fit the late style crankcase while using the early style gasket.
- The late style cover will not work with the early style crankcase and the late style gasket must be used with it.
- Old crankcase has a small boss with an oil trough (top center) on the cover mounting flange.
- New crankcase has a larger boss with an oil hole (top center) and an extra threaded mounting hole (top left) in the flange.
- Old style gasket (25224-52A) has a short slot (top center) at the oil hole location.
- New style gasket (25263-81) has a long slot (top center) at the oil hole location.
- Old style gearcase covers (XLH 25227-81) and (XLS 25229-81) have a rubber plug on the lower left.
- New style gearcase covers (XLH 25208-81) and (XLS 25209-81) replaced the rubber plug with a hex capscrew and also contains the extra mounting hole (top left).
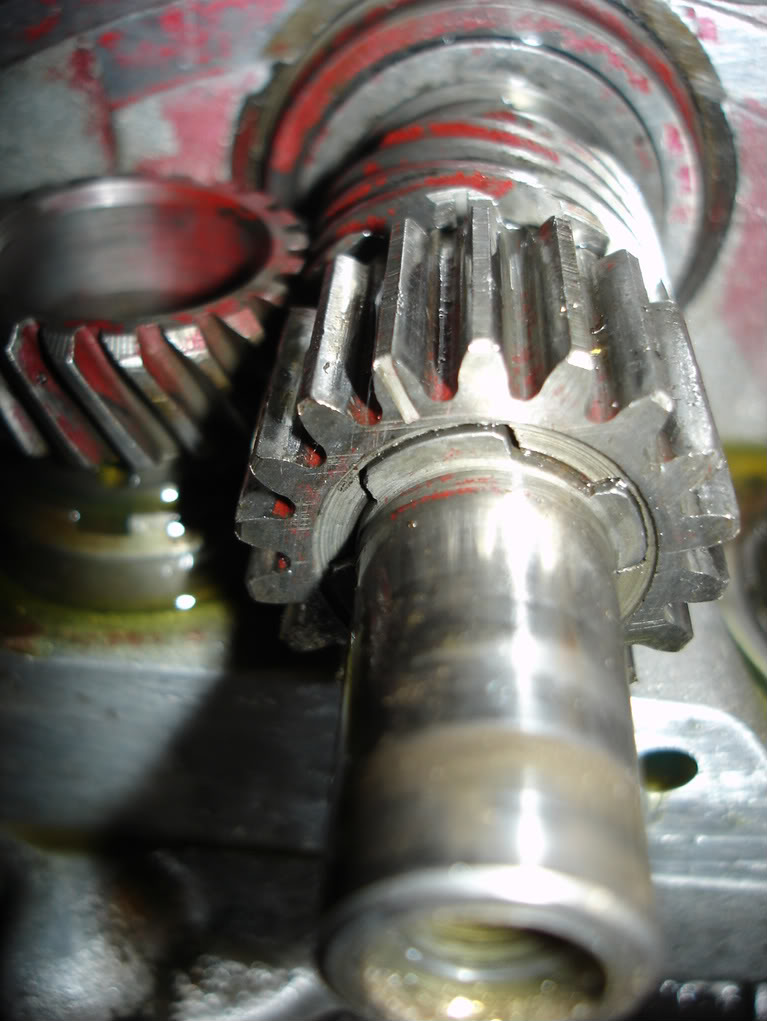
Pinion Gear
Compatibility
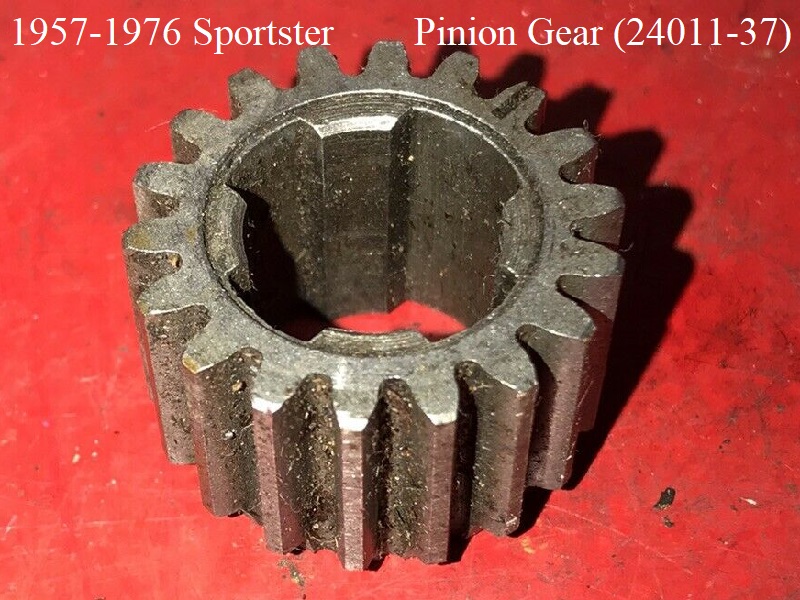
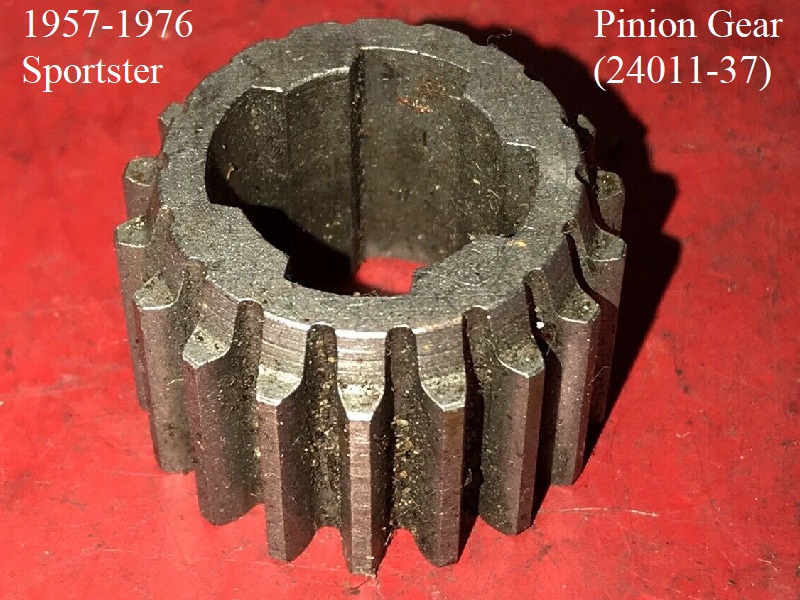
1957-1985 pinion gears have 18 teeth and splines to match the splined pinion shaft.
1957-1976 pinion gears have 4 splines.
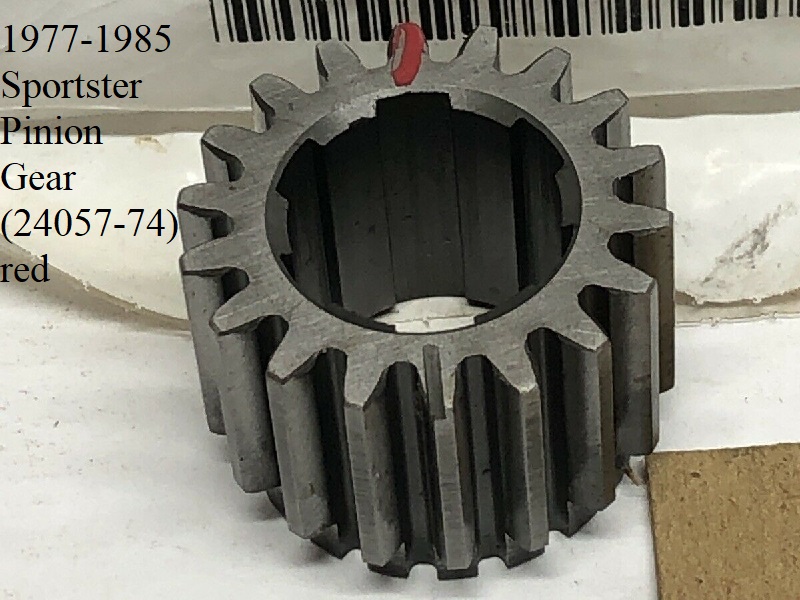
1977-1985 pinion gears have 6 splines.
| Part# | Year Models |
| 24011-37 | 1954-1976 KH / XL / XLH / XLCH |
| 24059-74 | 1977-1978 XLH / XLCH |
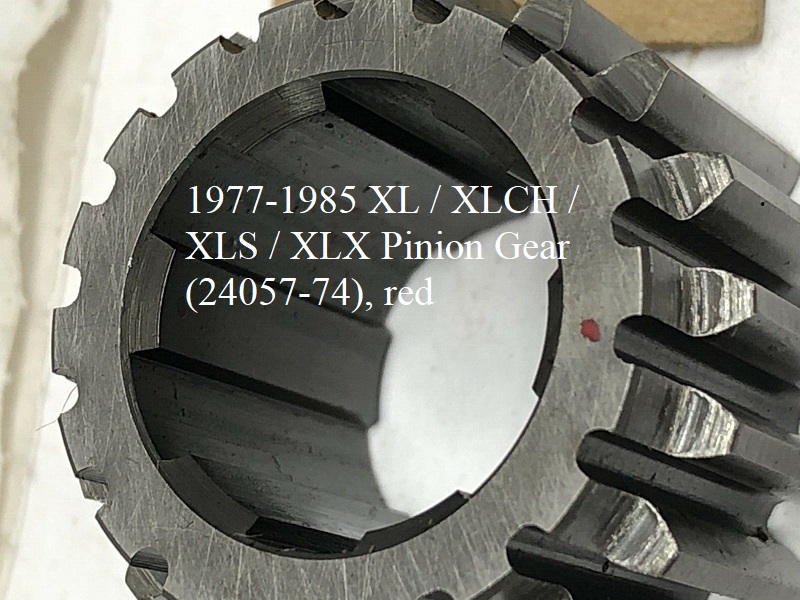
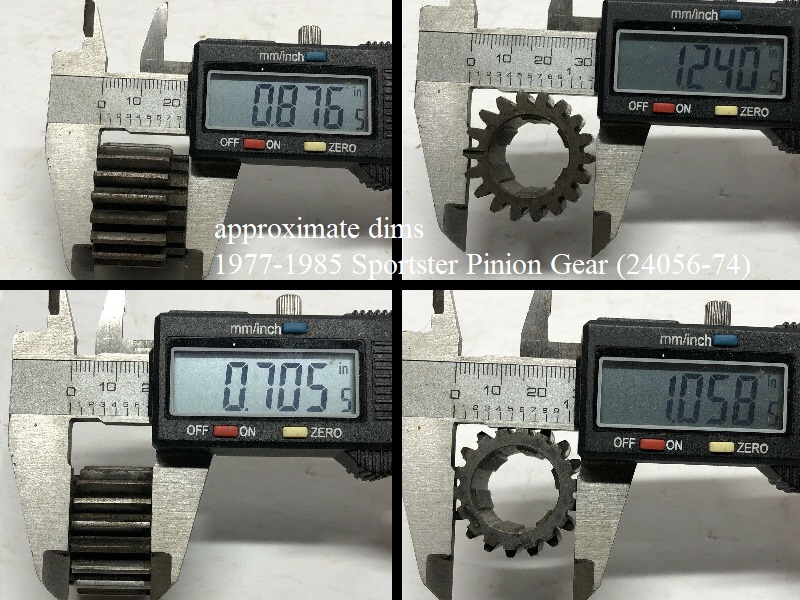
| 24055-74 (brown) | 1979-1985 XL / XLCH / XLS / XLX |
| 24056-74 (blue) | |
| 24057-74 (Red) | |
| 24058-74 (white) | |
| 24059-74 (green) | |
| 24060-74 (yellow) | |
| 24061-74 (black) |
Click on any pic below to enlarge:
| 1957-1976 Pinion Gear. 18) | |
 |  |
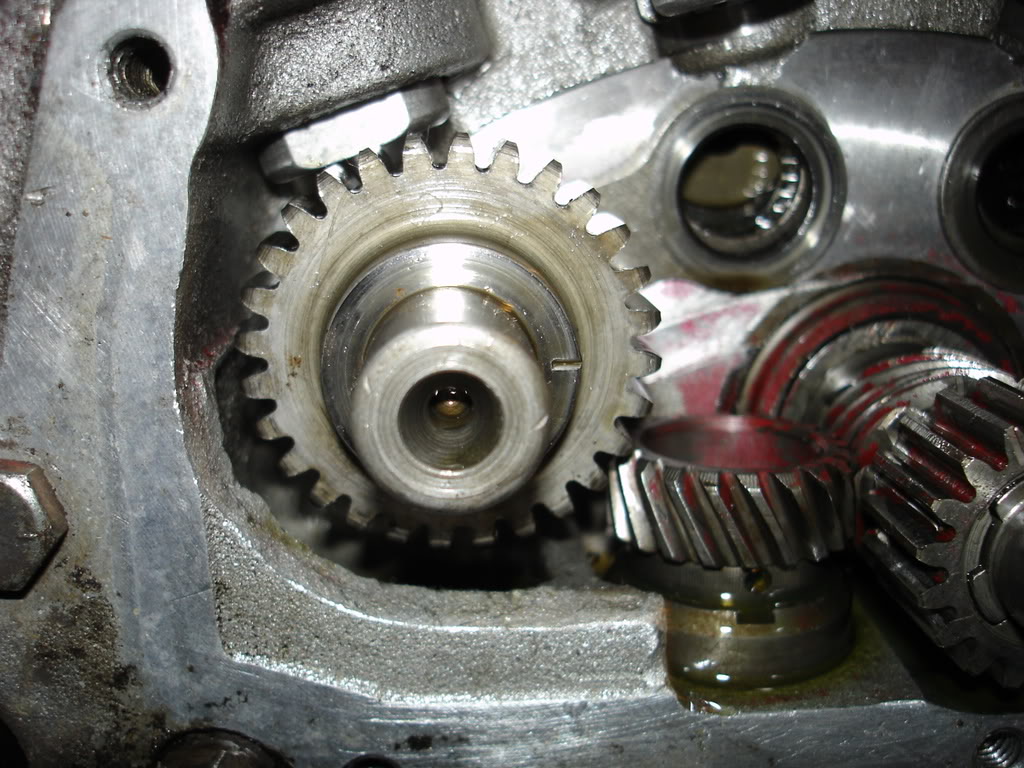
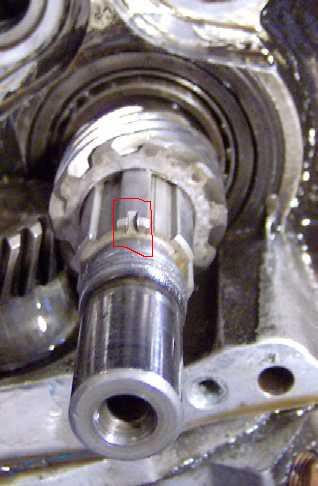
| 1977-1985 Pinion Shaft Timing Mark 19) |
 |
Pinion Gear Fit on Shaft
1957-1976 gear
These are OD measurements of 3 OEM pinion shafts as measured by needspeed (.7844“, .7840” and .7840“). 22)
Comments by Dr Dick;
Installing a tight gear: If you tap the gear on the shaft you are tapping on your flywheel assembly in a direction not supported by anything. NOT recommended.
You should utilize the 5/16”-24 left hand threads tapped in the pinion shaft to counteract installing force (press it in).
The 1957-1976 pinion gear needs to be a tight fit and was a factory press fit. However, it's a common problem to find them loose on a used engine. 23)
The trick in selecting the right fit part during assembly. The gear is supposed to be “size for size” with the major diameter of the shaft splines.
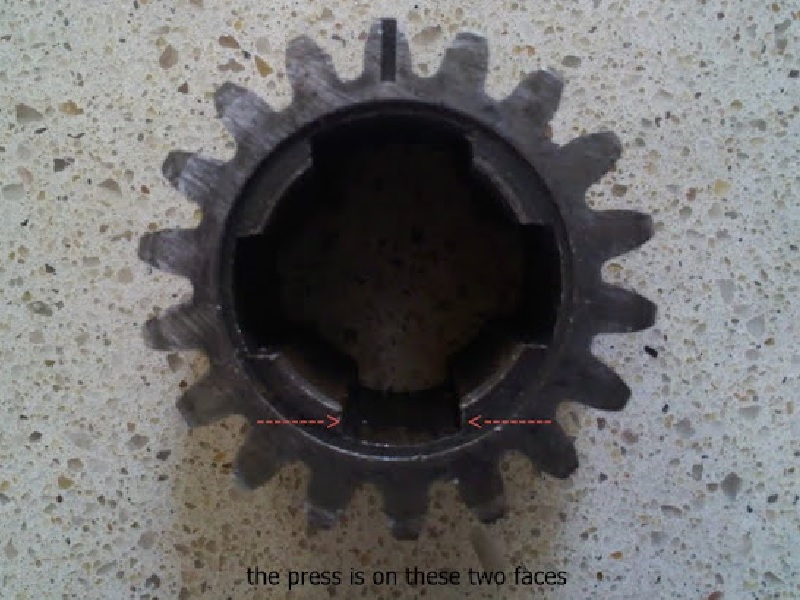
The “press” actually is between the sides of 1 male shaft spline and it's matching female spline in gear.
There is 1 bigger spline so the gear can index for cam timing. The press spline is the one opposite the bigger one.
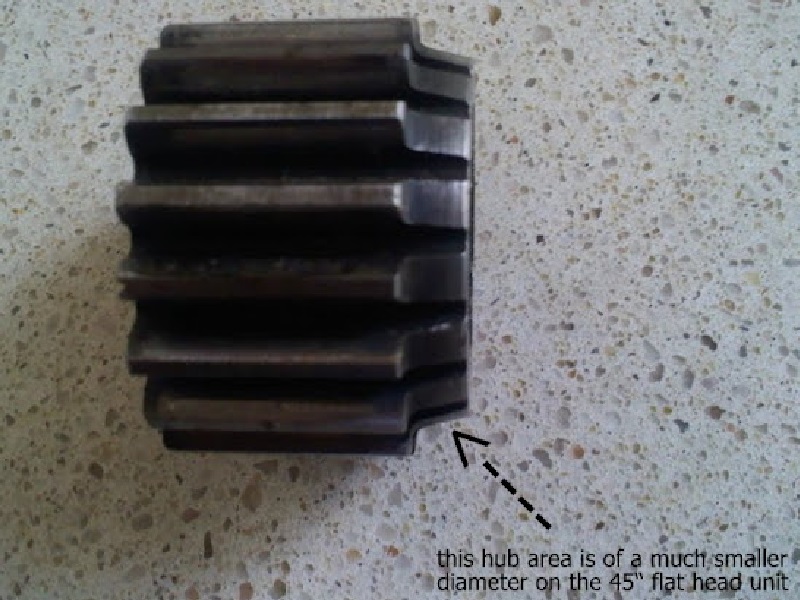
The bad news is the shaft wears before the gear. The XL gear is beefier where the pump drive gear hits the back of the pinion gear.
It's beefier because HD also had these failures.
However, leaving the gear loose makes you 1 of 80% of Ironhead riders. Worse side effect is non stop “tappet noise”.
It can be heard even just pushing the motor over with kicker.
It's usually not “destructive” problem to leave it as is and you can't use an adhesive to “glue” the pinion gear on.
(1) - A loose gear doesn't mess with breather timing too much. A correctly positioned gear sits .312“ above the gasket surface. 24)
The cover bushing face sits .312” below gasket surface. So the gear clears the bushing by 1 gasket thickness.
A loose gear rides on the bushing face. There is virtually little breather timing difference between the tight position and the loose one.
A shim between gears can make up for the loose position. This shim mustn't self destruct and get caught in cam train.
(2) - A loose gear will make a valve tapping type noise. No mechanical problems, just a tad noisy. Looser = noisier.
(3) - The gear press isn't diametrical. Its lateral. When loose both gear and shaft wear.
When a loose gear is removed you will see the wear on shaft spline flanks.
 25)
25)
4) Bikes using stock valve springs can use a 45“ flat head gear to regain some fit.
I have done this many times. Probably 50 times.
These gears are OEM WWII surplus (-29 pn). Many times marketed as XL but they are not the real XL gear. The real xl gears have been obsolete for decades.
Warning: I also had two 45” gear failures. Both big bore strokers. Both heavy springs and cams. Both bikes ridden extremely hard.
Both gears very tightly fitted to unworn shafts. Broken pinion gears make a serious mess of your motor. $$$$
Worst case scenario, you will be looking at new cylinders, pistons, heads, valves, guides, pushrods, cams and cam cover. You don't wanna go there.
I suggest never to use the 45“ gears on unworn shafts. Or with cams that require heavy springs.
1977-1985 Gear
The 79-85 pinion gear is a slip fit and slides up on a timing mark on the pinion shaft and corresponding to a timing mark on the pinion gear.
These must line up. 26)
Tappets (Lifters)
- Reports were received indicating that tumbling stone contamination may have been existent in Late 1982 - Early 1983 engines with crankcase VINs (782025001-783200001). Tumbling stones are used in the polishing process of tappet bodies and occasionally can become wedged within the tappet body. The retention of a tumbling stone in the tappet assembly will cause premature tappet wear. If contamination has occurred and tumbling stone material is allowed to circulate through the engine for an extended period of time, some engine damage will eventually occur. Affected engines will first show excessive wear of one tappet guide assembly. 27)
Installing Tappets
When installing the tappets, the valve may be recessed in the head a bit. 28)
You can gently lever up on the pushrod to allow it to pop in the tappet cup.
Just be sure you have some free play remaining once it is in the cup and before clearance is adjusted.
An open end wrench will work, or carefully with a pair of smooth sided needle nose pliers.
You just need to overcome some valve spring pressure.