Table of Contents

REF: Carburetor, Intake Manifold & Exhaust
Aftermarket Air Cleaners and Modifications
Air Cleaner
Sub Documents
See also Breather Vent Relocation in the REF section of the Sportsterpedia.
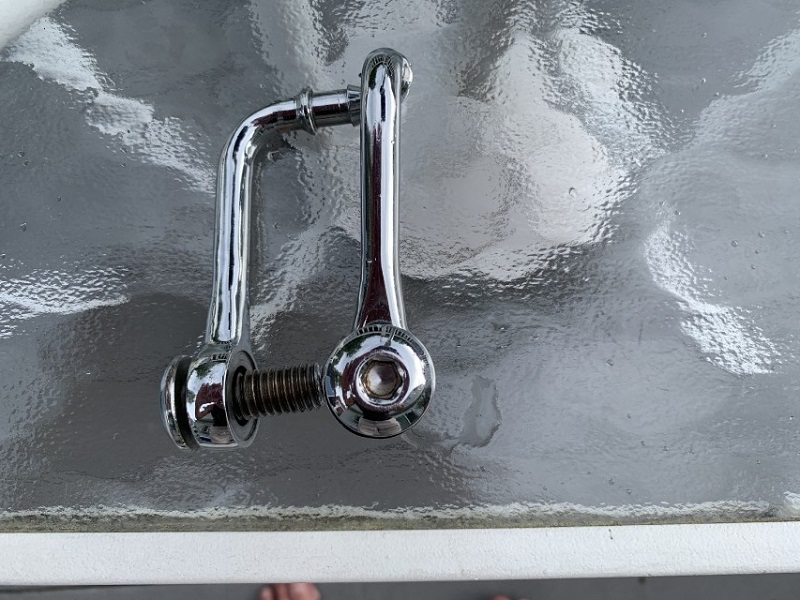
Some air cleaners are not set up to allow for the breather bolts into them and are only held on by the small front bolts. 1)
For these breathers you would need to get a head breather kit and carb support bracket.
The breather kit routes the head vents to the ground (or atmosphere) while the carb support bracket keeps the carb in the intake.
Below is a breather vent re-direction on an EFI model. 2)
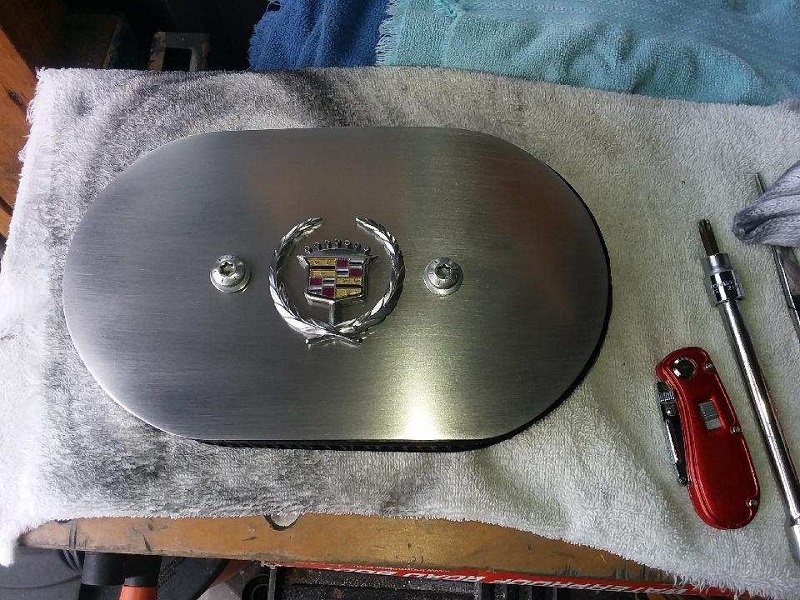
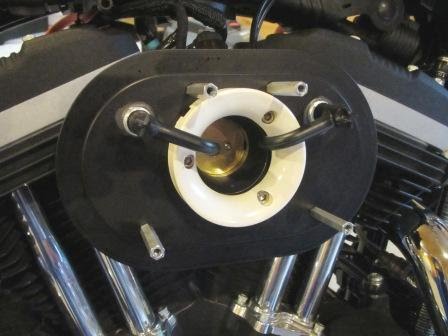
A small amount of crankcase oil was dripping into the A/C on a Figure Machine/Engineering air cleaner assembly.
This air cleaner uses the stock Harley-Davidson breather tubes.
There was no drip into the stock a/c but using the same breather tubes, it did with the afrtermarket A/C.
This mod doesn't bypass the air cleaner.
It doesn't solve the problem but rather just hides it.
You still have the excess oil but this will arrange for it to run straight into the intake and away from the A/C.
The problem is that the oil vapor needs to make a 180 degree turn, up and over the lip of the kit's bell-mouth, into the throttle body.
A rubber hose would work, except the radius of the curve is too sharp due of the limited space inside the filter.
It'd take some sort of semi-rigid tube.
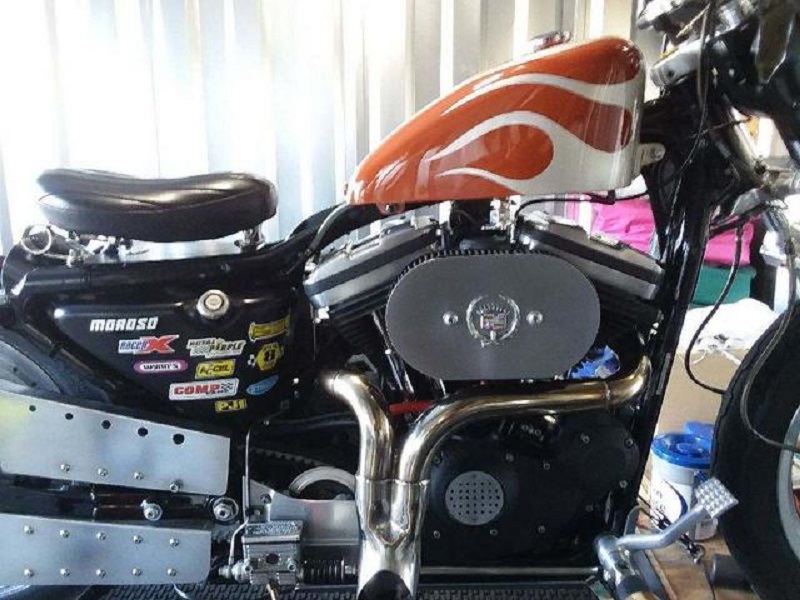
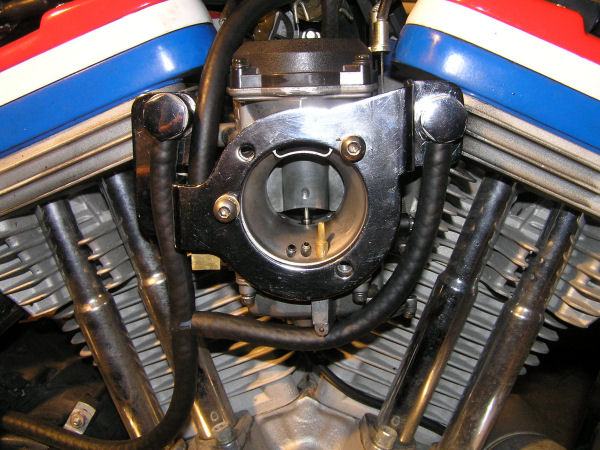
The Screaming Eagle Stage 1 air cleaner deals with the venting issue using two small preformed rubber tubes or hoses.
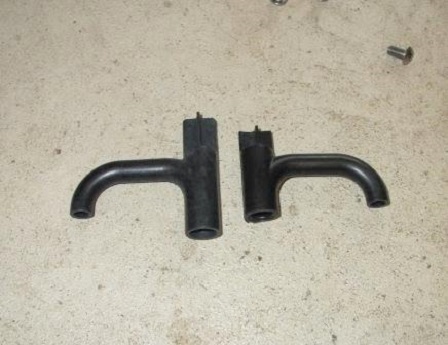
The Figure Machine air cleaner utilizes the stock Harley breather hoses (63520-04).
The hoses fit perfectly over the breathers.
The only problem is that about 3/8“ needs to be trimmed from both ends to fit the different internal dimensions of the filter/air cleaner.
(The photo above shows the stock part on the left and the trimmed part on the right.)
Once trimmed to size, the hoses are positioned at the mouth of the throttle body.
Big Sucker w/External Breather

How to modify the Big Sucker to vent to the atmosphere.
https://www.xlforum.net/forum/sportster-motorcycle-forum/sportster-motorcycle-intake-and-exhaust/sportster-motorcycle-air-intake-carburetor-efi-fuel-and-exhaust/21180-poll-big-sucker-owners-plz-respond (There are a number of mods listed in this thread)
Commentary Posted by Dodgenbullets (See Post #17 & #19)
After playing with different ideas, I found an easy fix for the Big Sucker intake. Your EVO will vent 100% of the crank case pressure to the atmosphere. IMO, the 1\16 hole in your stock breather bolts is not sufficient. Due to restrictor bushings in the Big Sucker, it isn't any better.
I was picking up some fuel line at an indy. I asked for some hose clamps and he opened a drawer with all kinds of neat looking stuff most call misc. hardware. There was various banjos and breathers. After blowing 2 sets of rocker cover gaskets and repeatedly spraying my slide with gumout I had it. First thought was to drill holes in the BS and put bleeder screws in the passages. Next was to use shortened stock bolts with vacuum lines in them. I remembered the bolts in the drawer and said, now why didn't I think of that sooner. It works perfect.
After doing this mod, even my bad rocker cover gaskets stopped leaking. One reason why I feel that crank case pressure is not fully expelled with the Big Sucker. Ness is only doing what HD is as far as the size of the breather holes. When Ness first introduced this intake you had to put the restrictor bushings in the banjo bolts your self. If I knew any better I wouldn't have.
The Mod:
For this mod you need HD# 3577 (2). These are breather bolts for early EVO motors (not banjos) and cost about $3.50 each. Next, is part# 24922-93. These are the boots that will slip over those bolts. 5/16 OD vacuum line, a Tee fitting and 5 fuel injection clamps. NAPA auto parts is your best bet for non HD parts. The boots are pre-bent for another application. You need to snip them leaving an inch of the tubing.
Remove the banjo bolts 1 at a time and thread in its place part# 3577. Place one of the original O rings on each bolt. The side benefit here is these bolts have Allen heads. No more trying to find a thin wrench that fits between the backing plate and it's mounting sleeve . While your at it, take those O rings to Ace hardware and get new ones. I went with O rings that were slightly thicker, and a slightly larger OD diameter, same ID of course. The new bolts will plug off the old oil vent passages in the Big Sucker so nothing needs to be done here.
Press the boots on the new breather bolts. You can see in the pics the air filter will keep them in place. Place a fuel injector clamp on each one. Now slip a 5-1/2 inch piece of 5/16 vacuum line inside the one inch tail you left on each boot. Clamp it.
Now point the front breather hose toward your front axle and the back one to the rear axle. Have them meet in the Tee fitting under your float bowl. Run the single line off the Tee along side the carburetor overflow line.
You don't need to run a filter on this or any other breather. That is if your vent line is 12 inches or longer. It's just not necessary. Keep in mind your stock breather holes were just 1/16 of an inch. This is a huge improvement.
Here's an opportunity to paint the backing plate. Mask off the Air cleaner side and the area on the back where the carb gasket sits. I used HD aerosol part# 98606DH the same color as my motor. When your done this will look good. No horseshoe, hoses, or filters in sight. It looks very much like a factory set up.
A variety of air filters and covers can now be used. . I interchange between a round cover and the “Ham Can” while using an over sized K&N filter. To bolt up the stock “Ham Can”, take the bracket off the factory element and simply put it on the BS filter. Also, you can buy a replacement filter for the stage 2 Big Sucker and put it in your stage 1 kit. The filter element is the only difference in the stage 1 and 2. There's one replacement filter for all stage 2 applications. 3 holes match the CV 40, the others plug off. Now go try.
Running the Breather Hoses (91 and UP)
How the umbrella ( head breather) valves work
Read more about the breather system here: Evo Crankcase Ventilation.
The breather valves are located in in the rocker box with their air outlets in the heads.
The breathers are one-way umbrella valves.
These exit crankcase vapors through vents in the top of the cylinder head into the air cleaner.
On each piston downstroke, crankcase pressure (air and oil mist) is routed up the pushrod tubes into the rocker box.
Collected air pressure and oil mist in each rocker box is routed up into a sealed cavity in the lower portion of the box.
This mixture passes up from underneath a rubber one-way valve sitting over the cavity inlet in each box.
The oil is designed to separate from the air by hitting the underside of the umbrella valve and dropping back down into the lower end.
Air pressure is designed to continue up past the umbrella valve and exit the hole in each head on the intake valve side.
Air pressure escapes the head through the hollow bolts (one in each head) that hold the air cleaner mount.
Vent Line Routing
Above vs Below the Head Vents
There has been debatable ways to route the vent lines off the heads when doing air cleaner mods.
However, exact line routing comes down to function over fashion.
While it may look better or cleaner for the lines to be routed above the air cleaner;
Doing so doesn't make for good functioning of the breather system.
The air / oil that gets blown out is a combination of crankcase pressure and engine blowby.
Blowby gasses produce a corrosive vapor which doesn't need to go back into the engine.
It'll simply pool in the heads / vent lines.
As you can see from the drawings below, expelled air leaves the rocker boxes by running downhill to get out the vent holes in the heads.
If the vent lines are piped above the exit point in the heads, oil out of suspension will not drain back into the engine.
The oil would have to run uphill to get from the heads to the rocker boxes and into the lower end.
So there is no functional advantage to running the lines higher than the head vents.
 5)
5)  6)
6)
The air coming from the head vents has fine oil mist particles in suspension with it.
When that air cools, the oil mist falls out of suspension and collects in the vent lines.
Pointing the vent lines straight into the A/C (OEM) or down into a catch can allows the oil out of suspension to leave the vent lines.
However, pointing the vent lines upward of the head vents allows oil out of suspension to collect in them.
Once there is enough liquid oil in the upward breather tubes it will act just like the trap under your sink.
It may block air from getting out until the engine (on startup) builds enough pressure to push the liquid and bubble up to the top.
So it may affect crankcase pressure slightly until the lines are cleared.
Or the trapped oil may simply be blown out the vent lines in globs.
Vent lines mounted low allows oil to leave the heads.
 7)
7)  8)
8)
Vent lines mounted high tend to promote a mixture of oil and condensation settling near the head connection of the hose.
 9)
9)  10)
10)