Table of Contents

REF: Electrical System - Sub-17A
LED VOES Indicator Light Install
Article by biknut of the XLFORUM 1)
Note: Do this mod at your own risk.
Also, please read the review at the bottom of the page before buying parts.
A certain amount of electrical knowledge is required for success of this mod.
You can put this circuit together on a PC board, solder everything together and tested 'er out. 2)
Apply a +12v to the ckt. (8 AA batteries in series); +12v to +12-terminal of the ckt, neg. battery to ground terminal and Voila, the red LED lights up.
Then I apply ground (neg battery)to the terminal labeled “ignition”, once again, Voila, the red LED lights up and the green LED lights up.
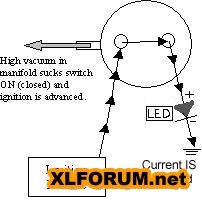
I thought it'd would be nice to have a indicator light to tell you if your ignition is working properly with the VOES. 3)
In case you're not familiar with the VOES function, it works like this.
VOES stands for vacuum operated electric switch. The ignition on solid mounds has 2 different advance curves.
One curve advances to full advance quickly when running under light load to improve fuel mileage.
The second curve advances more slowly for when you're accelerating under a heavy load, like when you need to dust a BT.
The VOES switch is connected to the intake manifold either directly or by vacuum hose.
It senses the difference between light throttle (high vacuum), and full throttle (low vacuum).
It's a normally open switch. This means when your motor is not running it's open.
When you start the motor, vacuum closes the switch, putting the ignition in the fast advance mode.
If you grab a big hand full of throttle, the vacuum goes low, and the ignition switches to the slow advance curve (acceleration curve).
If the VOES doesn't react fast enough, you get a crack of piston ping whenever you twist the throttle.
That's the reason for adjusting the VOES Read more on VOES operation, testing and adjustment here in the Sportsterpedia.
What I'm going to try to do is install a indicator light to let us know when the switch operates.
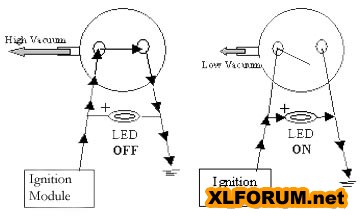
These are a couple ideas found on the net (bad ideas).
One recommends putting an LED in the VOES circuit in series between the VOES and chassis ground.
This is not really a good idea because it's possible your ignition might see the LED's load the same as an open switch and never allow the ignition to change advance curves. Even worse it could cause the ignition to chatter back and forth between the two curves, possibly damaging the ignition or your motor.
The other recommends just the opposite by putting the LED in parallel to the VOES.
This is even a worse idea, because the ignition might see the LED's load all the time and never pay any attention to the VOES. Also it still might chatter between the two curves causing damage.
| Examples of what not to do. Either of these ideas can be dangerous to the ignition.4) | |
 |  |
Parts and Construction
However, this is a workable solution:
Some testing was done on a Dyna 2000i ignition. The wire that comes from the ignition to control which curve you're in is very sensitive.
This wire comes from the ignition, goes through the VOES, and then goes to ground. Mine had about 9v on it ungrounded.
When the wire grounds, the voltage goes way down. We had no easy way to tell how much current draw there is on this wire, but it's not much.
The idea was to isolate the current draw of the LED from the ignition and use a dual color LED for an indicator light for both curves.
The dual lights aren't necessary but it's a lot cooler to watch the light change colors.
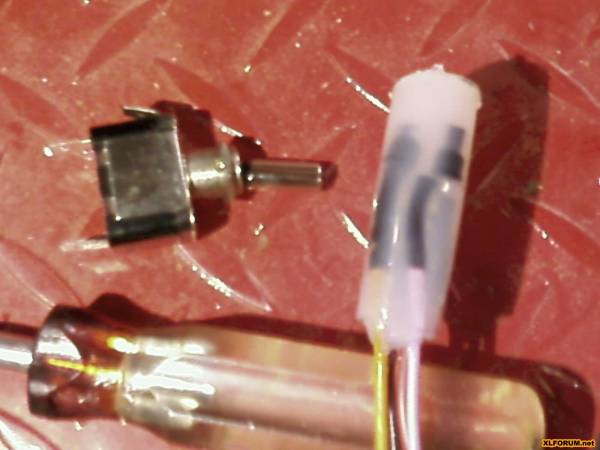
A toggle switch was also added to the circuit to disable the VOES altogether.
It turns out when the toggle switch is open the LED turns a third color, so you can also tell when it's disabled.
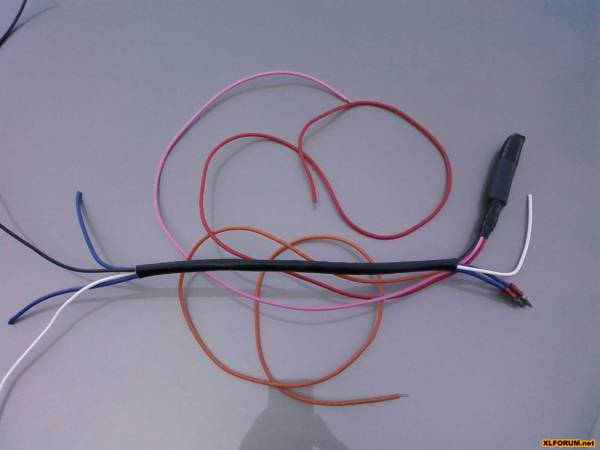
Here is the LED assembly wiring and hookup:
All the parts are easy to acquire and assembly is simple enough, but it will require a fair amount of soldering skill.
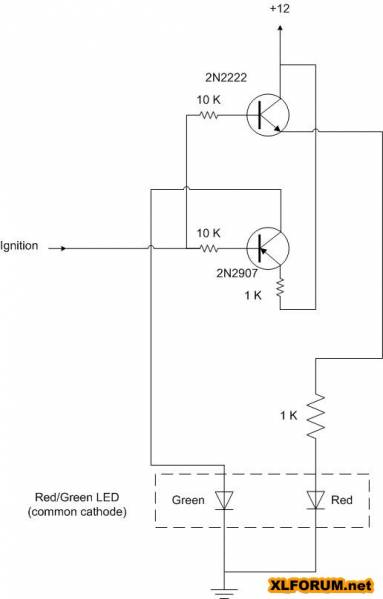
Not counting the parts used to house and mount the devise, there's only 7 parts.
All the parts are listed on the wiring schematic below:
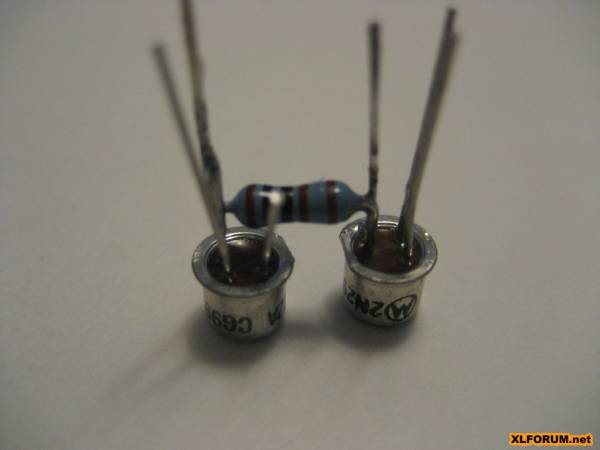
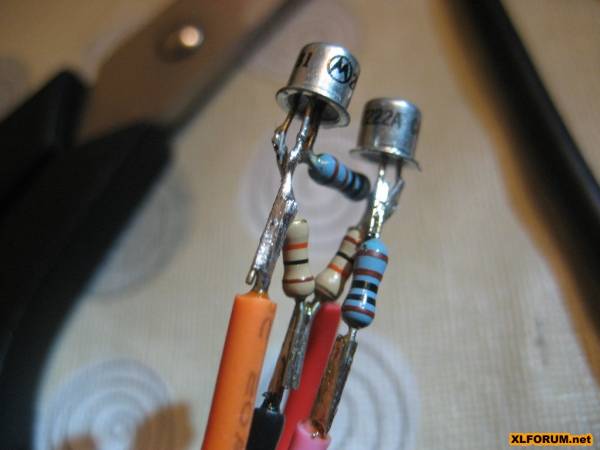
(2) transistors - 2N2222 and 2N2907.
The ones we used are metal clad military spec in order to handle high heat since I chose to mount the devise in between the V.
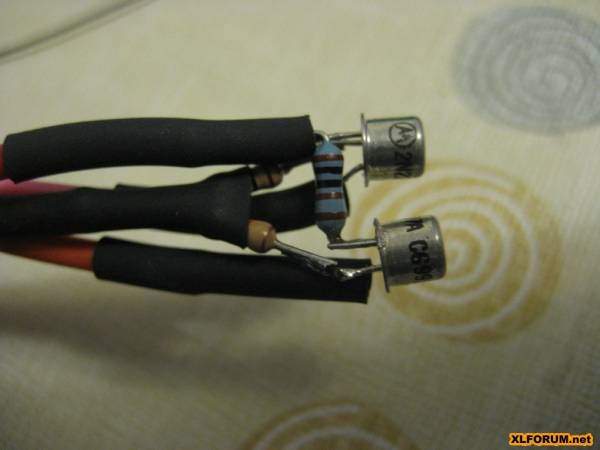
The metal casings have to be insulated from touching each other. That's why we shrink wrapped them.
(2) 1K resistors.
(2) 10K resistors.
The only other parts are a dual color LED, wires, and shrink wrap. The toggle switch is optional.
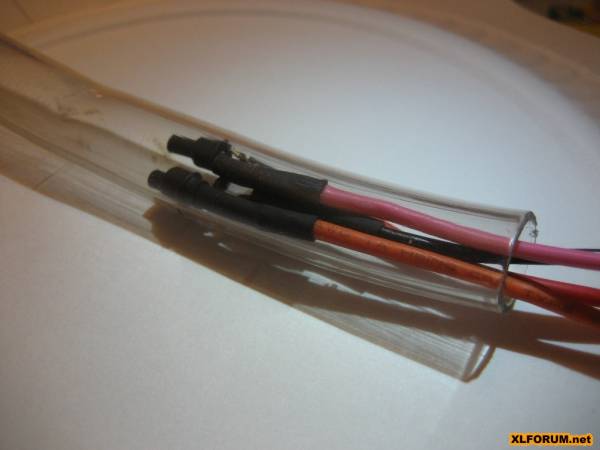
The housing to put it in can be made a lot of different ways. I used 5/8“ OD plastic tubing.
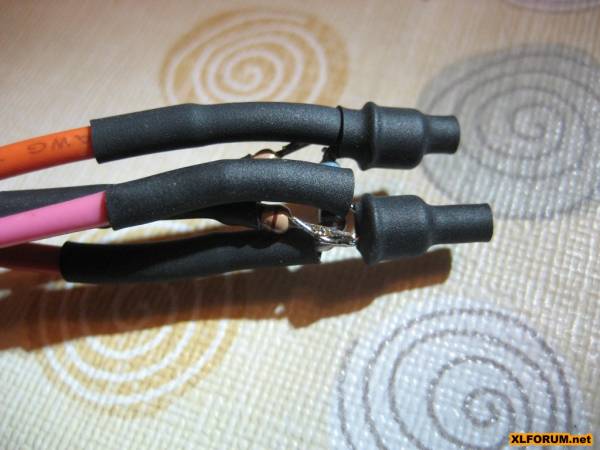
Once I slid the devise into the tubing I filled it with silicone sealer.
After it dried I used 3/4” shrink wrap to cover the entire devise. Only the wires stick out.
After that all you'll need is some wire ties and a few wire nuts. Maybe some electrical tape.
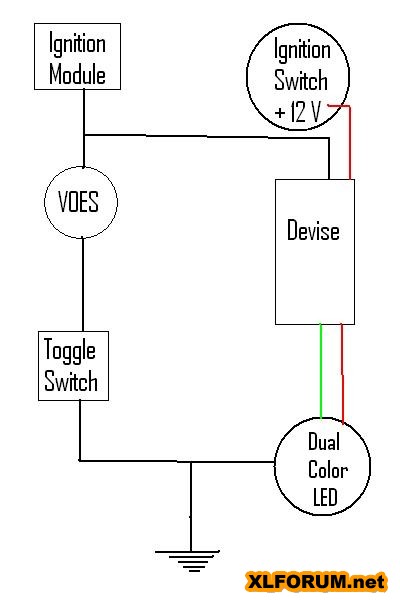
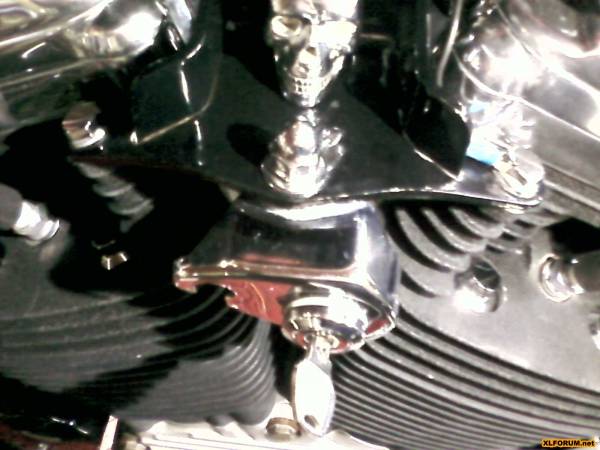
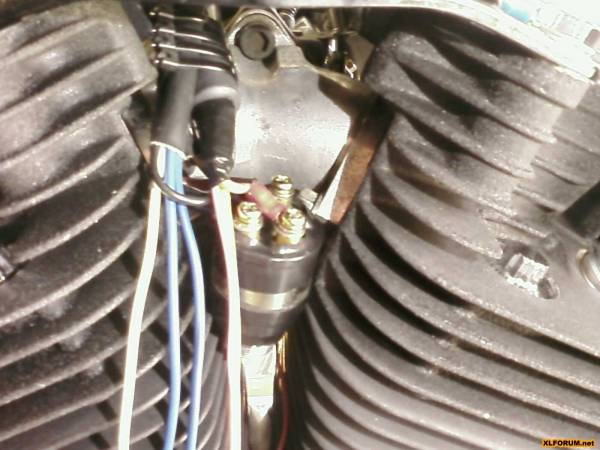
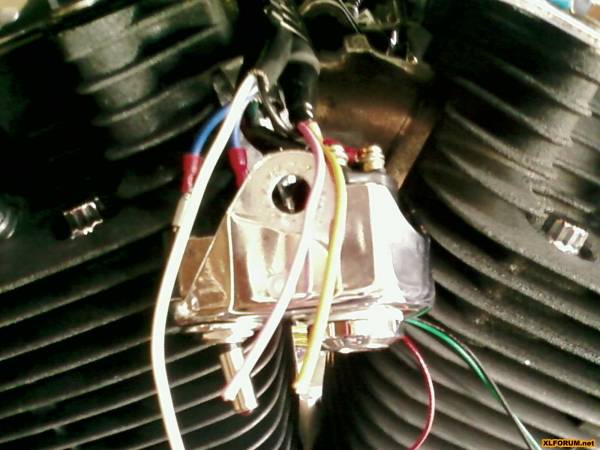
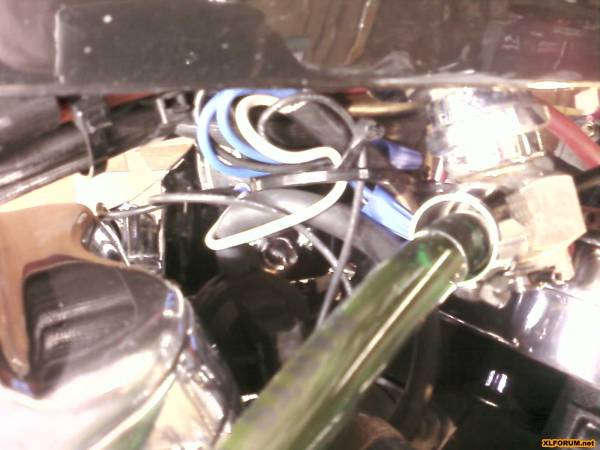
Here is the installation:
The assembly will mount to the ignition switch for visual just by glancing down when riding.
With the ignition it will turn red and green with the motor started.
Flipping the toggle switch will disabling it and the LED will change to orange.
After the silicone dried, the whole thing was covered in shrink wrap.
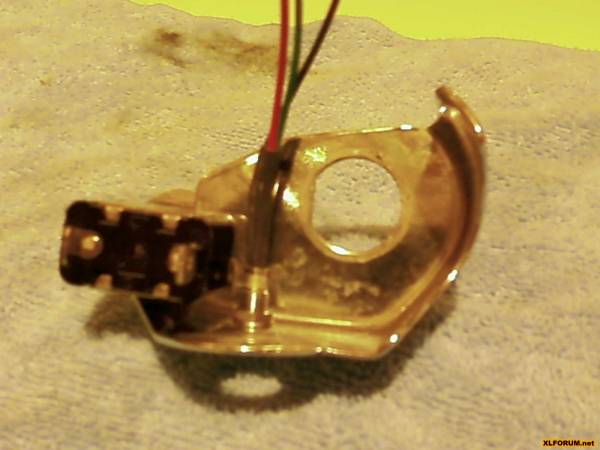
I used 4 wire ties to hold the devise to the wire conduit that connects to the ignition switch.
I also ran an extra conduit from the devise over to the VOES.
I tapped 12V from the ignition switch to power the devise. At the same time I hooked up the wires going to the toggle switch.
Next I used wire nuts to hook the LED to the devise.
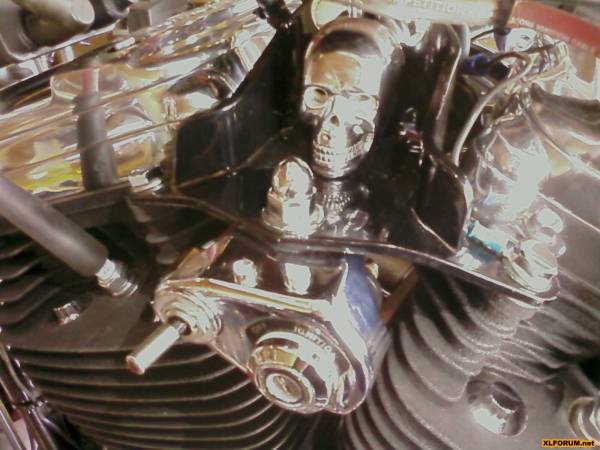
That completed the ignition switch side so I installed the mount back in place then I moved around to the other side of the bike to hook up the VOES to the devise.
Since this is the first proto type and there's no instructions I had to try a little trial and error to figure out the best way to hook this thing up.
My first try didn't work right when the toggle switch was opened. The LED still changed colors. Second try was the charm.
After I satisfied myself it was working right I used wire ties to get the wires held in place under the gas tank.

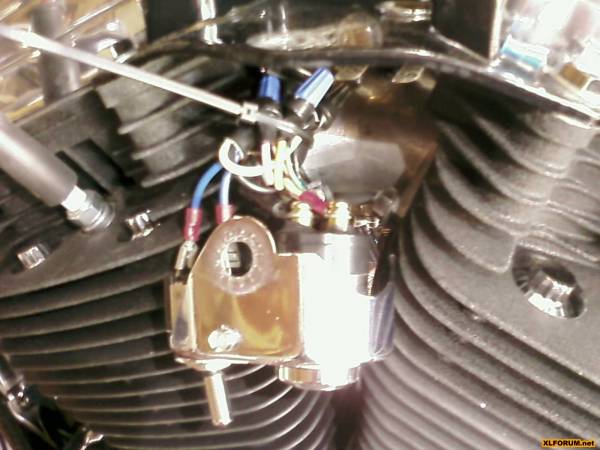
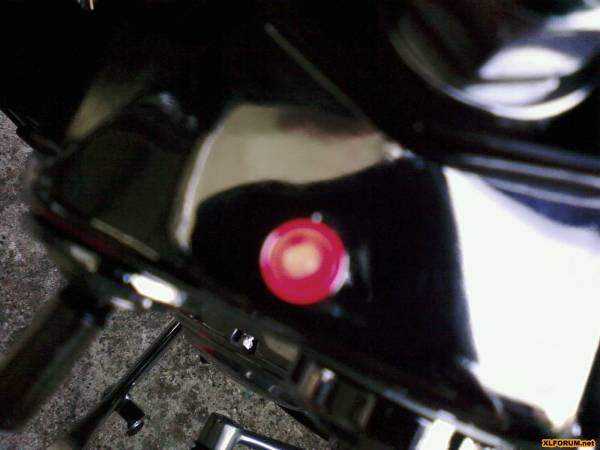
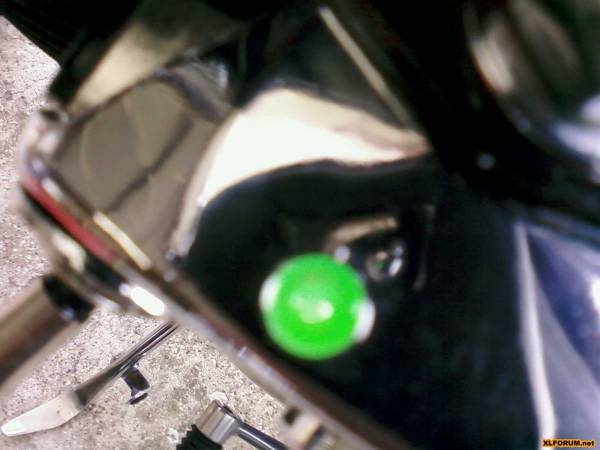
Finished Product
It took a little trial and error to figure out the best way to wire it up. It works as expected except it's only 2 color.
Red when the VOES is open, and green when closed.
When I turn on the ignition key the light turns red. As soon as the motor starts it changes to green. If I open the toggle switch it's the same as an open VOES, so the LED stays red all the time, and the ignition stays in the slow advance curve.
Review
On my first test ride couldn't tell any difference in the way it runs, except for the LED.
Of course, this is a good thing. It's nice to be able to flip the toggle and eliminate the VOES if I want.
As sensitive as mine is adjusted though it's kind of unnecessary. Maybe I'll adjust it back like stock so I'll have an excuse to use the switch once in a while.
After one test ride and I've already learned some useful information. I have my VOES adjusted a little too sensitive, because at idle it chatters the VOES.
In other words there's not enough vacuum at idle to hold the VOES closed constantly. A hundred rpm higher and it holds green.
It doesn't take much throttle to change it to red either. I'm going to have to adjust the VOES back a notch.
I adjusted it as far as it would go last year. Without this devise I would have never known what it's really doing.
About the only thing I can find to complain about is the LED isn't very bright in sunlight.
It's not a big issue though because after you know the VOES is working right you don't really need to see the light working anymore. At night it won't be an issue.
But here are a few ideas you could try.
- Substitute a 500 ohm resistor for the 1K ones. This will make the LED a little brighter, but not much.
Don't worry, the transistors can handle the extra current. In bright sun probably won't make much difference though. - Instead of a dual color LED use 2 separate single color ones, or just use one single color LED, and cut the parts list in half.
It's not really necessary to have 2 colors. One color going on and off would do the same thing.
The advantage to a single color LED is they're usually a little brighter. - Don't do anything, It's already good enough.
Once you use the LED to set up your VOES you don't need to look at it anymore, so who cares. At night it already looks real bright as it is.
After a few weeks, it was obvious the adjustment I made previously to the VOES using only the light as a guide turned out to be a bust.
After the weather warmed up I started noticing a little piston ping at low engine speeds under light acceleration in the upper gears.
This would be when you're accelerating enough to put a little load on the motor, but not enough to trigger the VOES.
The difference between adjusted right, and not, is just too fine an adjustment for the light alone.
It's too easy to trigger the VOES no matter what pressure you adjust it to.
When I checked to see what pressure the VOES was switching I found I had set it too low at 3“ mercury.
Using a vacuum pump to adjust it like recommended, I adjusted it to 4” mercury, and that works great with no trace of piston ping.
That's also about where I had it before installing the light.
Just looking at the light, you can't tell any difference in the way the light works before or after the adjustment.
So in the end my light operates great and looks really cool, especially at night. But it doesn't do much.
The only purpose it serves is to let you know the VOES is working without resorting to using an ohm meter.
And it's really cool to show off since nobody else has one. That's about it.
After testing I am 100% sure it works properly without interfering with the ignition operation.
With the VOES set at 4“ it's like a hair trigger, but yet cruising on the highway at 65 at light throttle there's no problem with intermittent switching.
With the switch set at 4” there is some flashing at idle mainly after initial start up when cold, but I don't think it hurts anything.
Obviously it's always done that for years, but I didn't know it.
After the motor warns up I don't see it doing it much. It never does it under load.
I'm sure everyone that's set their VOES to 4“ or above is experiencing the same thing, but they're unaware of it.
techtalk:ref:elec17a