Table of Contents
This is an old revision of the document!

REF: Oiling & Lubrication - Sub-01A
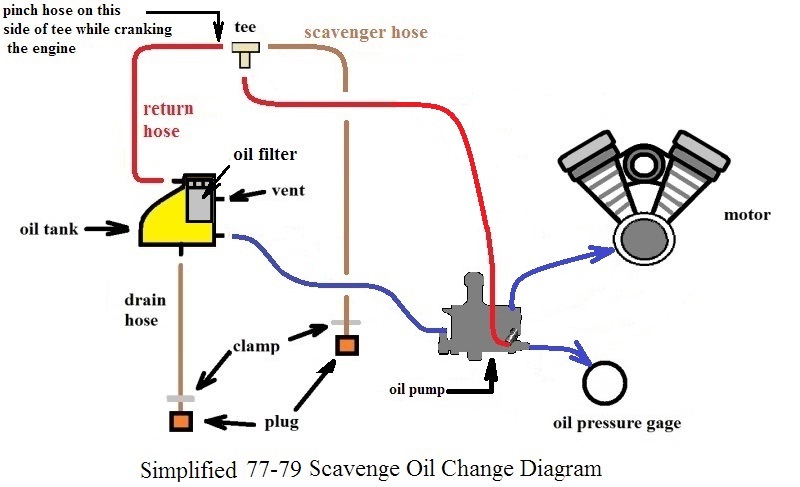
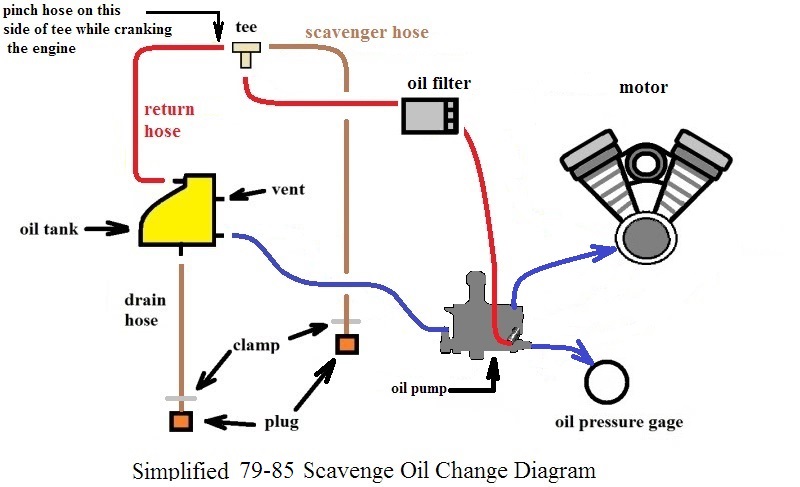
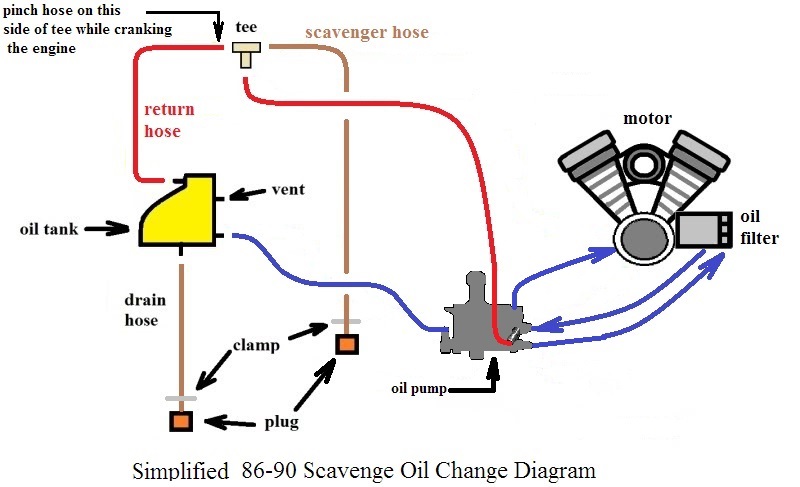
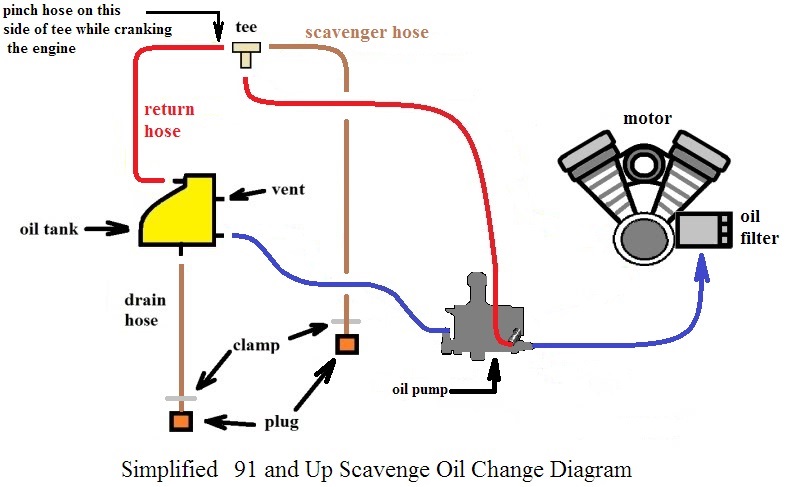
Performing a Scavenging Oil Change
When draining oil from the oil tank, all of the oil will not return to the tank.
There is a certain amount that will stay in the engine and mix with the new oil after a regular oil change.
When doing an oil change per the FSM;
There is oil left in the pump, in the feed hose to pump and filter, in the passages after the filter, in the sump that wasn't pumped out and in the return line to the tank. 1)
By scavenging the system you get the cumulative total of the oil forced out of the engine.
At most there's a tiny bit left in the return hose where you remove or pinch it off and the tank……maybe an ounce.
Bottom line, there can be 20-24 ounces of dirty oil left by doing a regular oil change.
The difference in the oil's clean appearance by scavenging vs. regular change is very noticeable.
However, a normal oil change won't remove all of the oil from the engine.
This will not drain oil from the feed / return lines to the engine.
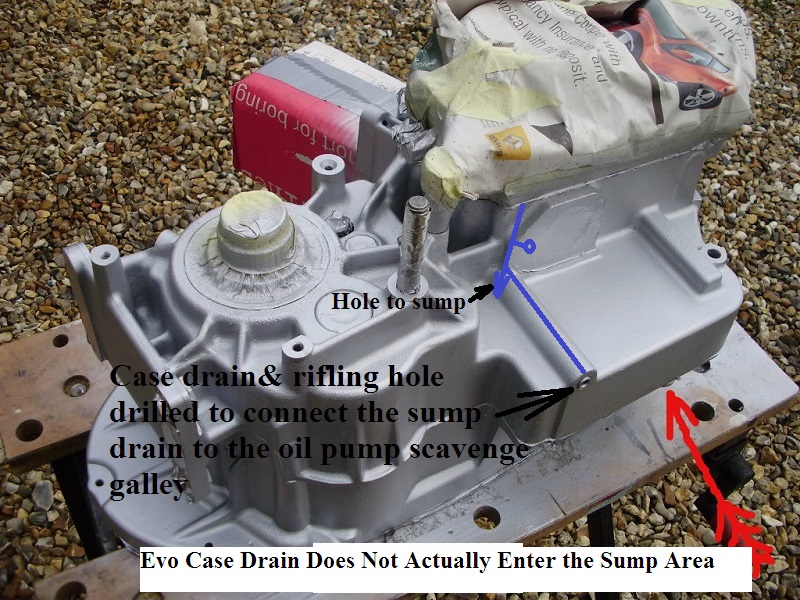
The Evo case drain will not drain the sump as the drain hole doesn't enter it.
Therefore, there will be a certain amount of used / old oil that will stay in the system and will mix with the new clean oil.
This will also dilute the new oil to an extent.
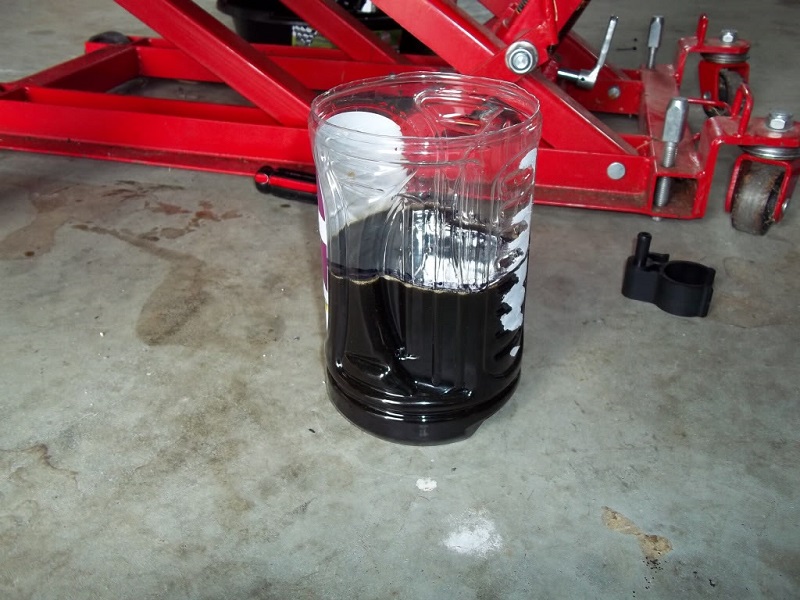
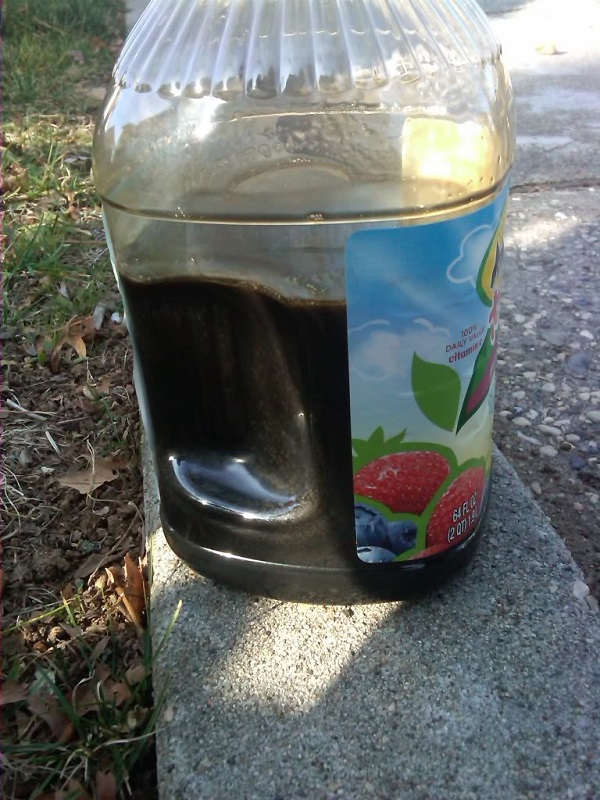
| The Evo case drain doesn't actually enter the sump 2) | This is how much used oil that could be hiding in the sump / lines (24oz in this case). 3) |
 |  |
| 1.3 quarts in this case. 4) |
 |
Some would prefer that all of the used oil be removed during an oil change.
Below are some ideas on how to accomplish this.
Scavenge by Removing the Oil Return Hose
The easiest way would be to disconnect the return oil line from the tank to and spin the engine / oil pump and let the remaining used oil collect into a container.
- Drain the old oil from the tank using the drain hose as usual. 5)
- Install the plug on the end of the hose and add two quarts of your favorite oil to the tank.
- Remove the return line from the oil tank (be careful not to break the connectors on plastic oil tanks).
- Remove the spark plug wires and close the gas petcock.
- Secure the return line so the oil goes in a waste container (be sure you can see the oil pouring out of it).
- Crank the bike with the starter until you see clean new oil coming out of the hose end (average of about a quart).
- Change your oil filter and turn the motor over a couple revs and reinstall the return line to the oil tank using a new clamp (spring or worm clamp as you prefer).
- Reinstall the plugs wires, open the gas petcock and start the bike for about 20 seconds to get oil circulating.
- Fill the oil tank to bottom line of the dip stick and go for a little ride to fully warm the engine.
- Then check the oil dip stick to see if the oil is between the two oil marks.
- The oil line should be between the two marks on the stick. Add oil if necessary.
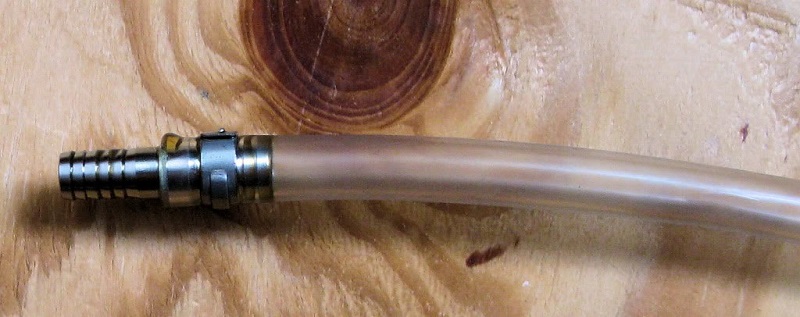
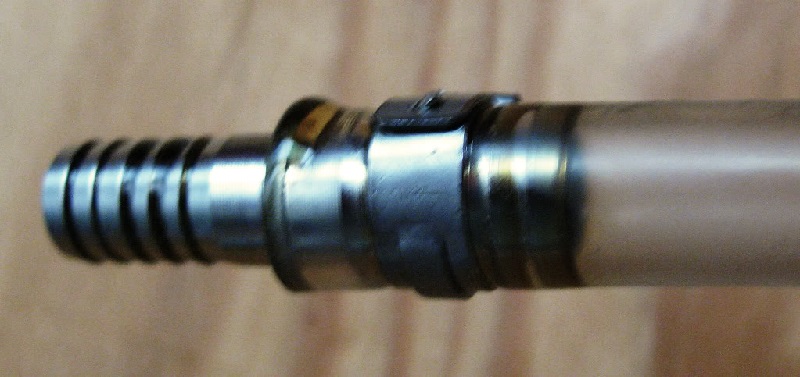
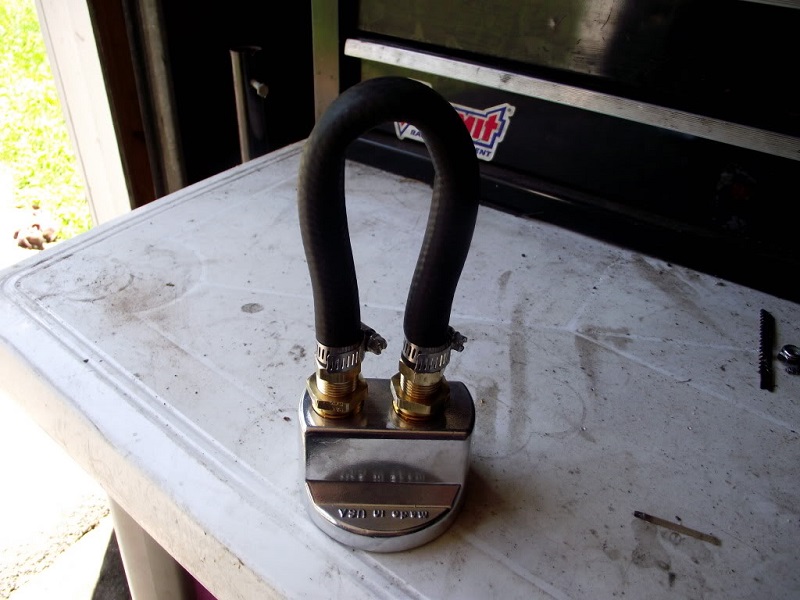
| Remove the return line from the tank Add a fitting and hose extension to a container. 6) |
Scavenge by Using a Puck
Rogue Chopper Sportster Scavenger Kit
The Rogue Chopper site sells an oil scavenger system for 2004 - 2009 Sportsters (except the XR1200).
This kit will also work with 86 models. The filter adapter has the same threads from 86 and up.
Reported, they have an '88 - '08 version also ($89.95 plus shipping). 7)
Cost is currently $69.95 plus shipping for the 09 and up version.
You don't have to install the drain line and tee on the 09 version (not included) but instead you just disconnect the scavenge hose from the tank. 8)
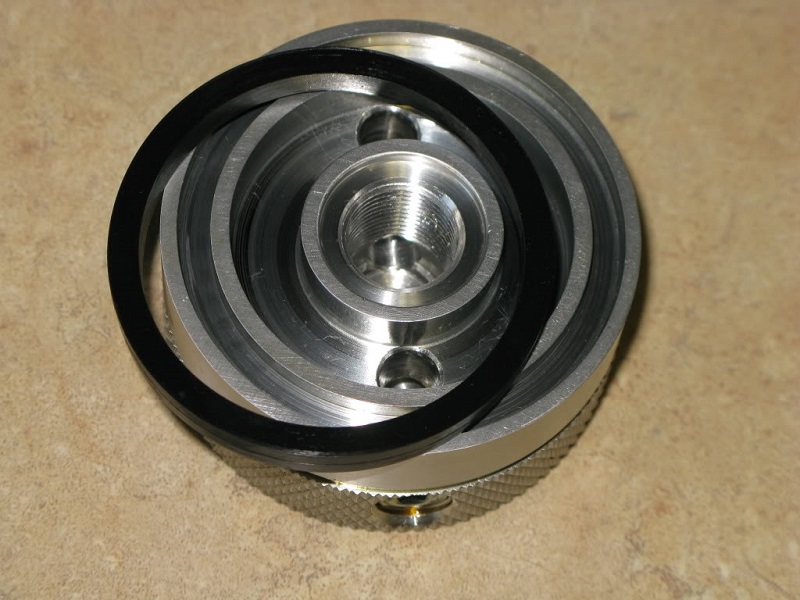
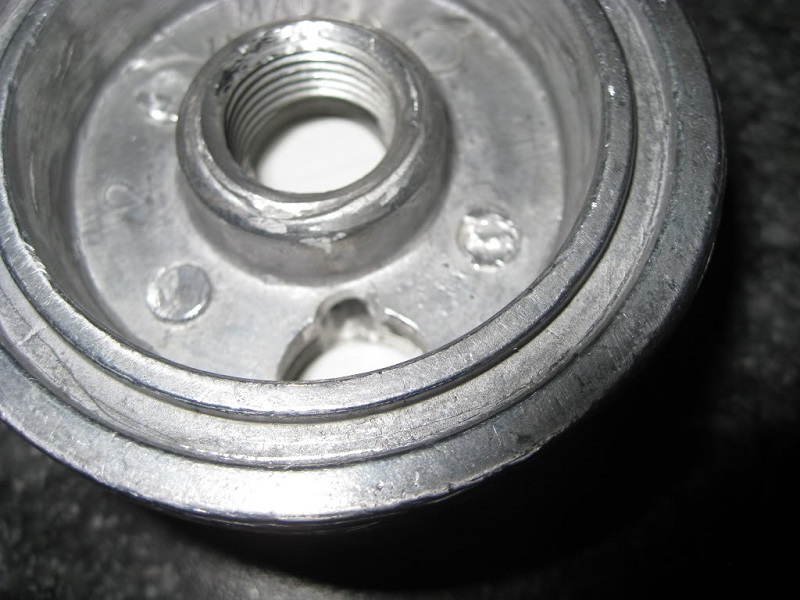
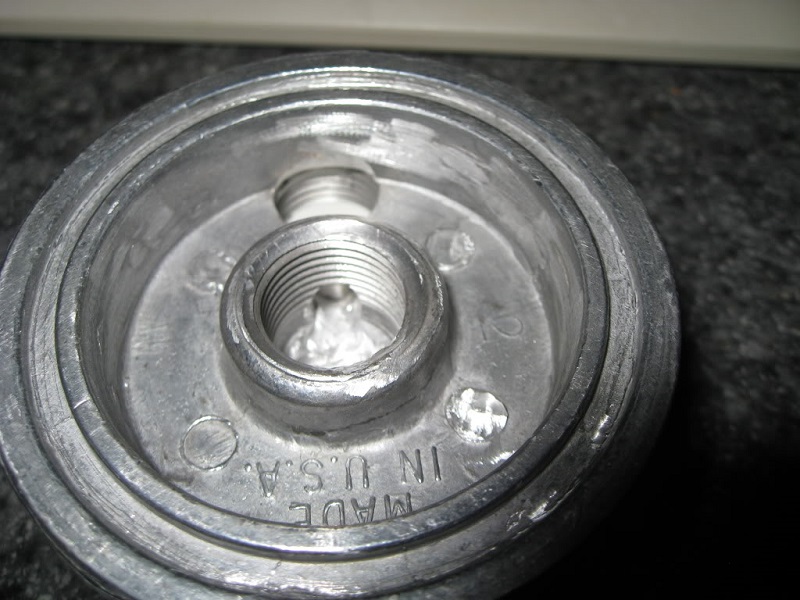
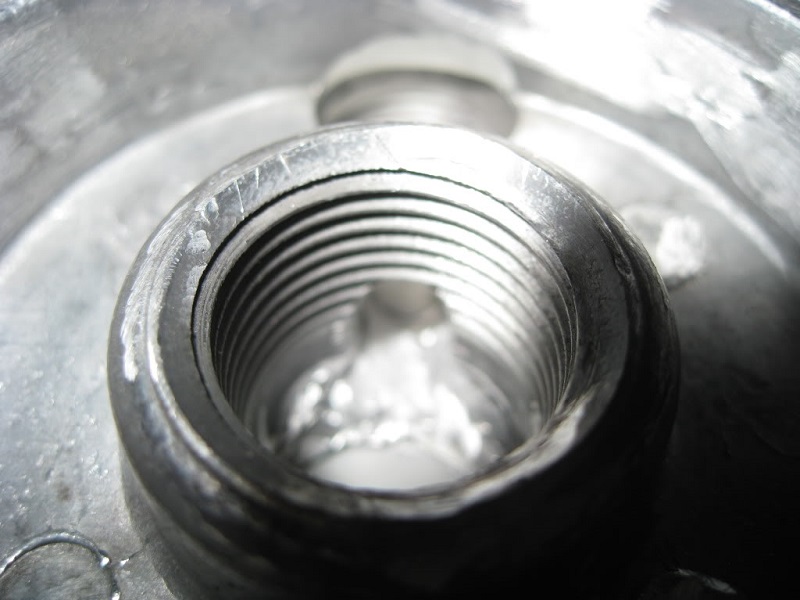
All the puck does is provide a straight through route to flow the oil without filtering. 9)
The reason for the puck is that there's old oil and crud still left in the old filter that will be pushed ahead of the clean oil to the engine.
The theory is “Why push it through when you can get rid of it there?”
It's just a more thorough oil change by using the puck or a reasonable facsimile thereof. 10)
If you could somehow gut a filter it would do the same thing.
The puck is nice though, made from billet aluminum but all in all it's only a tool.
The you fit a 'T' fitting on the return line with a piece of hose going down to the bottom of the scoot. 11)
Pinch the return line on the closest side to the oil tank (just by the T fitting) and start the scoot.
Wait till you get clean oil out of the hose off the 'T' fitting (make sure you have oil in the tank).
Then shut off the scoot, remove the puck, plug the scavenge and top off the oil tank.
The purpose of the tee is so you don't have to cut the factory crimped clamp at the tank. 12)
Also, with the tee you can have the scavenge drain routed down behind the primary out of the way with the tank drain hose.
The clamp on the return line used on the tank side is to clamp off the return line downstream of the tee fitting to prevent any scavenge oil from returning to the tank.
It wasn't necessary to take off the rear exhaust like their video instructions tell you to do.
There is plenty of room to cut out a 1/2“ piece from the oil return line.
You don't have to feed the “scavenge” drain hose to the left side of the bike in back of the primary.
It can be snaked down the middle, next to the regular drain oil drain hose and routed it to the right side of the frame to the bottom frame tube.
An extra OEM plastic drain plug can be used to clamp the scavenge drain hose to the frame just like the oil OEM drain hose, but on the right side.
Squeeze clamps come with it but you can use worm gear type clamps instead if you choose.
After installation of the “T” fitting and scavenge hose you can drain the oil as usual from the tank drain.
Then remove the oil filter and install the scavenger “puck” in place of the filter.
Clamp the return oil line right behind the “T” fitting installed for the scavenger drain hose with the forceps provided in the kit and fill the tank with oil.
Start the bike and run off oil until it shows clean oil out the scavenge hose end.
Then you can plug the hose and attach it the frame for future oil changes.
Remove the puck and install the new oil filter as usual.
The port passages on the puck are small so the puck doesn't hold a significant amount of oil.
(an estimated ounce or less when you remove it)
A gutted filter would hold about 4-5 ounces of clean oil.
Note:
The scavenge side of the oil pump doesn't seem to push a constant flow at idle.
It has a higher pumping capacity than the pressure (feed) side and the scavenge side will push out the sump contents in dribs and drabs.
(as if it was waiting for the oil to accumulate and then pump it)
Give it more throttle and flow was more constant.
It doesn't take too long to pump out a quart so the oil in our bikes circulates pretty quickly, especially at higher rpms.
| Rogue Chopper Sportster Scavenger Kit 13) | ||
 |  |  |
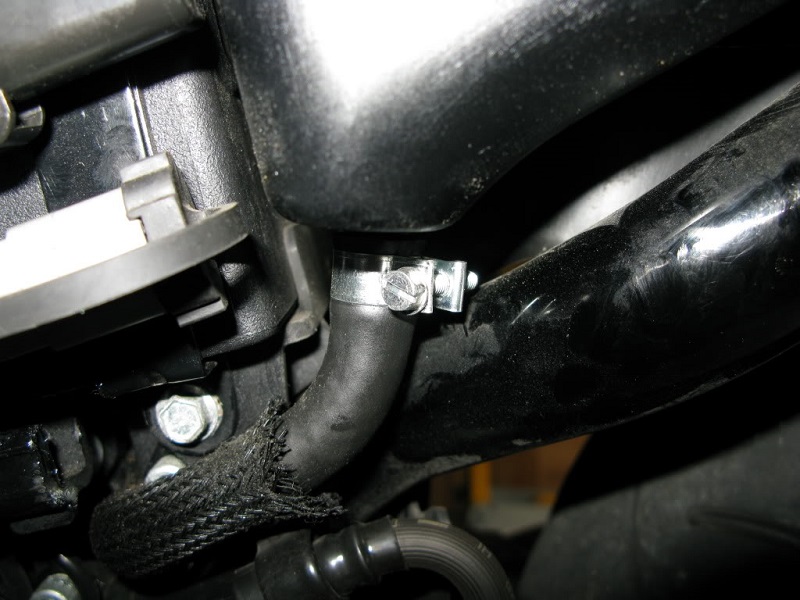
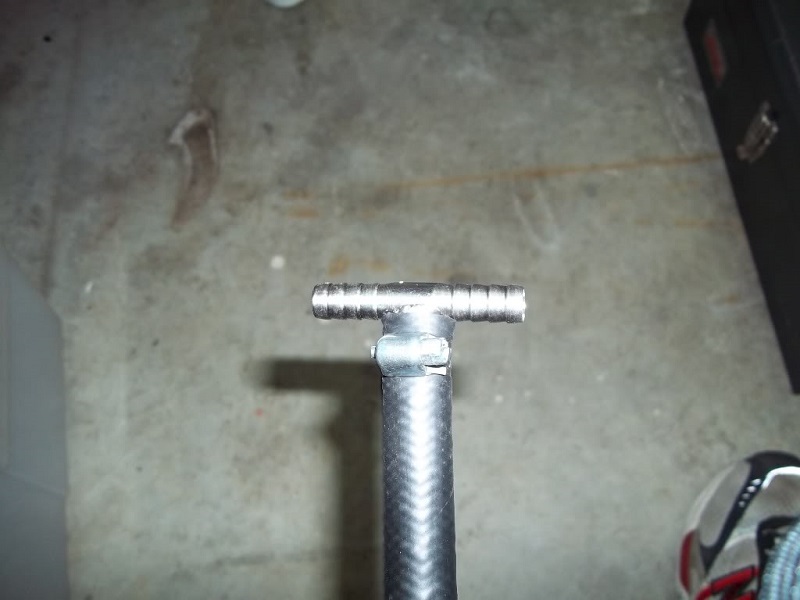
Installing a 'tee' in the return hose:
This works the same as above with the exception of installing an inline tee in the return hose to the tank.
Simply pinch off the hose on the tank side of the tee to allow the scavenged oil to empty into a container through the tee'd off hose.
The 79 models didn't come factory with an external oil filter.
But an optional kit was available for conversion. Likewise, the diagrams below reflect 79's both with and without an external filter.

Make your own scavenger kit
You can get a couple of fittings for the inlet and outlet for hose and loop the hose basically from one hole to the other. 21)
Then install a tee in the return hose. Whole setup was about $15.
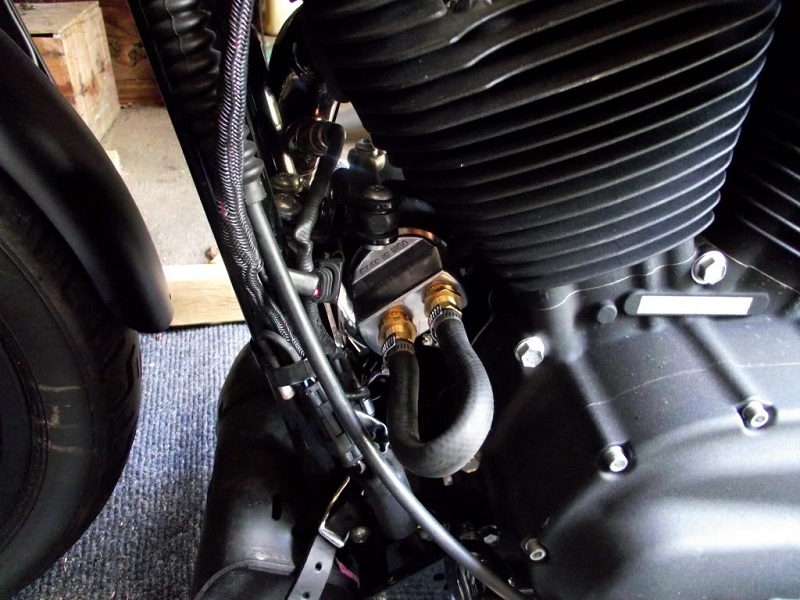
| Pop off the right side cover and all the lines are seen. You can loosen the clamps and rotate the tee to where you want it. 24) | ||
 |  |  |
Another Version of the Puck
Take one of these filter adapters and drill a hole straight across the port boss and then just plug the three holes. 25)
If you just plug the two holes on the outside, there would be no flow.
This one has a 3/16“ hole drilled between the two cavities.
| Working from the inside, drill a hole between the two channels. Capped and drilled. 26) | |
 |  |
| Then use a Dremil tool to smooth out the cutting. 27) | |
 |  |