Table of Contents
This is an old revision of the document!

REF: Tools - 137
Rear Shock Tools
Road King Shock Oil Replacement
- If your using Road King shocks, here is a way to change the oil in them.
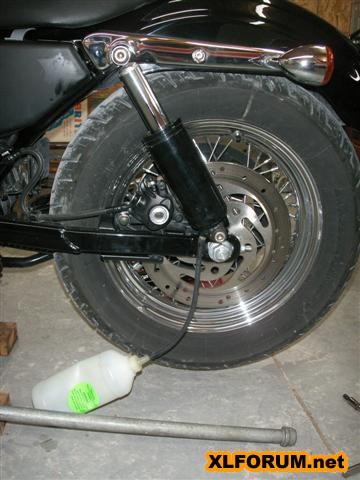
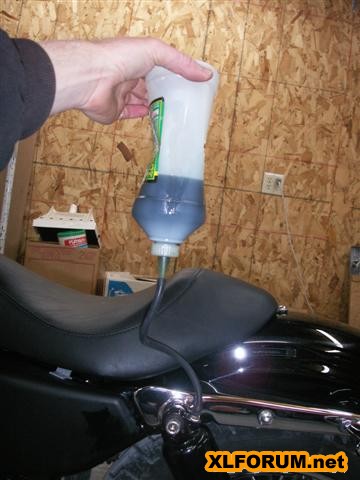
- Removing oil: Install the valve stems with the valve cores removed. Connect a piece of vacuum hose between the valve stem and a partially collapsed plastic bottle. Install only one shock upside down. Sit on the bike to force the oil out. Raise the bike to draw air in. 1)
- Installing oil: Add the proper amount of fork oil in your weight of choice to the partially collapsed plastic bottle. Install only one shock right side up. Sit on the bike to force air out. Raise the bike to draw oil in. 2)
- Caution You need to turn them upside down and then back right side up a few times to get the oil to drain from the inner chambers. Do not over fill them, they could blow apart. Put on one shock at a time and make it bottom out and force out all excessive oil, that is still too much because the inner air chamber will still be too small. The only way to tell how much oil is in them is by weighing them. There are several different years and models of shocks and no one knows all the specific differences. 3)
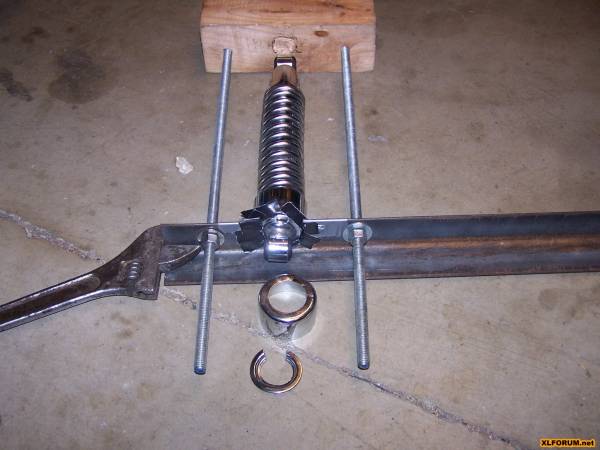 |
| Homemade spring compressor 6) |
Another Method
Article by LuxBlue of the XLFORUM 7)
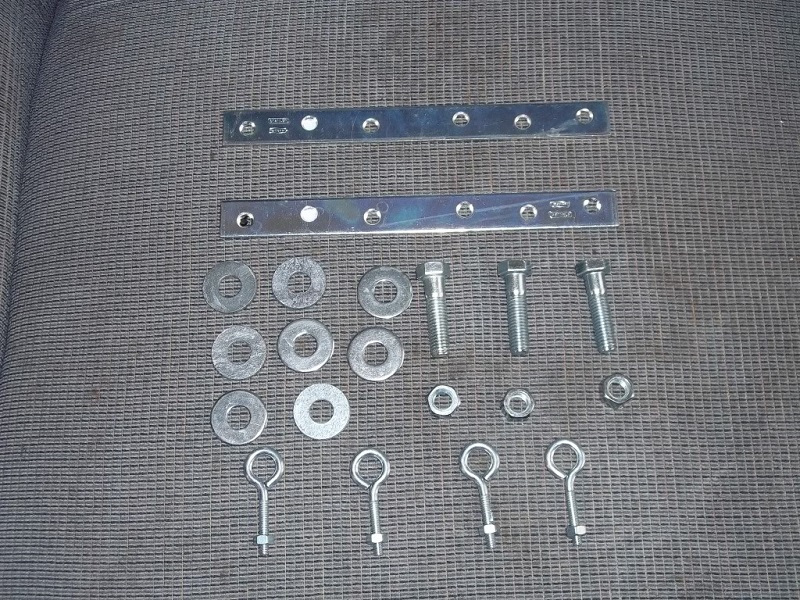
Parts:
- Eye bolts.
- 1/2“ X 2 1/2” bolts and nuts.
- 1/2“ washers.
- 2 shelf straps to act as levers.
- A piece of 3/4” plywood.
Drill holes in the shelf side and place the bottom eyebolts with a 1-1/8“ gap between them to allow the shock eyes to fit between them.
Drill out the end holes of the straps for a 1/2” hole (if the holes are too small as purchased).
These measured up just under 12“ (12” eye to eye) for the top eyebolts which are placed 1-1/8“ apart.
Using washers, space out the inside of the eyes.
Run a 1/2” bolt through a shelf strap, through the first eye bolt, through the washers and the second eye bolt and through the other shelf strap.
Loosely secure it with a 1/2“ nut.
Invert the shock, remove the plastic hose quick connector and place a funnel in a plastic bottle under the shock hole to catch the fluid.
Only a small amount of fluid may run out.
Stroke the shock (foot on the shelf strap levers) and push down with your body weight.
On every stroke, more fluid is pushed out. Continue until the gurgling stops and only air is expelled.
 |  |  |
6 ounces of dirty hydraulic fluid was collected below (plus about an ounce was spilled) otherwise.
Empty the fluid, invert the shock in the lever apparatus and fill the shock with fluid.
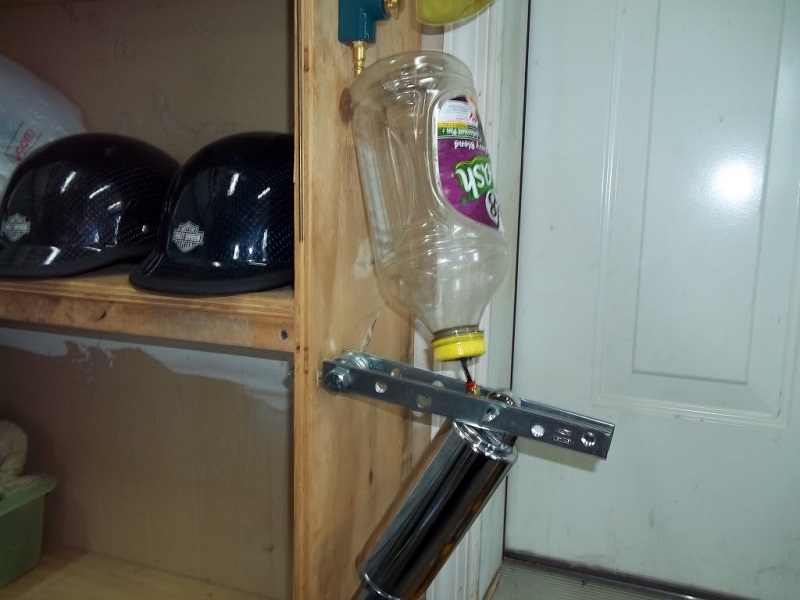
A plastic juice bottle was used below with a hole drilled in the lid to accomodate a piece of air shock plastic hose.
Then the hole was sealed with black RTV and allowed to cure fully.
Then place the 1/8” NPT quick connect in the shock, add the amount of fluid that was removed.
Install the lid, place the hose in the quick connect and invert the bottle.
By stroking the shock it pushes air out into the bottle and when the shock retracted, fluid is pulled in.
Numerous compressions pulled all 6 ounces of fluid into the shock.
Then remove the quick connect, re-tape with teflon tape and re-install in the shock.
Repeat for the other shock, pressure test them (these were tested overnight with 20 psi).
And install them on the bike.
 |  |  |