Table of Contents
This is an old revision of the document!

REF: Tools - 137
Rear Shock Tools
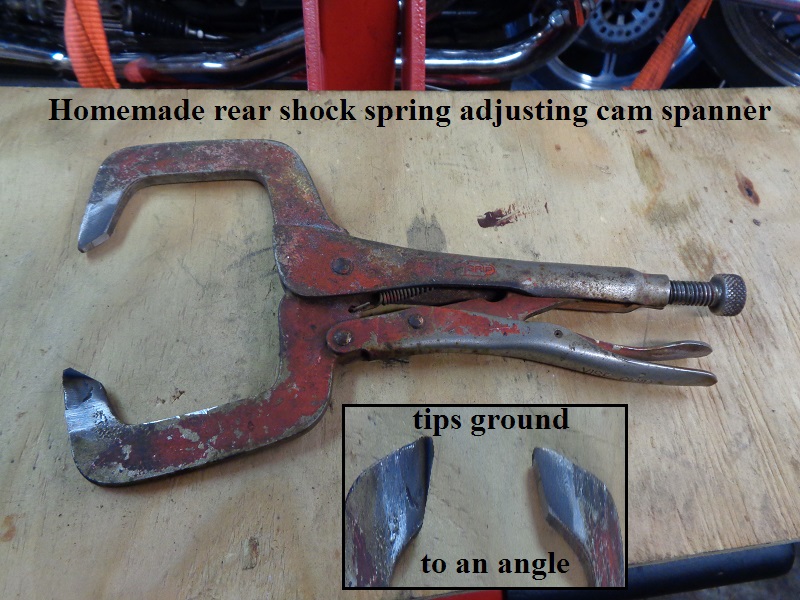
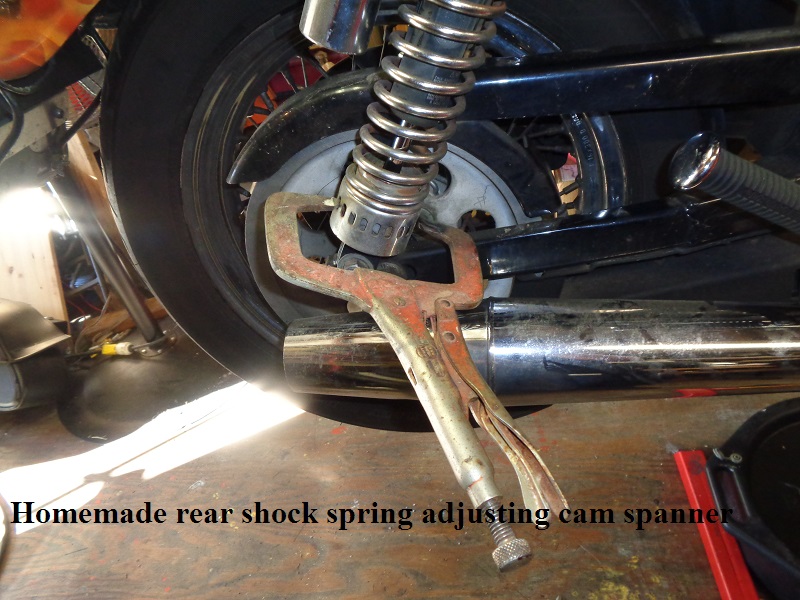
Spring Adjusting Cam Spanner
These C-clamp pliers make a good tool to adjust the spring cam height if you don't have the proper spanner. The ends were ground to an angle using an angle grinder.
Then you simply adjust the jaws to fit opposite holes in the cam with very light clamp pressure on the tool and turn the spring cam where you want it.
 ||
||
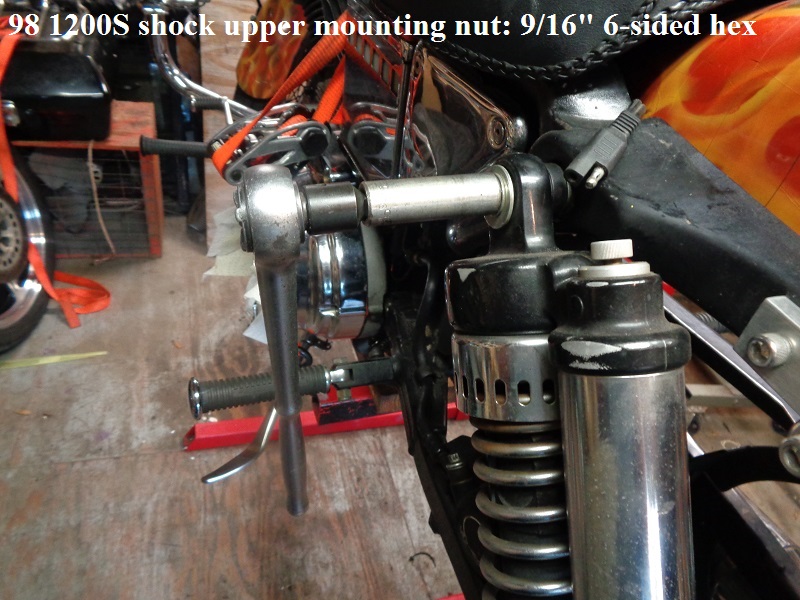
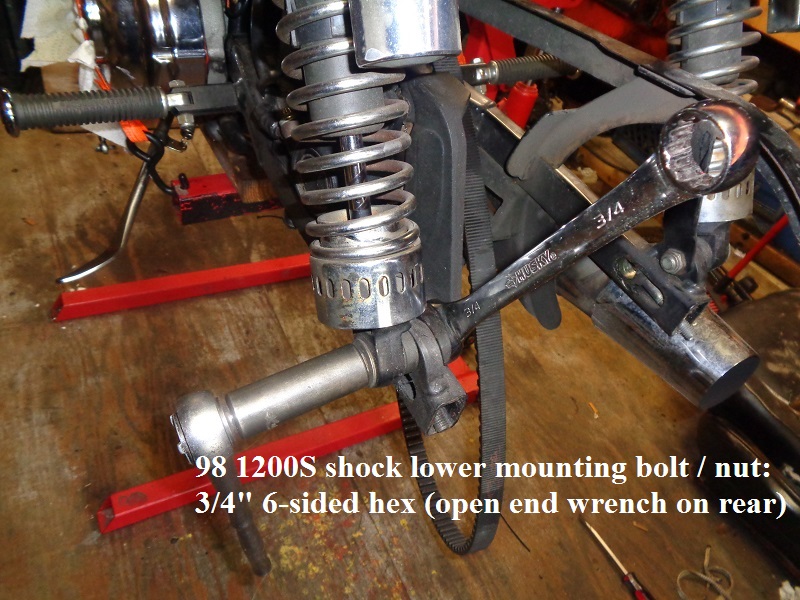
Shock Mounting Bolts
The top acorn nut on a 98 1200S (probably other year models) is a 9/16“ 6 sided hex nut. The threaded stud is welded to the frame.
The lower mounting nut and bolt are both 3/4” six sided hex heads. The rear nut takes an open end wrench due to little room between the nut and frame.
Road King Shocks
The shocks are a really simple design. 1)
Think of it as nothing but a strut assembly like the ones used on cars but with internal springs and a separate air/fluid chamber.
The main shaft is hollow and that is where damper is located.
At the top of the damper are the damper fluid holes.
If you don't have the correct fluid level it creates problems.
Too little oil and the dampers may not be filled with oil which reduces the dampening action.
Too much oil you create a hydro-lock situation where there's too little room for the shaft to compress into the shock.
Too much oil can also cause hydro-lock and possibly blow the shock apart. 2)
This can be very dangerous if oil gets under the rear tire while trying to brake or turn.
The springs and air pressure only support the weight of the bike and rider. 3)
One other internal item is the rubber bottom stops. On older shocks they have a tendency to turn to mush.
When this happens, the loose gooey material can work it's way into the damper holes plugging them up and restricts the flow.
You can also weigh the shocks to see how much oil is in them to start with. 4)
However, that may or may not be correct if some has leaked out.
There is no exact spec from Harley on how much oil to add.
It will depend on how much oil you drain out.
At the very least and after pumping all the air out, you should put on only one shock.
Leave the air fitting open and bottom out the shock to push out all the excessive fluid to ensure the shock does actually bottom out.
The shiny lower shaft that you attach to your swingarm is actually the damper housing. 5)
It's hollow with 4 (approx 1/8“ diameter) holes about a 1/2” down from the top that allow the oil to fill and expell from the damper.
Inside the housing is the dampening piston/actuator that's attached to the damper shaft.
With the shock hanging upside down you have to make sure that you fully compress the shock and hold it for a few seconds before you release the pressure.
This allows the oil that you just pushed past the piston to exit the housing through those 4 small holes.
If you take your time and do the compress, hold, slow release for about 20 strokes you should be able to drain at least 95% of the old oil out of the shock.
The only way to get it all out is to remove the top mount. That in itself is a totally different process.
Road King Shock Oil Replacement
- If your using Road King shocks, here is a way to change the oil in them.
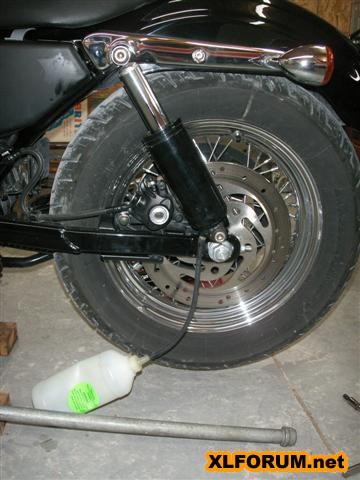
- Removing oil: Install the valve stems with the valve cores removed. Connect a piece of vacuum hose between the valve stem and a partially collapsed plastic bottle. Install only one shock upside down. Sit on the bike to force the oil out. Raise the bike to draw air in. 6)
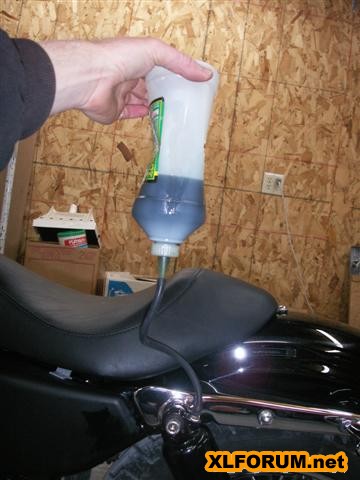
- Installing oil: Add the proper amount of fork oil in your weight of choice to the partially collapsed plastic bottle. Install only one shock right side up. Sit on the bike to force air out. Raise the bike to draw oil in. 7)
- Caution You need to turn them upside down and then back right side up a few times to get the oil to drain from the inner chambers. Do not over fill them, they could blow apart. Put on one shock at a time and make it bottom out and force out all excessive oil, that is still too much because the inner air chamber will still be too small. The only way to tell how much oil is in them is by weighing them. There are several different years and models of shocks and no one knows all the specific differences. 8)
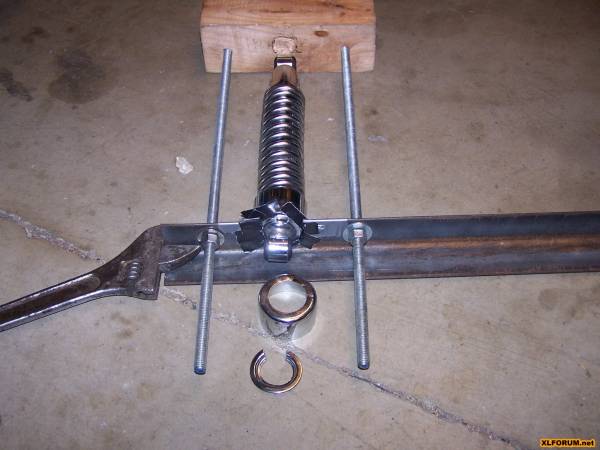 |
| Homemade spring compressor 11) |
Another Method
Article and pics by LuxBlue of the XLFORUM 12)
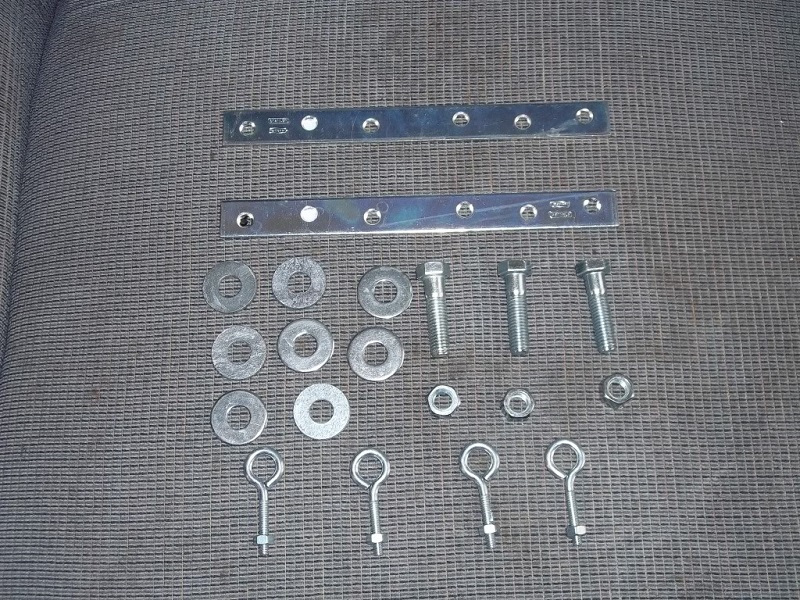
Parts:
- Eye bolts.
- 1/2“ X 2 1/2” bolts and nuts.
- 1/2“ washers.
- 2 shelf straps to act as levers.
Any flat metal that is strong enough to overcome the pressure needed to compress the shock will be fine.
You'll just have to drill it for the bolts. 13) - A piece of 3/4” plywood.
Drill holes in the shelf side and place the bottom eyebolts with a 1-1/8“ gap between them to allow the shock eyes to fit between them.
Drill out the end holes of the straps for a 1/2” hole (if the holes are too small as purchased).
These measured up just under 12“ (eye to eye) for the top eyebolts which are placed 1-1/8” apart.
Using washers, space out the inside of the eyes.
Run a 1/2“ bolt through a shelf strap, through the first eye bolt, through the washers and the second eye bolt and through the other shelf strap.
Loosely secure it with a 1/2” nut.
Invert the shock, remove the plastic hose quick connector and place a funnel in a plastic bottle under the shock hole to catch the fluid.
Only a small amount of fluid may run out.
Stroke the shock (foot on the shelf strap levers) and push down with your body weight.
On every stroke, more fluid is pushed out. Continue until the gurgling stops and only air is expelled.
 |  |  |
6 ounces of dirty hydraulic fluid was collected below (plus about an ounce was spilled) otherwise.
Empty the fluid, invert the shock in the lever apparatus and fill the shock with fluid.
A plastic juice bottle was used below with a hole drilled in the lid to accomodate a piece of air shock plastic hose.
Then the hole was sealed with black RTV and allowed to cure fully.
Then place the 1/8“ NPT quick connect in the shock, add the amount of fluid that was removed.
(reportedly about 10 oz total is what should be in there)
Install the lid, place the hose in the quick connect and invert the bottle.
By stroking the shock it pushes air out into the bottle and when the shock retracted, fluid is pulled in.
Numerous compressions pulled all 6 ounces of fluid into the shock.
Then remove the quick connect, re-tape with teflon tape and re-install in the shock.
Repeat for the other shock, pressure test them (these were tested overnight with 20 psi).
And install them on the bike.
 |  |  |
Using a MixMizer
Article and pics by joesporty of the XLFORUM http://xlforum.net/forums/showthread.php?t=1038905&page=3))
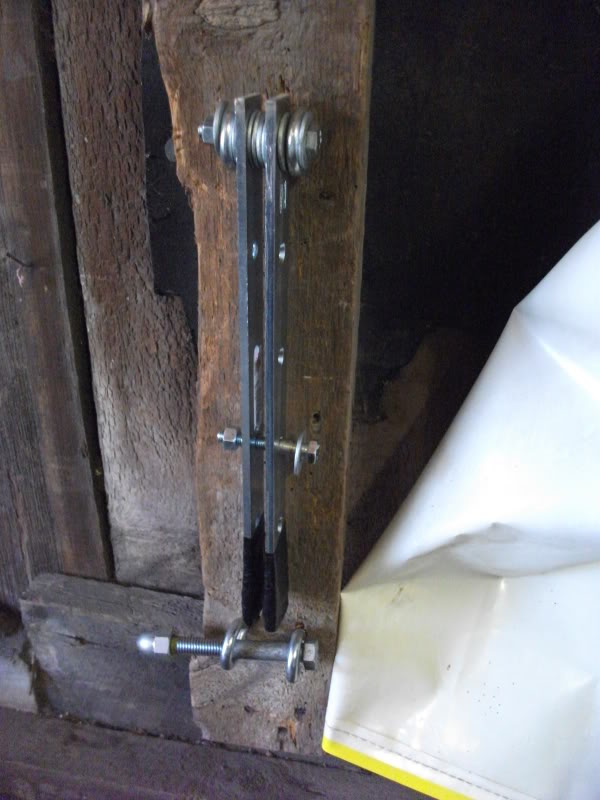
This compression tool is made similar to the one above.
Mending braces, four screws in eyelet hooks and a couple nuts, bolts and washers.
The eyelets are screwed into a stud on the wall with the mending braces attached.
See the mock-up below using an old stock shock.
 | 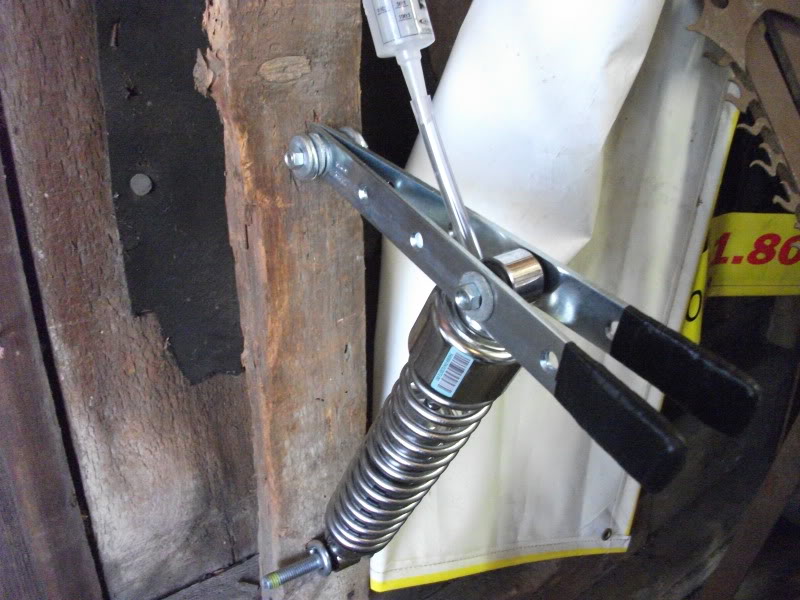 |
The MixMizer is a little syringe type tool (cheap at under 5 bucks) that was used for filling the RK shocks back up.
It comes with a little hose that fits perfect over the air valve.
It only holds 2 ounces so you'll have to keep refilling it until the proper amount of oil has been added.
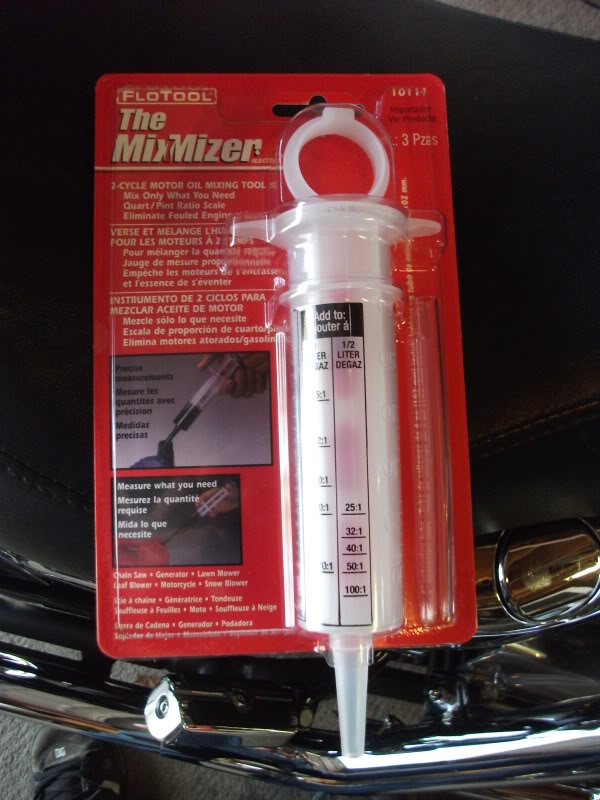 | 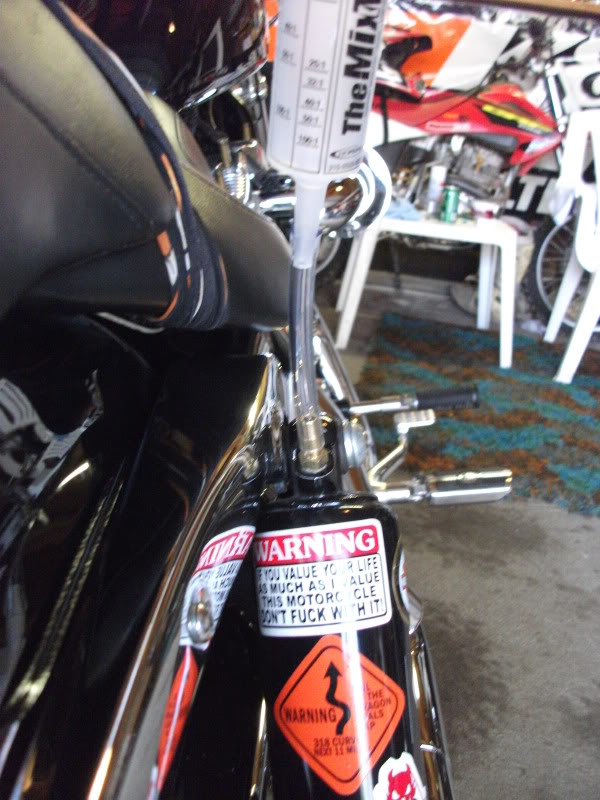 |
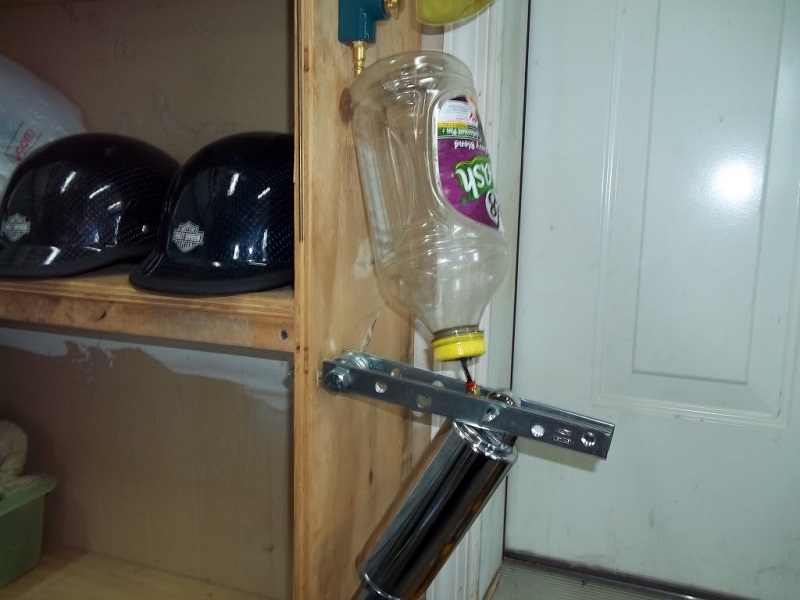
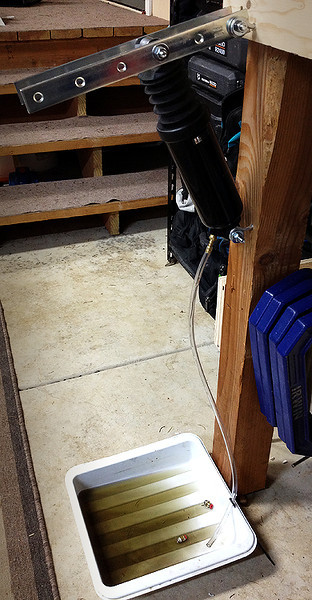
Table Leg Mounted Compressor
Same style compressor using a syringe to install the oil.
Draining the shocks:
A 1/4” barb x 1/8“ NPT fitting and some 1/4” ID vinyl hose was used to drain the shocks.
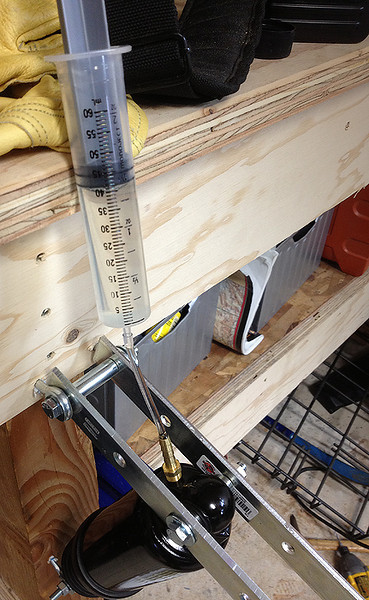
Adding oil:
A short piece of 1/8“ ID hose which is 1/4” OD and fits snugly inside the same barbed fitting.
The other end fits tightly on the nozzle of the syringe.
You can just pull 2 oz. at a time out of the container of fork oil and squeeze it into the shock with no spillage.
After each 2 oz. “shot”, wrap a piece of paper towel around the barbed fitting and pull out the tubing.
The displaced air escapes with the removal of the hose and a very tiny (not measurable) bit of oil spits out.
Draw two more ounces of oil into the syringe and repeat until you've added 10 oz.
Slowly cycle each shock after the oil is in to work it into the damper and help work out any air.
Another reason to do this is to ensure that 10oz wasn't too much and that it wasn't going to come shooting back out of the shock.
14)
 |  |