Table of Contents

REF: Tools - 147
Reamers
See also in the Sportsterpedia:
Reaming:
Reaming is the process of cutting a larger hole to a specific diameter. 1)
The purpose is to not only make the hole the correct diameter but also to align it and square it with the part that goes into it.
This usually means aligning it with a hole, or bearing, opposite and at the other end of a shaft.
Reason is because the cast part can not be manufactured to hold the required alignment tolerances (and in the case of aluminum, the required abrasion resistance).
So, the cast part is made to accept a bushing made of a harder material that can endure the force and abrasion potential that goes with it.
The bushing is then inserted into the casting but, because of the nature of casting, it is not in exactly the right place both in horizontal position and axis angle.
So, the bushing is made with a smaller diameter hole than is required to allow for the precise alignment by reaming.
Line Reaming:
Line reaming is the process of using additional support features to help provide shaft alignment.
In this case of reaming cam bushings, it is the cam cover and its associated bushing that is used to “line up” the reaming tool.
The bushing hole in the right crankcase is cut to the correct size diameter, is properly located horizontally, and is cut square to the intended shaft axis.
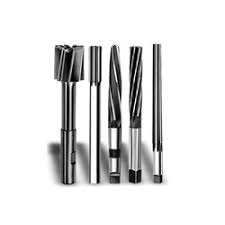
Types of Reamers
- Flute spirals. 2)
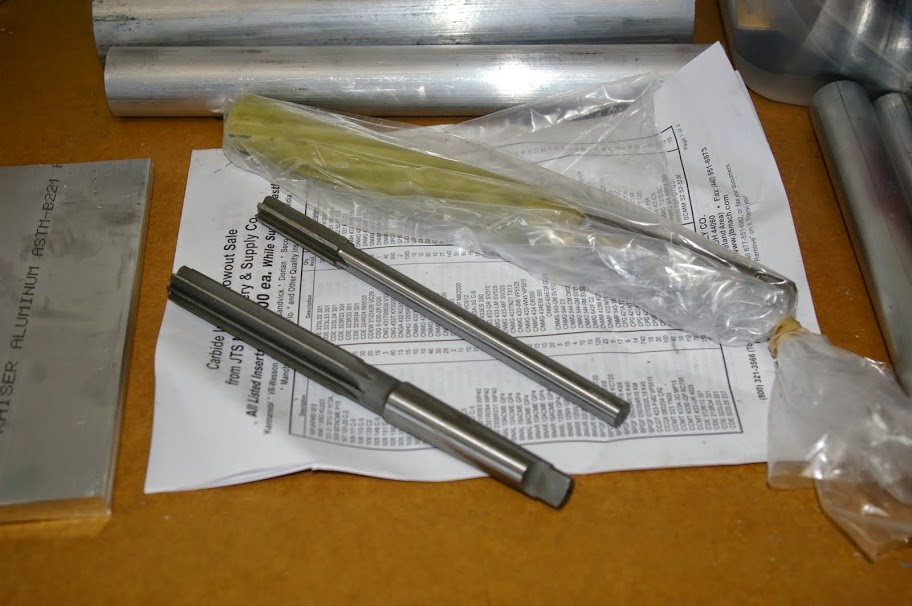
All 3 reamers below are “right hand cut” meaning they all cut while being spun in the same direction as a drill bit.
Reamers come in different cuts as in straight, forward spiral, reverse spiral etc. Looking at the last one, you may think is cuts in reverse rotation but it does not.- Straight reamers are by far the least expensive to buy. It also makes holes that aren't true cylinders.
They can have a lobed wall shape. This lobing goes hand in hand with amount of material being reamed away.
In our case it's a small amount of removal so the lobing is also very small.
For us it's ok for pinion & #2. But a spiral is nicer albeit usually 2X the cost.
It's also fine for 1-3-4 if bushes have no oil groove in bore.
Grooves in bore need the gap bridging action that spirals provide.
This is where you need spirals. - Forward Spiral reamers will give a truer (but not perfect) cylinder.
Forwards gives the lowest cutting forces = easiest to hand ream with.
But they can 'grab' into the work (like a drill sometimes does). - Reverse Spiral reamers are the best of the 3 for surface finish.
High cutting forces due to the reverse rake at the cutting edge makes the roundest holes of all three when driven by hand.
High safety in use. It won't toss you any curve balls but they dull quick.
All reamers when dull are useless.
L to R:
- Jig bore reamer.
- Chucking reamer.
Chucking reamers are used in drill presses, turret lathes, screw machines, and other machine tools. They are also known as machine reamers.
It can be used by hand if you square the shank end with a grinder and you can use a socket wrench or tap wrench to turn it.
The shank is round or Morse taper and the cutting end of the reamer is ground with a 45° chamfer angle for easy hole entry.
(this reamer is a good choice for blind holes) - Bridge reamer. *this reamer has a lead in taper)
- Hand reamer.
Hand reamers have a square portion at the end of the shank so the reamer can be turned by hand with an adjustable wrench or straight-handle tap wrench.
Most hand reamers have a slight taper at the cutting end for easy hole entry.
(this reamer has a lead in taper just like the bridge type although the taper is much more shallow) - Tapered reamer.
- Shell reamer. (fits on an arbor)

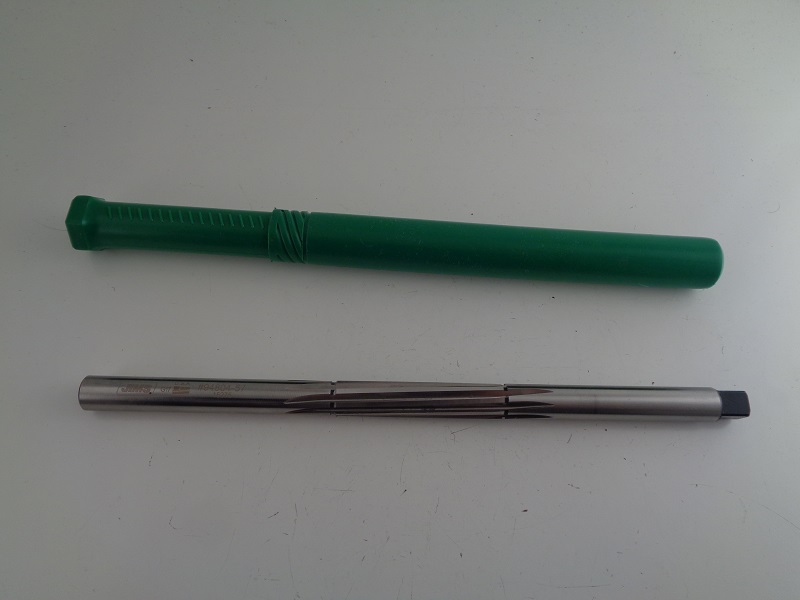
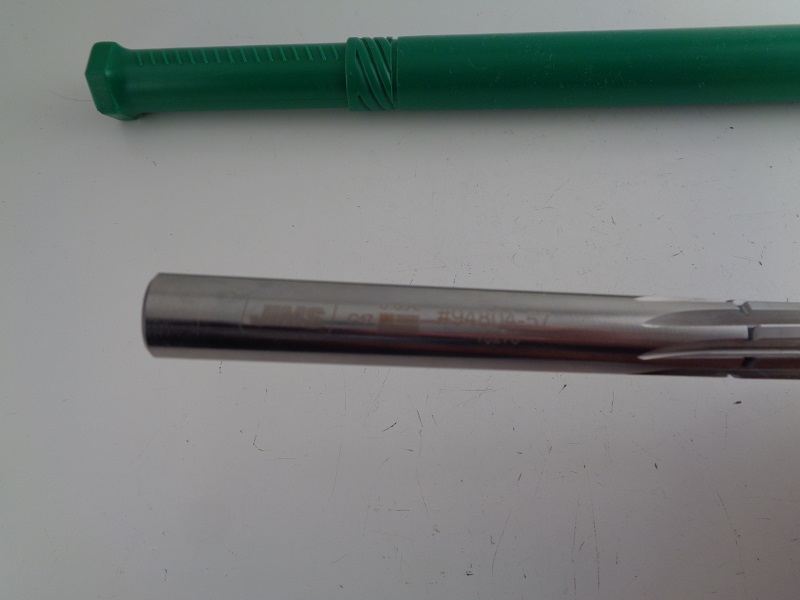
Rocker Arm Bushing Reamer (94804-57)
See also Rocker Arm Bushing Replacement in the Sportsterpedia.
This reamer is specially designed for reaming the rocker arm bushings from 1957 to present.
It is the right length and cut to fit into the old bushing on one end of the rocker arm and ream the new bushing in the other end.
It has flutes which actually turn to the left but it is a “right hand cut” tool.
Never turn it to the left while using it.
| “Jims” makes this reamer referenced to HD part number (94804-57). Use with a 12mm socket and wrench or a standard tap wrench. 7) | ||
 |  |  |
Chucking Reamer
You can use chucking reamers to ream bushings on a Sportster.
But it is necessary to build or acquire a sleeve that slides over the shank portion of the reamer to keep center.
And that sleeve OD is inserted into an opposite end of the piece you are working on to establish center.
If it is necessary to control chip loss, an 8 flute chucking reamer will probably do better at holding chips than one with 4 flutes.
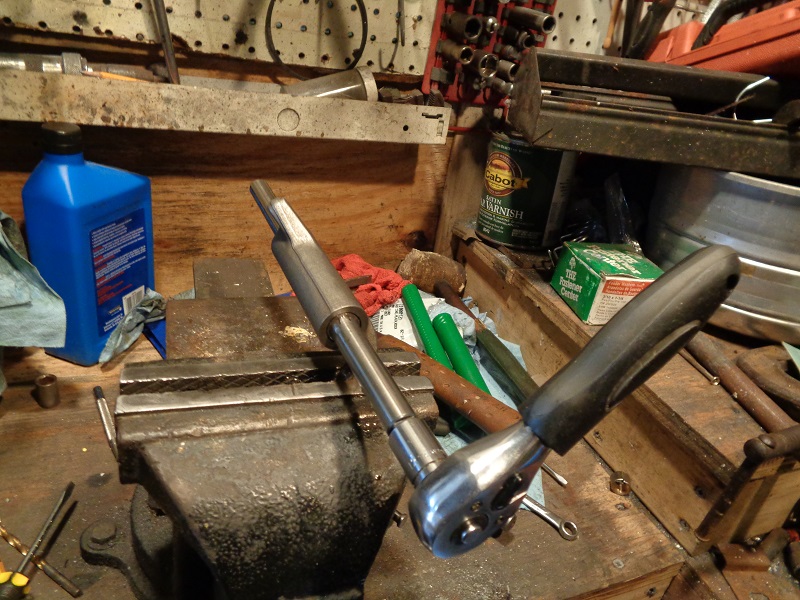
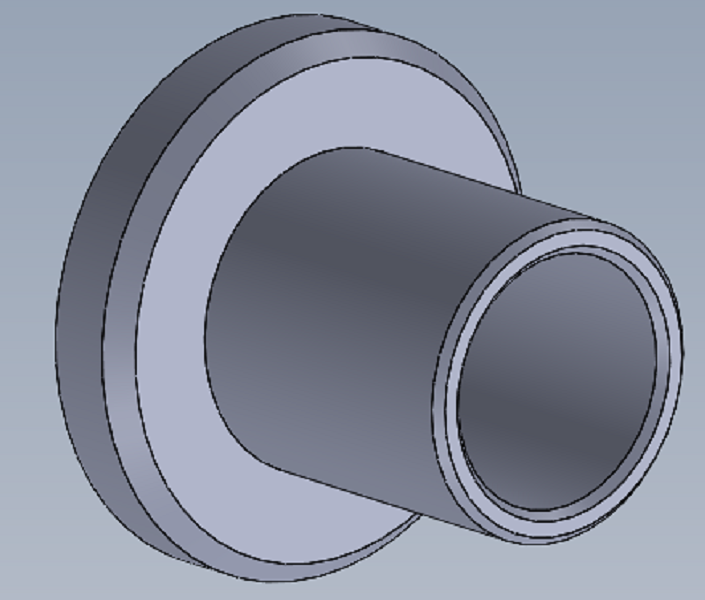
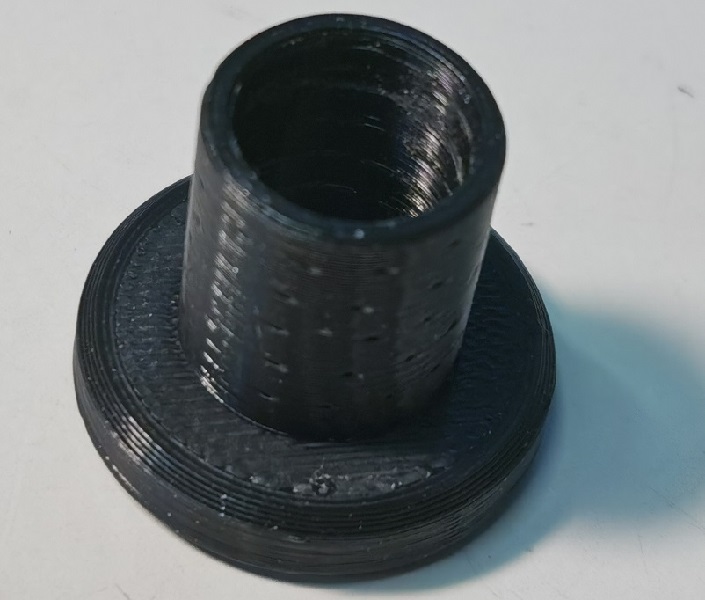
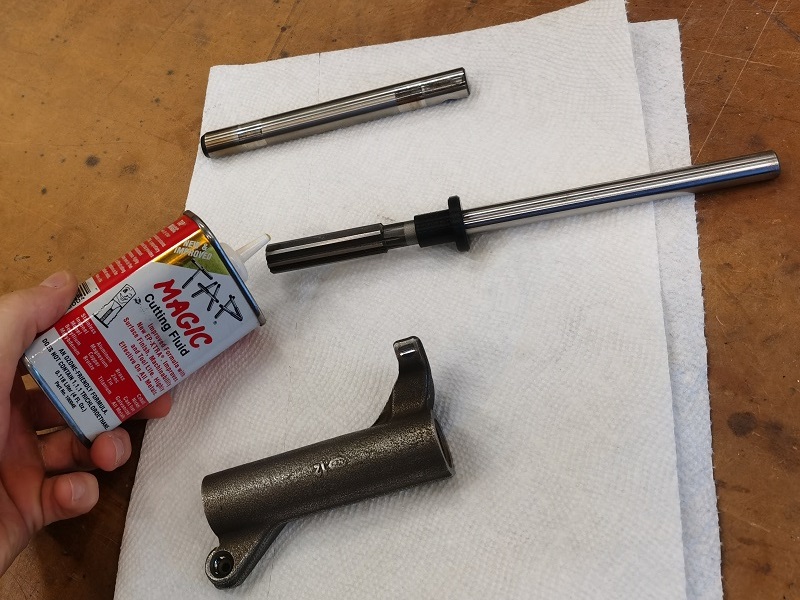
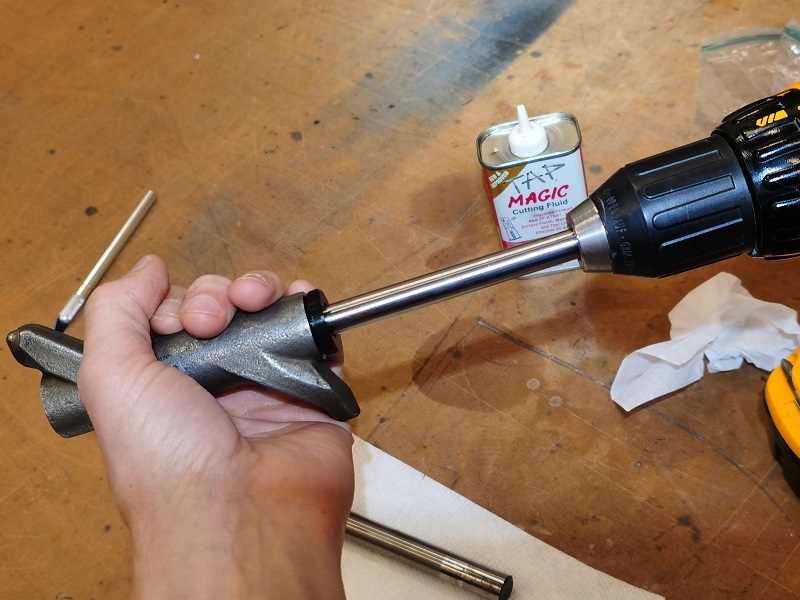
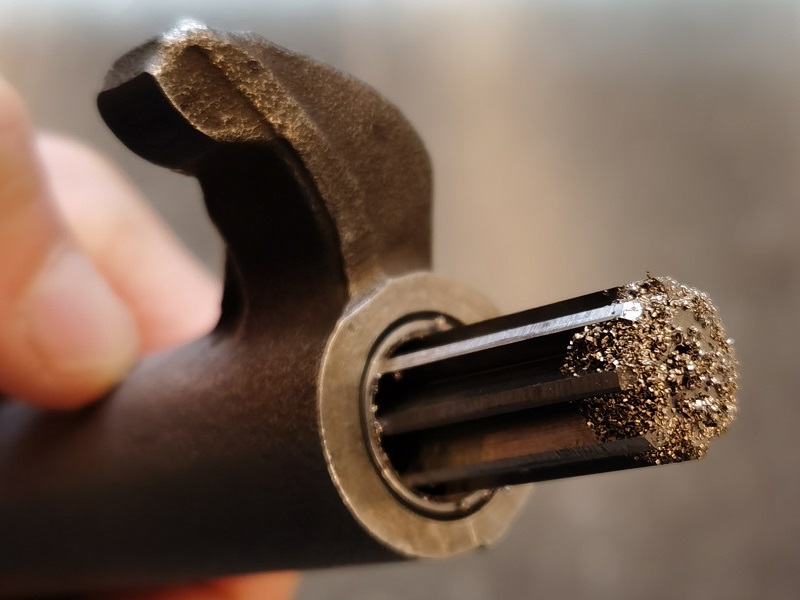
This reamer sleeve was made for a 0.435“ shank chucking reamer, by TPEHAK of the XLForum, from a 3D printer for use in reaming rocker arm bushings. 8)
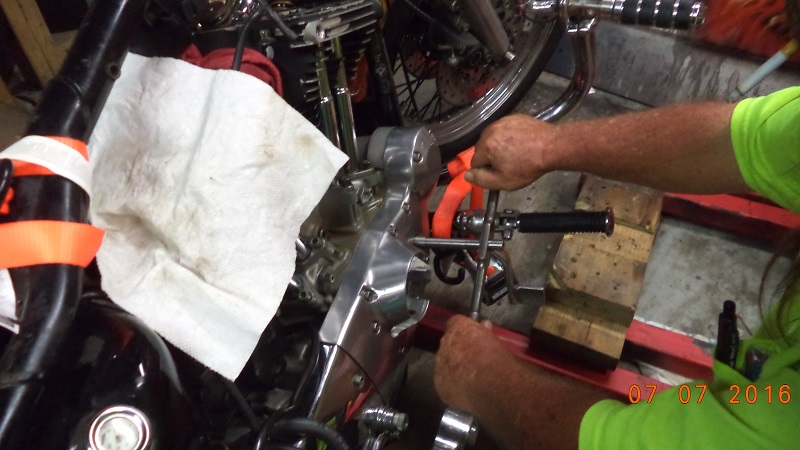
You can see how it is used below. The centering sleeve is slid onto the reamer shank and the assembly goes into an existing bushing in the rocker arm.
Then the reamer was chucked in a hand drill run at low speed to ream the new bushing on the other end. 9)
Click Here to download the CAD file on the bushing
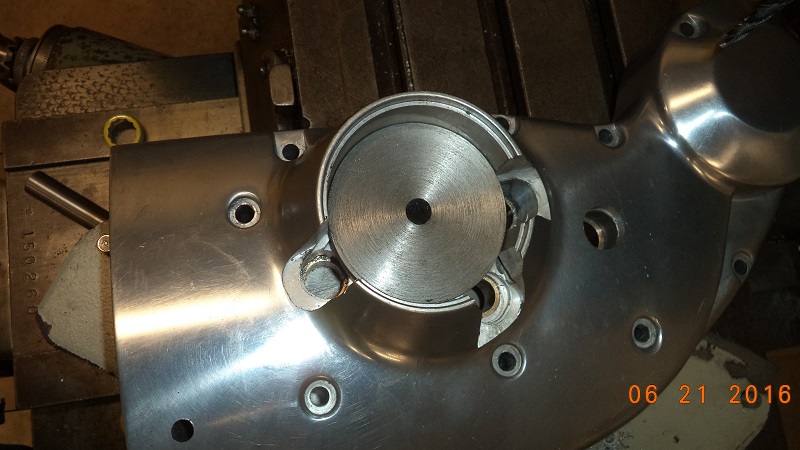
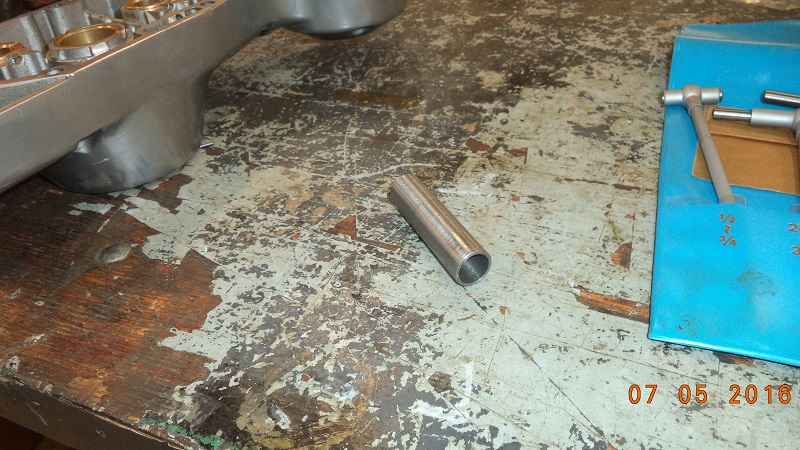
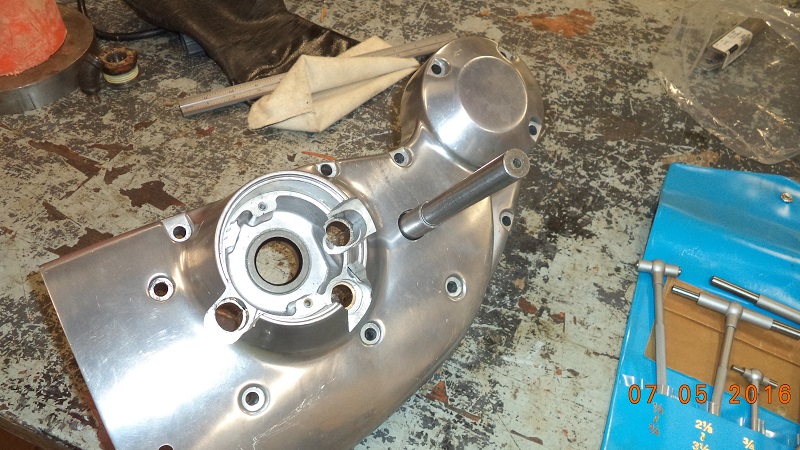
These reamer sleeves were made on a lathe to use a spare cam cover and it's existing bushings to ream new inner cam bushings in the case. 10)

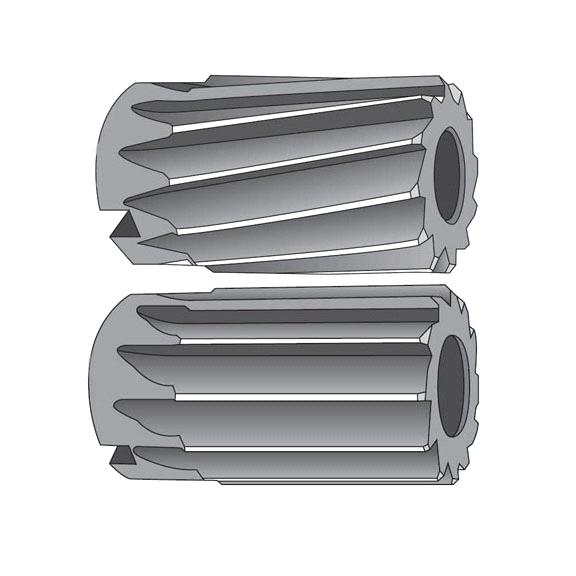
Cam Bushing Reamers
Outer Cam Bushings
(AKA Cam Cover Bushings):
The reamers for the cam cover bushings (#1, #3 and #4) need to be chamfered (chucking) reamers.
The ends have a short chamfer that will enter the blind bushing bore and not hit the rear of the bore before finished cutting the bushings.
The reamer for #2 cam can be a tapered bridge reamer on models with nosecone ignitions.
(the hole for #2 cam is open to atmosphere so the reamer has plenty of room to extend past the bushing)
Else it will also need to have a chamfered end.
Cam cover reamer sizes:
1986-1990:
9/16” for the pinion shaft and idler bushing.
1-1/8“ for #2 cam bushing.
11/16” for #1, #3 and #4 cam bushings.
1991-up:
5/8“ for the pinion shaft bushing.
1-1/8” for #2 cam bushing.
11/16“ for #1, #3 and #4 cam bushings.
Outer Cam Bushings
(AKA Case Bushings):
A single reamer is all that is needed for the case side bushings as all the cam bushings are the same size in the case.
The normal way of reaming the case bushings is to split the case and ream case bushings by using the cover bushings as a guide.
This will require a bridge reamer with a tapered end.
If reaming the case bushings from the outside of the cover bushings, you'll need a chamfered (chucking) reamer with a short chamfer.
The long taper will go in and touch the flywheel before the blades have a chance to cut into the reamer.
So reaming the case side bushings will not be possible with a bridge reamer from the outside of the cover.
Case bushing reamer size:
11/16” for #1 thru #4 cam bushings.
| Cam bushing reamers 11) |
 |
Calculating Pre-Ream Drill Hole Sizes
The amount of material left in the hole prior to reaming (pre-ream hole size) plays an integral role in the quality of the reamed hole. 12)
The pre-ream hole size affects characteristics in the reamed hole including hole finish, hole straightness, tool life, and cycle time.
There are several ways in which the pre-ream hole size may be obtained some examples include investment casting, boring, line boring, rough reaming, and stamping.
The most common way to obtain the pre-ream hole size is through drilling.
The appropriate amount of stock removal for carbide tipped and solid carbide reamers is generally 2% to 3% of the finished hole size.
Carbide tipped and solid carbide reamers need to have adequate stock to remove or they will rub in the hole and generate excessive heat.
This leads to premature tool wear and poor hole finishes.
A 0.7500” diameter reamer should remove between 0.0150”-0.0225” of stock.
A 0.2500” diameter reamer should remove between 0.0050”-0.0075” of stock.
A good way to calculate the drill bit size is to take the desired finished hole diameter and multiply it by 0.98
Then take the desired finished hole size and multiply it by 0.97
This gives you the range of stock removal best suited to the finish ream hole size.
From that range refer to a standard drill chart to chose the appropriate standard drill size for your pre reamed hole size.
Below are examples for calculating the pre-ream drill hole size for a 0.7500” finished hole diameter and a 0.2500” finished hole diameter.
| 0.7500“ x 0.98 = 0.7350” | 0.7500“ x 0.97 = 0.7275” |
Therefore, the appropriate range of the pre-ream drill hole size for a 0.7500” finished hole;
0.7275” – 0.7350”
| 0.2500“ x 0.98 = 0.2450” | 0.2500“ x 0.97 = 0.2425” |
Therefore, the appropriate range of the pre-ream drill hole size for a 0.2500” finished hole;
0.2425” – 0.2450”
If you are fine tuning your operation and are within the 2%-3% range;
Try removing 2% of the reamer diameter for steels and tough alloys..
And 3% for non-ferrous and cast iron materials..
If you are rough reaming, stock removal can be up to 5% of the reamer diameter.
The 2%-3% rule is great in theory.
In the real world drill bits come in standard sizes.
Most do not have time or money to wait for a special size drill bit to be made.
You are usually forced to choose among standard drill bit sizes that are on the shelf.
A Pre-Ream Drill Hole Size Chart is provided below.
The chart tells the appropriate standard drill bit size to choose when reaming fractional diameters from 1/8” to 1” in 1/64” increments.
Pre-Ream Drill Hole Size Chart
A PDF of this chart can be downloaded from Rock River Tool Inc. 13)
| Reamer diameter fraction - decimal (nom) | Hole size to leave 2% | Drill size to leave 2% | Hole size to leave 3% | Drill size to leave 3% |
|---|---|---|---|---|
| 1/8“ - .1250” | .1225“ | 31 | .1213” | 3.0mm |
| 9/64“ - .1406” | .1378“ | 29 | .1364” | 3.4mm |
| 5/32“ - .1562” | .1532“ | 24 | .1516” | 25 |
| 11/64“ - .1719” | .1685“ | 19 | .1667” | 4.2mm |
| 3/16“ - .1875” | .1838“ | 14 | .1819” | 15 |
| 13/64“ - .2031” | .1990“ | 5.0mm | .1970” | 9 |
| 7/32“ - .2188” | .2144“ | 5.4mm | .2122” | 4 |
| 5/64“ - .2344” | .2297“ | 1 | .2274” | 5.7mm |
| 1/4“ - .2500” | .2450“ | C | .2425” | 6.1mm |
| 17/64“ - .2656” | .2600“ | 6.5mm | .2576” | F |
| 9/32“ - .2812” | .2756“ | I | .2728” | 6.9mm |
| 19/64“ - .2969” | .2910“ | 7.3mm | .2880” | 7.25mm |
| 5/16“ - .3125” | .3063“ | 7.75mm | .3031” | N |
| 21/64“ - .3281” | .3215“ | 8.1mm | .3183” | O |
| 11/32“ - .3438” | .3370“ | 8.5mm | .3335” | 8.4mm |
| 23/64“ - .3594” | .3522“ | S | .3486” | 8.8mm |
| 3/8“ - .3750” | .3675“ | 9.25mm | .3638” | 23/64 |
| 25/64“ - .3906” | .3828“ | 9.6mm | .3789” | V |
| 13/32“ - .4062” | .3982“ | 10.0mm | .3941” | 25/64 |
| 27/64“ - .4219” | .4135“ | 10.4mm | .4092” | 13/32 |
| 7/16“ - .4375” | .4288“ | 10.8mm | .4244” | 27/64 |
| 29/64“ - .4531” | .4440“ | 11.2mm | .4395” | 7/16 |
| 15/32“ - .4688” | .4594“ | 11.6mm | .4547” | 29/64 |
| 31/64“ - .4844” | .4747“ | 12.0mm | .4699” | 15/32 |
| 1/2“ - .5000” | .4900“ | 31/64 | .4850” | 12.2mm |
| 33/64“ - .5156” | .5053“ | 1/2 | .5000” | 12.6mm |
| 17/32“ - .5312” | .5206“ | 33/64 | .5153” | 13.0mm |
| 35/64“ - .5469” | .5360“ | 17/32 | .5305” | 13.4mm |
| 9/16“ - .5625” | .5513“ | 35/64 | .5456” | 13.8mm |
| 37/64“ - .5781” | .5665“ | 9/16 | .5608” | 14.2mm |
| 19/32“ - .5938” | .5820“ | 37/64 | .5760” | 14.5mm |
| 39/64“ - .6094” | .5972“ | 19/32 | .5911” | 14.9mm |
| 5/8“ - .6250” | .6125“ | 39/64 | .6063” | 15.3mm |
| 41/64“ - .6406” | .6278“ | 5/8 | .6214” | 15.7mm |
| 21/32“ - .6562” | .6431“ | 41/64 | .6365” | 16.1mm |
| 43/64“ - .6719” | .6585“ | 21/32 | .6517” | 16.5mm |
| 11/16“ - .6875” | .6738“ | 17.0mm | .6669” | 16.8mm |
| 45/64“ - .7031” | .6890“ | 11/16 | .6820” | 17.2mm |
| 23/32“ - .7188” | .7044“ | 45/64 | .6972” | 17.6mm |
| 47/64“ - .7344” | .7197“ | 18.2mm | .7124” | 18.0mm |
| 3/4“ - .7500” | .7350“ | 18.5mm | .7275” | 18.3mm |
| 49/64“ - .7656” | .7502“ | 18.9mm | .7426” | 18.8mm |
| 25/32“ - .7812” | .7656“ | 19.3mm | .7578” | 3/4 |
| 51/64“ - .7969” | .7810“ | 19.7mm | .7730” | 49/64 |
| 13/16“ - .8125” | .7963“ | 20.1mm | .7881” | 25/32 |
| 53/64“ - .8281” | .8115“ | 20.5mm | .8034” | 51/64 |
| 27/32“ - .8438” | .8270“ | 20.8mm | .8185” | 13/16 |
| 55/64“ - .8594” | .8422“ | 21.25mm | .8336” | 53/64 |
| 7/8“ - .8750” | .8575“ | 21.6mm | .8488” | 27/32 |
| 57/64“ - .8906” | .8728“ | 22.0mm | .8639” | 55/64 |
| 29/32“ - .9062” | .8881“ | 22.5mm | .8790” | 7/8 |
| 59/64“ - .9219” | .9035“ | 22.8mm | .8942” | 57/64 |
| 15/16“ - .9375” | .9188“ | 23.25mm | .9094” | 29/32 |
| 61/64“ - .9531” | .9340“ | 23.5mm | .9245” | 59/64 |
| 31/32“ - .9688” | .9494“ | 24.0mm | .9397” | 15/16 |
| 63/64“ - .9844” | .9647“ | 24.4mm | .9549” | 61/64 |
| 1“ - 1.0000” | .9800“ | 24.75mm | .9700” | 31/32 |