This is an old revision of the document!

EVO: Engine Mechanicals - Sub-01A
Timing Inspection Hole / Plug Thread Repair
- These are aluminum internal (case) and steel external (plug) threads (5/8“x18 NF straight bolt cut).
- It is a common occurrence with these threads to damage them or for them to being found to be damaged. Whoever threaded the plug in last may have not taken the time to insure proper thread starting before using a wrench to install the plug and cross-threaded them. Over tightening the plug can crack / stretch the threads and thermal expansion can warp and gall them 1). Sometimes the threads get corroded and galled to the point that removing the plug takes the threads out with it. You can't be certain that the threads haven't been galled before you remove the plug. 2) If you've noticed oil seeping from this plug, the threads are at least suspect.
- The foregoing is under the assumption the engine is assembled. This would obviously not be as big of an issue with the engine out and the case split. Repairs of the timing inspection hole are much easier for you or most machine shops without the flywheel in the way or concerns of metal shavings getting into the engine.
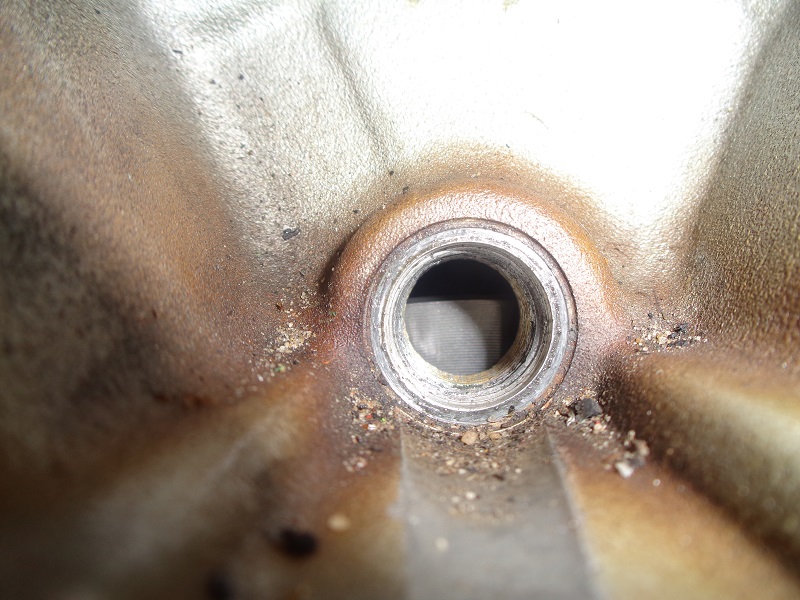
| Timing inspection hole (centered between the two cylinders on the right crankcase) 3) | The plug can be removed with a 3/8” hex tool (Allen wrench). |
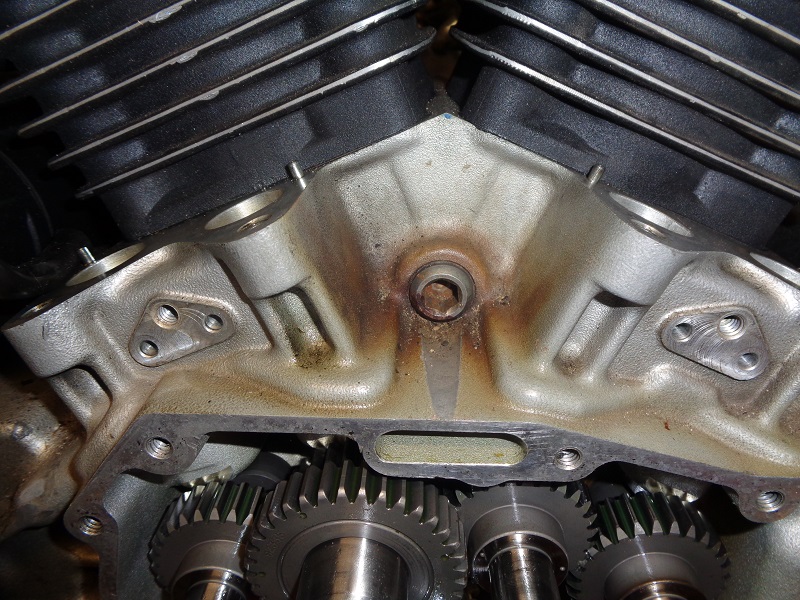 |  |
- Once removed, check the threads on the plug and in the case for damage before trying to re-install the plug. These are straight (not tapered) threads on the plug and in the case. There is no need for the plug to have tapered threads with it having a head on the end. Inspect them closely and in the case of warped or damaged threads, first try to repair or 'chase' the threads. This will keep you from having to drill into the case it isn't necessary.
Permanent Repairs
Chasing the Threads
See also the warped or damaged thread repair section of the Sportsterpedia.
- A tap and a die is used to chase the threads in the case and on the plug respectively back to their original shape / cleanliness and usually done with plenty of good cutting oil.
For this application, fluidity can be detriment to the cause. With the small amount of threads on the plug and the imminent danger of getting cut shavings (swarf) into the engine case thru the timing hole, it is best to use thick lube or even axle grease to lube the tap to chase the case threads.
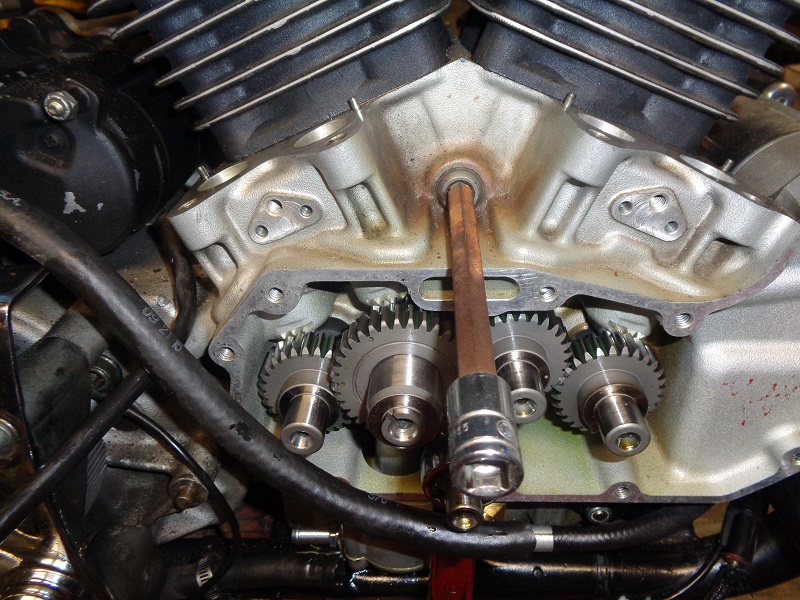
While chasing the threads, your following the existing 'centered' thread pattern. 4)
You only have to run the tap in far enough to clear the length of the plug, not to the end of the case threads.
Tools Needed
- You can generally purchase these at most machinist supply stores online cheaper than you can buy them from motorcycle supply stores 'made for Harleys'.
- 5/8“x18 NF 'bottoming' hand tap for the case threads (which is flat on the end without a taper).
- A bottoming tap only has a very short taper on the end to allow it to get inside the hole. It will immediately cut the threads before it bottoms out into the flywheel. 5)
- A tapered (not to be confused with tapered thread) or plug style tap has a longer tapered end. The tapered end does not cut any threads and it will bottom out against the flywheel before the threads are finished cutting. It is designed to help you center up in the hole for tapping new threads. If you continue turning from that point, you risk back pressure on the tap which could crack the case. If you aren't planning on doing this again, you could cut off the taper 6) (with a Dremil cutting tool) but leave a slight amount of it to allow you to get into the hole before the threads start. But, it's just better to buy the correct tool.
- Tap Wrench: These come in different sizes so make sure it's correct for a 5/8” tap.
- 5/8“x18 NF die for the plug. You can buy a round or a hex die. Either could possibly be held in your palm for use. But, if your threads are bad enough to need repairing this way, you probably need to buy the wrench for it.
- The round one requires a spanner wrench to hold it for use.
- The hex die can be clamped into a vise, held by a standard open end wrench or a socket. You can also purchase the die wrench that fits it.
- Die Wrench: The rounded O.D. die works best with the holder wrench to fit it. Some die and die holders have a different OD depending on the brand.
- Thick lube or grease is needed to catch and hold the shavings and keep them from flinging through the engine case. You will need to clean the threads after your done repairing them. Using compressed air from the engine out through the hole will not work while using lube since the shavings will cling to it and not be blown out of the hole.
- Optional Items:
- Panty Hose: Stuff one solid section of panty hose into the hole prior to any work (between the flywheel and the case while allowing a small amount to be gotten to later with a pick). Make sure the material is not in the way of your work. You wouldn't want to snag it and spin shavings everywhere. The grease on the tap should also help minimize snagging the material. You could also grease the panty hose. When the job is complete grab the panty hose with a hook pick and needle nose pliers (so you don't let go of the panty hose) and pull it out. Any foreign material not already caught up in the threads should be stuck to the panty hose. 7) Pull the material slowly out, so as not to pop any debris off of it into the engine, and it will act as a brush.
- If chasing the threads doesn't work or leave enough meat to allow the plug to tighten without stripping, you may have to do some work on the hole and buy an oversized acorn style plug and tap kit for rethreading the stripped out timing hole. If the taps that come with this kit have a taper or a pilot on the end, 8) that will need to be cut off with a grinder or a Dremil cutting tool before use.
Pics and App. Dims
| 5/8”x18 plug has straight threads with Teflon tape around the neck. 9) | |
 |  |
 |  |
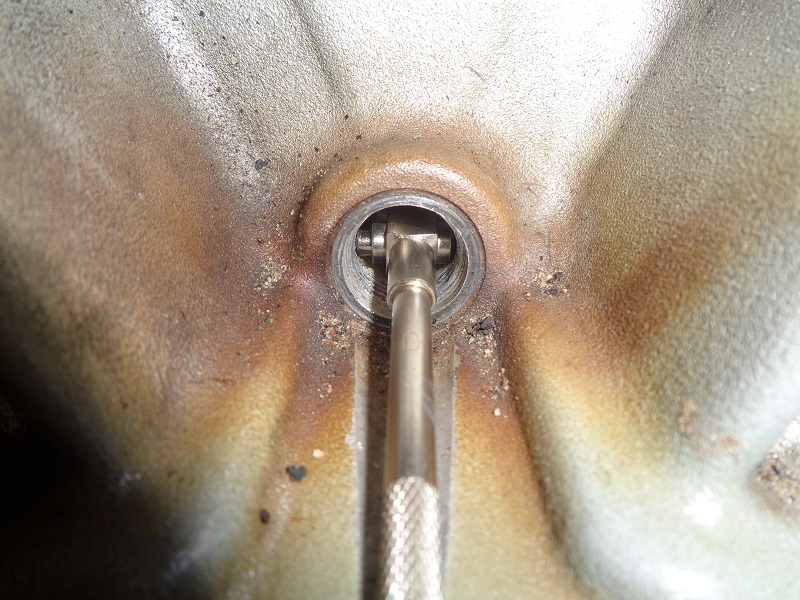
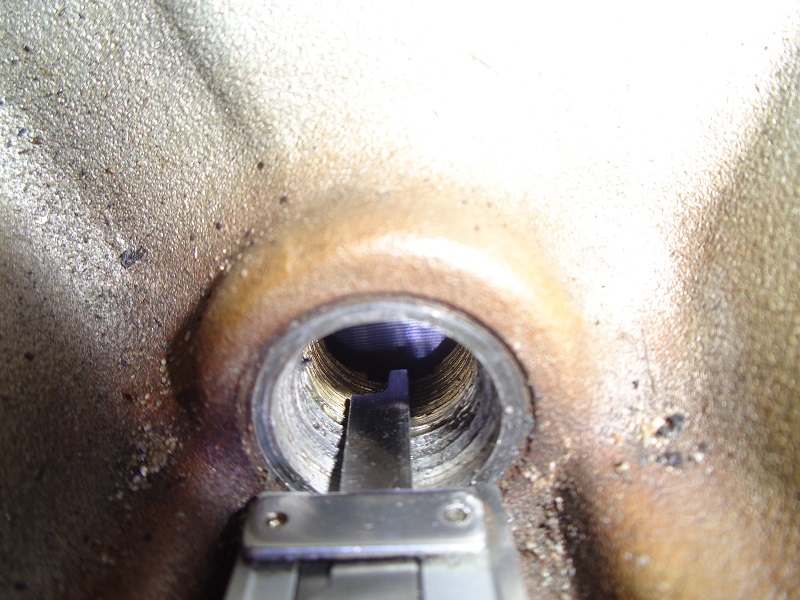
| Straight threads in the case. Same drag on bore gauge - front to back. No taper 10) | |
 |  |
| Notice the plug doesn't go all the way into the end of the case threads 11) | Flywheel sits close to the back of the hole 12) |
 |  |
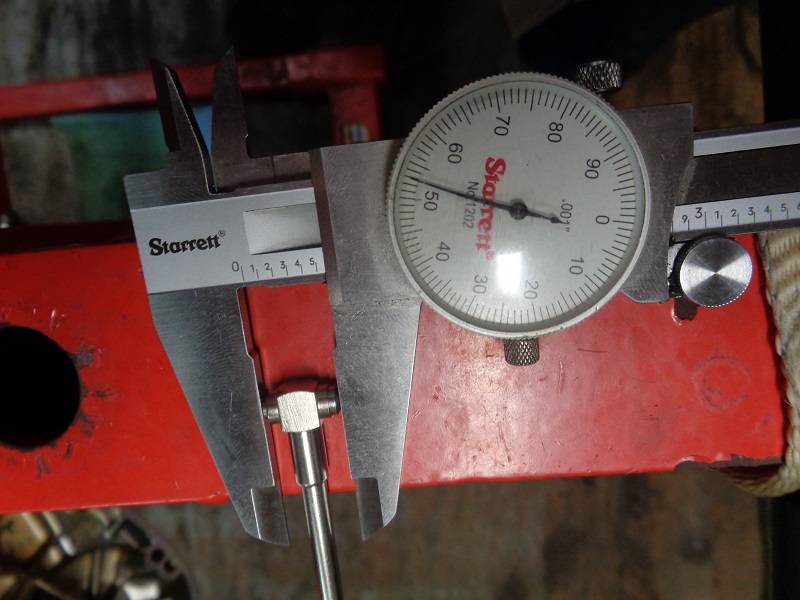
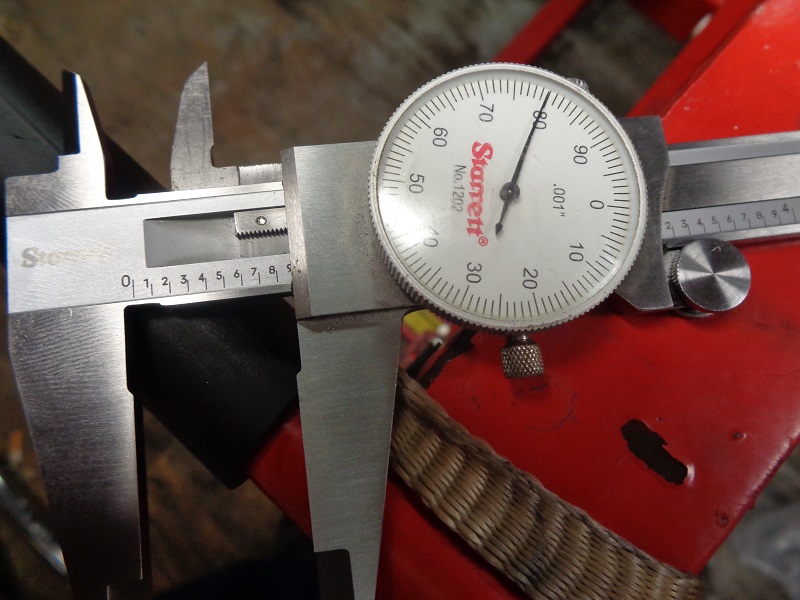
| Measured from the case outside surface to the flywheel. 13) | |
 |  |
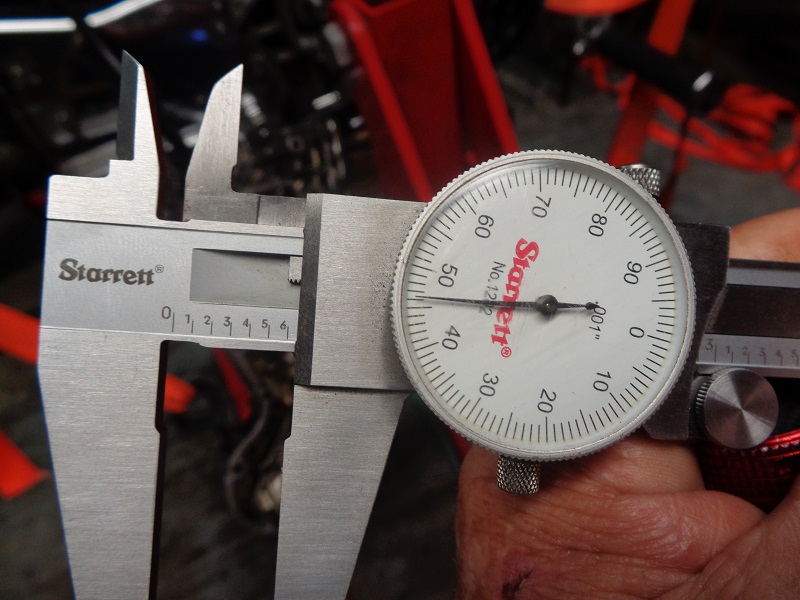
| Measured from the case outside surface to the app. end of the case threads (app. 1/4“ longer than the plug threads). 14) | |
 |  |
1)
hippysmack
3)
photo by Hippysmack
5)
, 7)
Whitewalls of the XLFORUM http://xlforum.net/vbportal/forums/showthread.php?t=2067088&page=2
6)
iNSaNeSHaNe of the XLFORUM http://xlforum.net/vbportal/forums/showthread.php?t=2067088&page=3
13)
photos by hippysmack