Table of Contents

EVO: Electrical System - Sub-02B
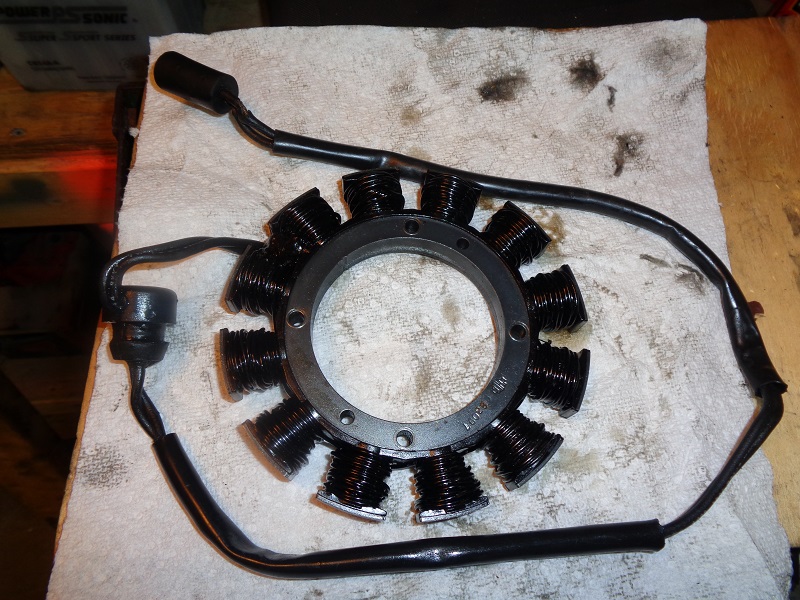
91-03 Stator Replacement
This is not intended to replace the service manual but rather to explain more in depth with pics.
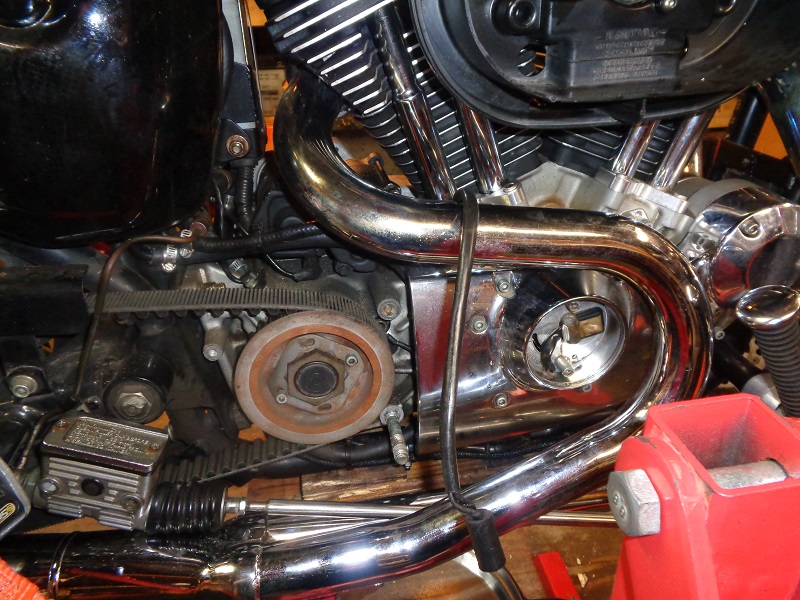
The stator is in the primary compartment behind the engine sprocket.
You'll have to remove the primary cover, engine sprocket *and* the clutch basket to access the stator.
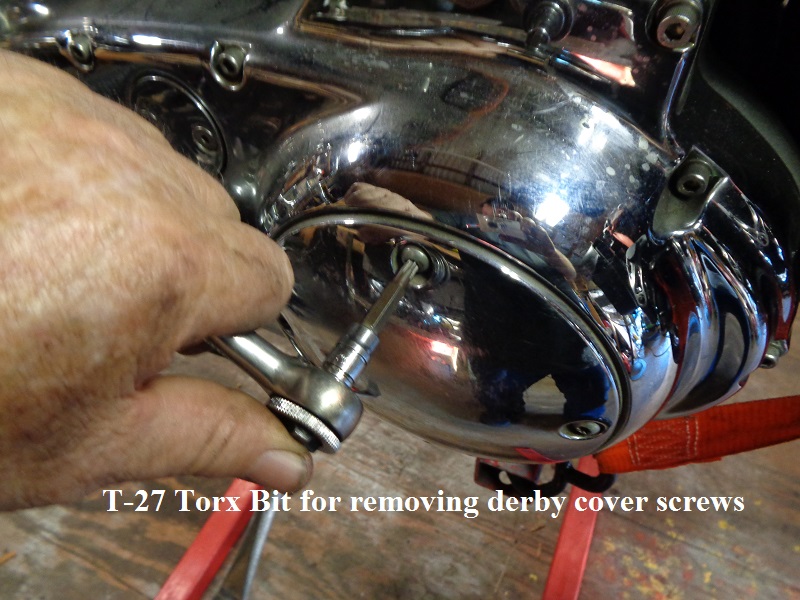
Before removing the primary cover, you'll need to remove the shift lever bracket (or mid foot pedal bracket if applicable), linkage and derby cover.
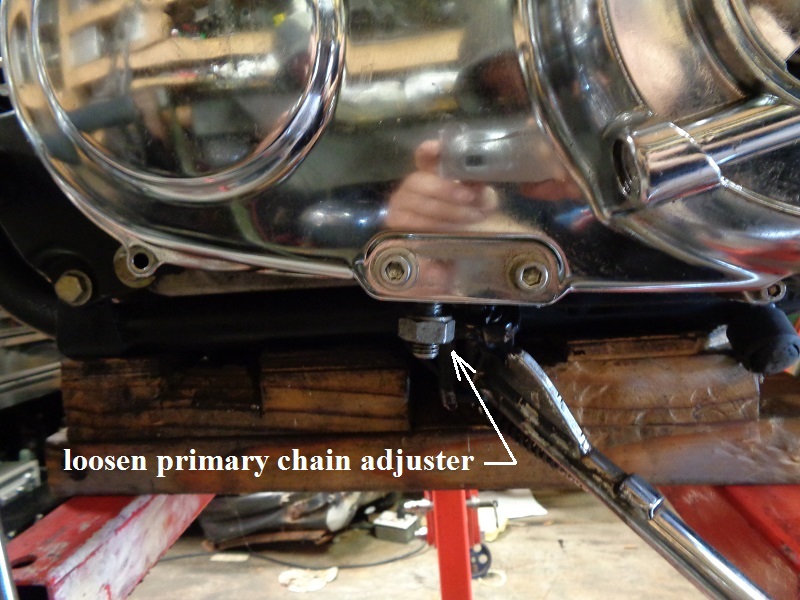
Drain the primary fluid, loosen or remove the clutch cable and loosen the primary chain adjuster.
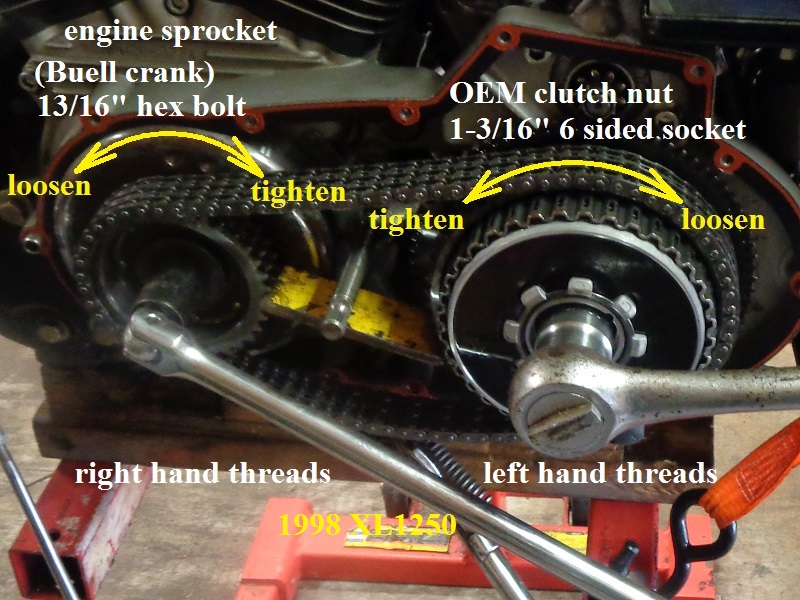
The engine below is a 98 XL1200S that has been upgraded to 1250 with a Buell XB crankshaft and respective engine sprocket.
Before removing the primary cover
Remove shift lever
The bike below has forwards but if you have mid controls, they'll be behind the (2) 5/16“ bolts on the bottom middle of the cover.

Remove the rubber spacer behind the shift lever.
Remove the clutch release assembly


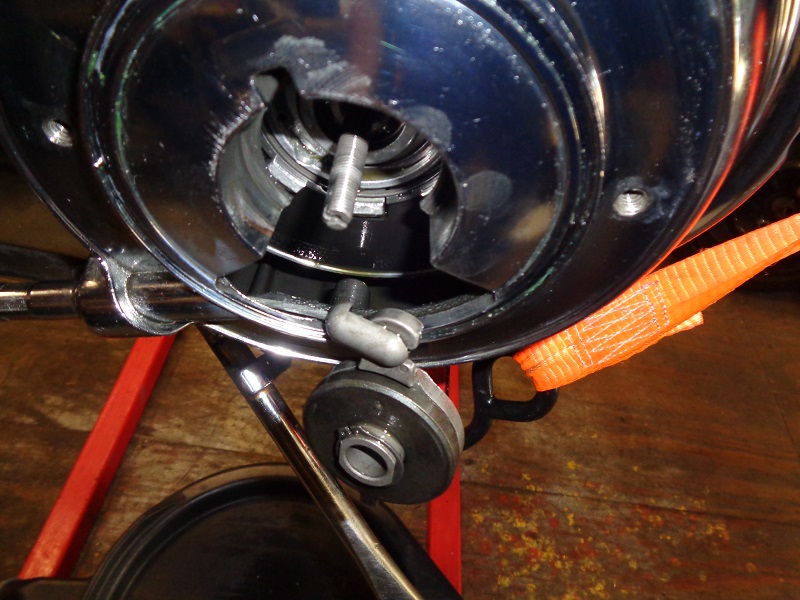
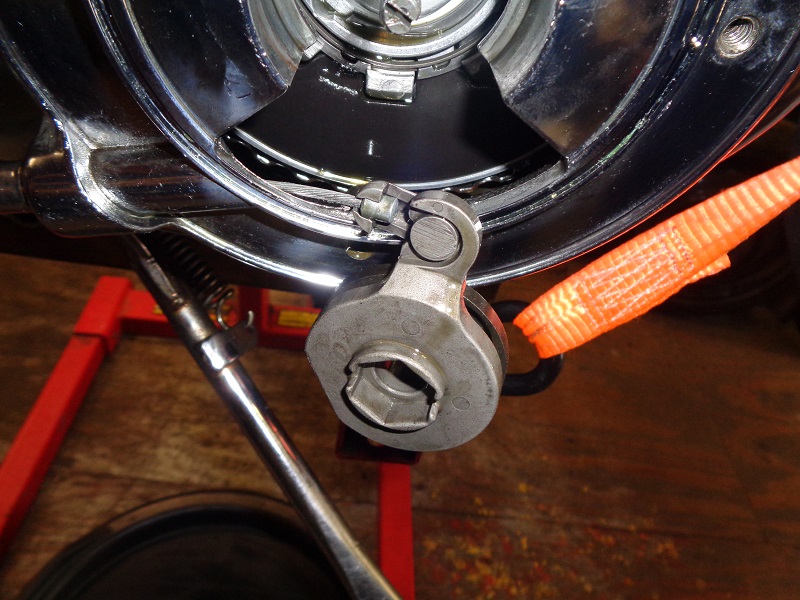
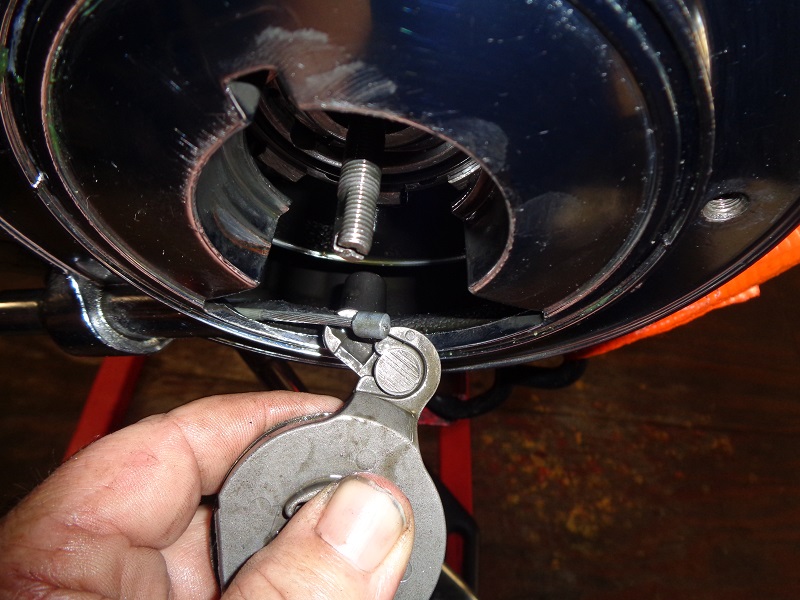
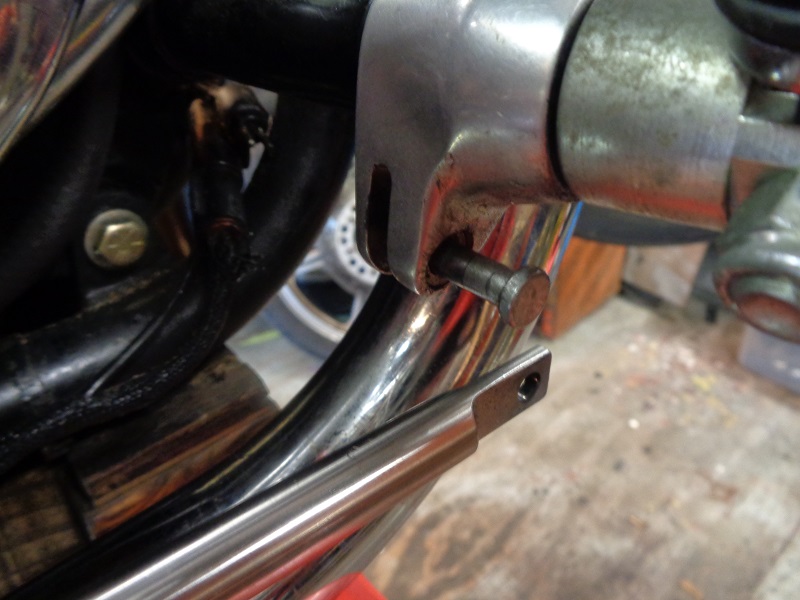
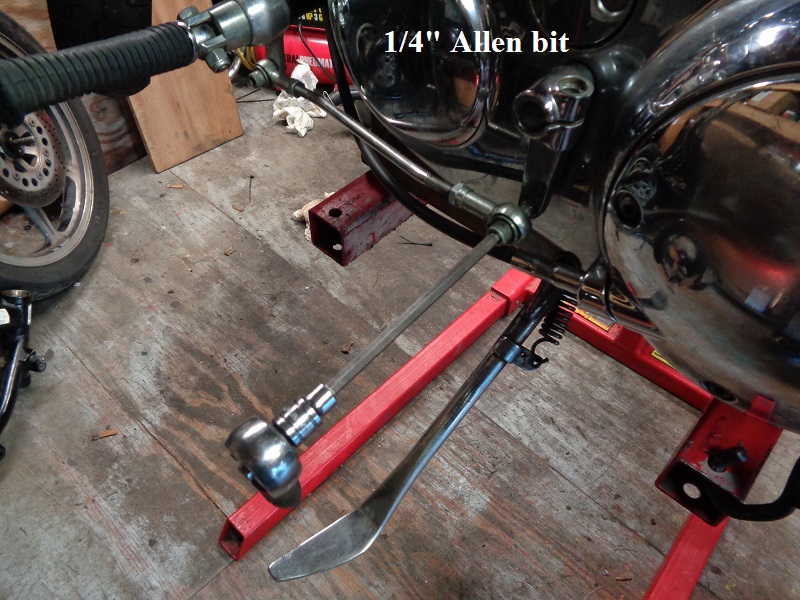
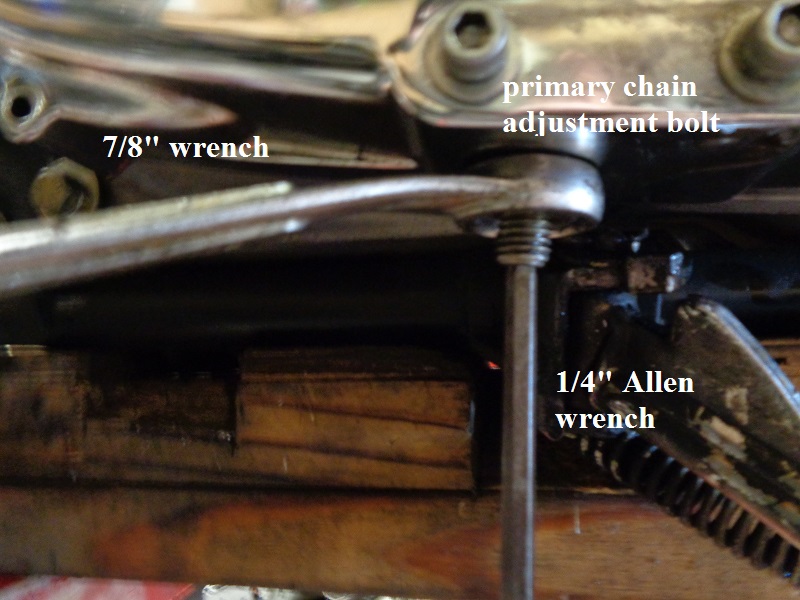
Loosen the primary chain adjuster
Loosening the primary chain adjuster takes the pressure off the primary chain from the cover.
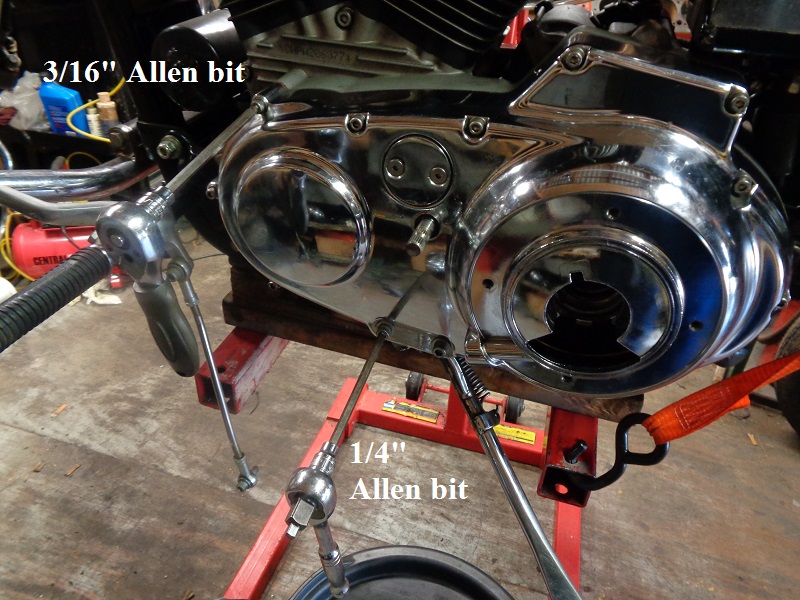
Hold the stud with a 1/4” Allen wrench and use a 7/8“ open end wrench to loosen the tightening nut.
Once the nut is loose, unscrew the stud until it bottoms out to loosen the chain adjuster. \
This is easier done before removing the cover since the engine holds the assembly in place.
If you don't loosen this before re-installing the cover, it will be more difficult to install the cover later.
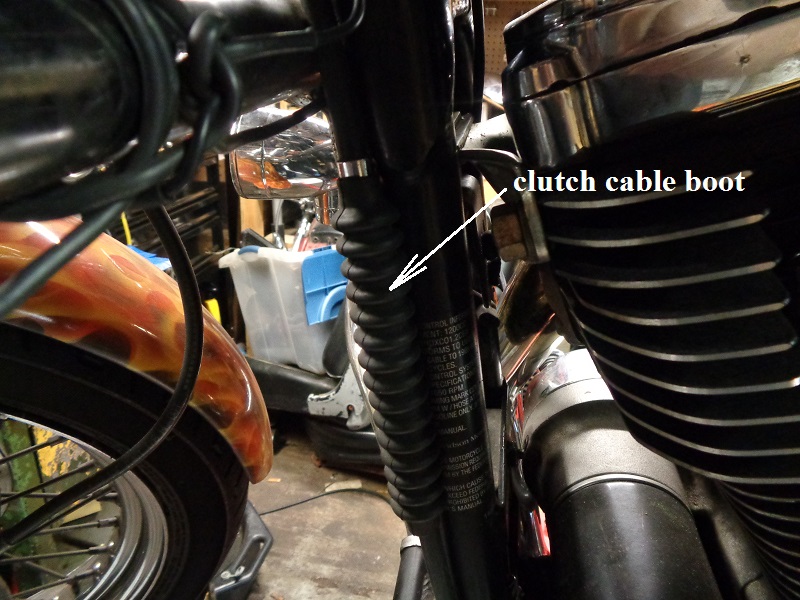
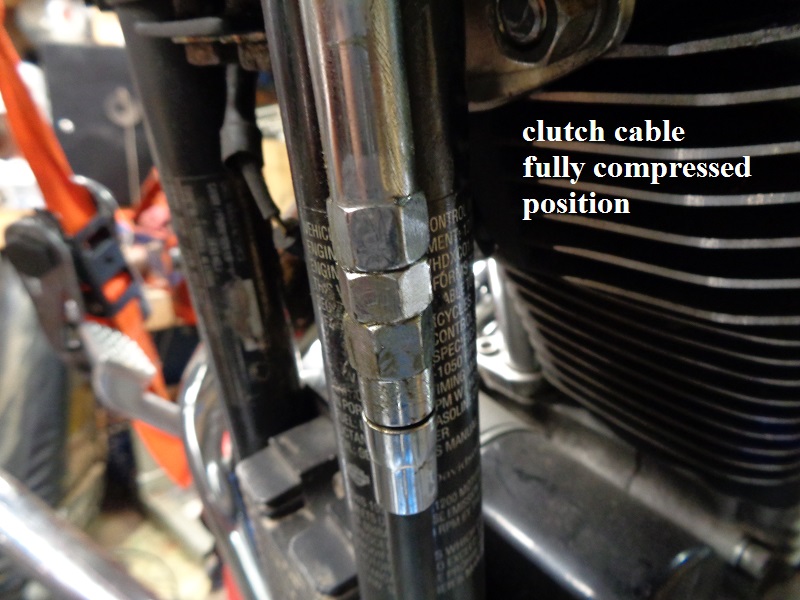
Clutch cable
The clutch cable is best removed from the cover.
It's awkward to handle and keep the cover out of the way while you remove the sprocket / clutch basket and work on the stator.
However, for this application, you could simply leave it on and hang the cover from the bike once removed.
If you have to remove the cable connection or the cover completely from the engine, removing the cable is the easy part.
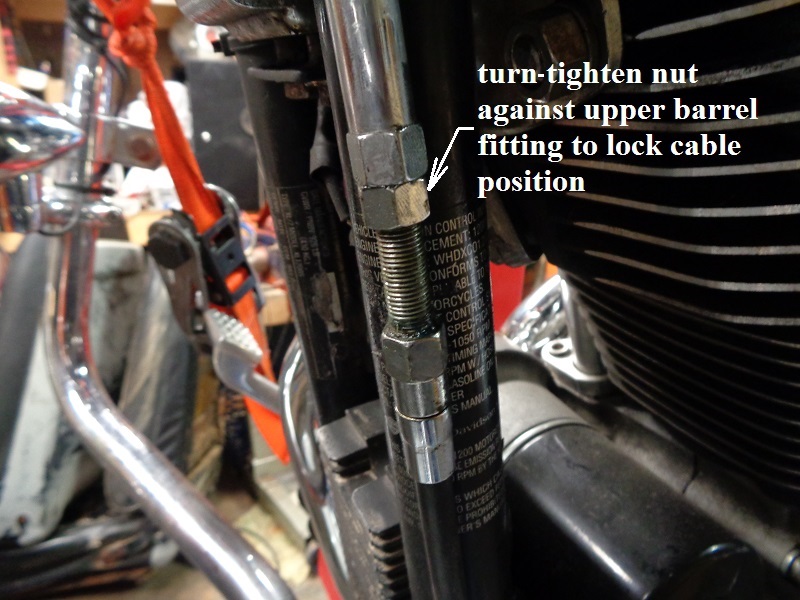
It's easy to cross thread the cable in the primary cover if the cable isn't stretched out to keep it from binding up when installing.
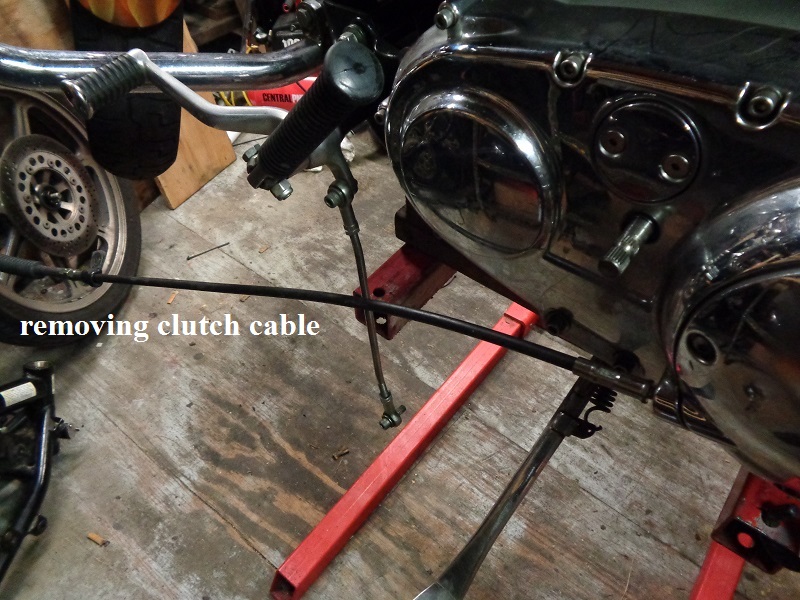
To remove the clutch cable, detach both ends as shown below and any holding clips and/or wire ties.
Retract the cable connection fully to allow slack on the inner braided wire.
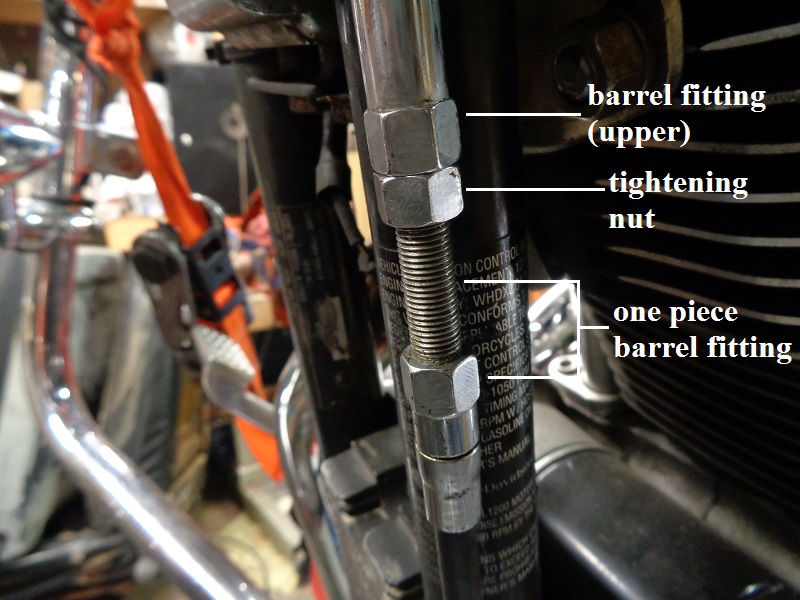

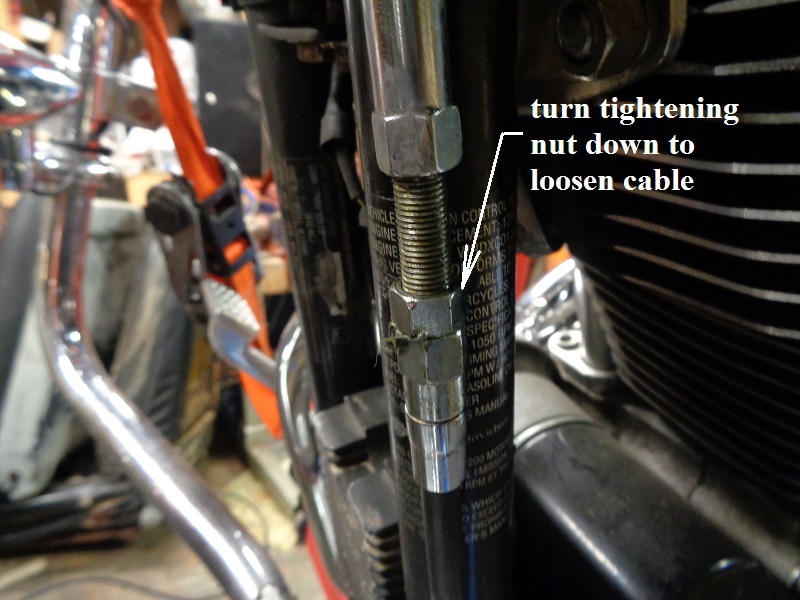
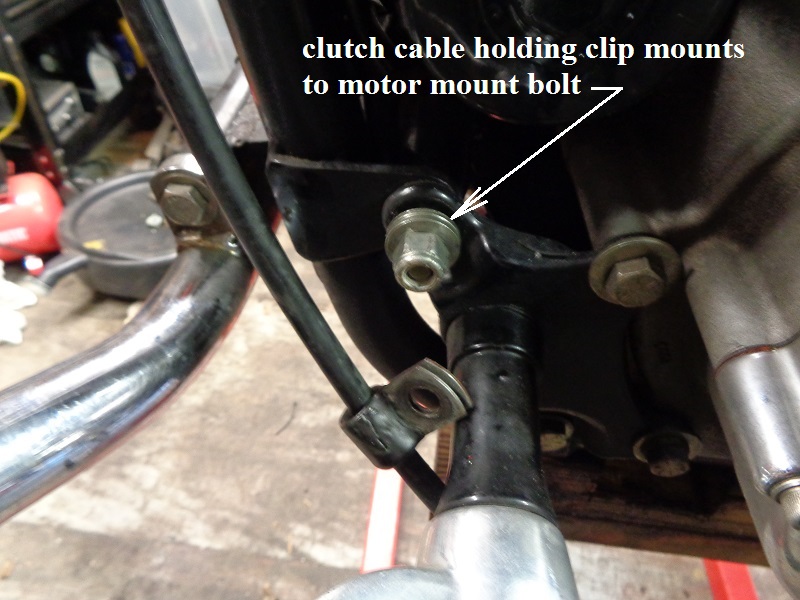
Remove the cable holding clip (if used) and any wire ties etc. that may be holding the cable to the frame.
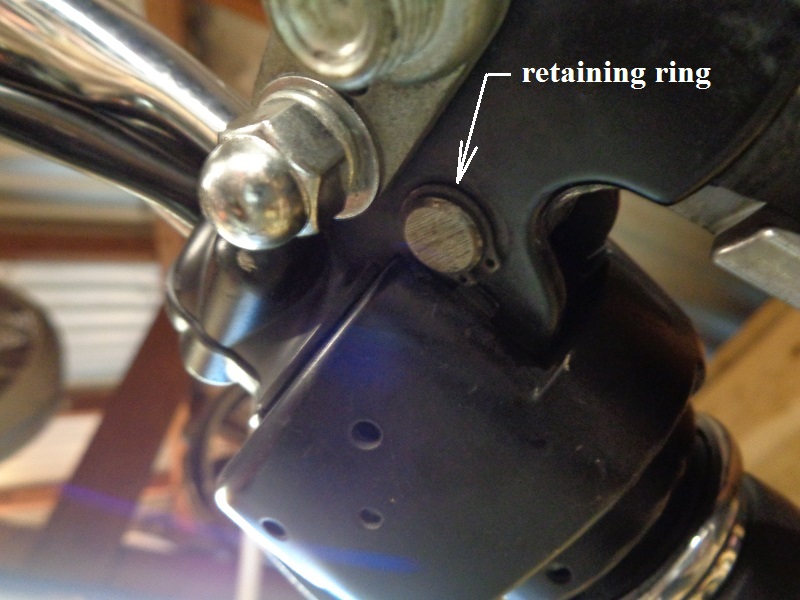
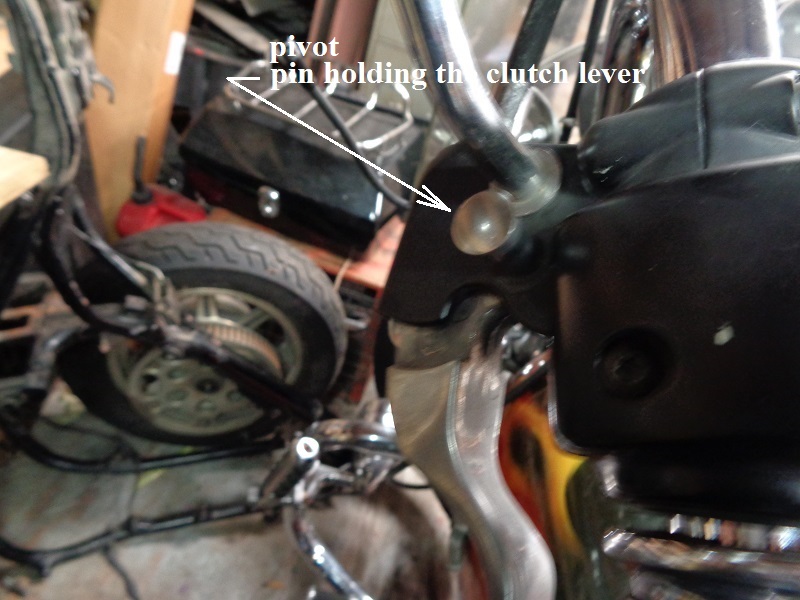
Remove the clutch lever from it's bracket by removing the retaining ring (circlip) underneath and pivot pin from the top.
Then pull the lever from the bracket, swing the cable wire through the slot in the bracket and remove the plastic cable pin.

Then pull the clutch cable down thru the trees and lay it out in front of the bike.
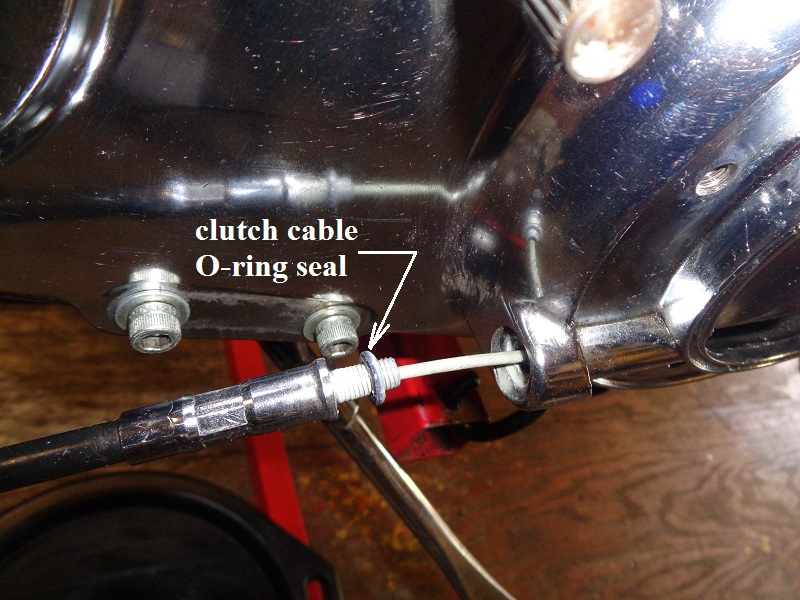
Use a 1/2” open end wrench to loosen the cable connector at the primary cover and then you can most likely twist the cable to loosen the threads.
This method will help keep the cable straight so as to not cross thread it making it more safe for re-installing the cable later.
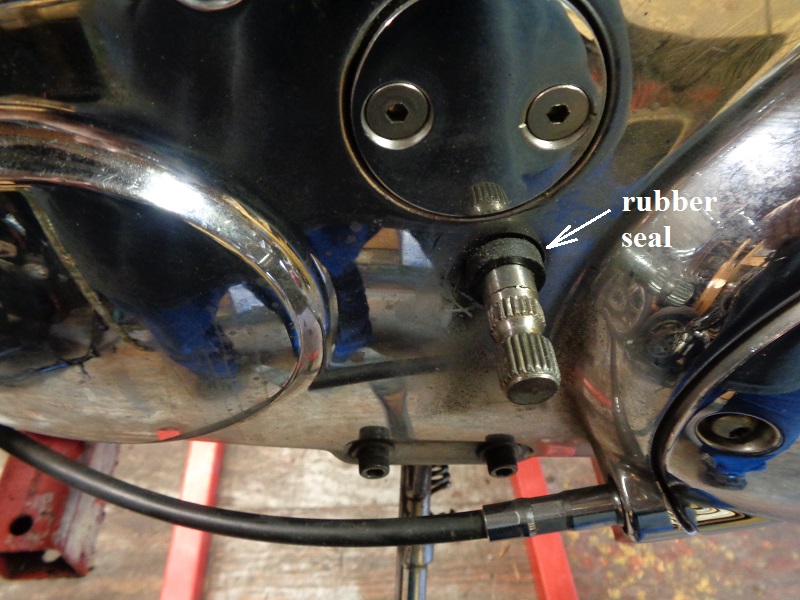
Be careful not to damage the O-ring on the part of the cable that comes out of the cover.
Inspect the O-ring and replace it if needed.
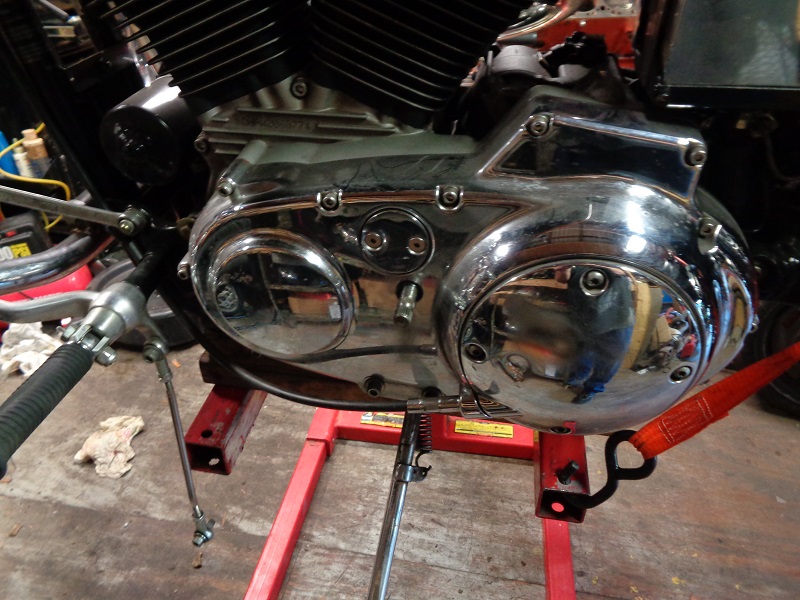
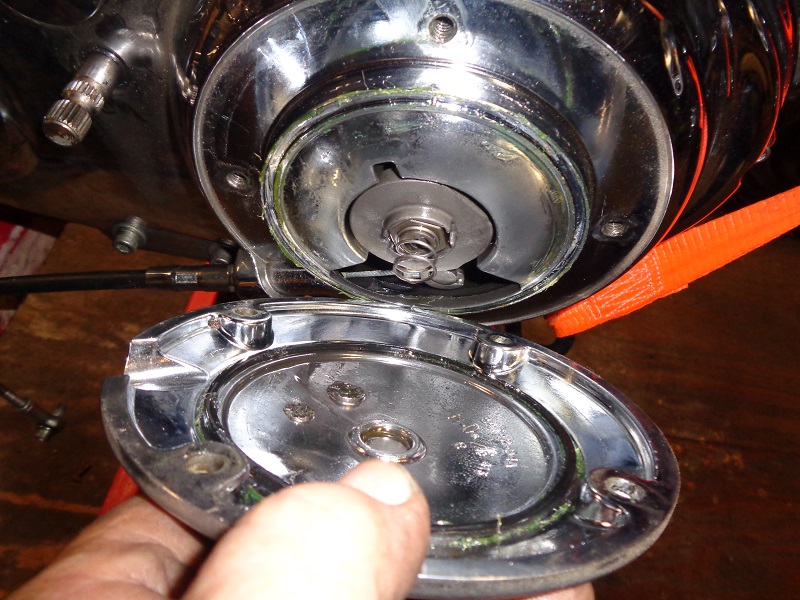
Loosen and remove the primary cover
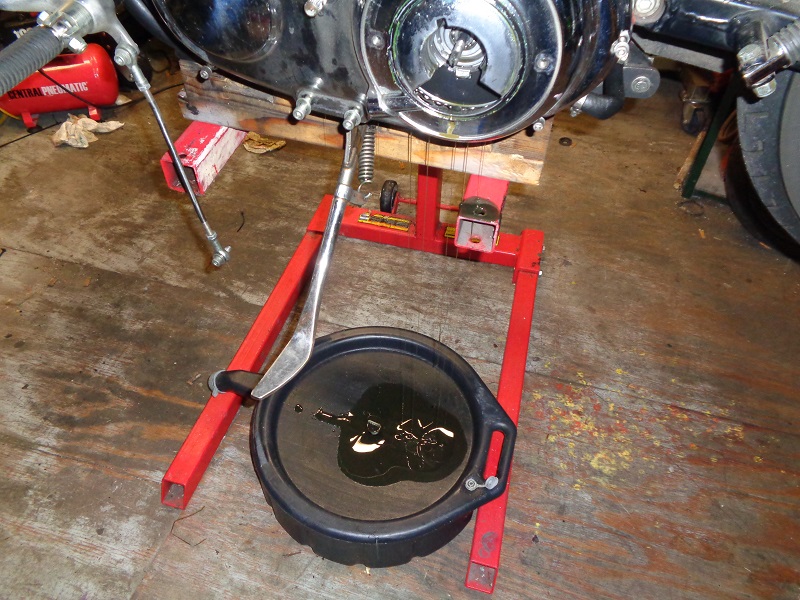
Loosen the screws will most likely result in an oil leak. So, first, put an oil drain bucket or catch pan under the engine.
Loosen the primary cover screws but don't completely remove them to allow oil to drain into a bucket or catch pan.
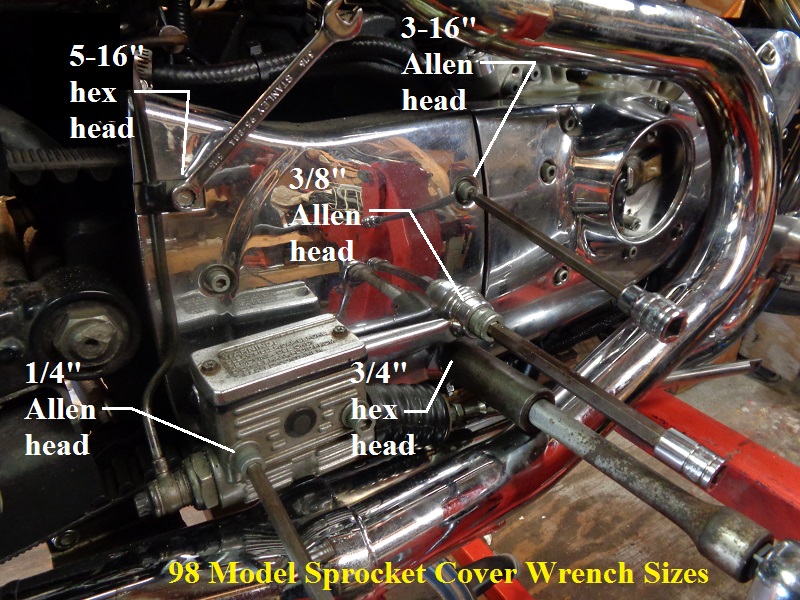
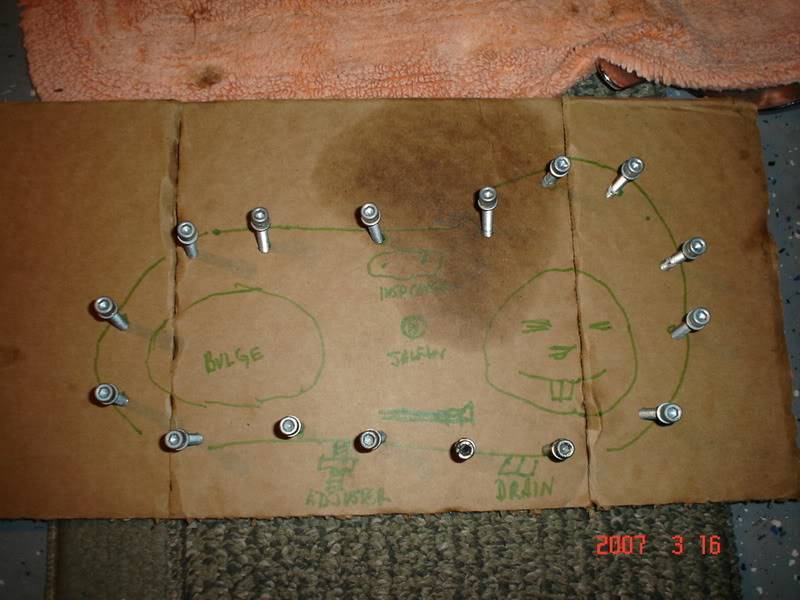
The primary cover has (14) 1/4“ and (2) 5/16” Allen head screws of various lengths.
They will need to be replaced back in the same holes from which they were removed.
So, their proper location will need to be marked upon removal. You can make a drawing of the primary cover on a piece of cardboard.
Remove them one at a time and then put each into it's respective place in the cardboard as removed from the cover.
You can punch the holes with a screwdriver, insert the screws for holding and it makes reassembly less of a headache.

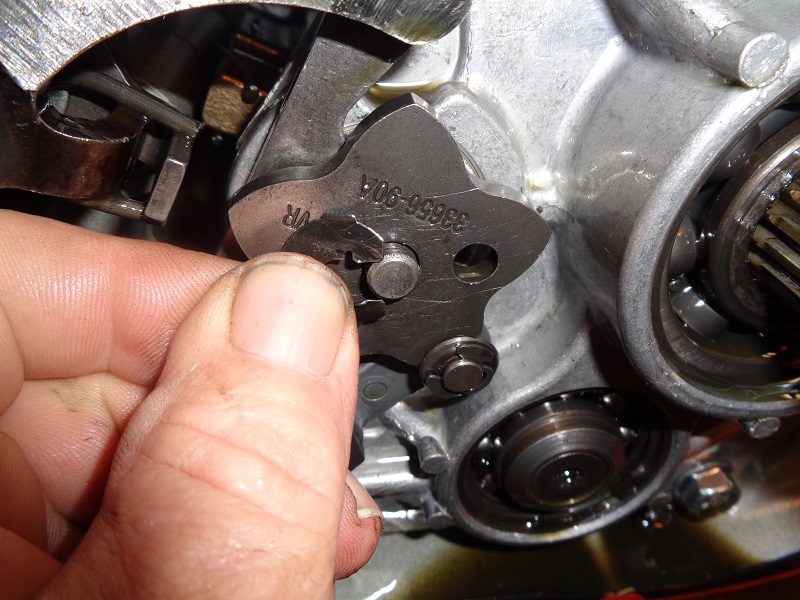
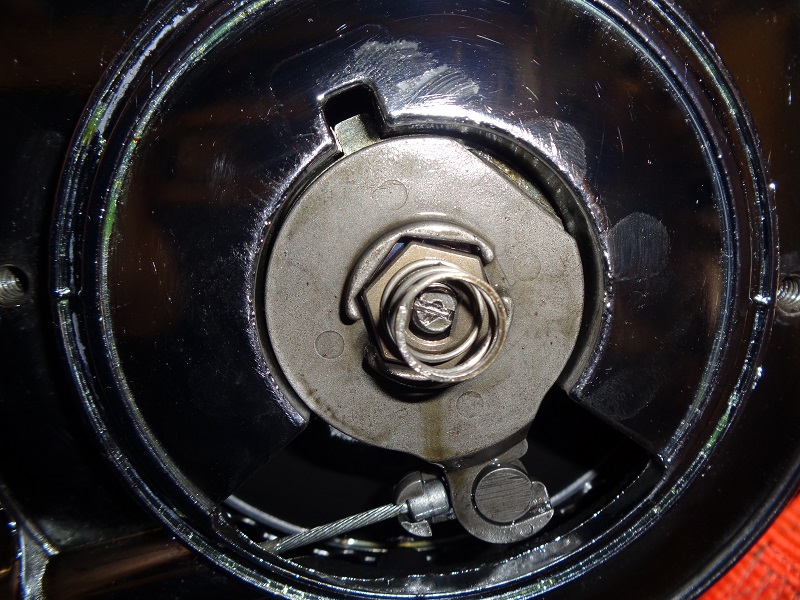
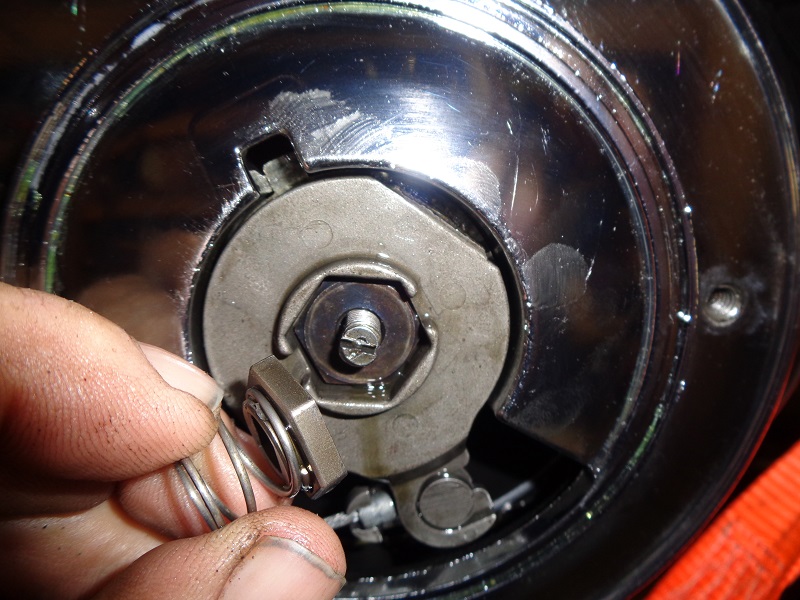
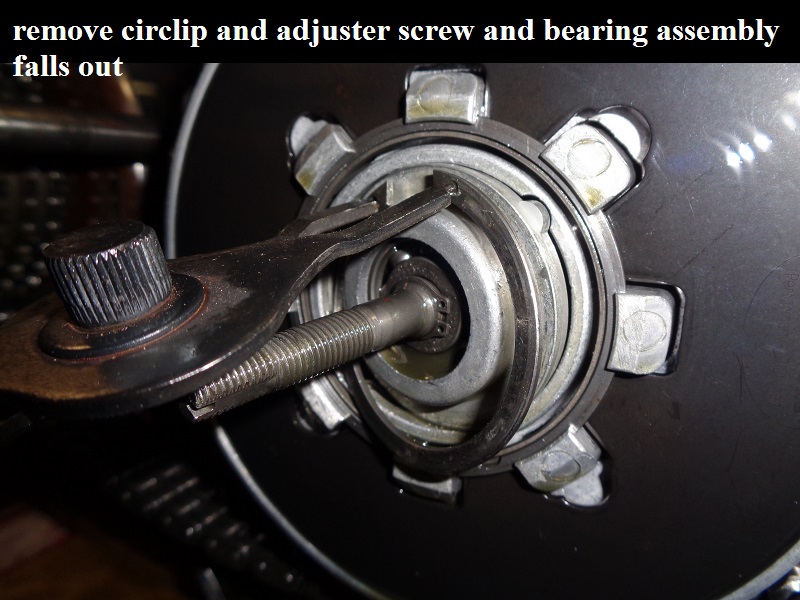
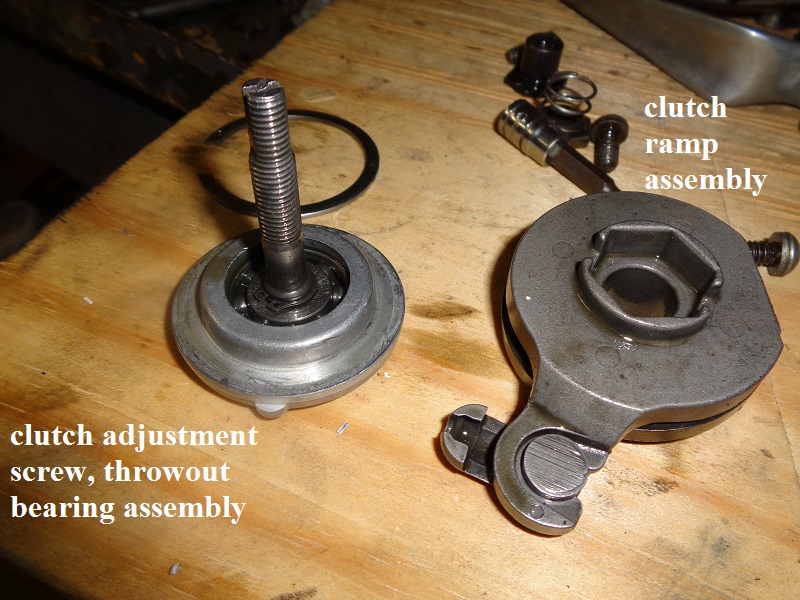
Remove clutch adjustment assembly
Use circlips pliers to remove the circlip and the adjuster assembly simply falls out of the clutch hub.
Inspect the bearings / race for smooth operation and / or damage. The circlip is reusable as long as it's not bent / warped.
 34)
34)  35)
35)
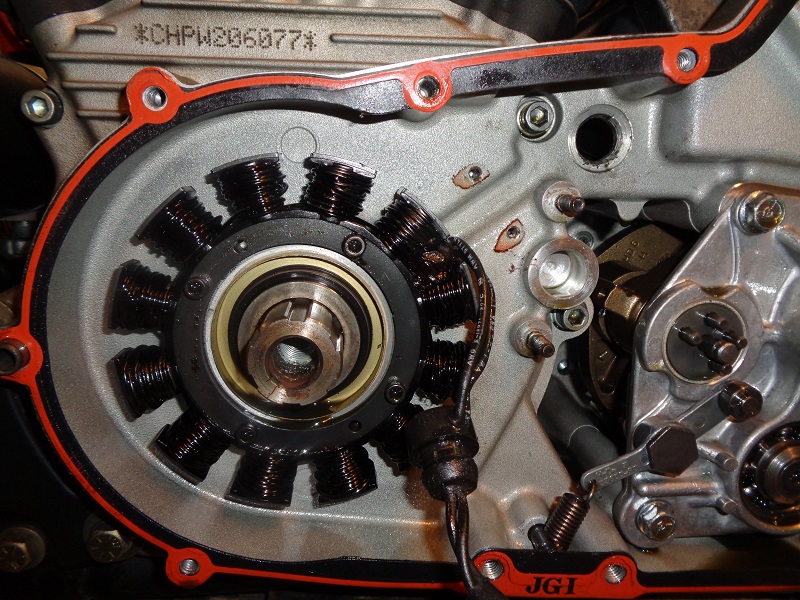
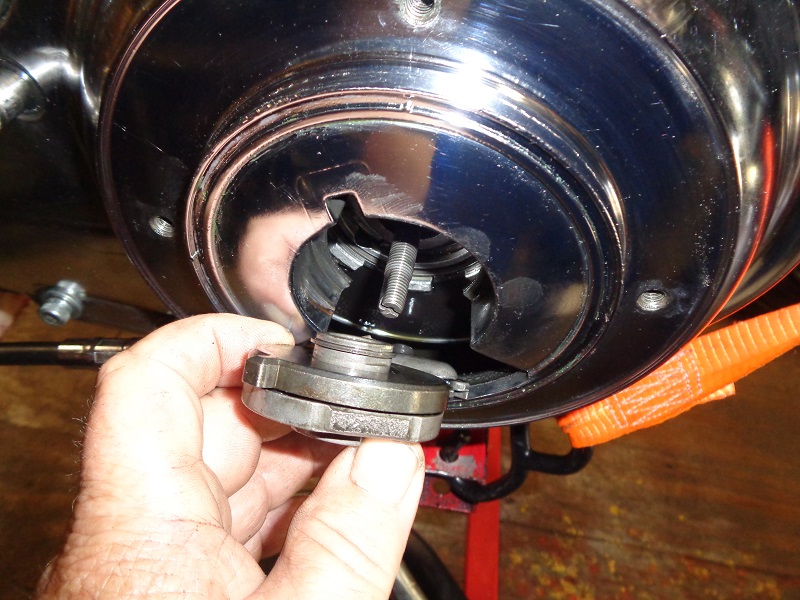
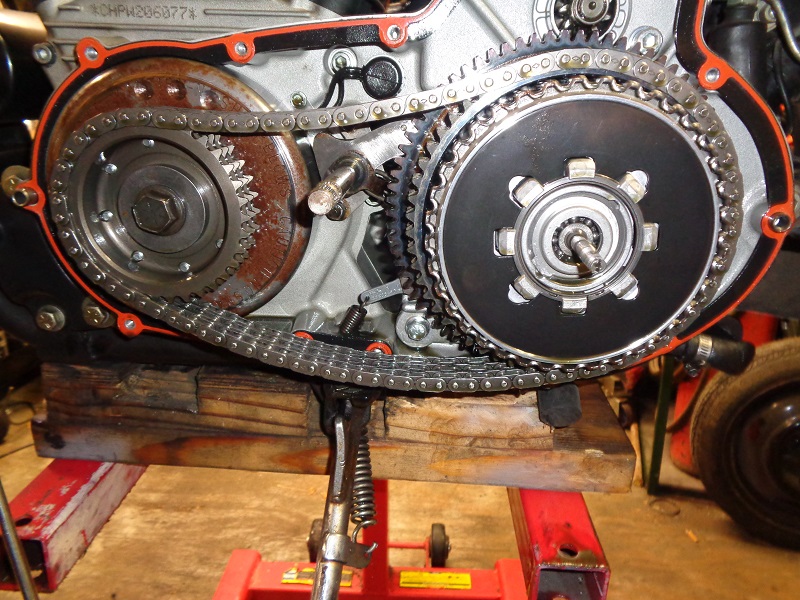
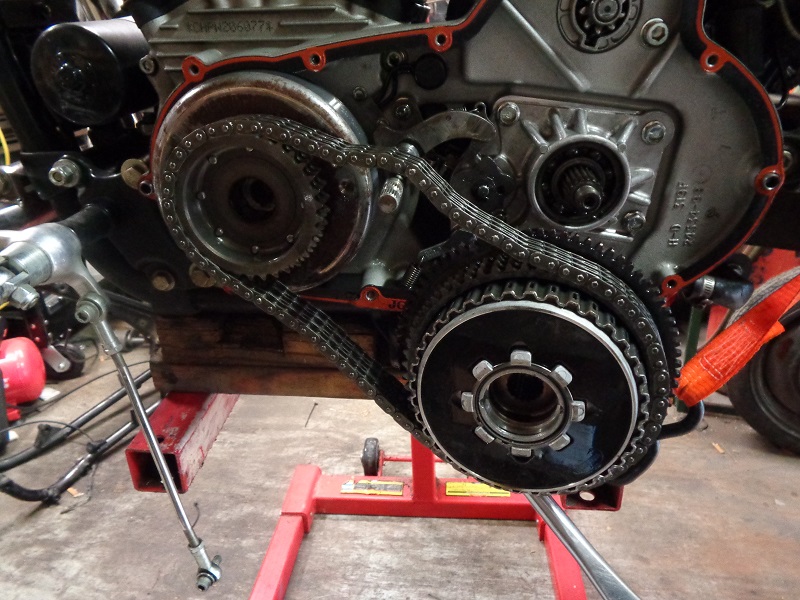
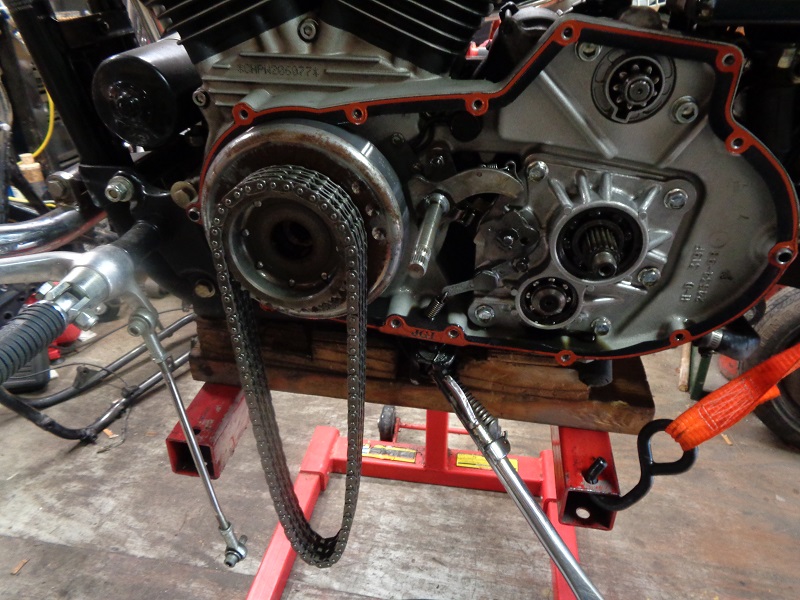
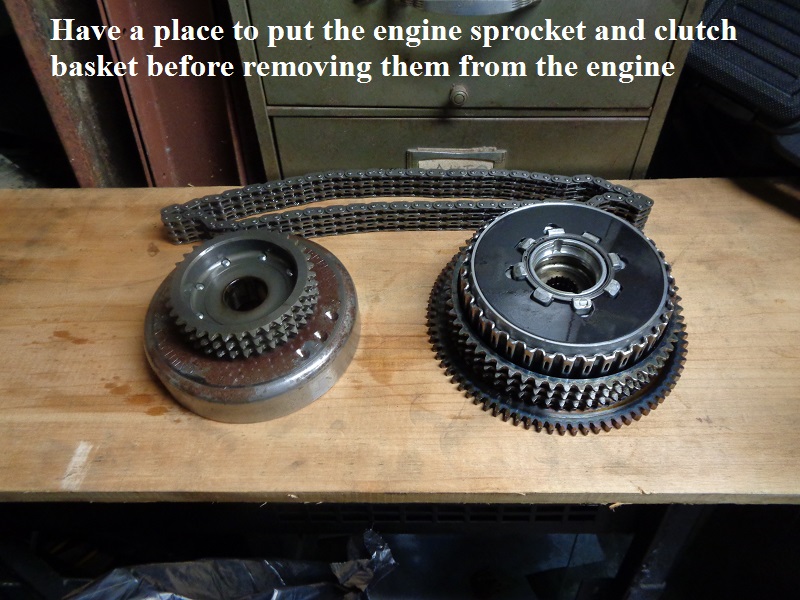
Remove the engine sprocket / clutch basket
See also Replacing Stator Magnets in the tools section of the Sportsterpedia.
Loosen the nuts / bolts holding the engine sprocket and clutch basket on.
The engine sprocket has right hand threads and the clutch basket has left hand threads.
A reversible impact wrench has been used successfully to remove both the engine sprocket and the clutch basket nut.
However, it's been debatable whether you can accurately install them back to proper torque without using a torque wrench instead.
Whichever way you remove them, use regular six-sided sockets.
They are less likely to slip and round off the edges of the nuts. Impact-type sockets are likely too thick to fit.

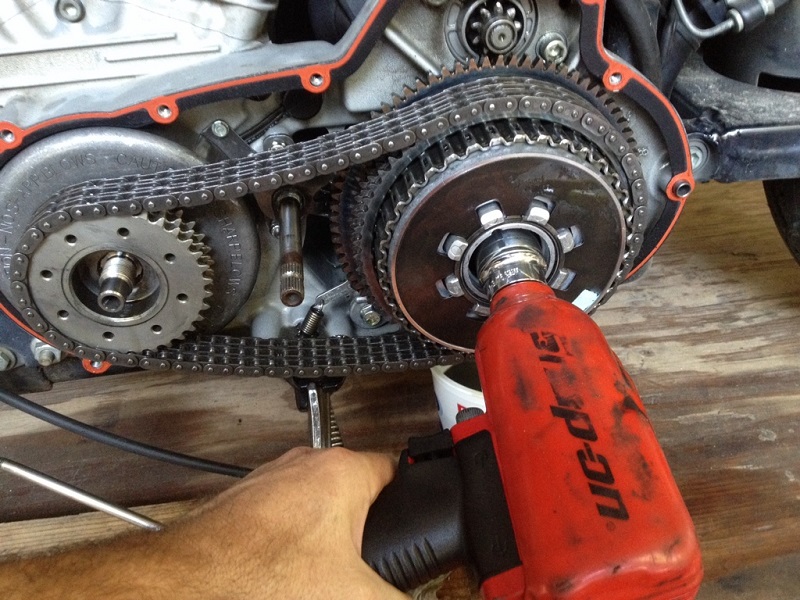
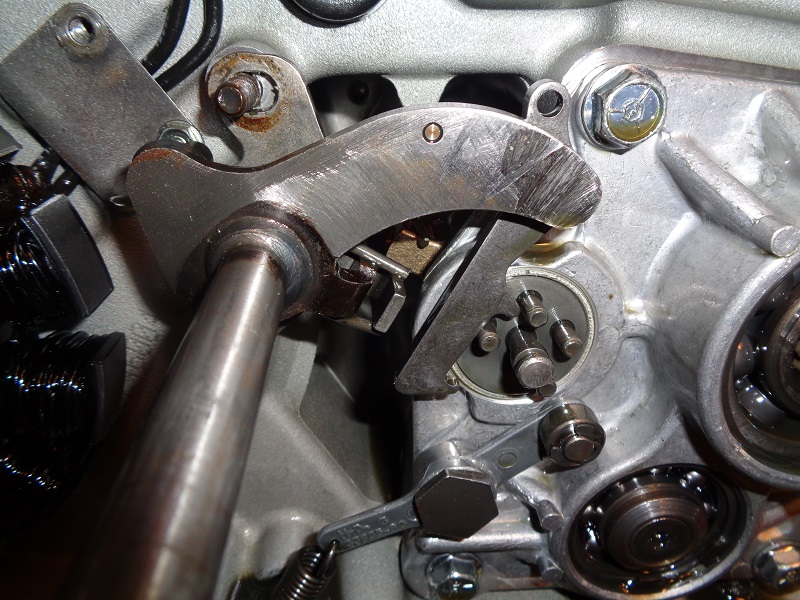
Normally when loosening or tightening these nuts, you will need to lock the hub & sprocket - Do not wedge the chain.
You can buy a primary locking tool (bar) or use a closed 4“ BRASS hinge as a wedge. Place the wedge so as not to put pressure on the shifter shaft
There are also several 4 and 5 speed primary locking tool examples in the tool section.
A closed 4” BRASS hinge also works well to lock the sprockets and then you can use a pull bar and sockets / socket wrench.
The threads should have previously been assembled with red Loctite.
Using a propane torch (on the nut or bolt only) will heat up and melt / soften the Loctite somewhat to make removal easier.
Remove both fasteners holding them on before attempting to remove either.
Big socket wrenches or pullbars give you a lot more leverage to make removing the fasteners less strenuous.
Note:
The engine sprocket has right hand threads (lefty loosy-righty tighty)
The clutch basket has left hand threads (lefty tighty-righty loosy)

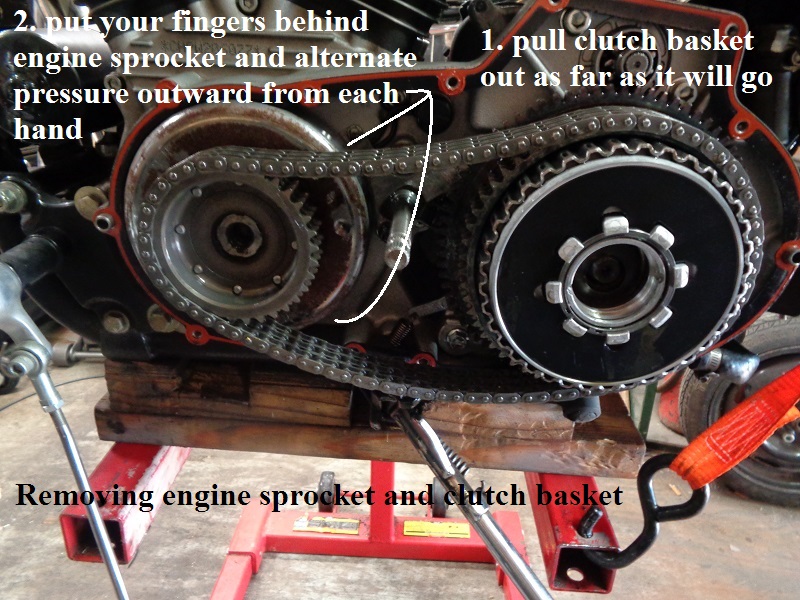
The engine sprocket and clutch hub should be removed as one unit.
Both have to come out together to some point since the chain will tighten and neither will budge at that point.
Once they are both moved out far enough, you may be able to get one or the other to come off without the other.
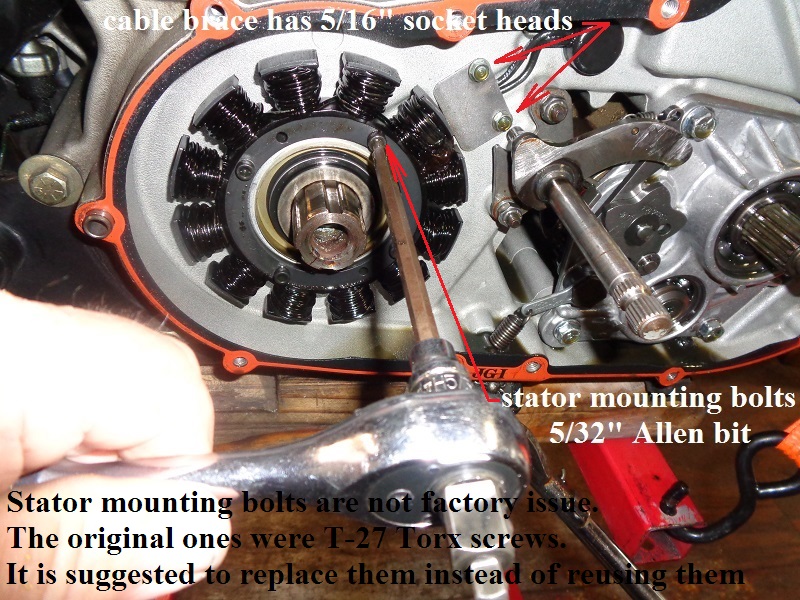
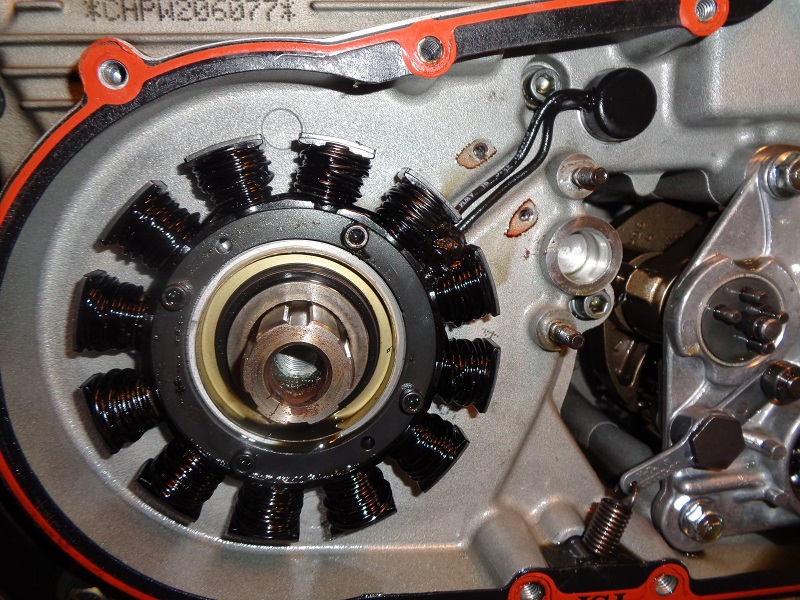
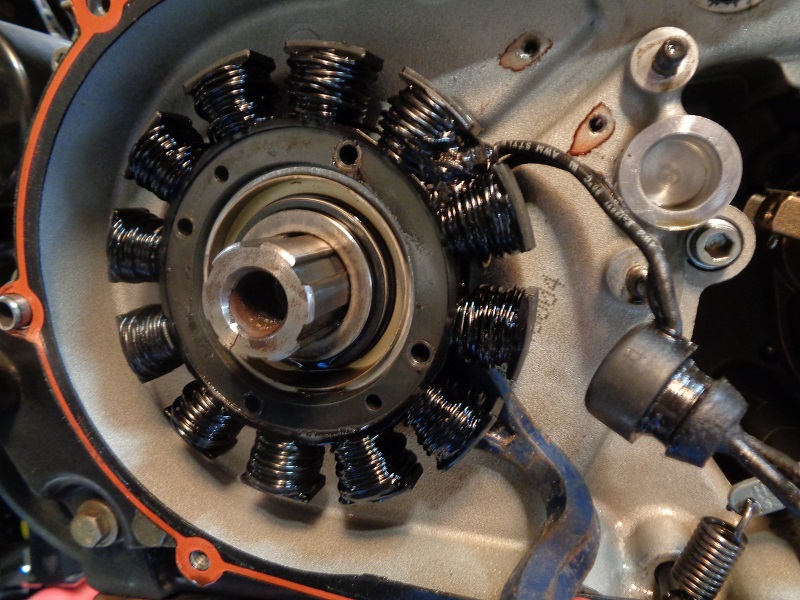
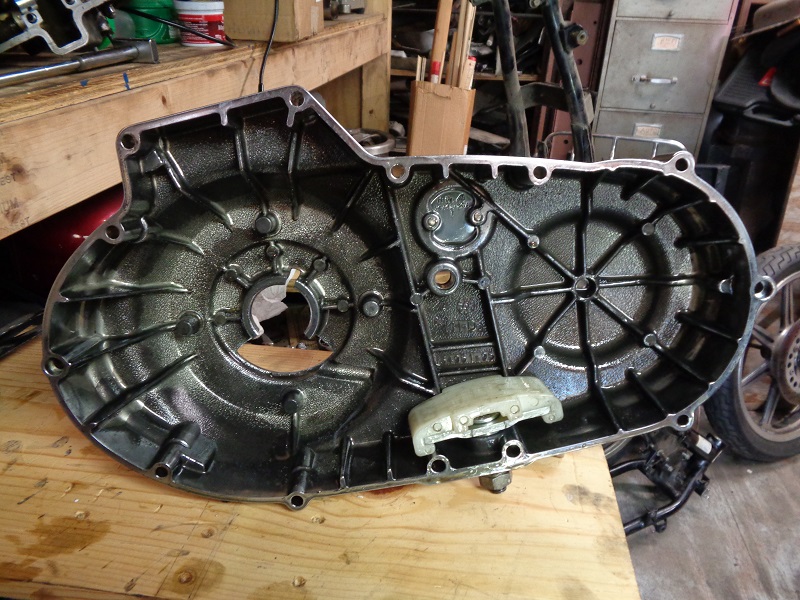
Once the sprocket and clutch basket is removed, you can gain access to the mounting screws for the stator.
You'd think both should slide off at this point.
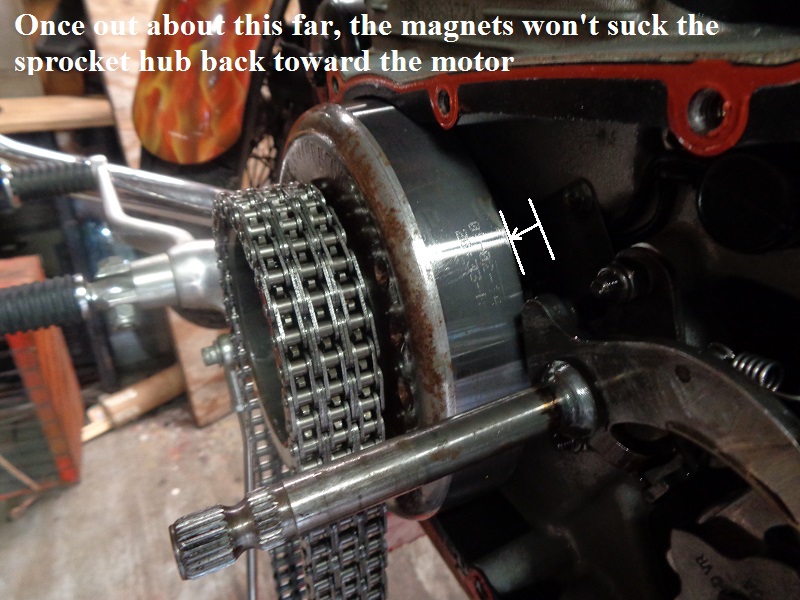
However, the magnets on the engine sprocket are very strong and will keep a good amount of pressure toward the engine until it's moved out so far.
Pull the clutch basket out as far as possible and then maneuver your fingers both hands under the engine sprocket.
Rock it side to side while pulling outward.
Slowly you can rock it out enough to get your fingers under it to move it out far enough to release the force generated by the magnets.
If the chain gets tight, move the clutch basket out some more and go back to the sprocket.
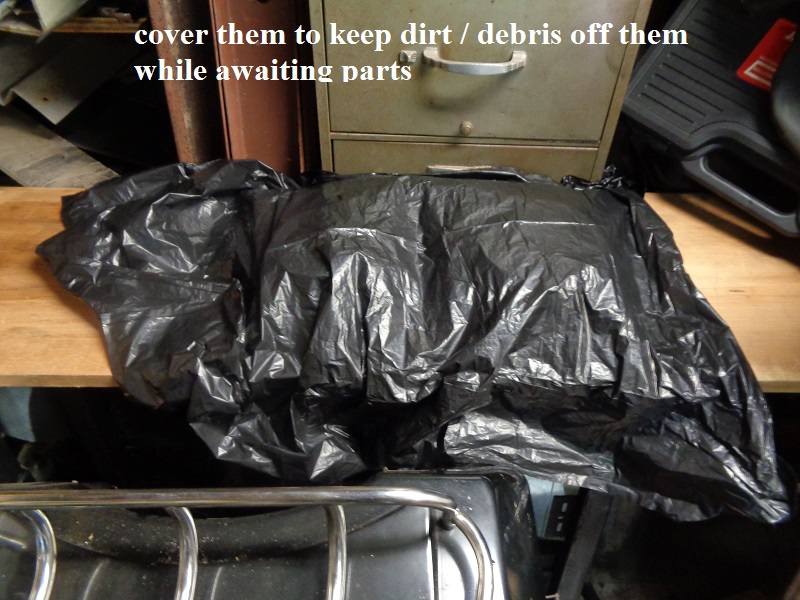
DO NOT DROP THE ENGINE SPROCKET. The magnets can crack or break off and that's a different problem.
However they come off is fine as long as they are not dropped.

Make sure you already have a place to put them and a clear walking path before removing them from the engine.
Cover them to keep dirt / debris off them until they are ready to go back on.
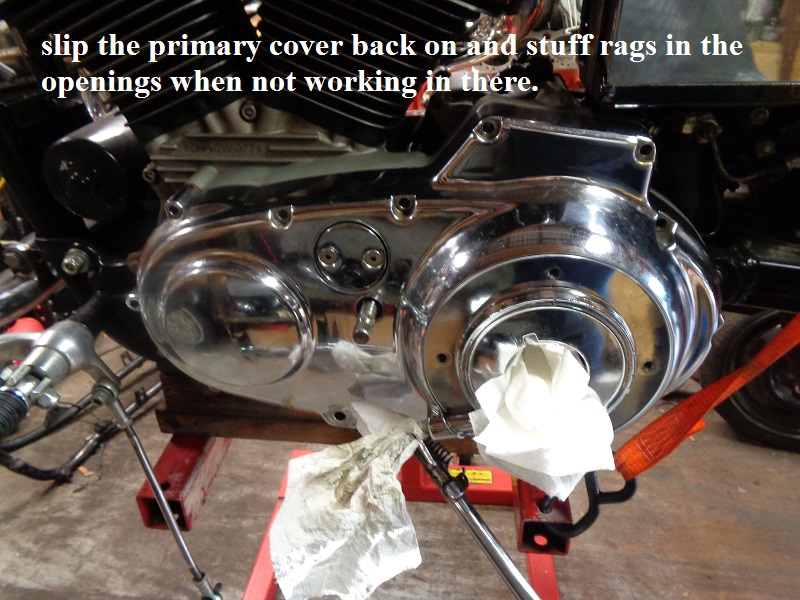
Slip the primary cover back on and stuff rags in the openings when not working inside the engine to help keep out dirt / debris.
 45)
45)  46)
46)