Table of Contents
This is an old revision of the document!

EVO: Primary Drive & Clutch
Primary Drive Design
Primary Chain Adjustment
 FSM Recommended Procedure
- Place the bike on a lift
- Remove the Primary Chain inspection cover
- Remove the spark plugs
- Put the bike in 5th gear
- Rotate the rear tire to cause the Primary Chain
to rotate past the inspection hole
Rotate the chain fully around its length to find the spot that has the tightest tension. This is the point at which you must set the minimum play (or looseness). The initial primary chain vertical free play may be slightly tight from the factory since they use precision measurements.
On a cold engine (left overnight), the overall movement of the chain from pressed down to pressed up must be 3/8“ to 1/2”. On a hot engine, the recommendation is 1/4“ to 3/8”. By finding & using the tightest tension point and using the looser specification, you will avoid overtightening, which might otherwise occur. An overtightened primary chain will cause whining and excessive wear of the sprocket bearings.
The adjustment of the chain tension is made using the Primary Chain Adjuster, mounted to the bottom of the Primary Cover. The adjuster mounting bolt extends through the Primary Cover to allow adjusting the tension without removing the cover. The adjuster bolt has a lock nut to keep the adjustment from changing.
To make the adjustment, hold the bolt steady and loosen the lock nut. Turn the bolt clockwise (viewed from below) to reduce (or tighten) the amount of chain free play or CCW to increase the free play. Once the adjustment is correct, hold the bolt steady & tighten the lock nut.
Primary Chain Tensioner
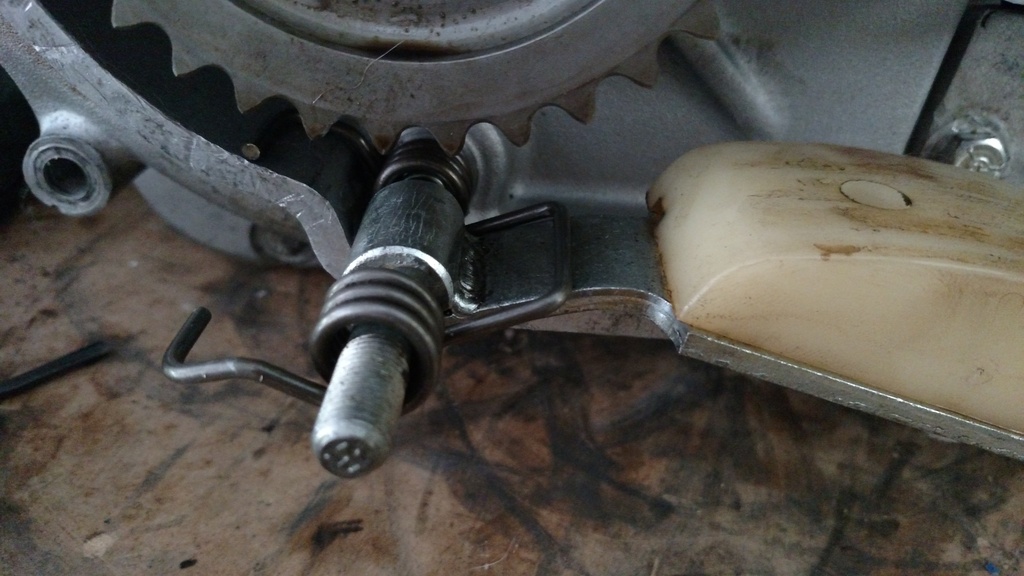 |
| 84 XLH Primary Chain Tensioner & Spring (40019-86) 1) |
Sprocket Mounting Torques
When disassembling or re-installing the Engine Sprocket (Rotor), Primary Chain and Clutch Basket, use the following information:
| Nut Description | Nut Size | Tightening Torque | Where | Notes | |
|---|---|---|---|---|---|
| Engine Sprocket Nut | |||||
| 1991-1997 Models | 1-1/8“ Nut | 150-165ft-lbs | at Rotor Assy | *HD Tech Tip 211 – September 16, 2005 Flywheel Sprocket Shaft Nut Torque Update The flywheel (engine) sprocket shaft nut torque for 2004 & later Sportsters and 2003 & later Buell XB models has been changed. The torque has been increased from 190-210 to 240-260 ft lbs. Remember to clean the threads and generously apply LOCTITE Threadlocker 262 (red) onto the threads of the engine sprocket shaft. |
|
| 1998-2003 Models | 1-1/8” Nut | 190-210ft-lbs | at Rotor Assy | ||
| 2004+ Models | 1-1/8“ Nut | 240-260ft-lbs* | at Rotor Assy | ||
| Transmission Main Shaft Nut (1991-later) | |||||
| Left-hand Threads!! | 1-3/16” Nut | 75ft-lbs | at Clutch Hub | Use only 2 or 3 drops of RED threadlocker on this nut |
|
Use regular six-sided sockets which are less likely to slip and round off the edges of the nuts. Impact-type sockets are likely too thick to fit.
You will need to lock the hub & sprocket while loosening & tightening the nuts. Buy a primary locking tool (bar) or use a closed 4“ BRASS hinge as a wedge.