Table of Contents

EVO: Suspension - Sub-03A
1998 1200S Swingarm Bearing / Bushing Inspection and Replacement
Prep Work
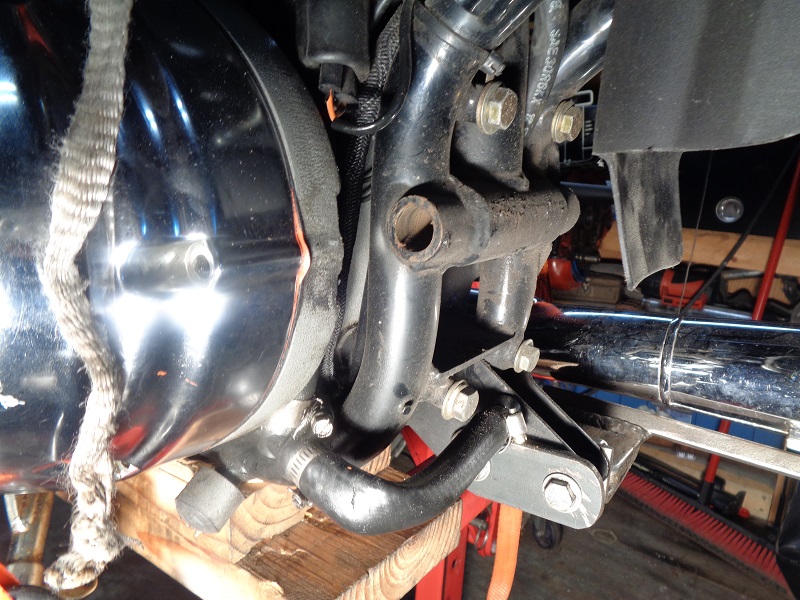
The rear tire and lower shock mount(s) must come off before you can remove the swingarm.
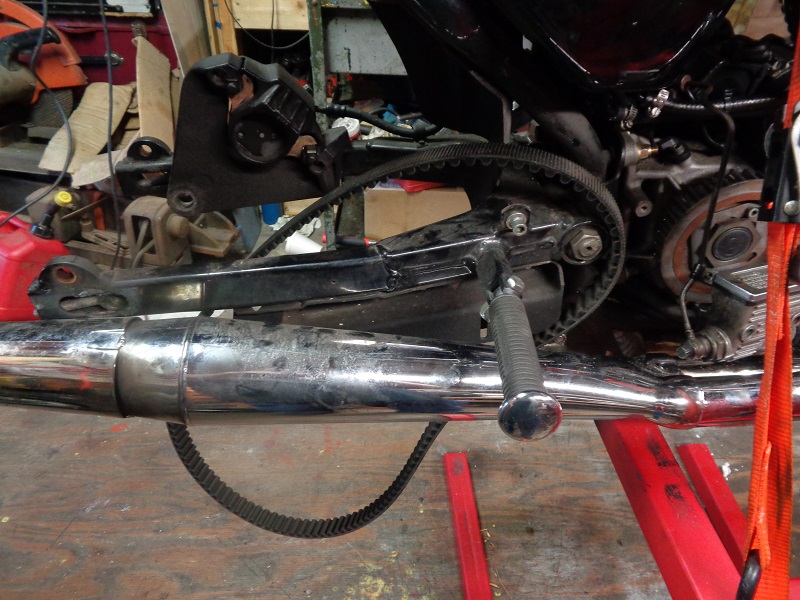
The belt doesn't have to come off but has been removed below.
| With the belt guard removed, the belt just slides around and out of the swingarm. 3) | ||
 |  |  |
| The 98 style brake caliper still on it's bracket simply lifts off with the wheel removed. It can be hung from the bike out of the way for swingarm removal. 4) | ||
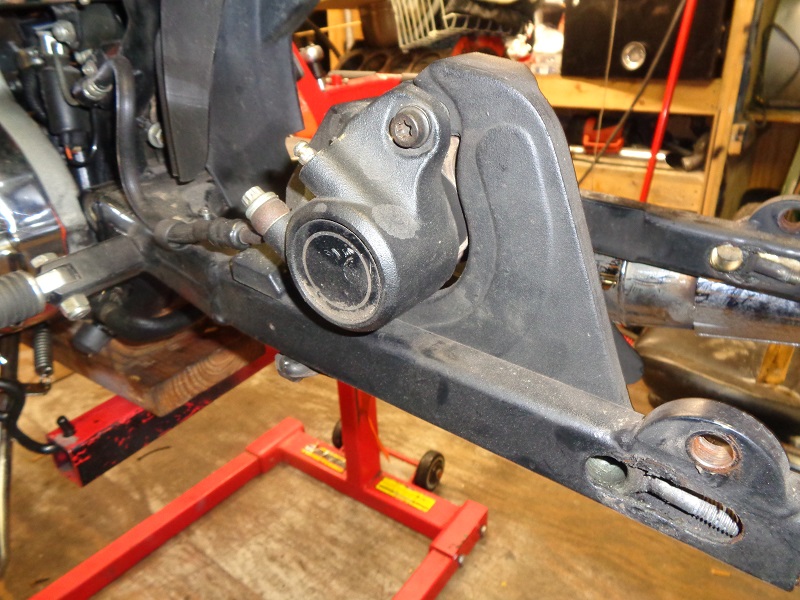 | 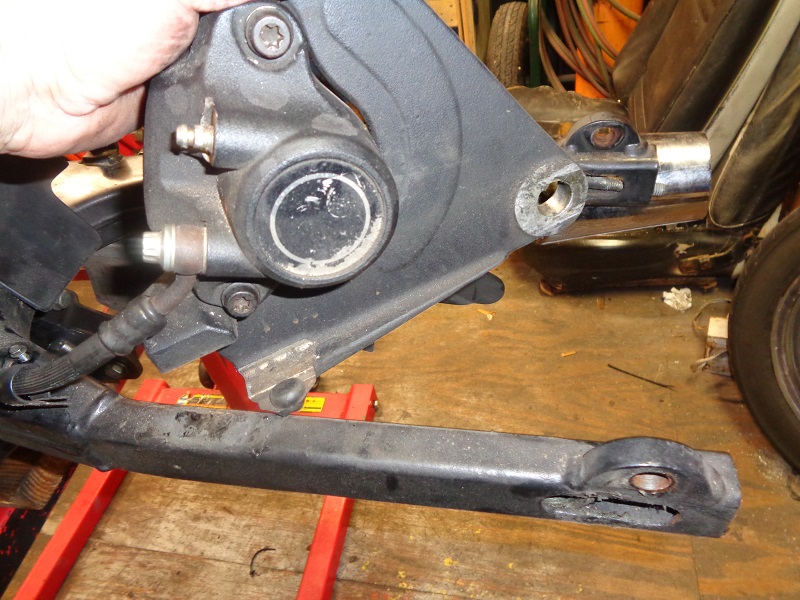 |  |
Removing the Swingarm
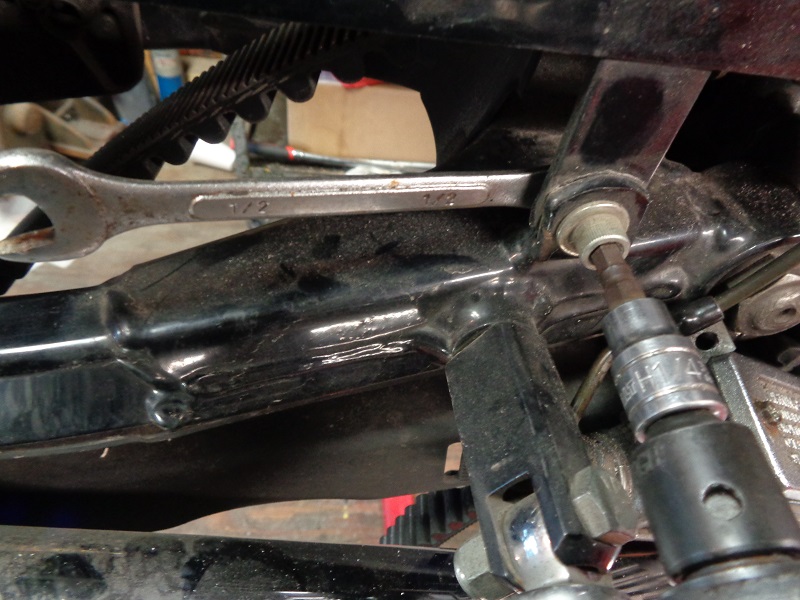
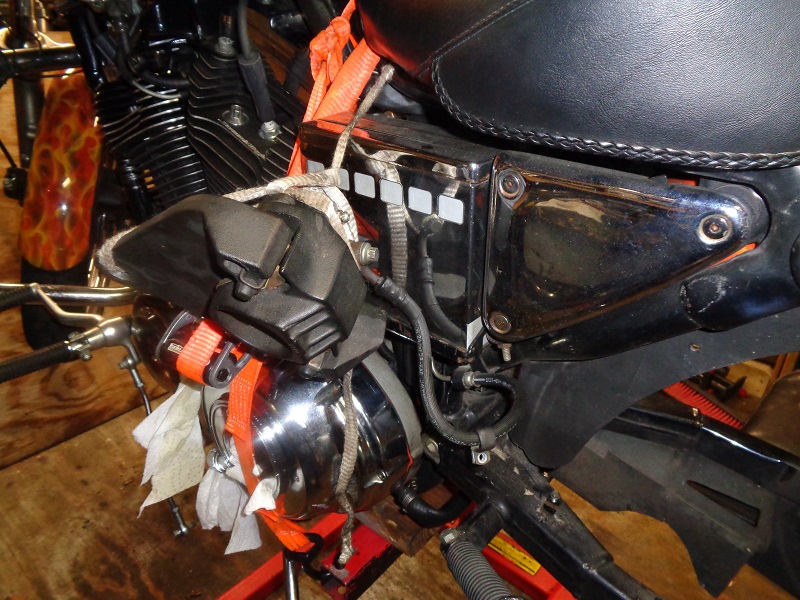
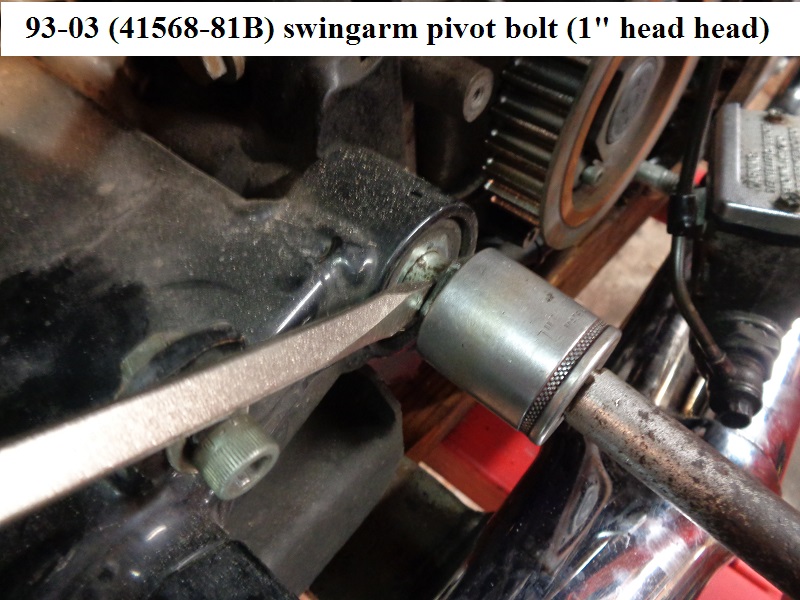
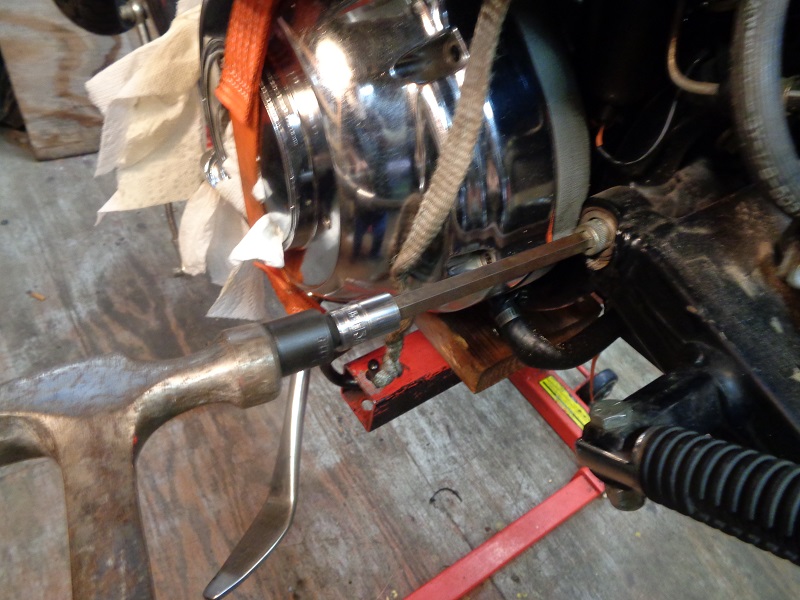
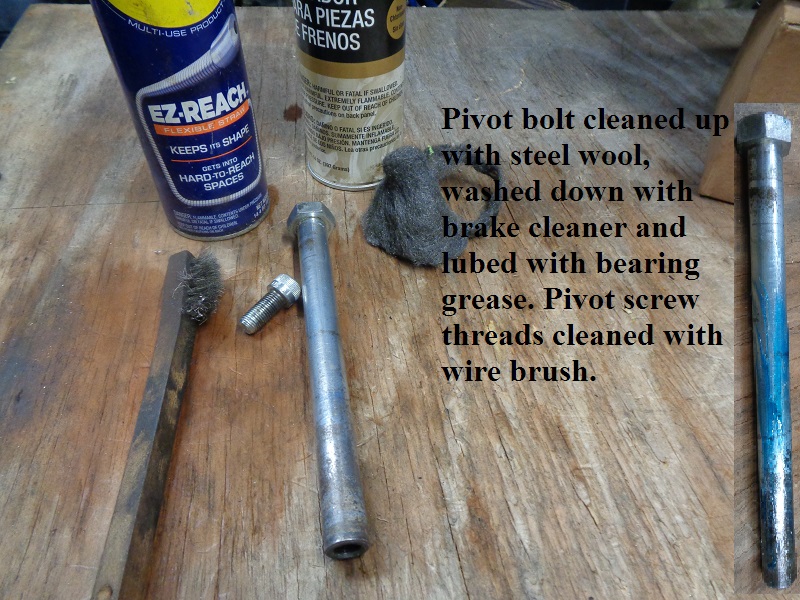
Remove the pivot bolt screw (left side) and turn the bolt (right side) a few turns to loosen it up.
Put the pivot bolt screw back in a few turns and whack it with a hammer to initially drive the bolt out toward the right side.
Then use a screwdriver to pry the bolt outward while turning the screw. Continue turning while giving up pressure on the wrench to back the bolt out.
Or you could use a drift and a hammer on the left side to punch the bolt out but be careful not to damage the internal threads of the bolt.
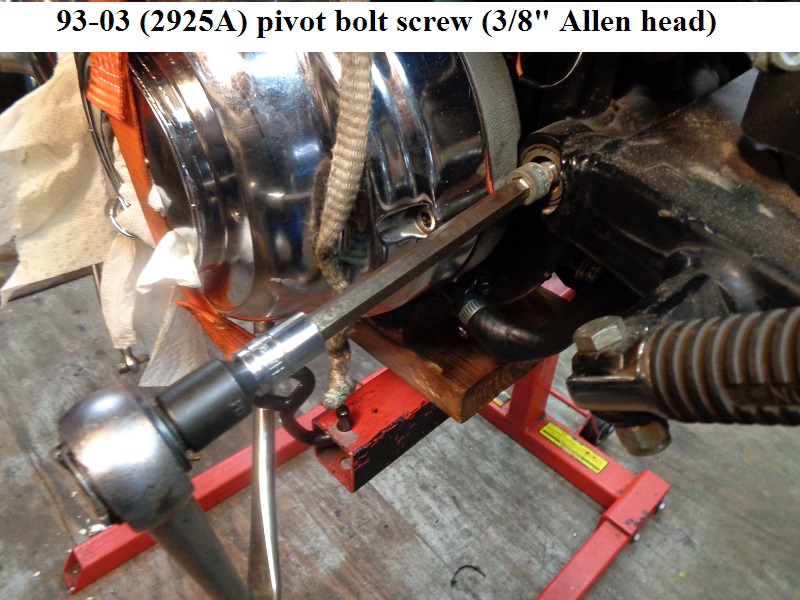
The sleeve on the frame that the bolt runs through has a hole in the middle where water can get onto the middle of the bolt and cause rusting.
So you may have to get creative when knocking the bolt out (which is the reason for turning the bolt out instead of knocking it out).
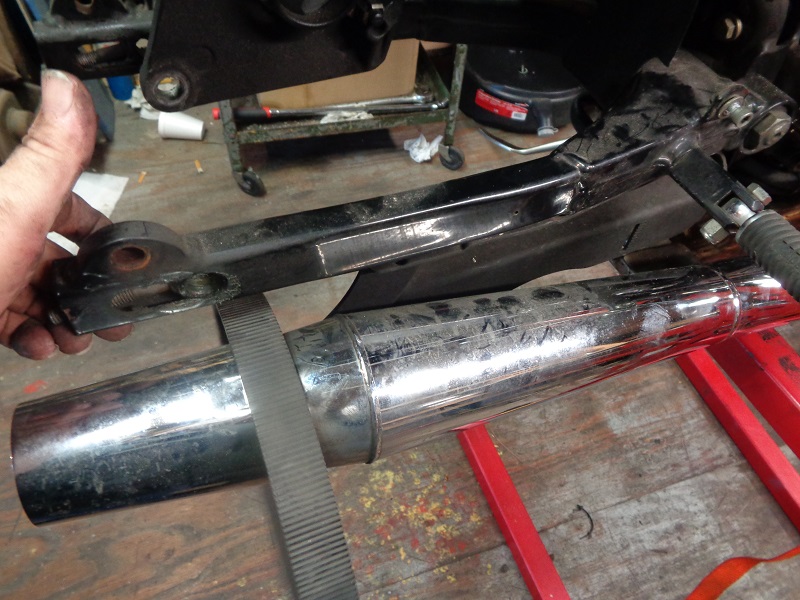
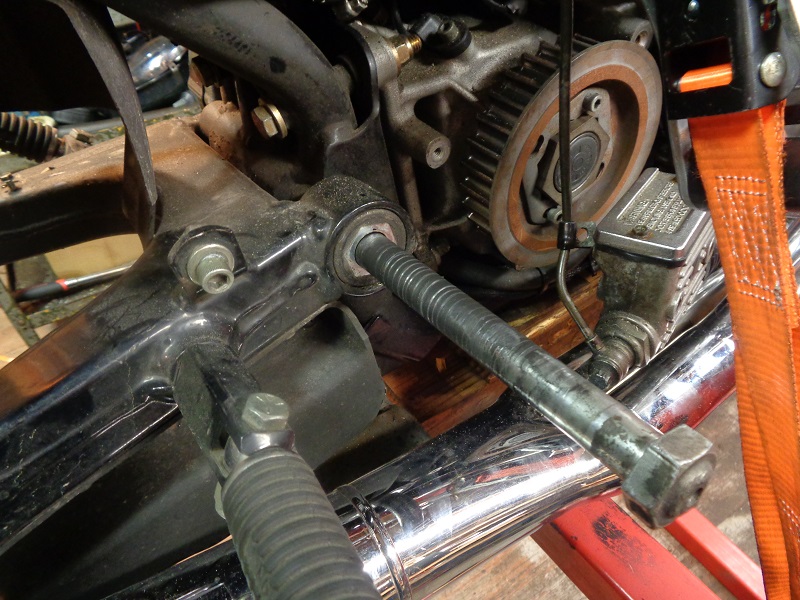
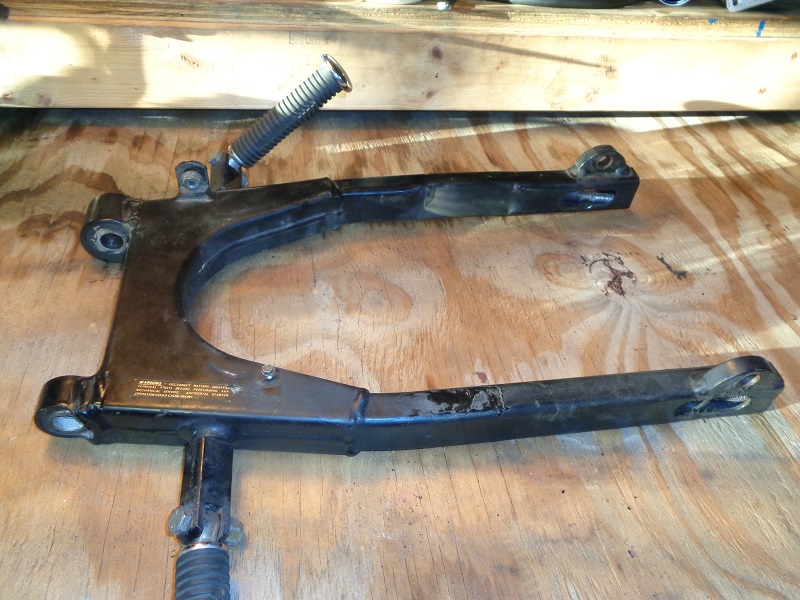
Once the bolt is removed, the swingarm just falls away.
Inspecting the Swingarm and Parts
Note: The maintenance schedule in the FSM suggests to inspect the pivot shaft and swingarm bearings every 5,000 miles.
Then to lube the swingarm bearings every 10,0000 miles. 9)
However it doesn't take but just a couple minutes to hose down the bearings with carb cleaner, blow dry and repack them with fresh grease.
(since you have the pivot bolt out for inspection anyway)
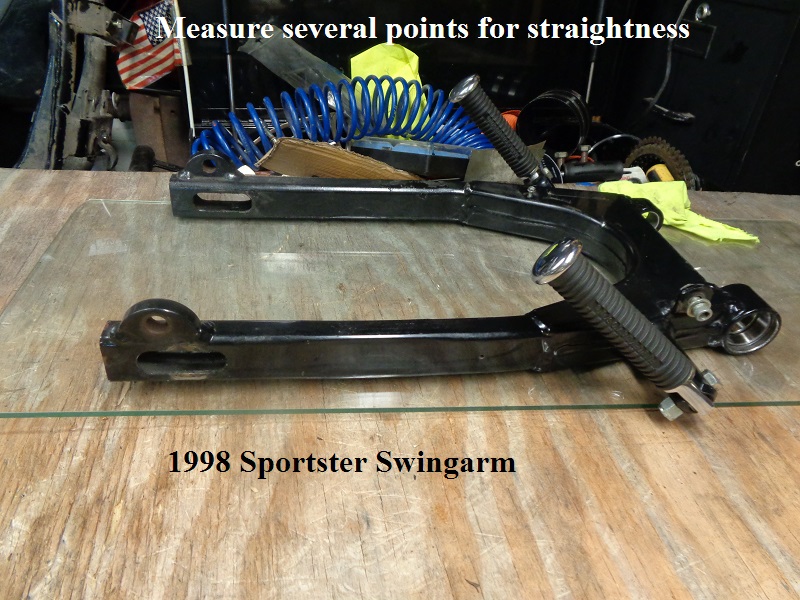
Check that the swingarm isn't warped, damaged or rusted.
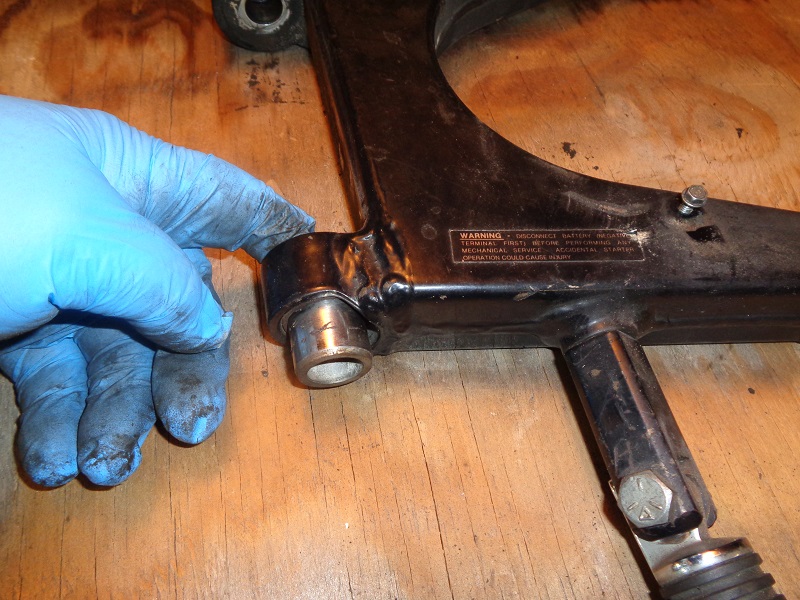
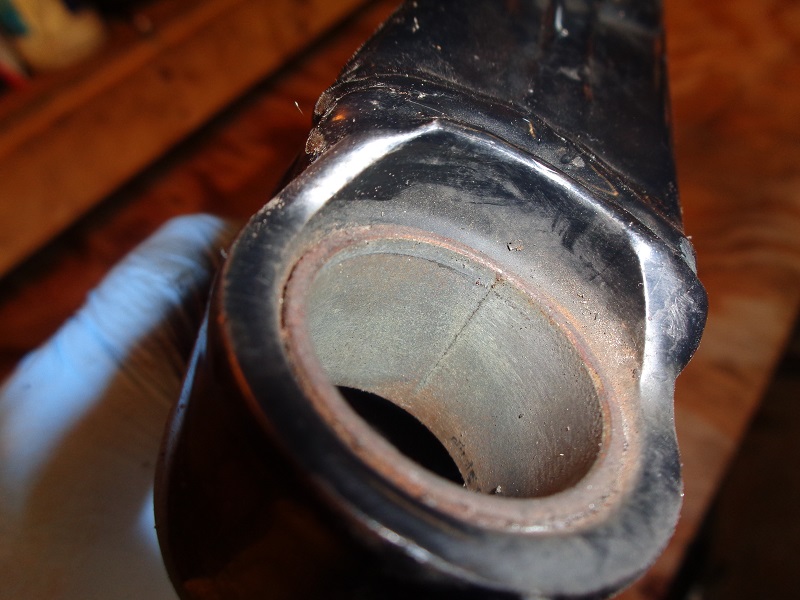
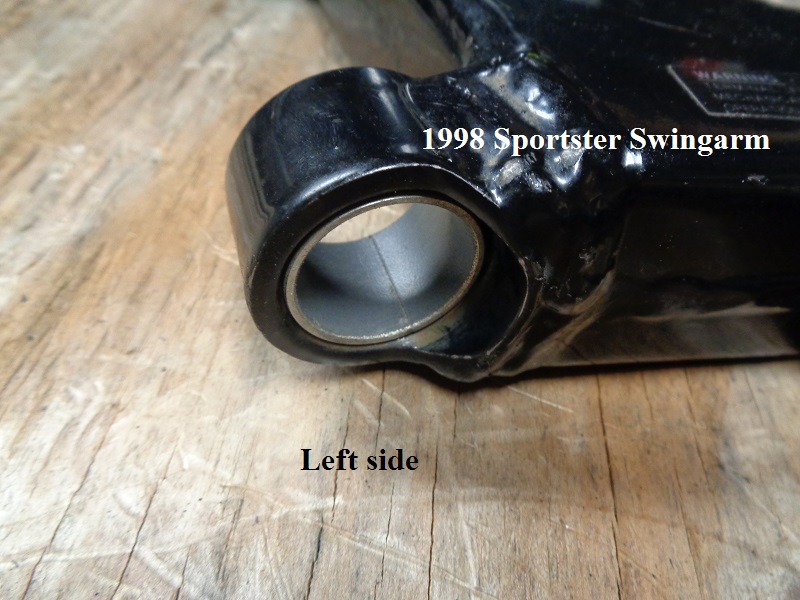
Remove the pivot bolt spacer and inspect both the spacer and it's bushing in the left pivot for damage or pitting.

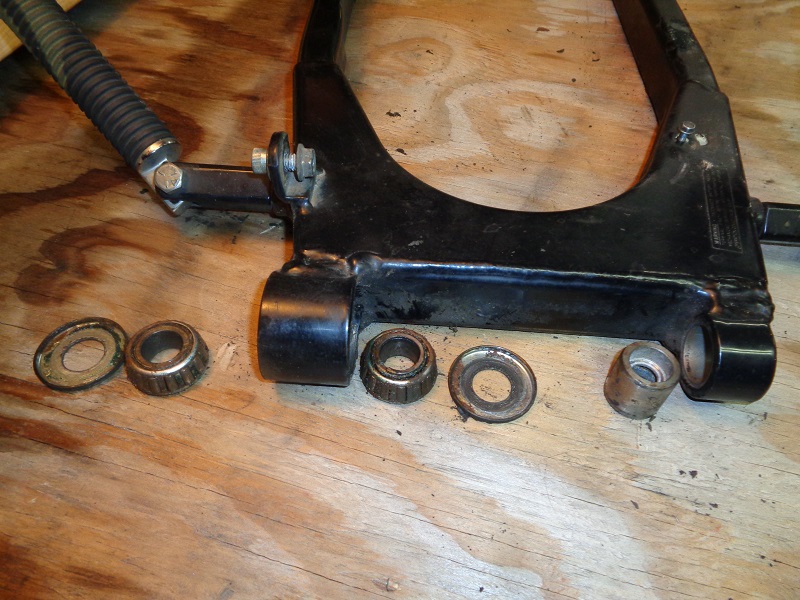
Remove the bearings from the right pivot.
You may be able to simply push a finger in the hole and wiggle the dust cover off or you can use a small pick to pull it out then remove the first bearing.
From there you just push the other bearing out through the pivot.
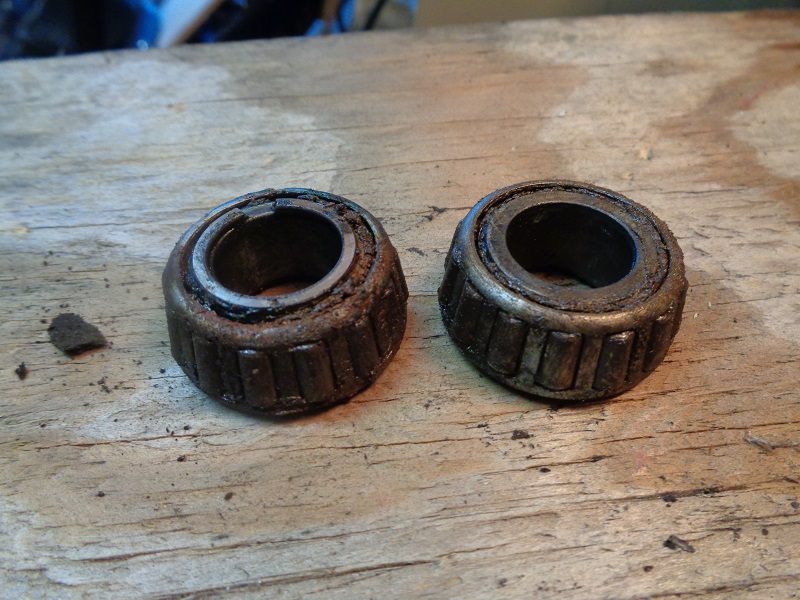
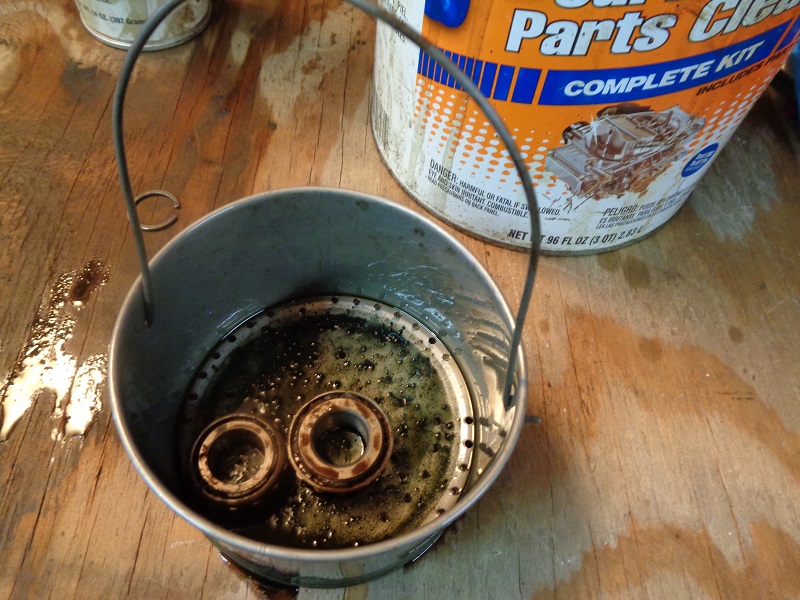
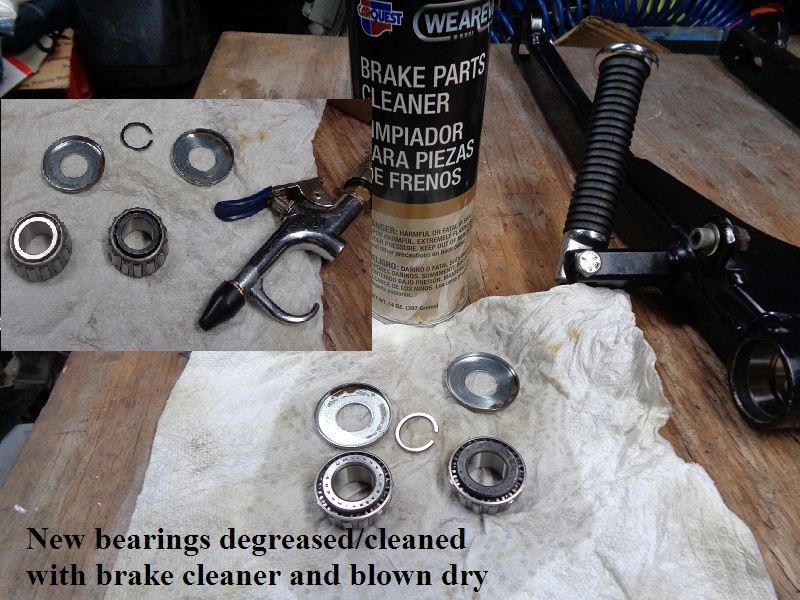
Hopefully your bearings won't look as bad as the ones below. You can spray them down with brake cleaner to clean off the old grease.
After cleanup, these bearings did not roll smooth (bumps felt while turning) so they had to be replaced.
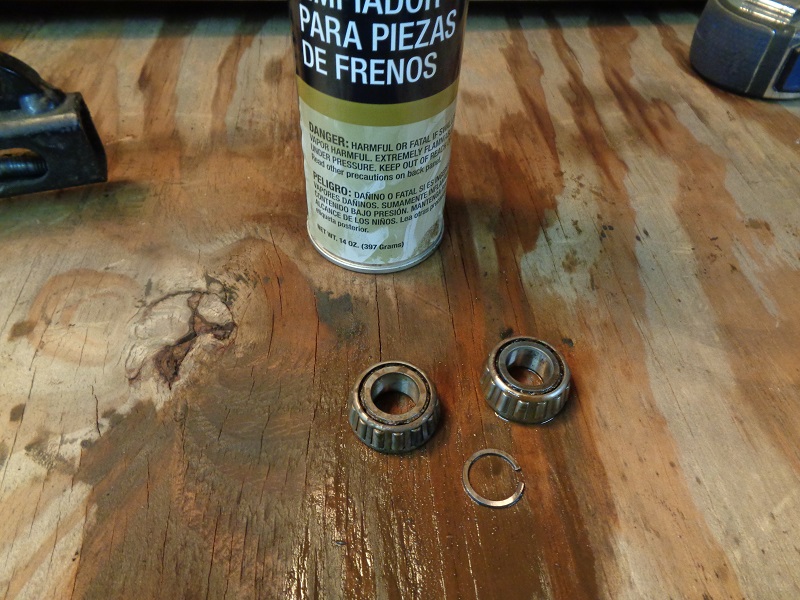
With extreme buildup, you can simply dunk them in a gallon of carb cleaner and let them soak for a couple hours and spray them down with water and re-lube them.
However you clean them, the old grease needs to be removed so it won't contaminate the new grease.
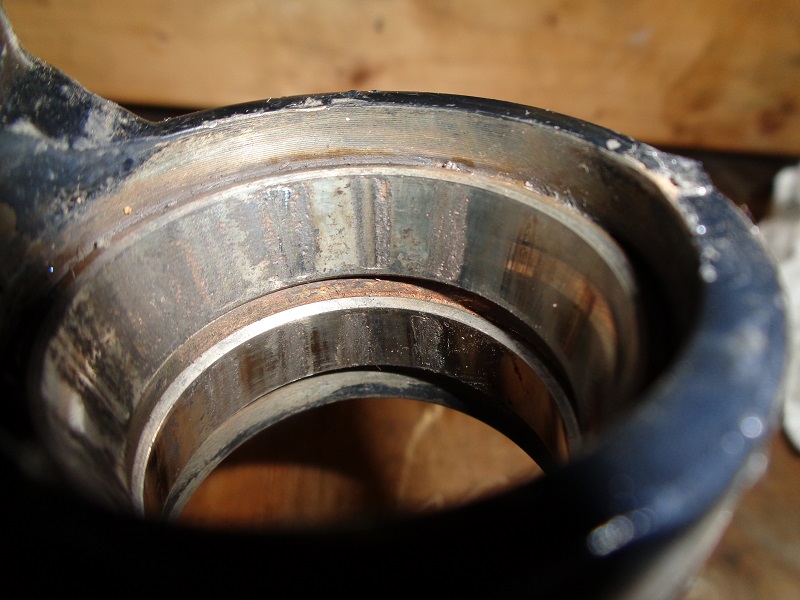
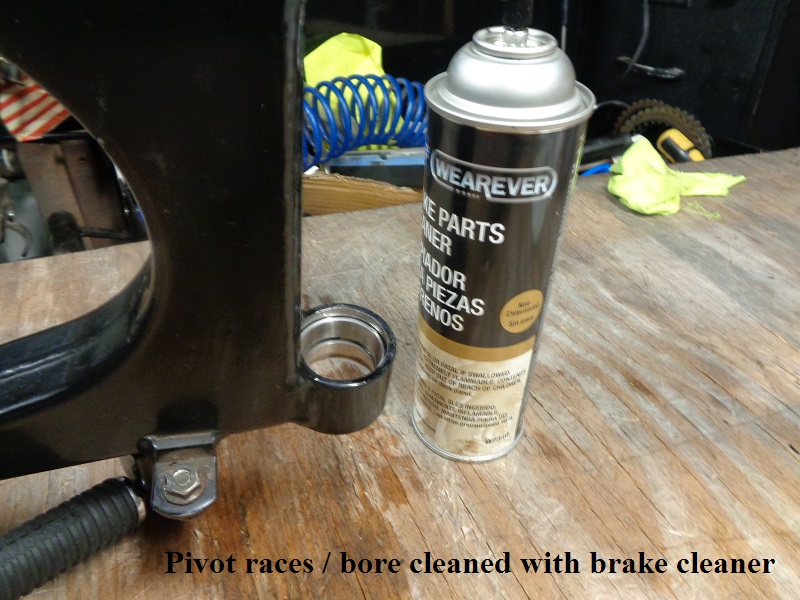
Clean both bearing races and inspect them for smoothness, pitting and out of roundness.
The races below are damaged and have to be replaced.

Installing the Swingarm and Parts
If the internals are in good shape, wash down the bearings and internal parts with brake cleaner and dry with compressed air.
Old grease will contaminate the new grease.
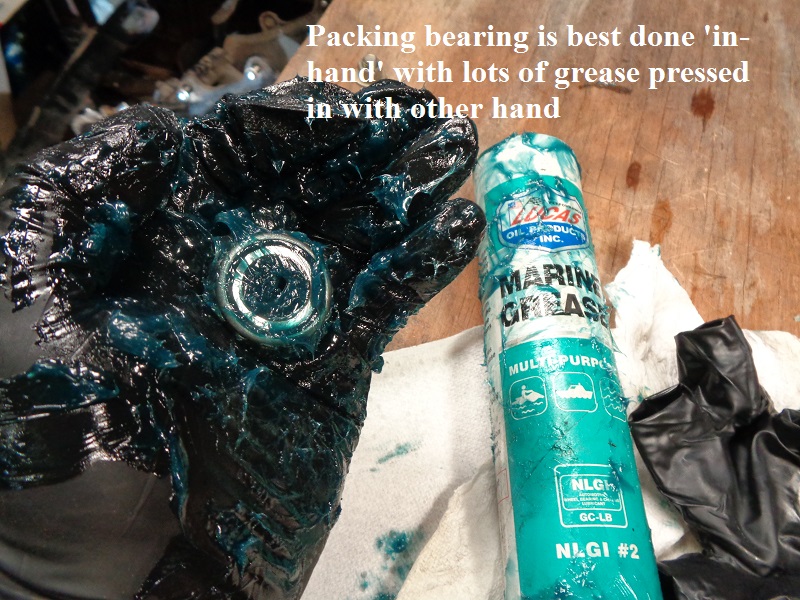
Even if the bearings are new and came 'pre-greased', remove that with brake cleaner and add fresh grease.
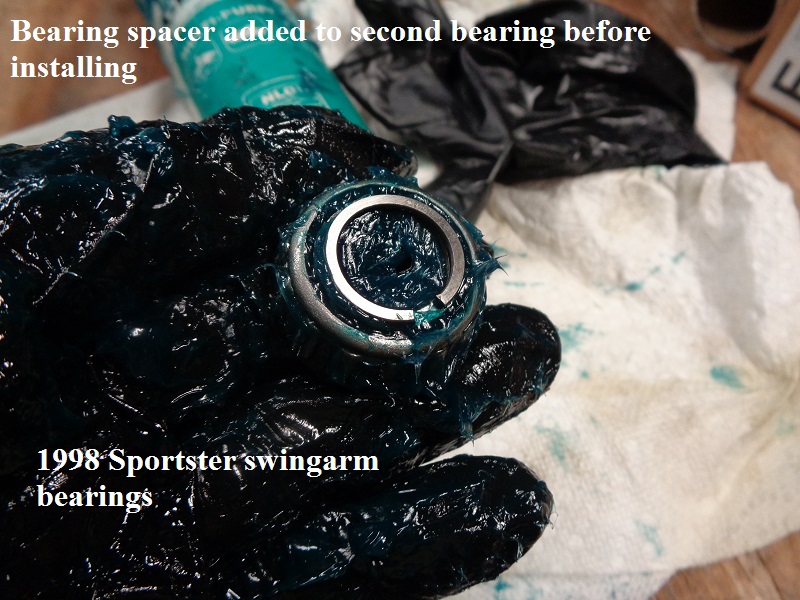
Packing bearings with grease in hand. The bearing spacer goes on the second bearing face before installation.
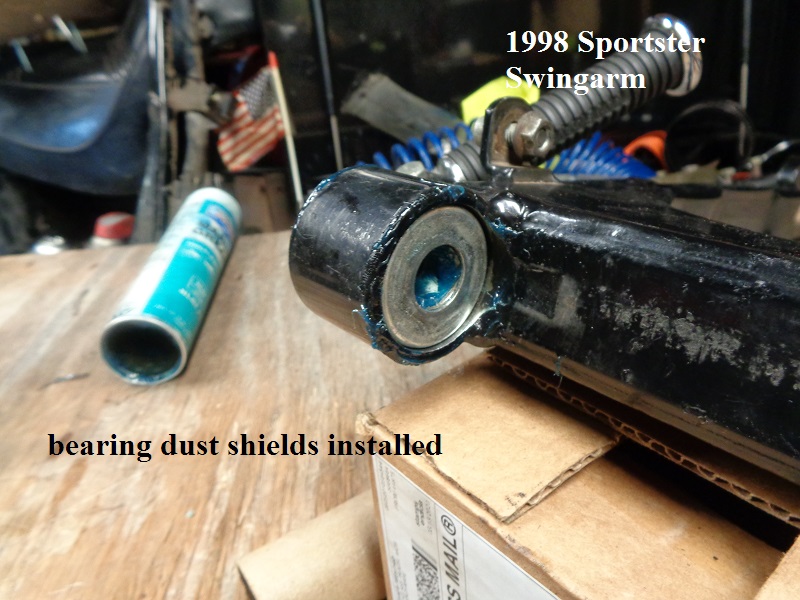
Install the bearings and spacer and cover them both with the dust shields.
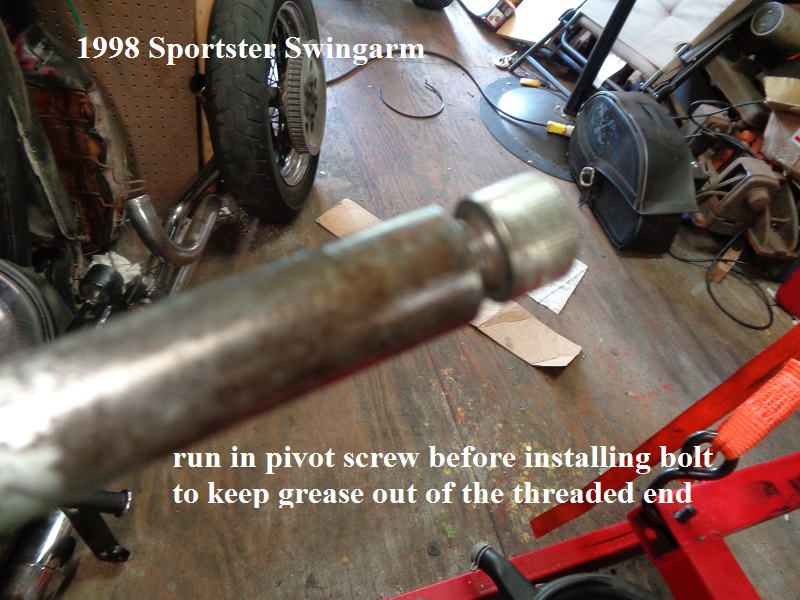
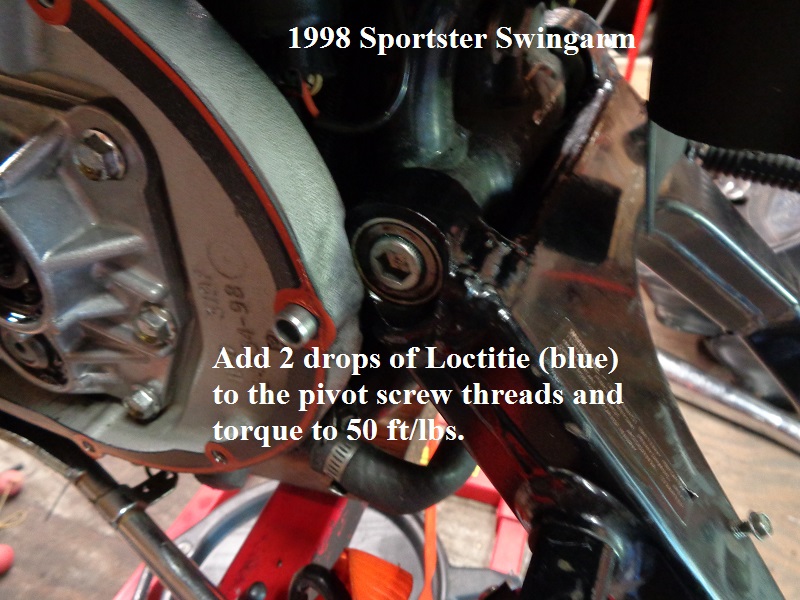
It's a good idea to install the pivot screw in the end of the pivot bolt before inserting it into the bearings (full of grease) to keep grease out of the threads.
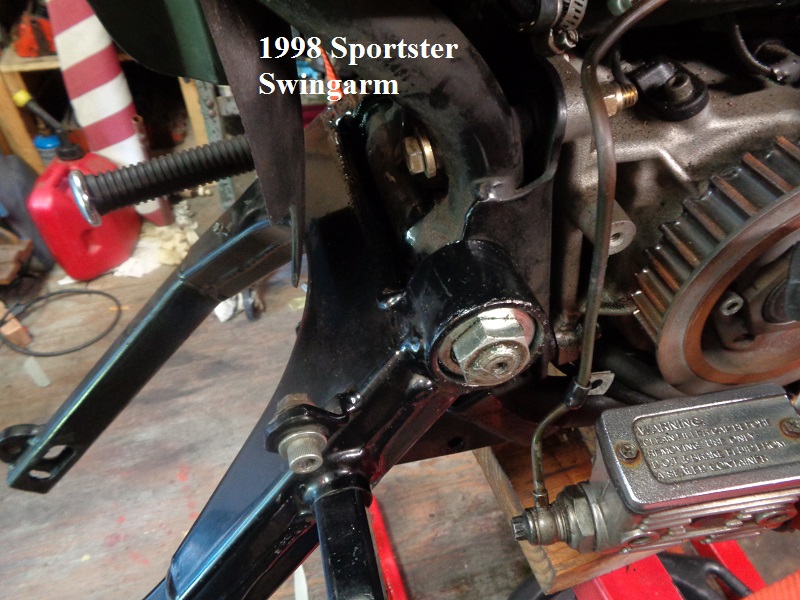
Hold the swingarm in place, push the bolt thru and let it hang carefully while removing the screw from the left side.
Then remove the screw, install the spacer (chamfer out- towards frame), install the screw and torque to 50 ft/lbs.
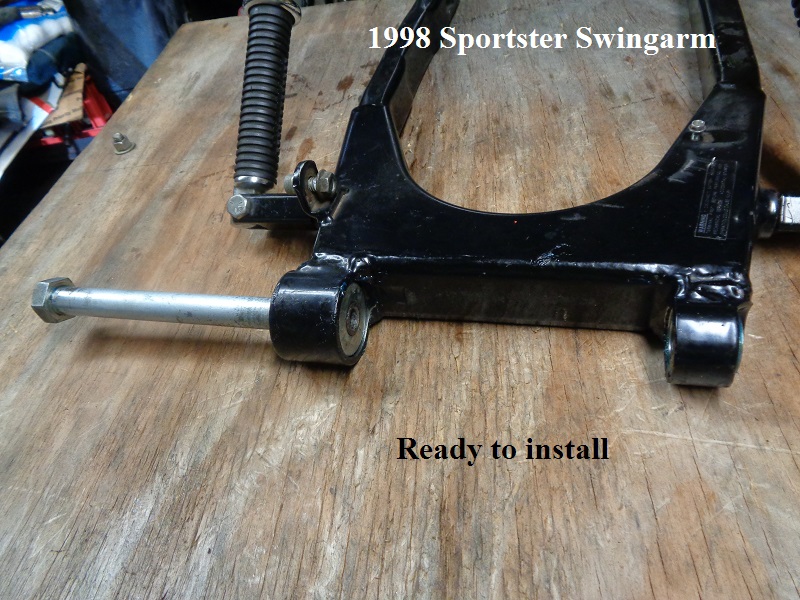
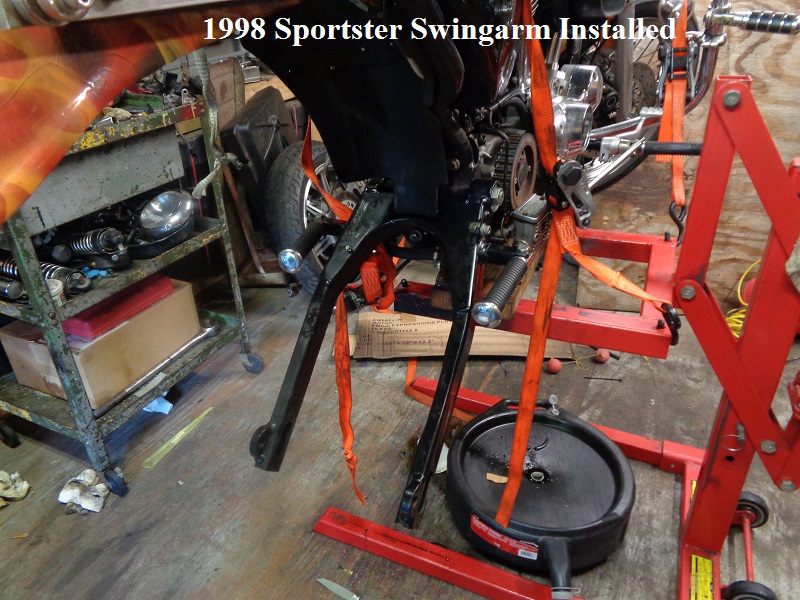
Install everything else in reverse order.
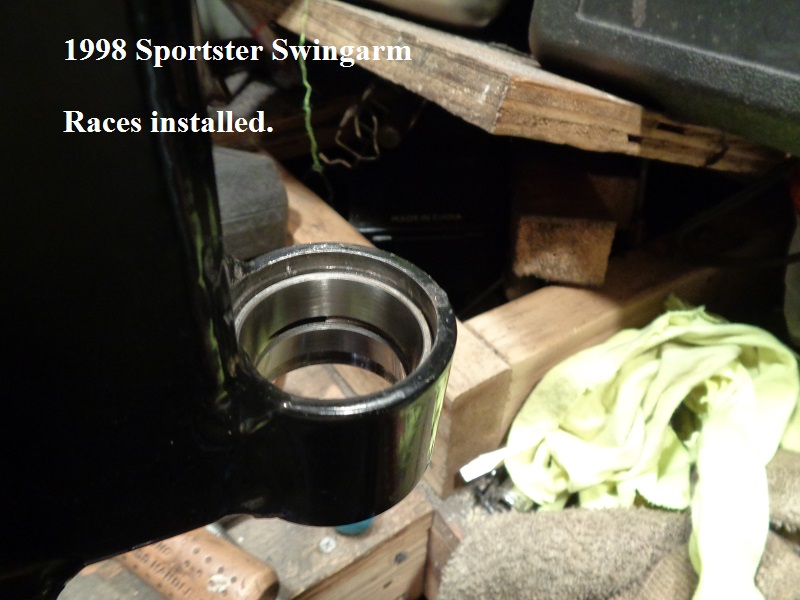
Bearing Outer Races
See also 1982-2003 Swingarm Bushing Removal / Installation in the Tools section of the Sportsterpedia for several ideas on working with the races.
Timken bearings and races come as a set and should be used as a set.
If bearings are in need of replacement, the races should also be removed and replaced with the ones that come with the new bearings.
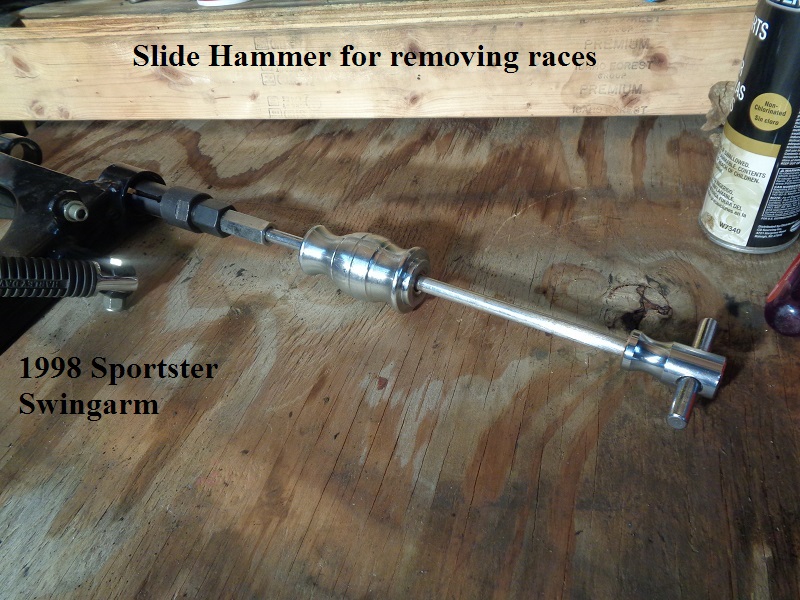
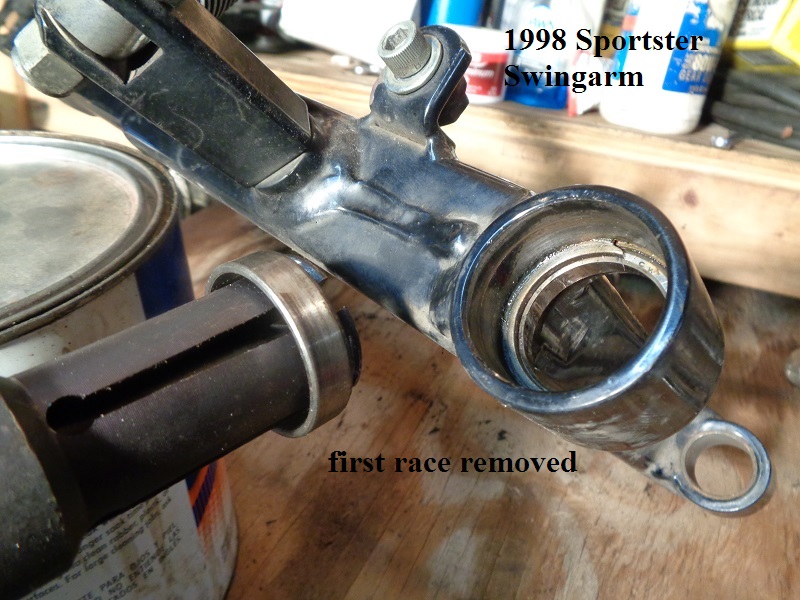
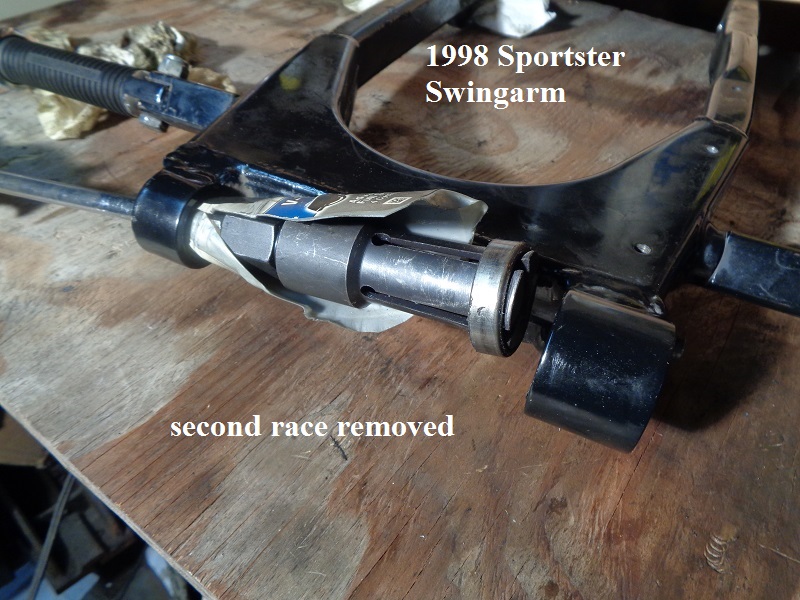
Removal
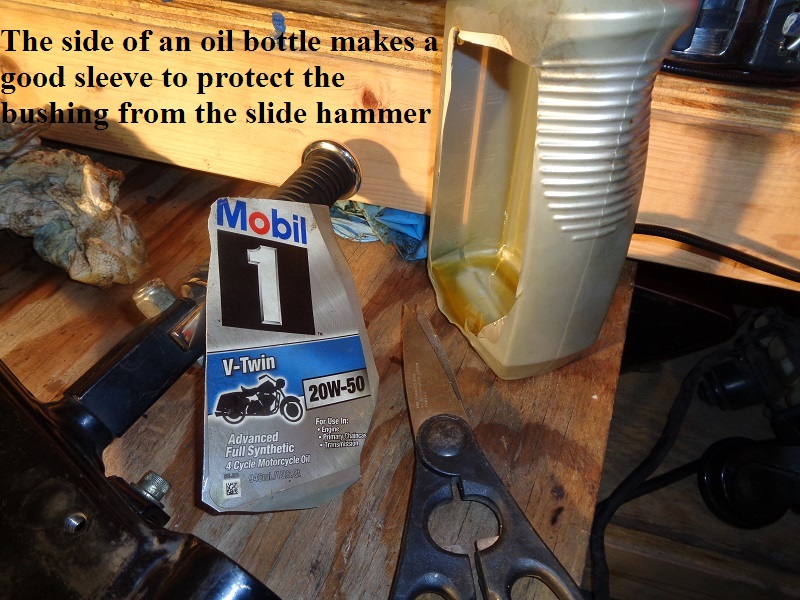
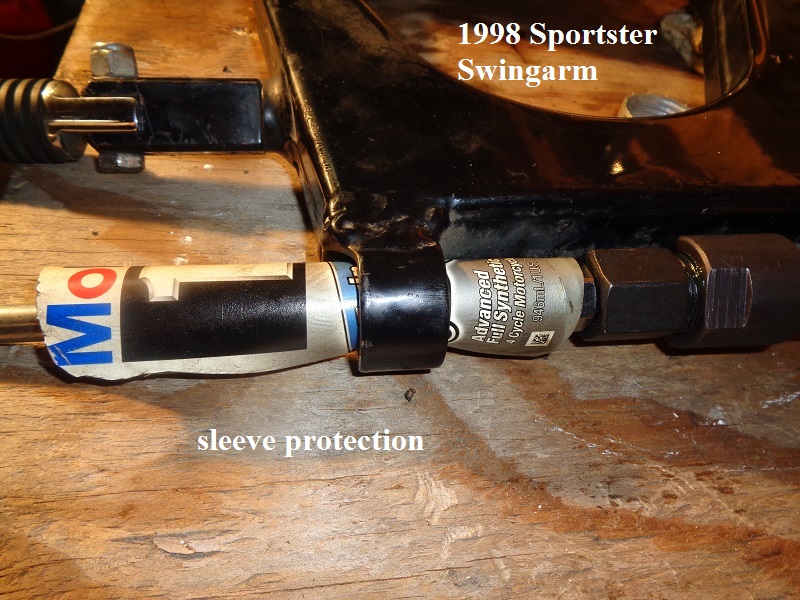
A slide hammer was used to remove the outer races.
A sleeve from an oil bottle was cut to protect the left pivot bushing.
Installation
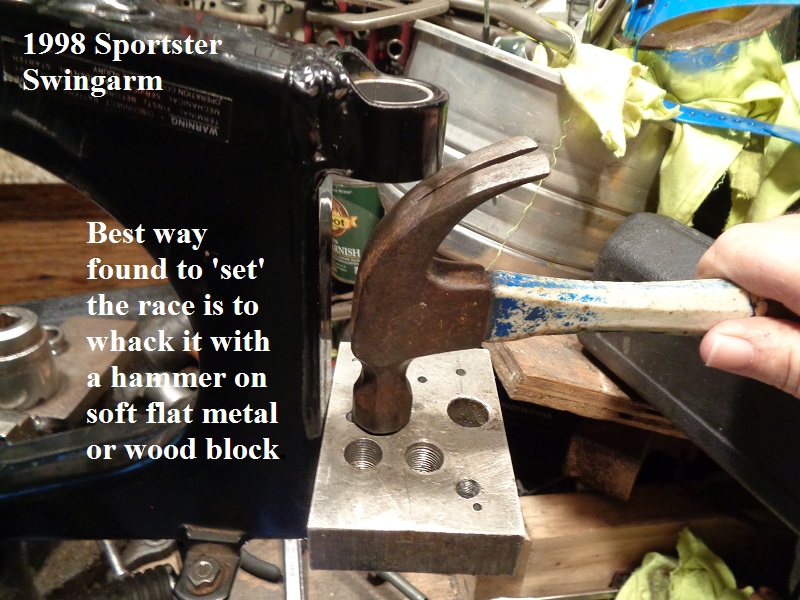
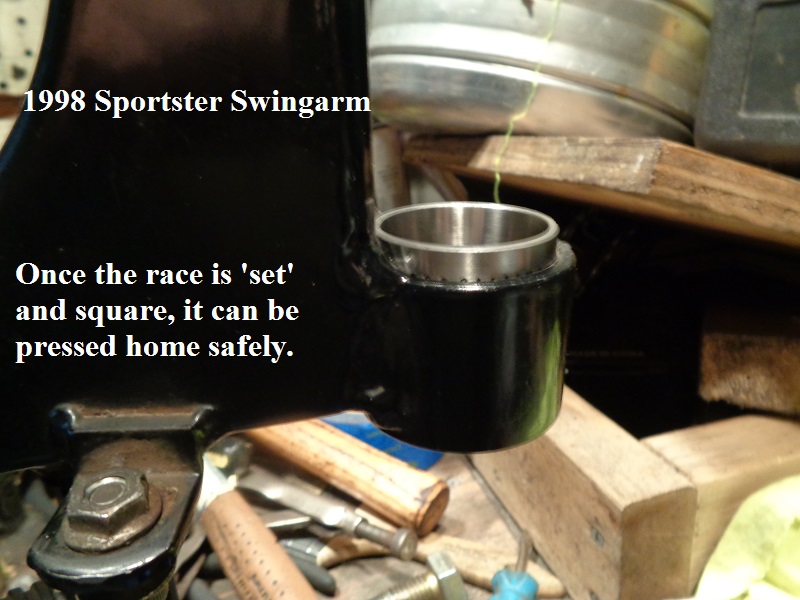
The race has to be installed straight in the bore. Getting it to go in straight can be very difficult however.
Several methods were tried to see what was most effective.
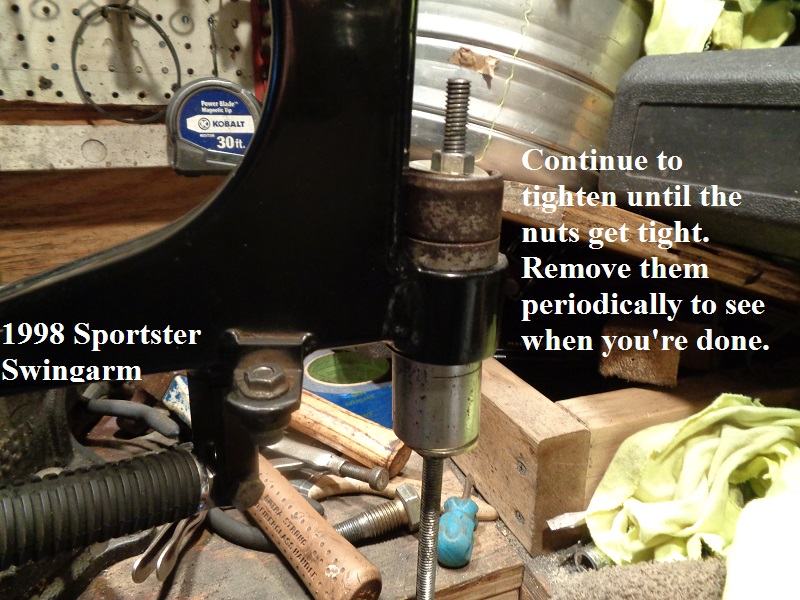
The best tools ended up being a flat aluminum scrap piece and a hammer to 'set' the races in straight and a threaded rod and socket press to pull the races home.
Just slight tapping was all that was required to get them started.
The races will have a certain resistance when pressing them in. You'll feel the resistance and the races moving.
If the resistance changes drastically (tightens suddenly), STOP, remove the tool and find out why.
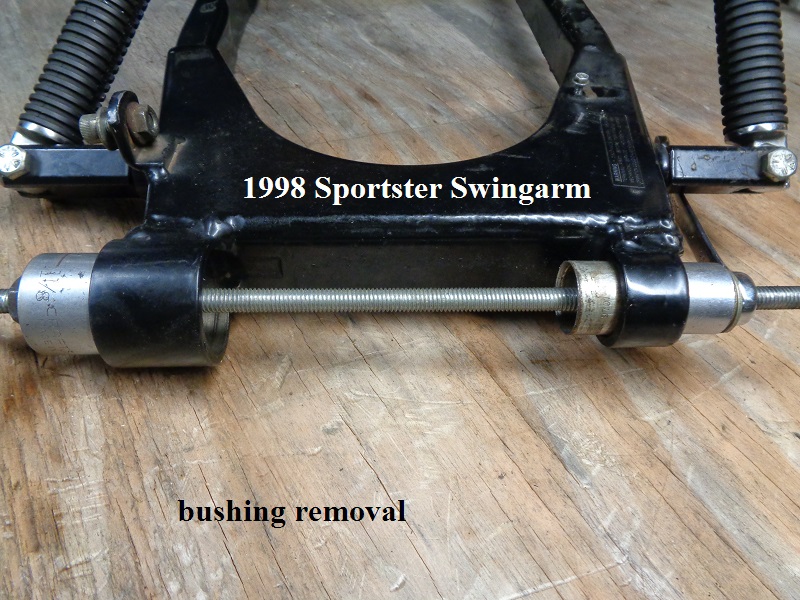
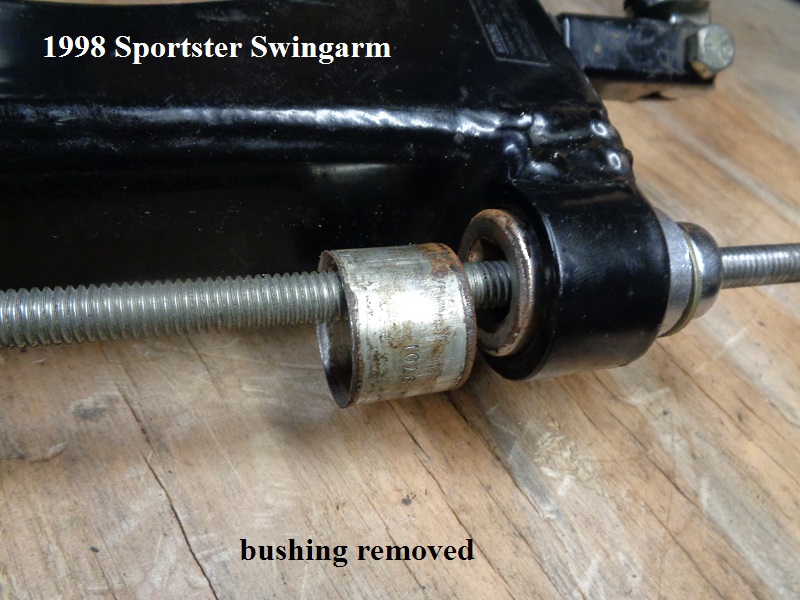
Pivot Spacer Bushing
Removal
This method uses the lockring inside the pivot to push / pull against for pressing the bushing out and back in.
If the races are installed, simply use the outside pivot surface instead. The process is the same whichever bracing you use.
The FSM says to replace this bushing only if needed.
However, there is no criteria / spec to determine if it's needed. Use your best judgment.
If it's really in bad shape, you'll know it when you see it.
Also check for excess side play by rocking the spacer side to side in the bushing.
There are no clearance specs in the FSM for the spacer to bushing fit.
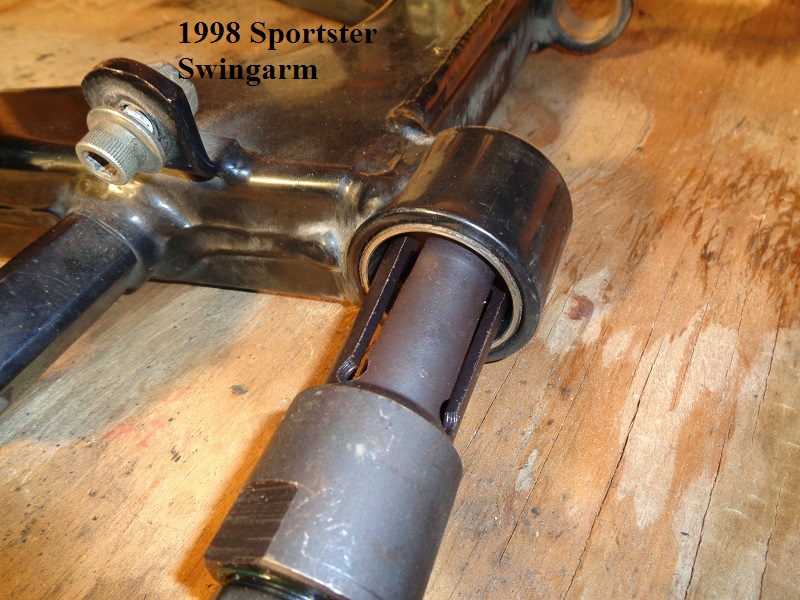
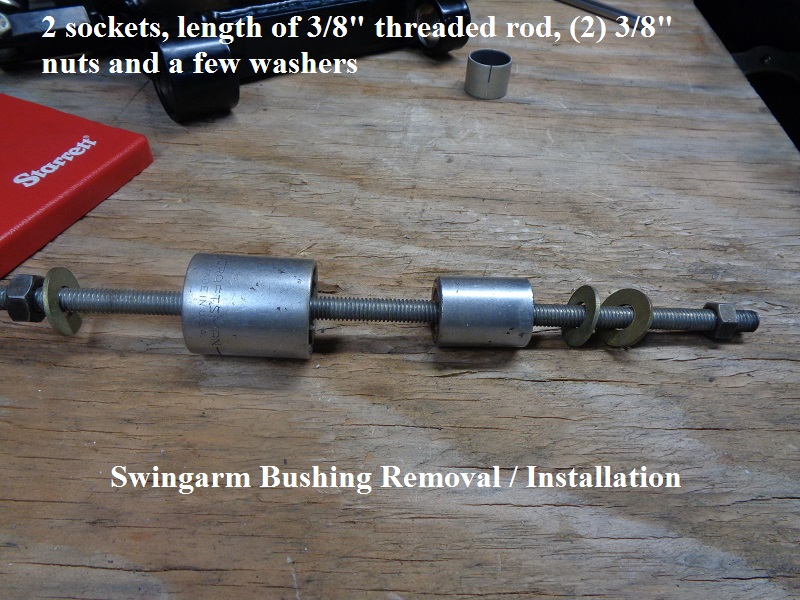
The bushing was pressed out using a 3/8“ threaded rod and a couple sockets that were (1) just smaller than the bushing OD and (2) just smaller than the pivot ID.
In this case, (1) 1-1/8” and (1) 25/32“ socket was used. They make a special tool for removing / installing the bushing.
But the rig below can also be used as a remover / installer tool.
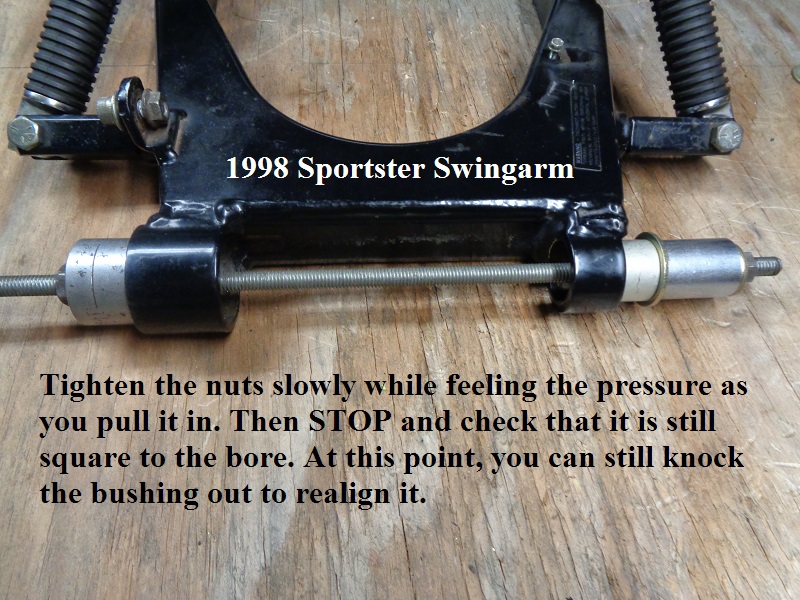
Installation
The socket below had rounded edges which allowed it to kick sideways when torque was applied.
So a larger 1/2” washer was used to create the flat surface to initial pull in the bushing and keep it straight in the process.
When you start tightening the tool, the nut will get hard to turn as the bushing gets squeezed into the bore.
But once it starts pulling in, the pressure should be consistent.
If the nut gets hard to turn all of a sudden, don't be afraid to remove the tool and check for obstructions and alignment.
Actually, a cheater bar was used on the wrench to pull the bushing in on the last 1/4“ or so on this one.
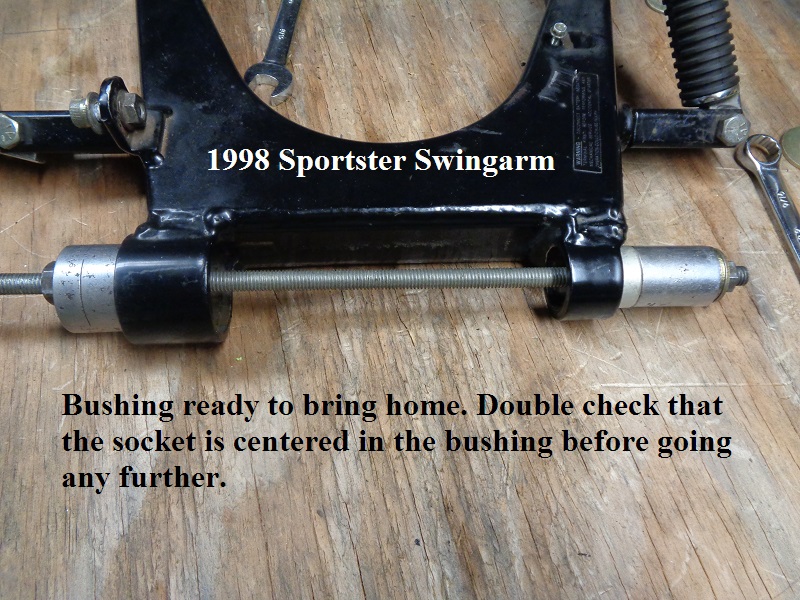
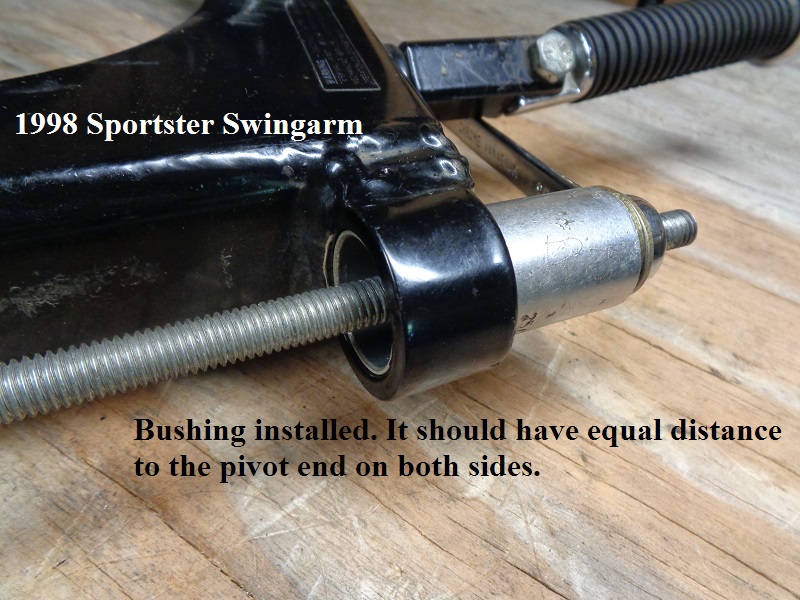
Bushing installed. Make sure it glides freely without bumps or stops.
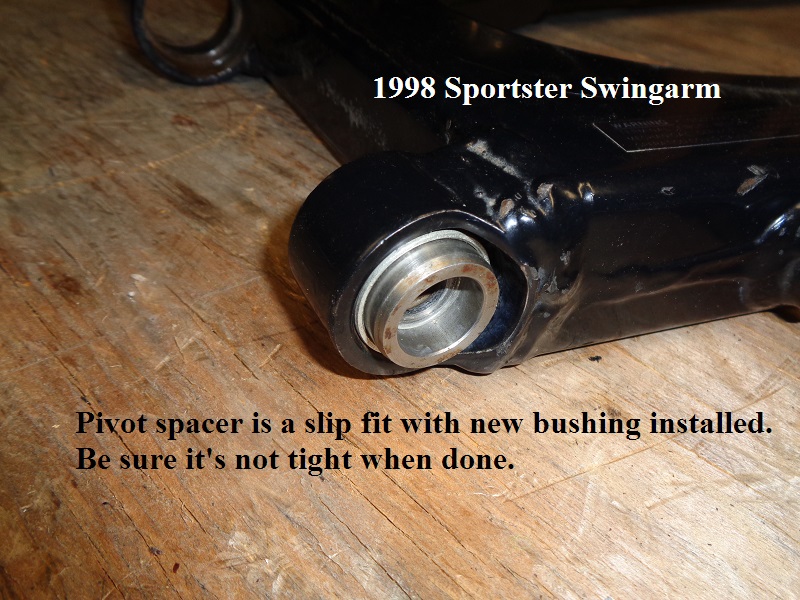
The spacer is a slip fit and should not bind during operation. No reaming required.
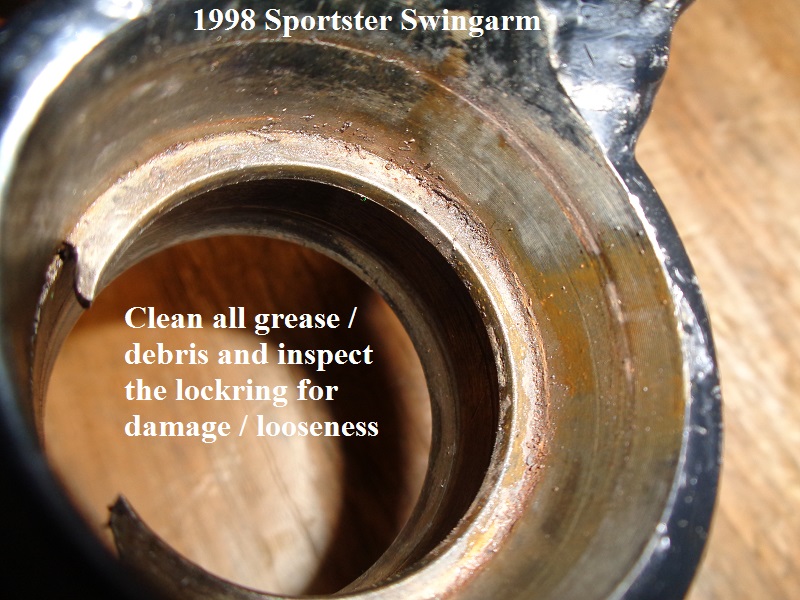
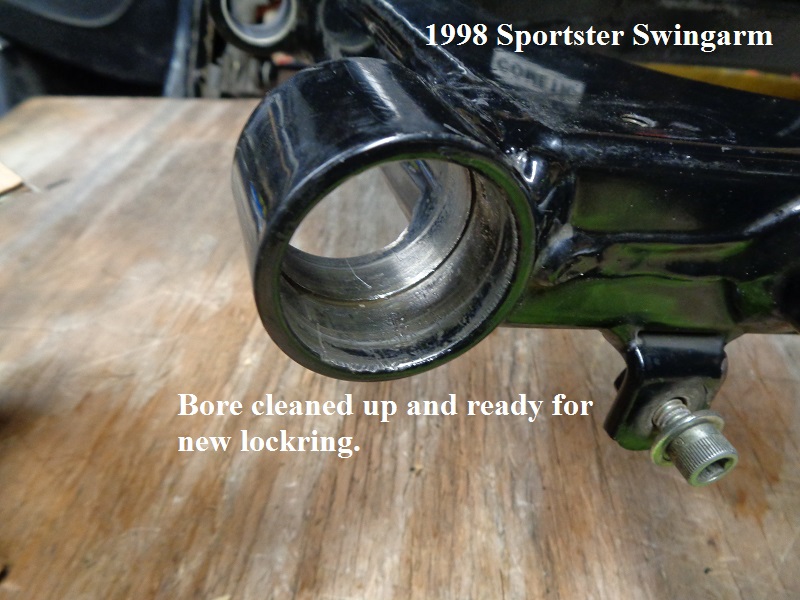
Bearing Lockring
Removal
Caution: Use eye protection as the lockring may pop out on you.
There is no reason to replace this ring unless it's damaged or rusted to the point it will hinder proper bearing race installation.
The races butt up against this ring on both sides and that determines distance apart from each other thus how far the inner bearing race sticks out the end.
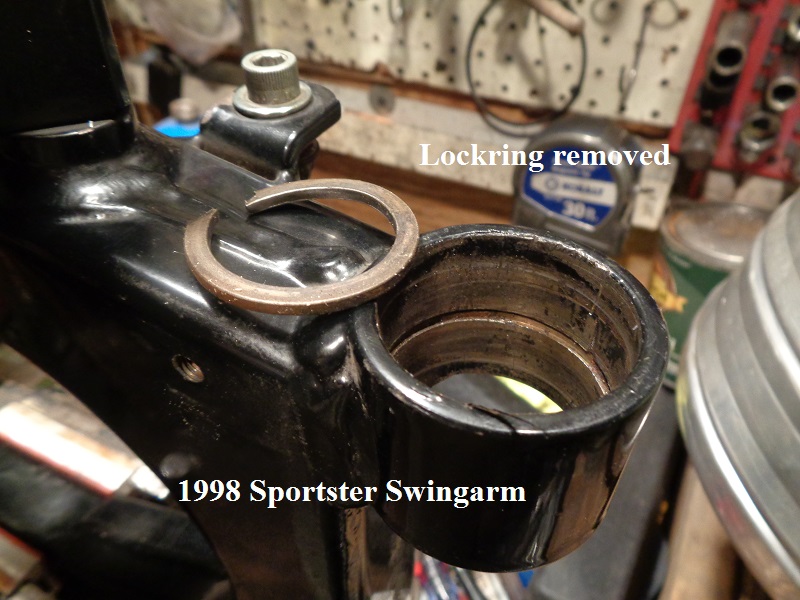
This ring didn't need replacing but was replaced anyway for example.
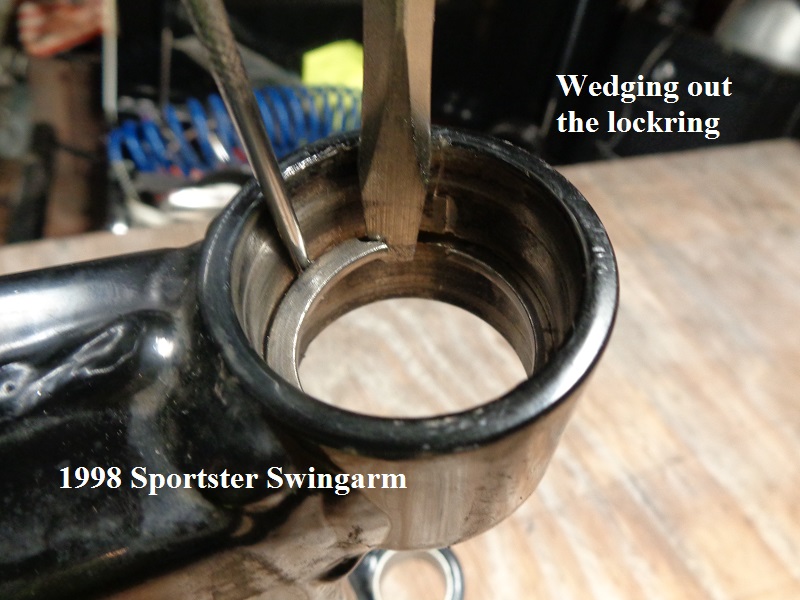
There are no known pliers to compress the ring due to it having no holes or slots for pliers.
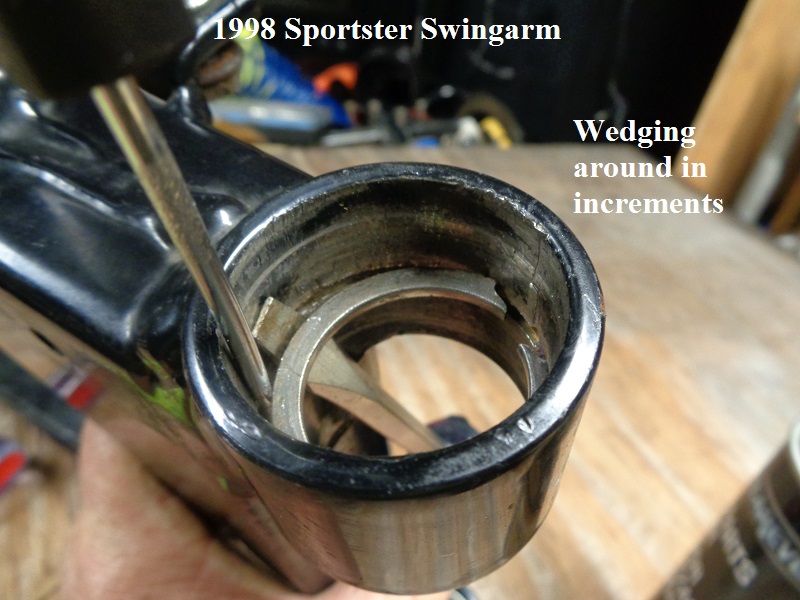
So it was pried out with screwdrivers in a circle pattern to get the ring out of the groove in the pivot.
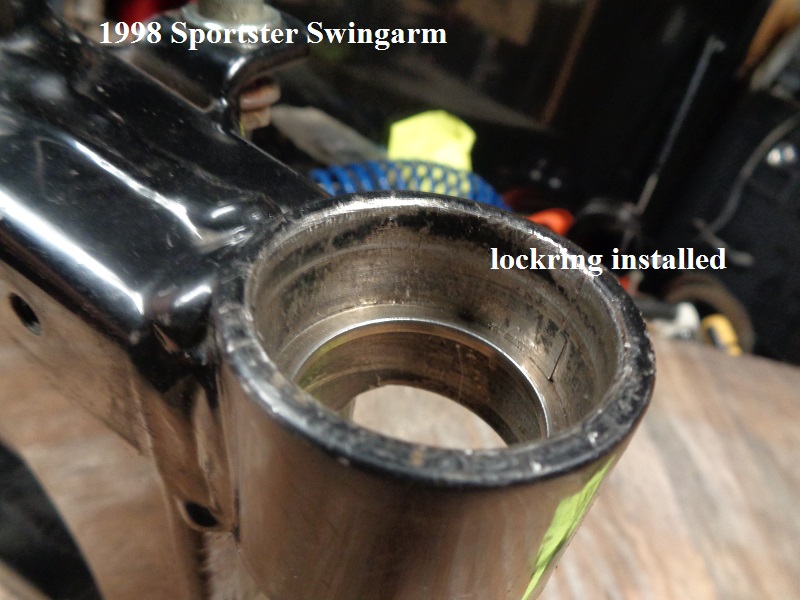
This ring just popped out once it was out of the groove. 14)
Installation
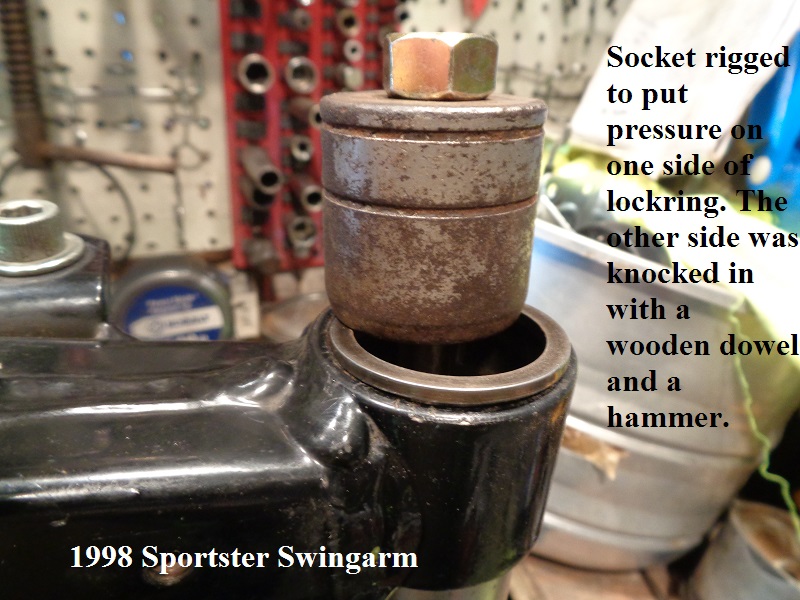
The ring needs to be installed with a tapered sleeve so you can set it in one side and knock it into the bore while the sleeve taper narrows the ID of the ring.
But without having that tool, a socket was bolted up into the bearing bore sitting on top of the open end of the ring to keep it from popping out.
Then the other side of the ring was carefully knocked into the bore with a wooden dowel and a hammer.
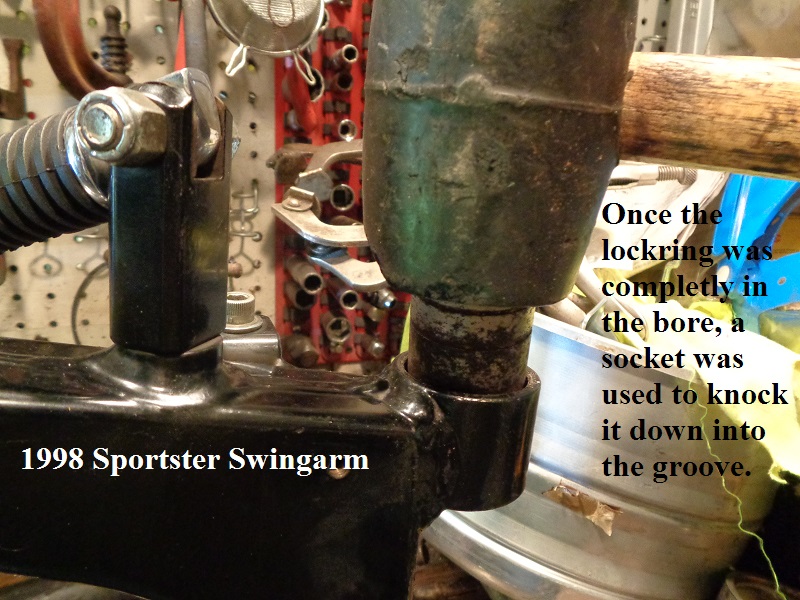
Once the ring was fully in the bore, the socket was used to push the ring down so it snapped into the groove. 15)