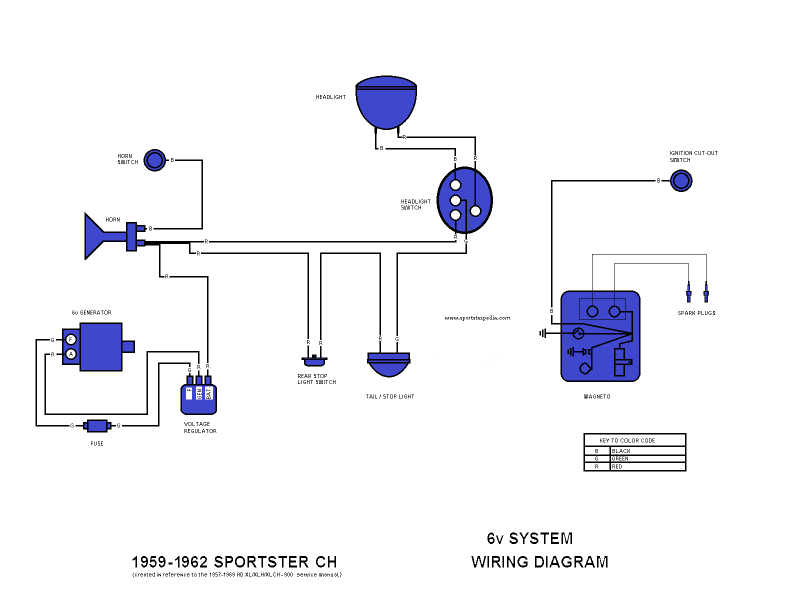
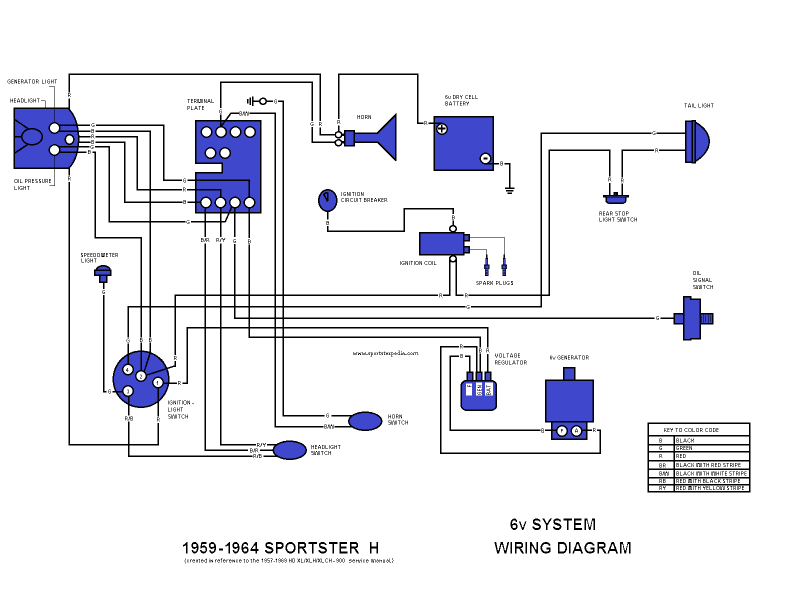
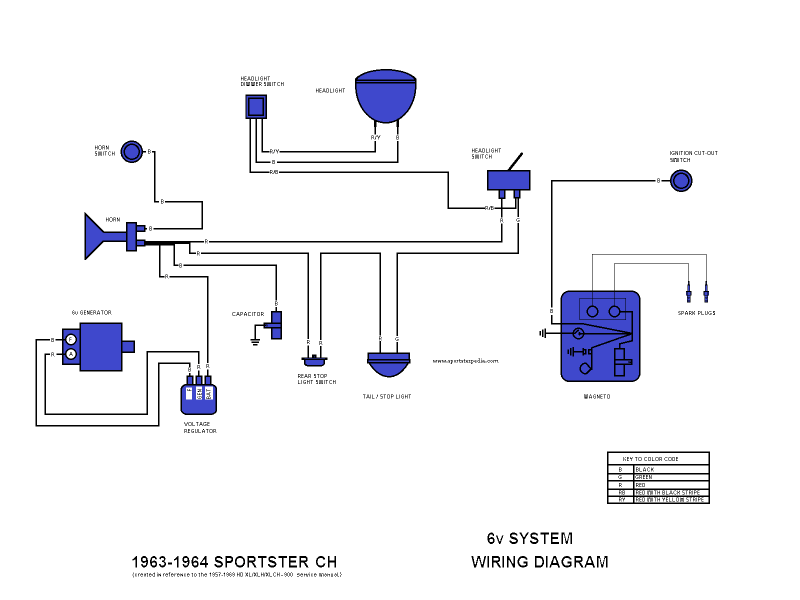
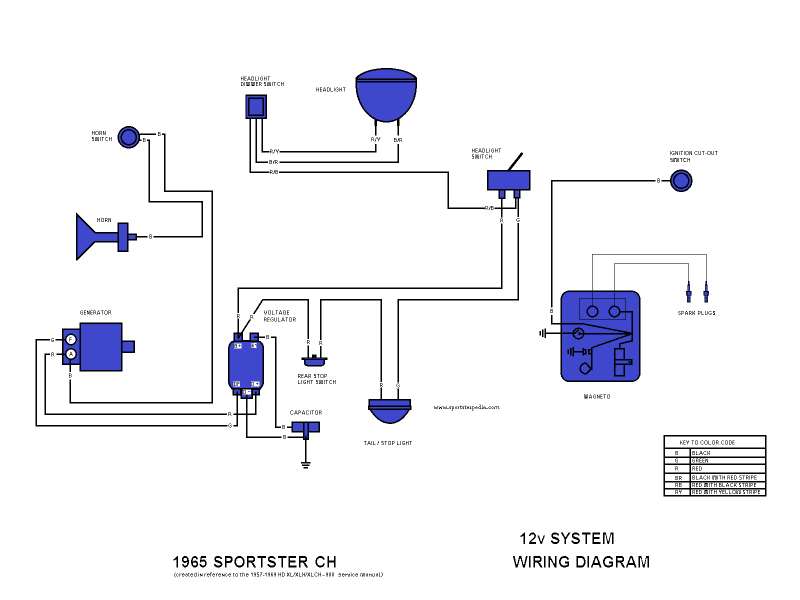
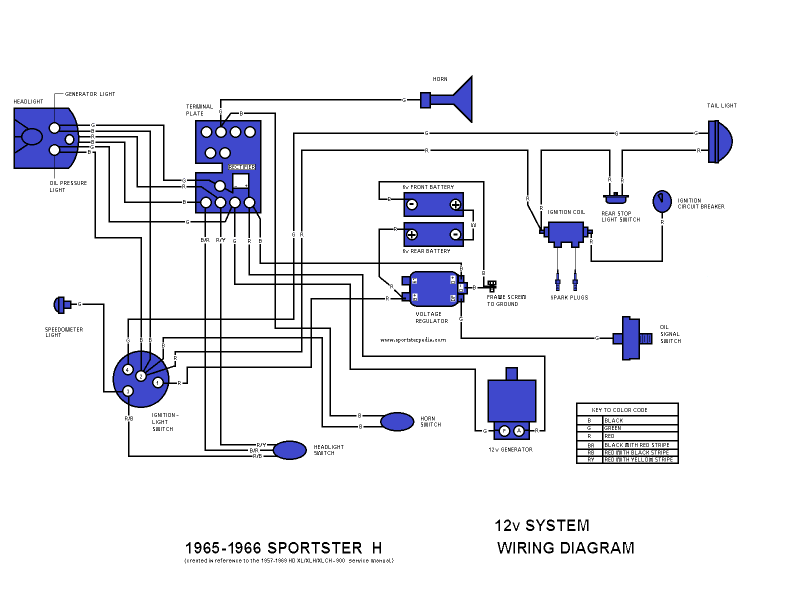
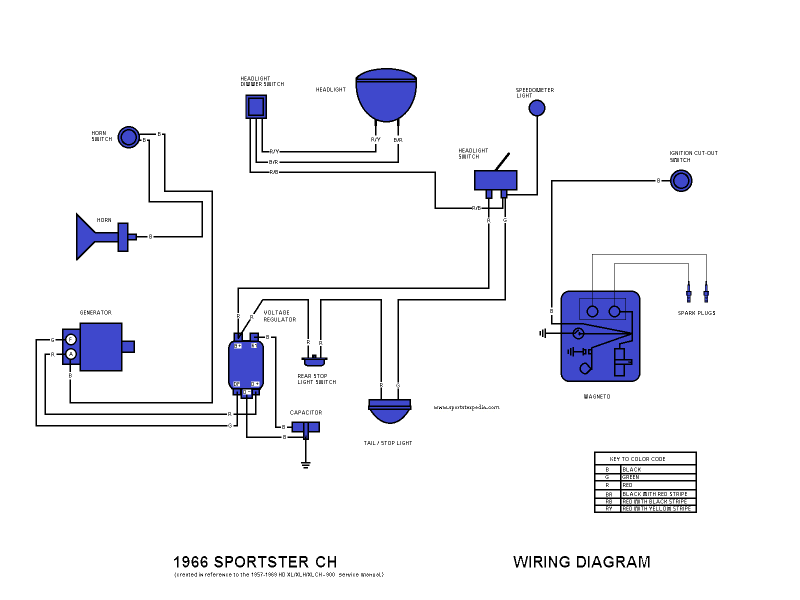
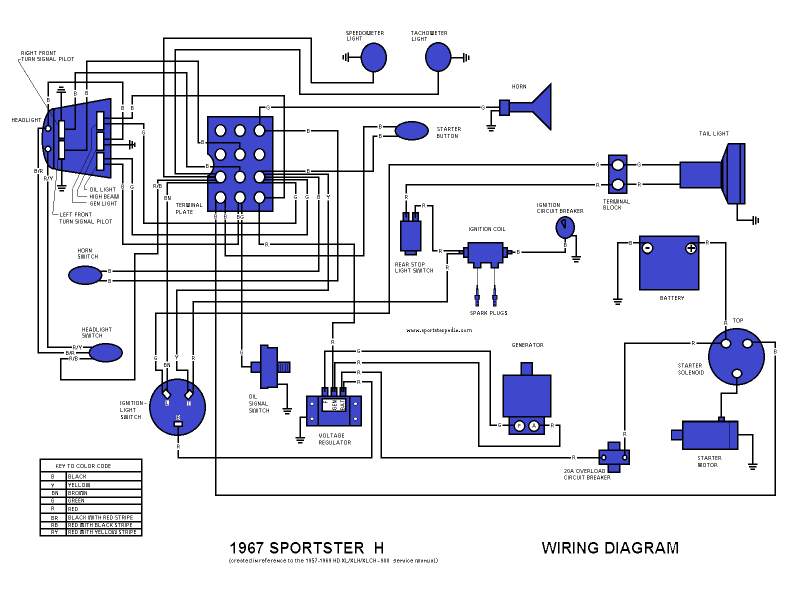
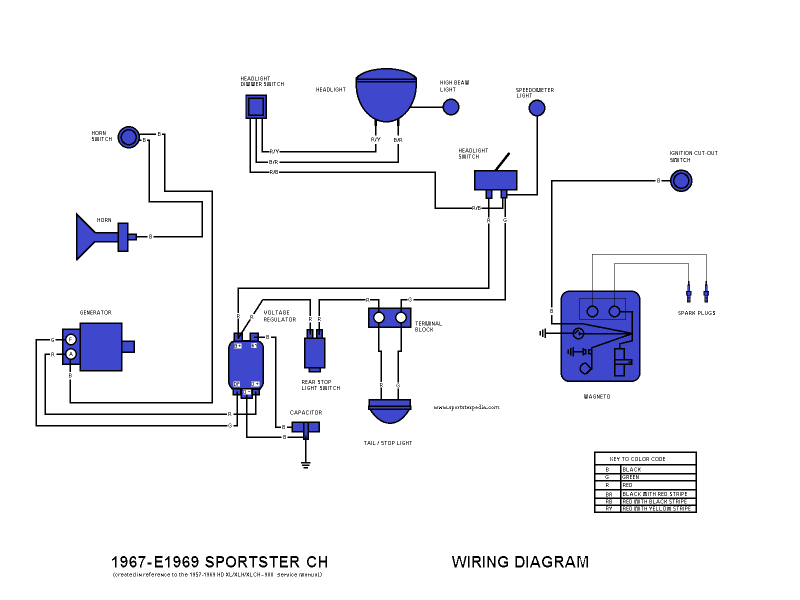
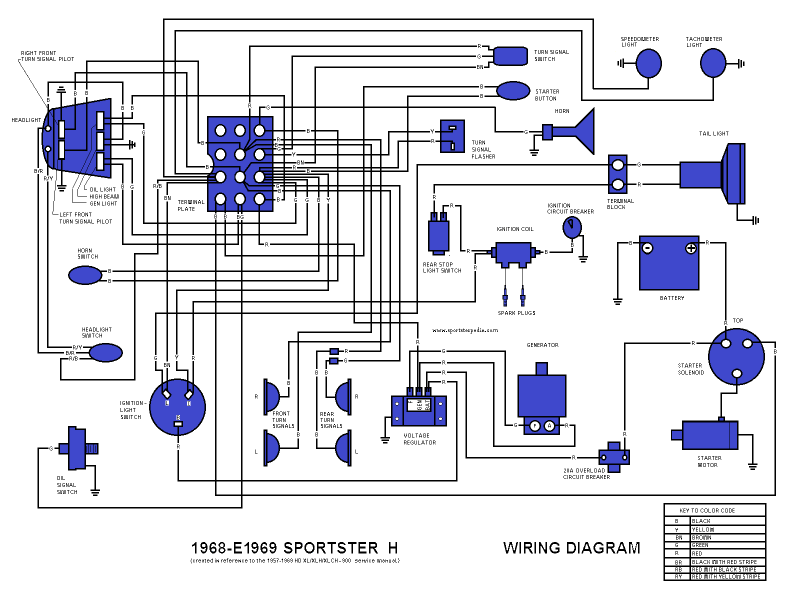
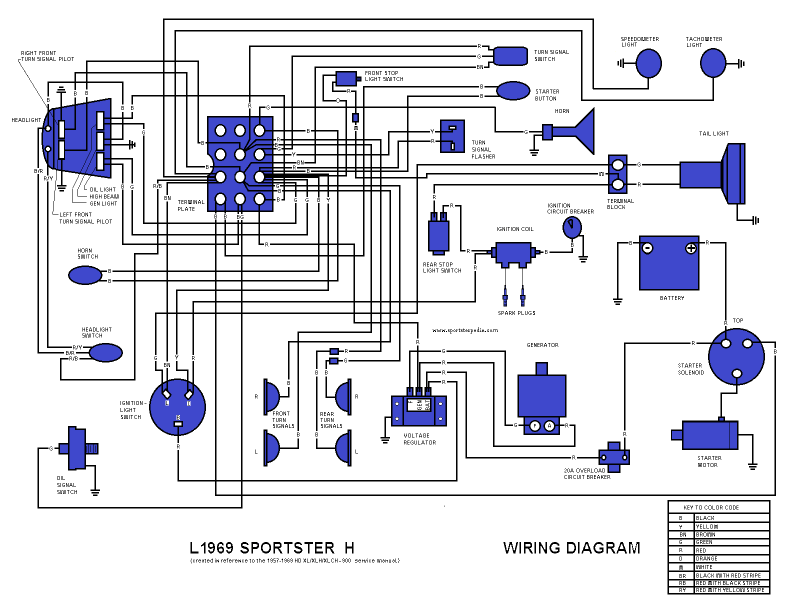
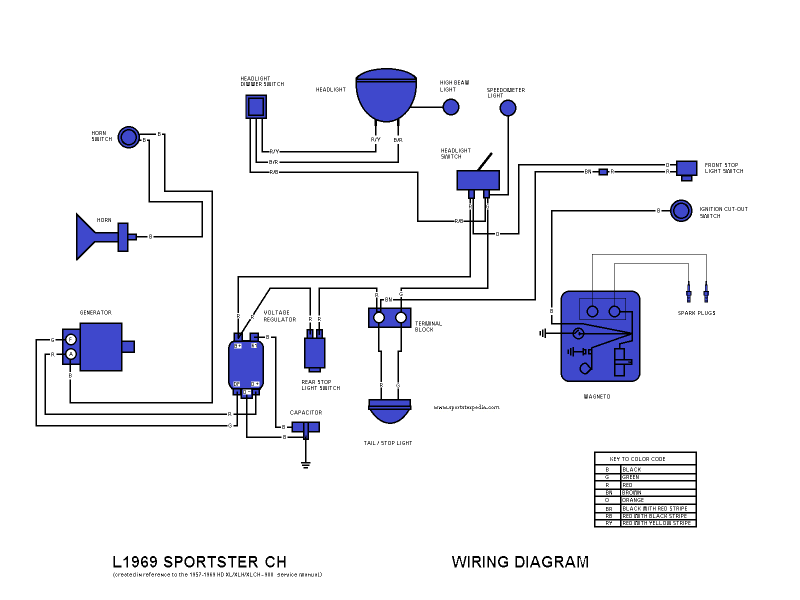
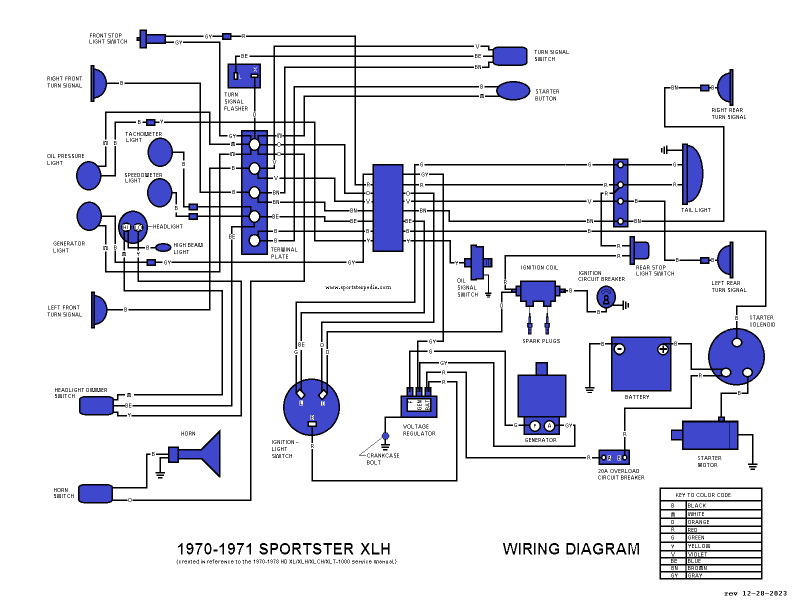
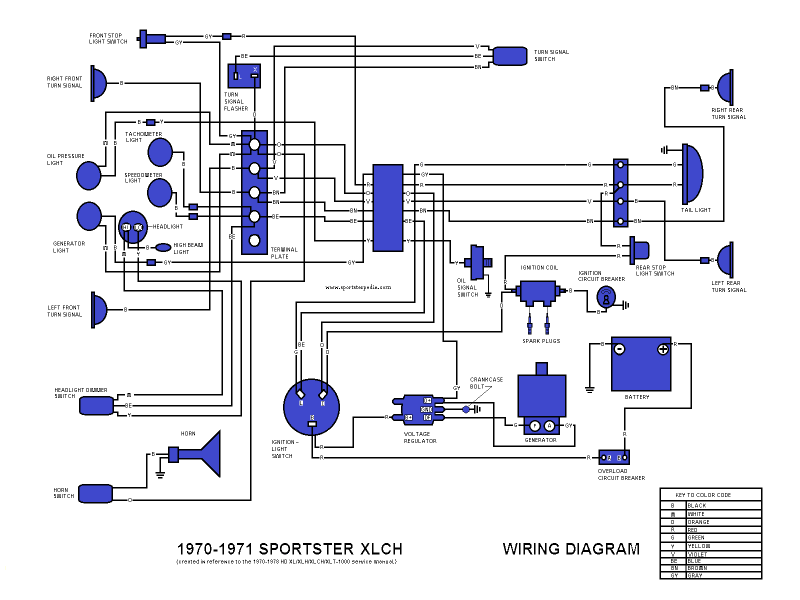
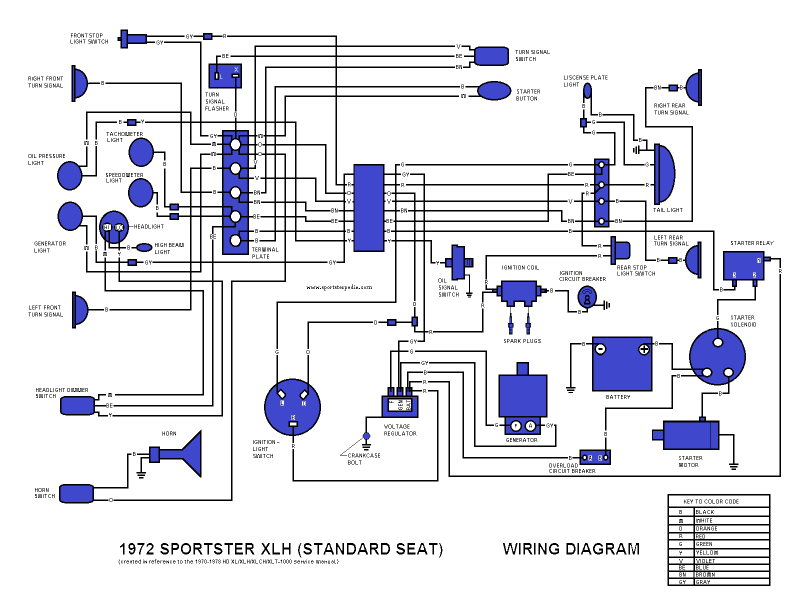
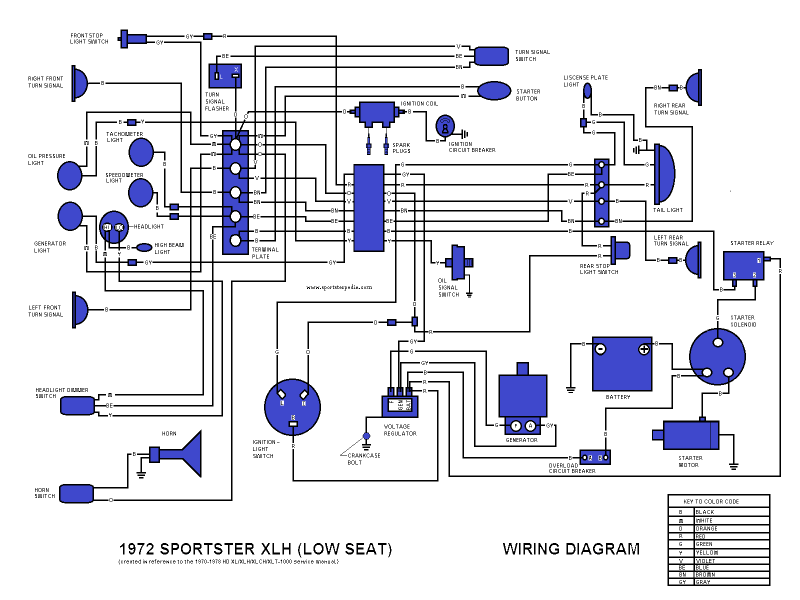
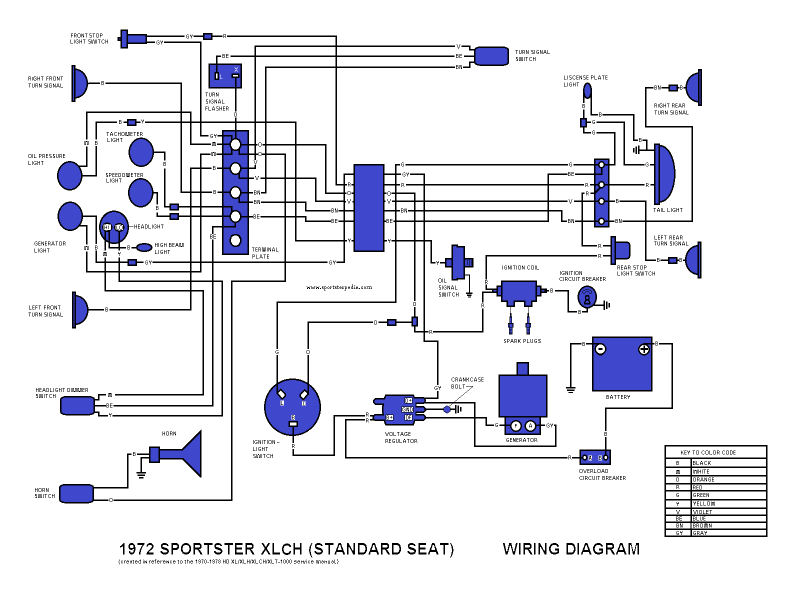
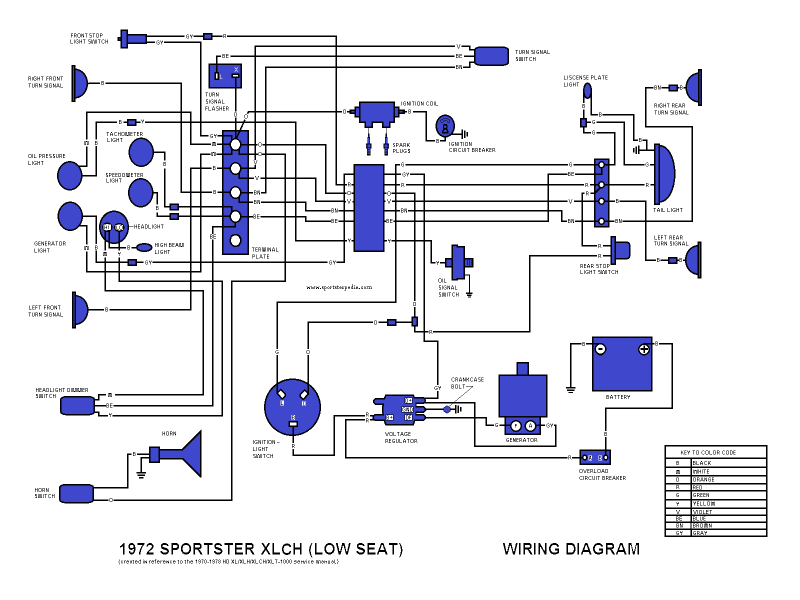
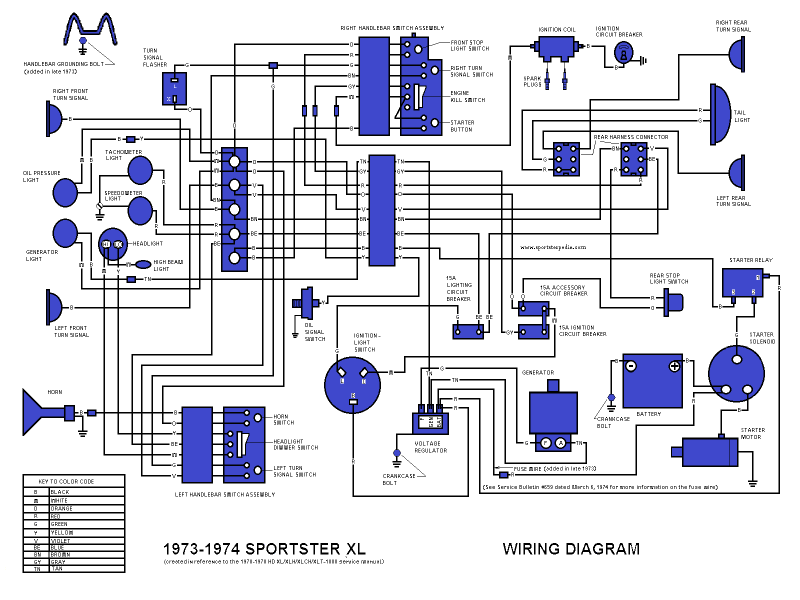
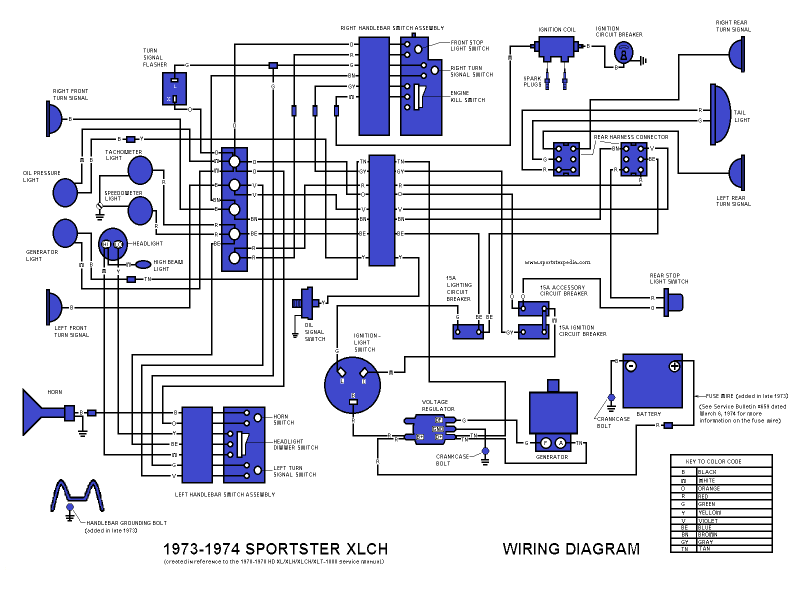
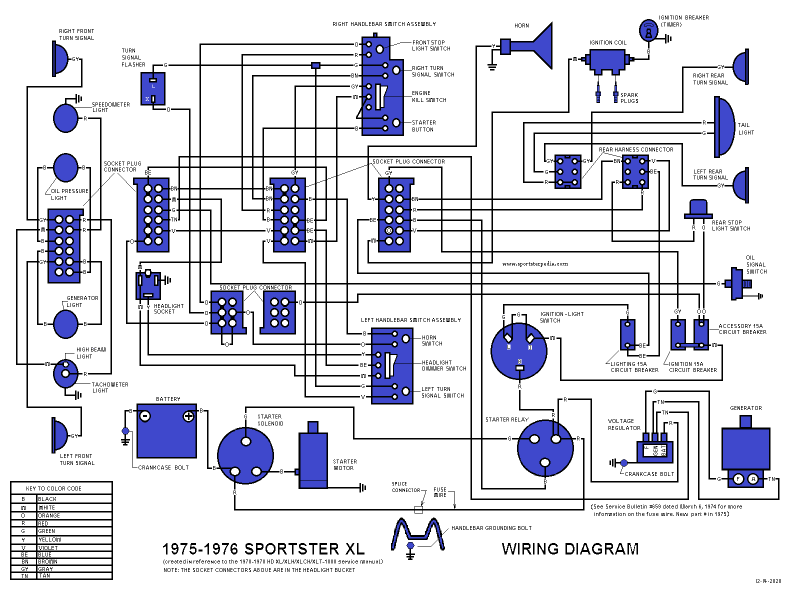
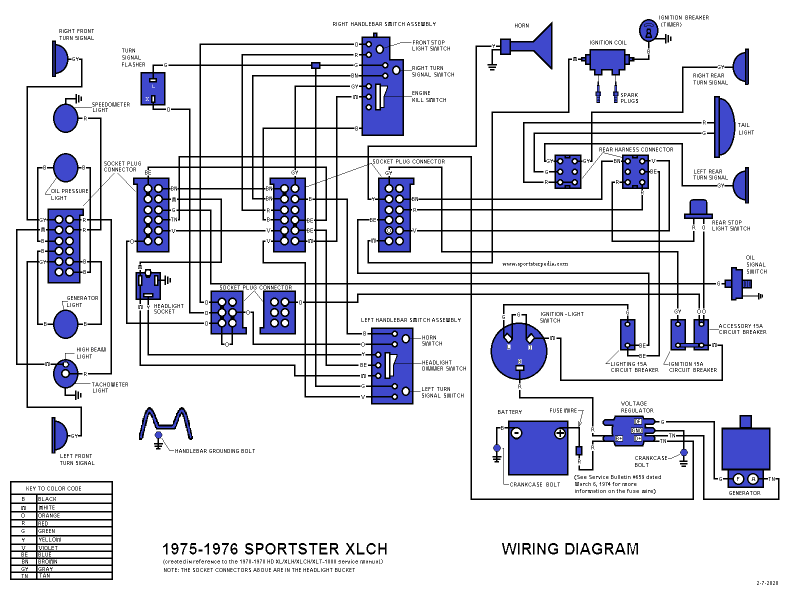
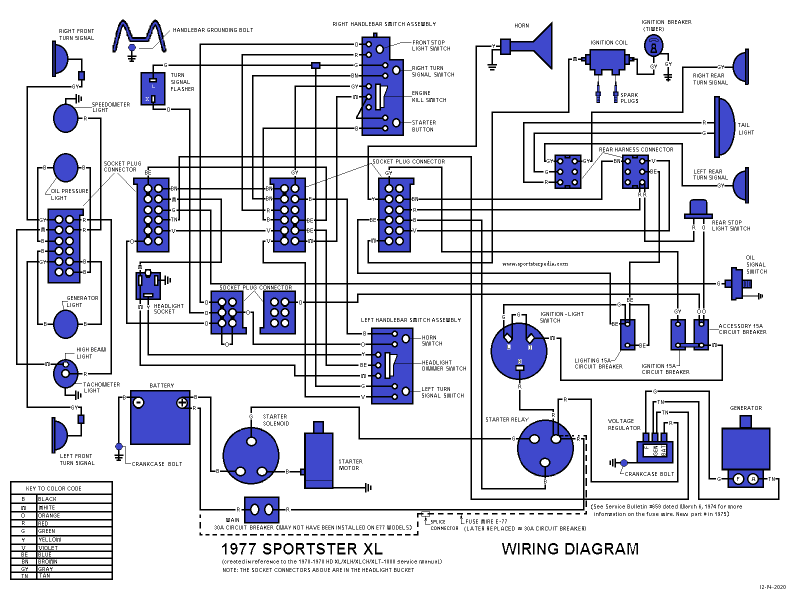
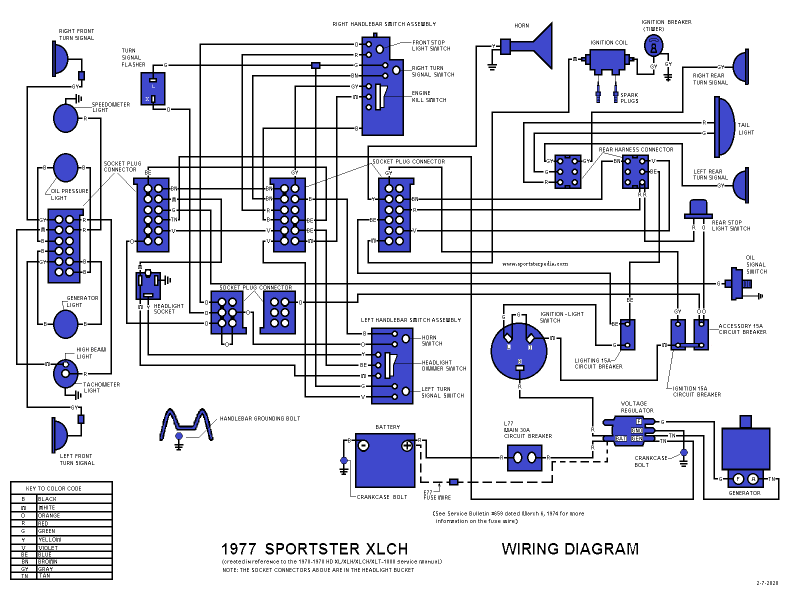
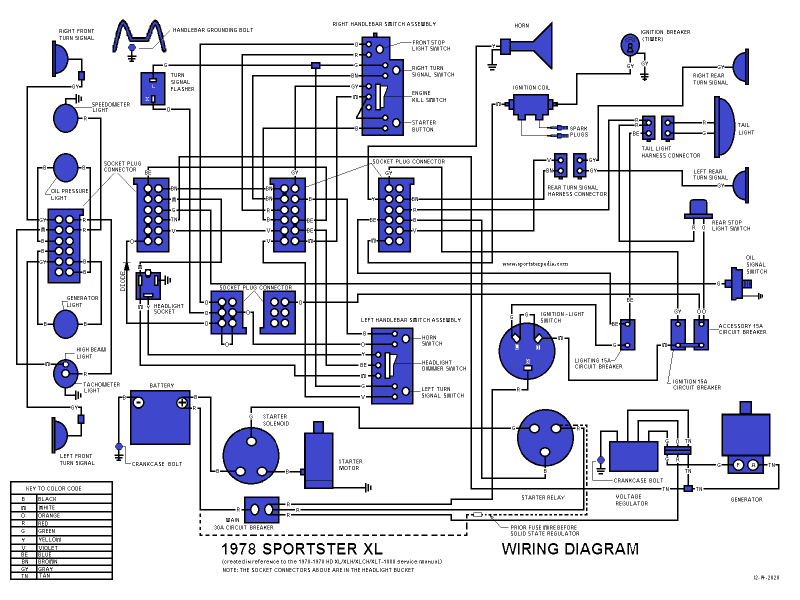
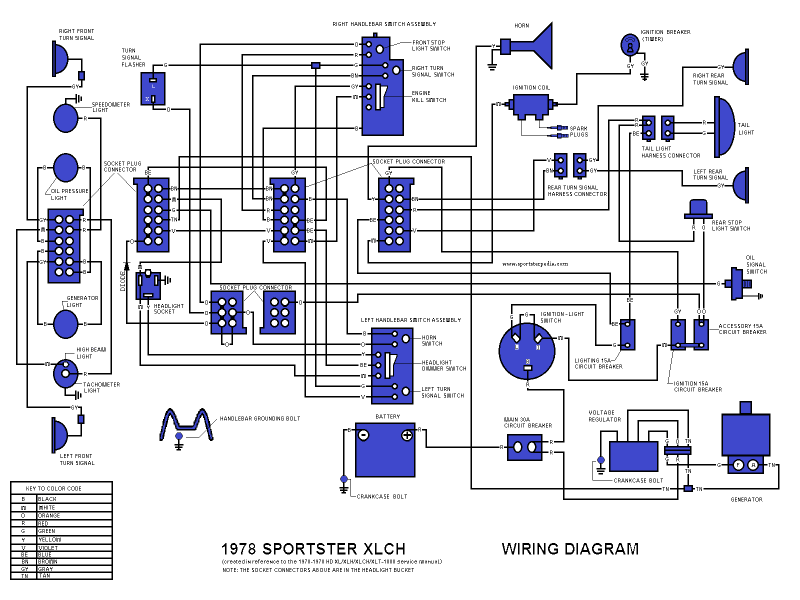
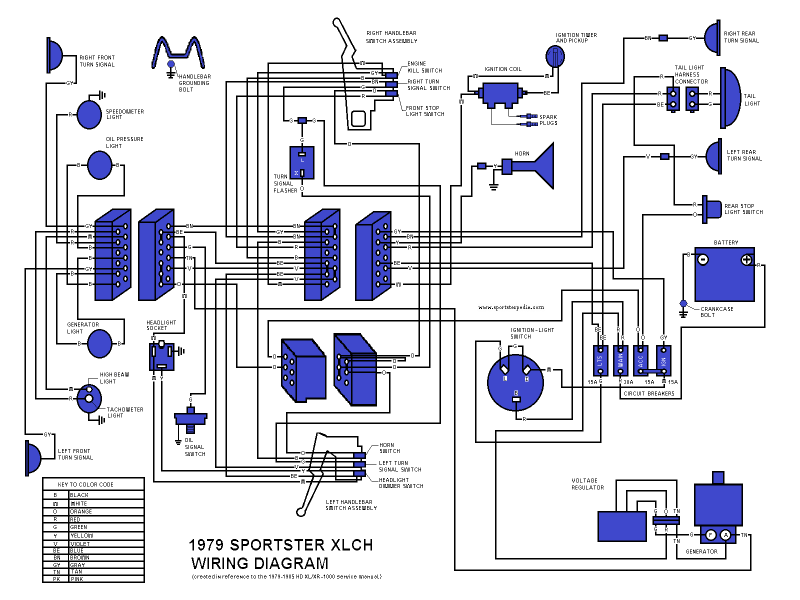
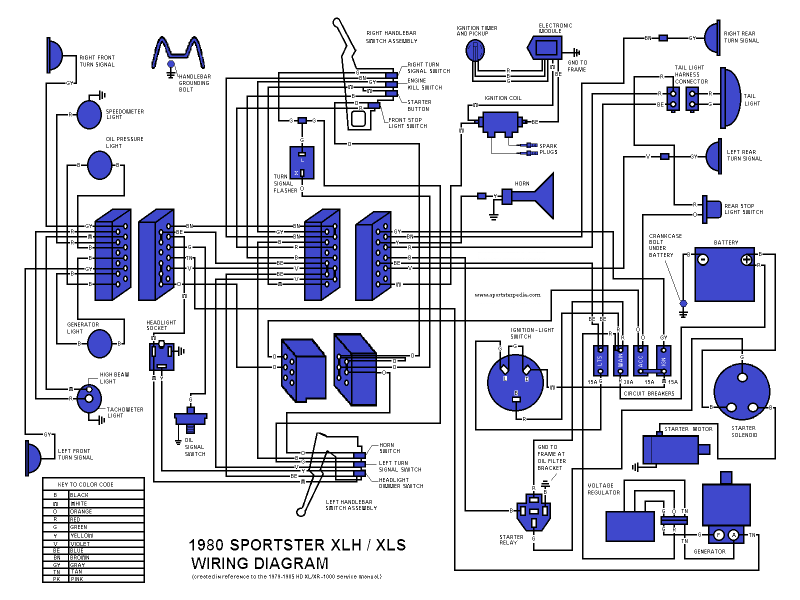
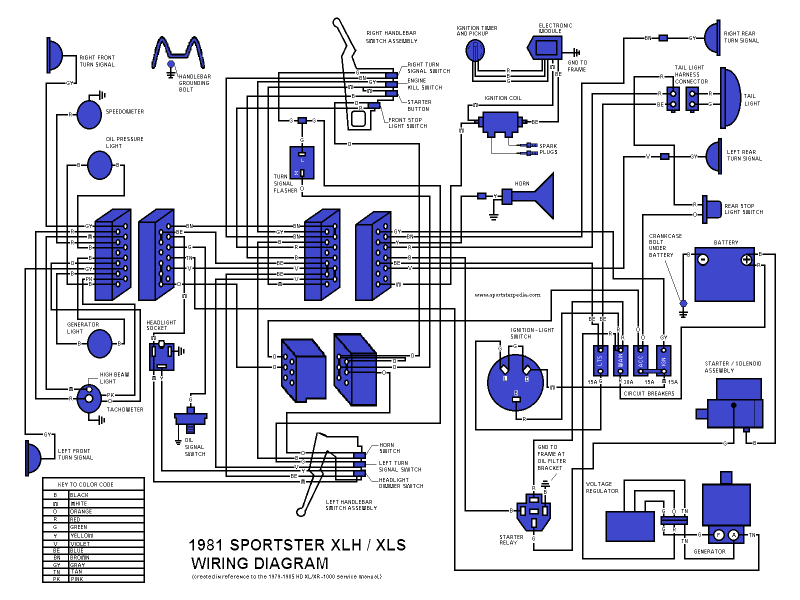
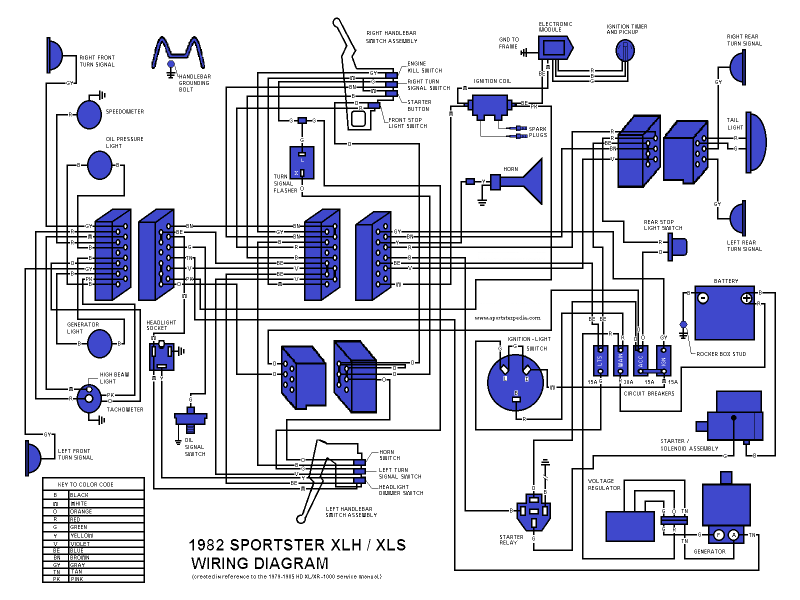
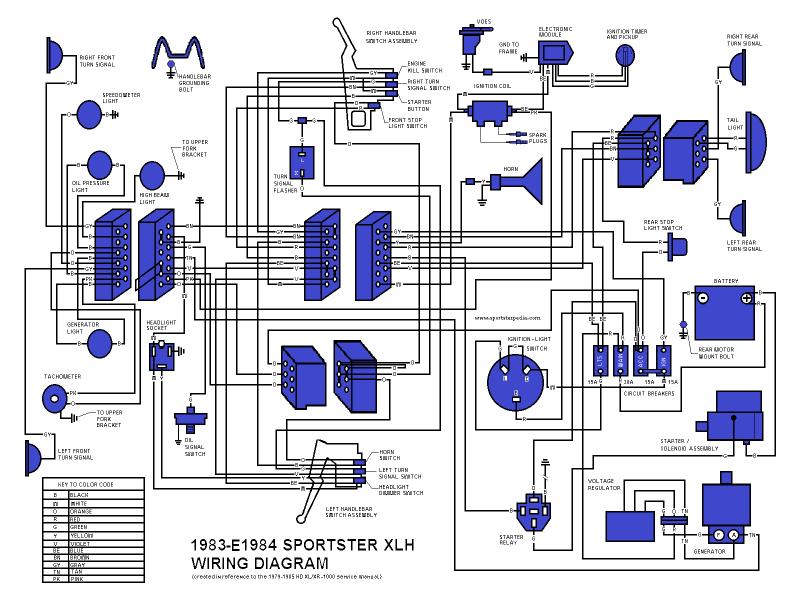
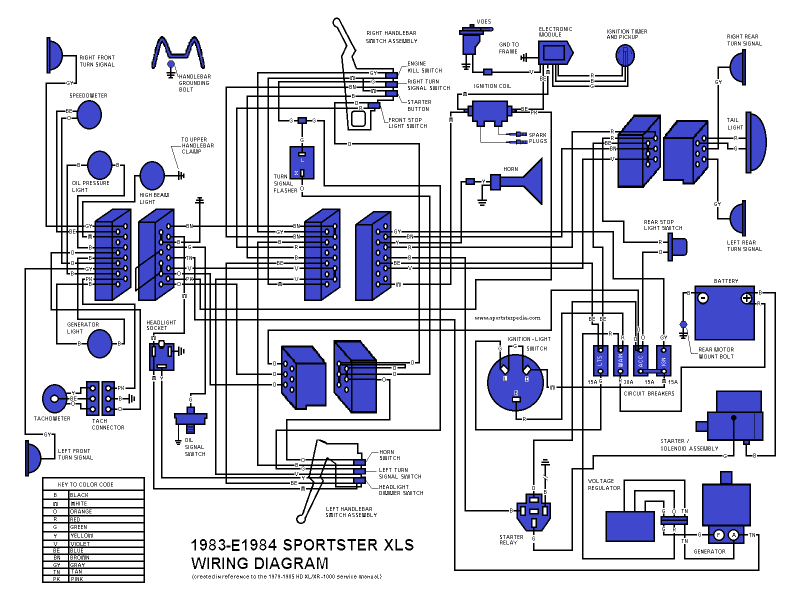
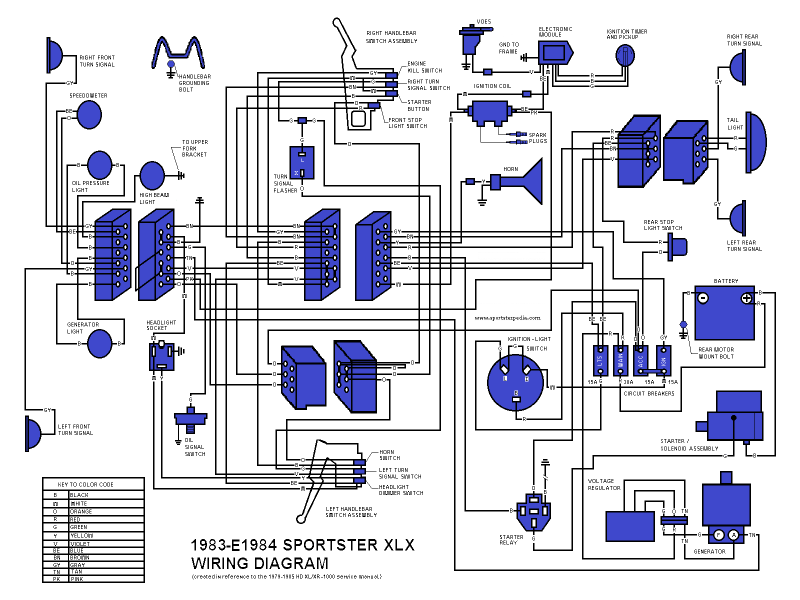
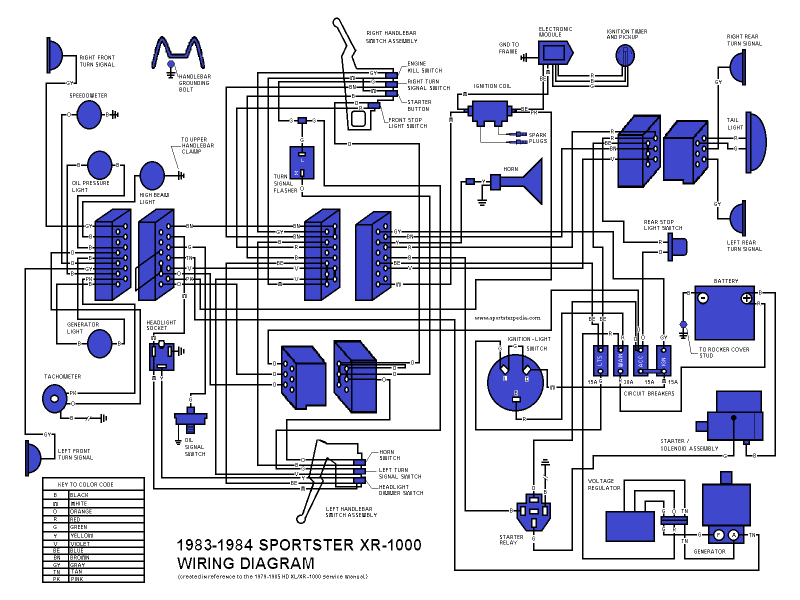
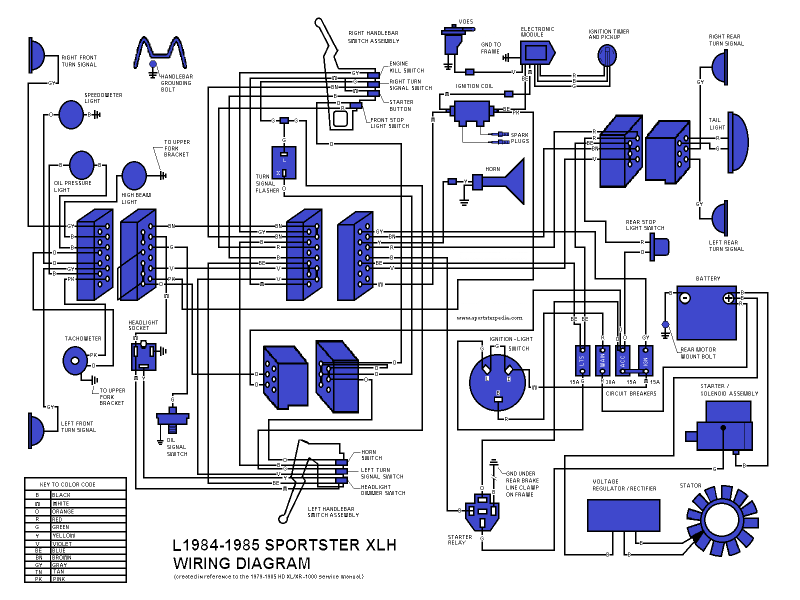
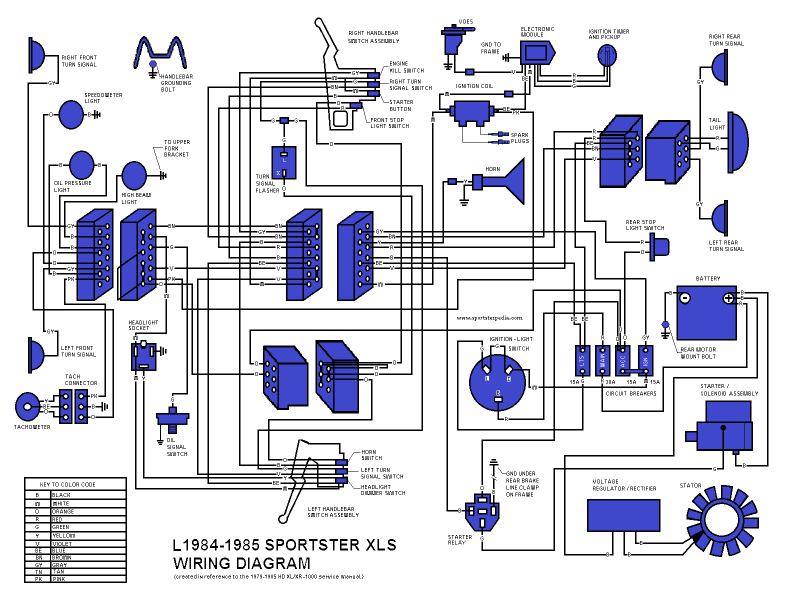
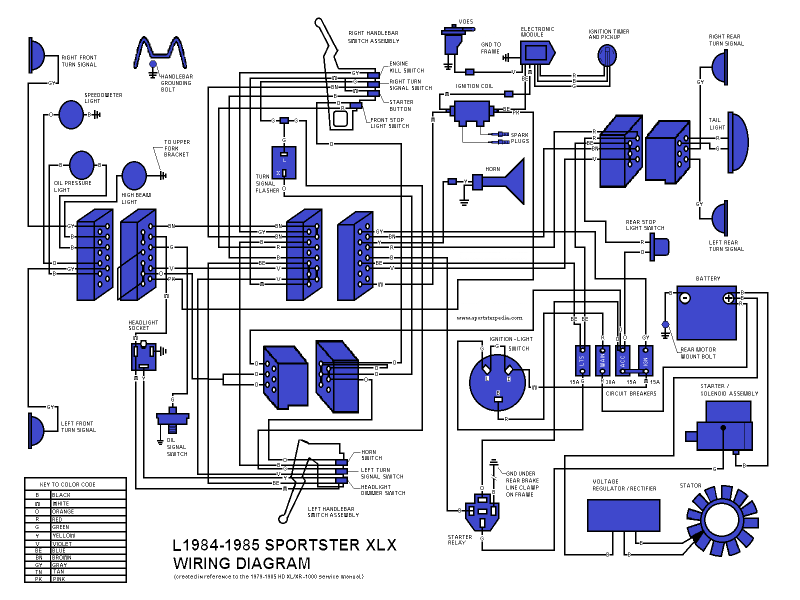
1959-1985 Sportster Main Wiring Diagrams
The drawings below have been created using the factory schematic drawings from the FSMs as reference. They are available here but are not intended to replace the factory drawings. Some parts symbols are generic, may not represent the actual period parts and have been spread out for clarity from the originals. However, the parts are labeled. The drawings are not to scale and parts and wiring are positioned on the drawings for clarity.
Note: The L84-85 Wiring Diagrams show an improper connection from the Regulator to the Battery.
The wiring diagram shows an unsafe connection but we have not been able to determine if the actual bikes are wired wrong, matching those wrong wiring diagrams. So the following information needs to be verified against the actual bike wiring.
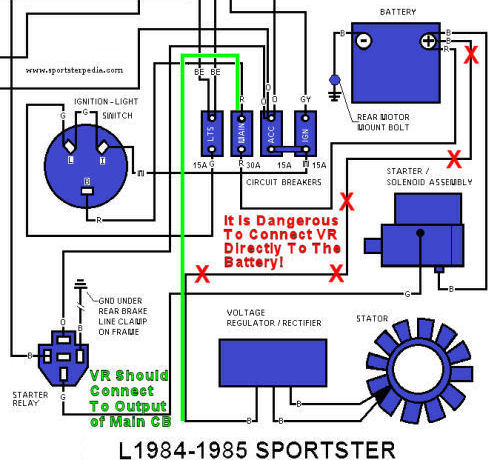
The Main Circuit Breaker is supposed to protect the wiring from a shorted battery. If the regulator is connected directly to the battery (as shown on the diagrams), not utilizing the main circuit breaker for protection, there is a potentially dangerous situation. If the regulator internally or externally shorts that wire, connected to the battery, to ground, the battery will supply upto 200 amps of current, causing the wire to overheat and possibly creating a fire. This is what the Main Circuit breaker is to prevent.
So, the proper way to connect the output of the voltage regulator to the system is at the output side of the Main Circuit Breaker (typically, on the Silver Stud). The battery would be connected to the input side of the Main Circuit Breaker on the Brass Stud.
This is the way earlier & later model wiring diagrams show the connection of the voltage regulator to the circuit breakers. The L84-85 diagrams are the only ones showing this improper, potentially dangerous, wiring.
If you find that your bike is improperly wired, PLEASE, rewire your bike to make it safe. Be sure the output wire of the voltage regulator is connected to the output side of the Main Circuit Breaker (typically, on the Silver Stud).
Because so many bikes (especially the Ironheads) have had the wiring modified (either deliberately or simply by accident while making repairs or modifications) it is hard to find this answer unless you have a truly UNMOLESTED model of those years. For those who don't understand this issue (and its dangers), I can imagine that putting the wiring back improperly (maybe for convenience) was easy to do.??


