This is an old revision of the document!

IH: Oiling & Lubrication
Engine Oil Routes
Right Crankcase Feed Galley
Top End Oiling
Rocker arm / Valve oiling
Rocker Box Oiling
Bottom End Oiling
Pinion shaft and Crank Pin
Cam Cover Bushings
Cam Cover \ Gasket
Case Oiling and Drainage
Splash
Oil Pump Scavenge
See also the IH Oil Pump section of the Sportsterpedia.
'77 and Later Cases
The “drain plug” on the bottom of the case is simply a threaded plug that caps the oil scavenging passageway. 1)
The MoCo drilled from the bottom of the case to the horizontal oil passage in the gearcase.
This connects the crankcase sump oil to the scavenge port of the oil pump and the hole is plugged on the bottom.
From inside the case with the plug removed from the scavenge passage;
In the second pic below, you can see that the threads, from the tap, have been machined farther up into this hole.
This is the oil passage from the sump to the scavenge pump.
Oil from cylinder drains, crankpin, pushrods and cam chest that collects in the sump is fed to the pump by crankcase pressure and pump suction through this hole.
| Case Drain Plug on a 1977 engine 2) | ||
 |  |  |
Gravity
Case Drains Explained
76 and Earlier Cases
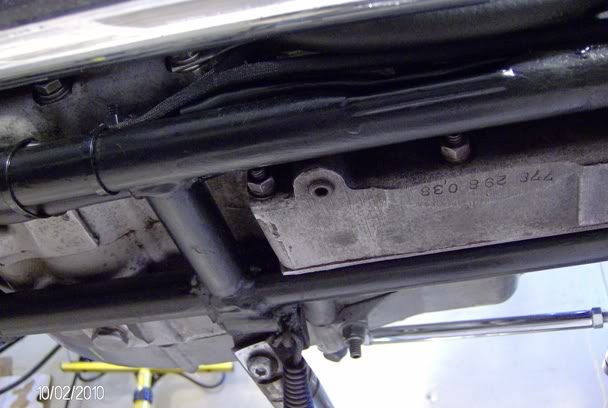
- The plug on the bottom left of the photo is the primary drain plug. 3)
- It is only used when draining the primary / tranny oil.
- The one above it in the photo is for the transmission. 4)
- Since the transmission shares the same fluid with the primary, and the primary plug is lower than the tranny drain plug, there is no reason to remove this one.
- The plug to the right center of the photo is the (crankcase drain plug). This is the one everyone has problems with. 5)
- (It has been said that ) this plug was never meant to be an actual case drain (in street engines). It's purpose has been somewhat of a debate. 6) See more below.
 |
| Drain plugs in a '75 case 7) |
- Primary Drain Plug: 1/2“x20x1/2” 8)
So, if the only plug out of the three you'll ever need to remove (theoretically) is the primary drain plug, what is the purpose for the other two plugs?
- Transmission Drain Plug: 1/2“x13
- Crankcase Drain Plug: 1/2”x13 9)
- The drain on the pre1977 [non-mini sump] engine is under the flywheels, and was intended as a case drain. 10)
The 57 and 59 parts catalogs do specify “crankcase drain plug” while all others just read “drain plug” in the crankcase sections. 11)- We used either the pre'77 or we put one into '77-+ cases so that when racing, we could pull the plug in the pits to see how much oil was in the bottom end…helping to determine how much more restriction or bypass of feed oil we needed to eliminate, because the oil pump could not get rid of it. 12)
- If you are not requiring that knowledge, or don't intend to do anything about it anyway.
- According to one theory, the hole was needed for the casting and machining process only and the plug was never meant to be removed after it was installed at the factory. The MoCo couldn't provide information on exactly how the hole was used during the manufacturing process because AMF did not keep good records and also a lot of records were lost during the transition back from AMF. 13)
- Another theory is that people think the plug under the crankcase is a drain plug like you find on a car's oil pan and they remove it to drain excess oil collected in the case. 14)
- However, dry sump engines, like Harleys, drain from the oil tank, not the crank case. 15) Draining your oil tank and refilling it there is all we need to do for changing our oil. The amount of oil sitting in the bottom of the cases is trivial, and that lower drain plug is notorious for stripping and not worth the hassle. 16)
- A car is a wet sump system which most people are familiar with.
- Once removed, the plug will not tighten up again because the crumbly threads have stripped out.
- Right behind the plug sits the flywheels.
- You have about 3/8“ of air space between the wheels and the end of the plug. So a tap is not going to be able to get through to establish new threads.
- The best way to fix this correctly is to dismantle the entire engine and split the cases. Then you can tap out the hole but a better fix is to weld it over.
- Most people just use JB Weld to do their fix (?) and let it go at that.
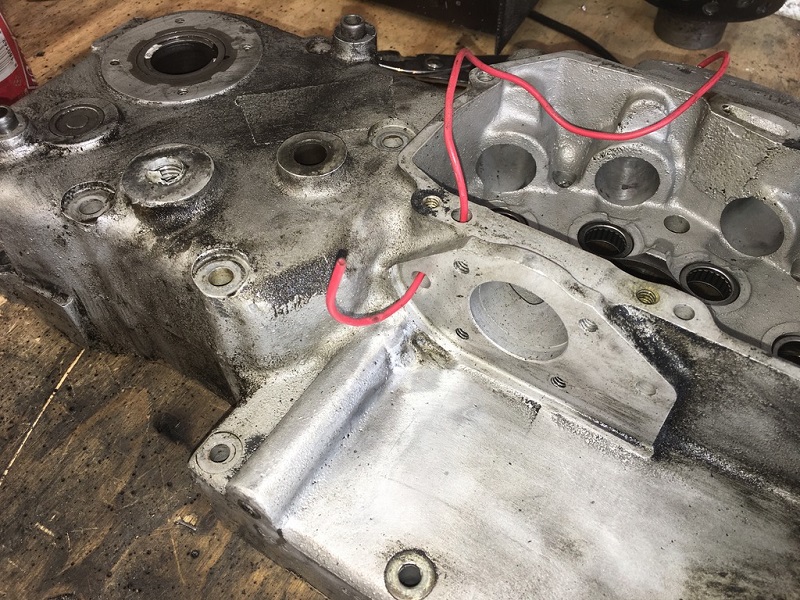
- The depression in the pic below is from the boss on the plug smashing the case on over tightening.
Then, one time when the plug got removed, that piece of stressed aluminum broke free. 17) - The same thing can happen to the threads. They can break free upon removal of the plug for the same reasoning above.
 |  |
| Crankcase Drain Plug on a 1967 XLCH 18) | |
- Note that there will be no seal effect here because there is no surface for the plug boss to contact. 19)
- Oil will travel past the thread gaps and with no sealing surface, it will leak.
- That means a gasket may not effect a seal as there is not much for the gasket to squeeze against.
- In this case, some kind of pliable sealer (one that won't rip the threads out if you need to remove the plug again) smeared on the threads of the plug before installing it may work.
- If you use Teflon tape, you'll need to reduce the torque applied to the plug to keep from overloading the threads with wrench force.
Oil leaking around crankcase oil drain plug
- 1st thing to do is to make sure its the plug. It can be the case seam near the plug. If it is the latter, don't mess with the plug. Look for a weeping case seam and cracks between the plug threads and the case seam. 20)
 |  |  |
| Leak around oil drain plug. 21) In this instance, the case seam appears to be weeping oil. | ||
If your plug is a factory unit, and you can spin it in or out (once initial torque is broken) all the way by hand, you have no problems. As long as you don't over tighten it. Clean and install the plug with blue locktite. Then don't tempt fate again by removing it. If you want to try to remove / break plug loose, use 1/8 turn max. If you can spin out by hand see above. If it gets too tight to remove by hand after the initial 1/8 turn, GINGERLY put the wrench to it. If you feel even the slightest unusual resistance- stop (personally what I'd do is use a 5/8 deep socket only (no ratchet) in my hand. If I can get it out by doing that I MAY be safe for a no hassle re-install). Get whatever sealant you feel comfortable with in the small gap. then re-tighten GENTLY. 22)
UNDERSTAND THE PLUG DESTROYS THREAD INTEGRITY IN CASE ON REMOVAL. The thread may look ok but if they arent— you will know on re-torque. If you have a brass flanged washer on your plug, be very suspect of messing with it. These washers were used on XLH oil tank drains. That means someone has installed one on your drain plug. That can't happen unless the plug has been removed. Remember its ham fisted plug r&r that causes striped plugs. Think hard about that when looking at your brass washer.23)
- This one is cracked across to the edge of the case.
 |
| Cracked case at the crankcase drain plug on a 1968 XLCH 24) |
L69-E71 cases
Late 1969, all 1970 and some early 71 cases came with no motor drains from the factory. 25)
| 1969 XLCH with no sump drains. 26) |
 |
77 and Later Cases
The “drain plug” on the bottom of the case is simply a threaded plug that caps the oil scavenging passageway. 27)
The MoCo drilled from the bottom of the case to the horizontal oil passage in the gearcase.
This connects the crankcase sump oil to the scavenge port of the oil pump and the hole is plugged on the bottom.
Some see this plug as a sump drain location while others view it as a permanent plug.