Table of Contents

REF: Body Parts - Sub-30K
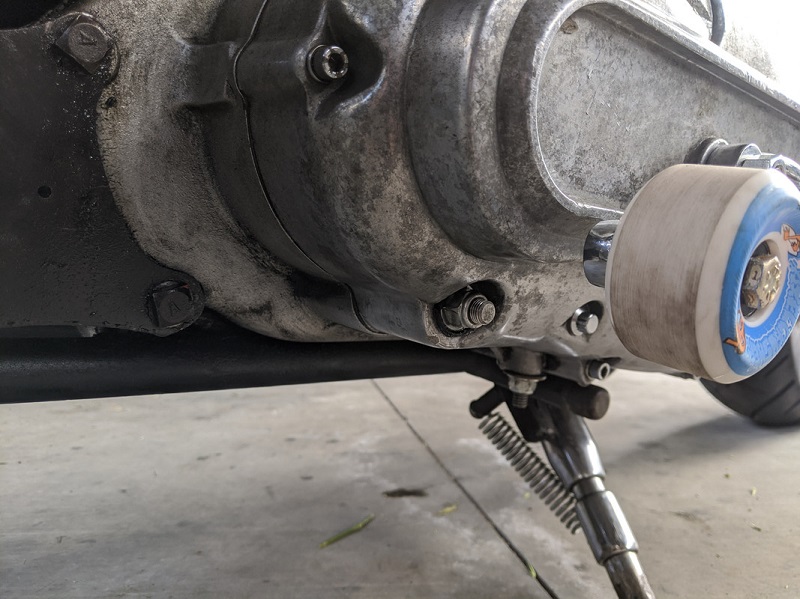
Shifter Mods
Pegs
| 50bmg shifter: The shoulder of the casing was cut off with a bolt epoxied into it. 1) | |
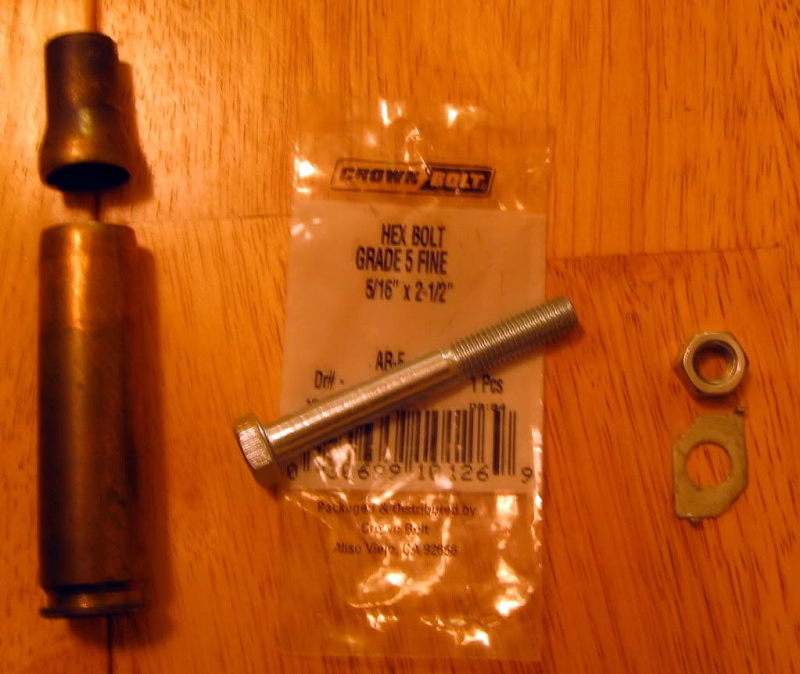 | 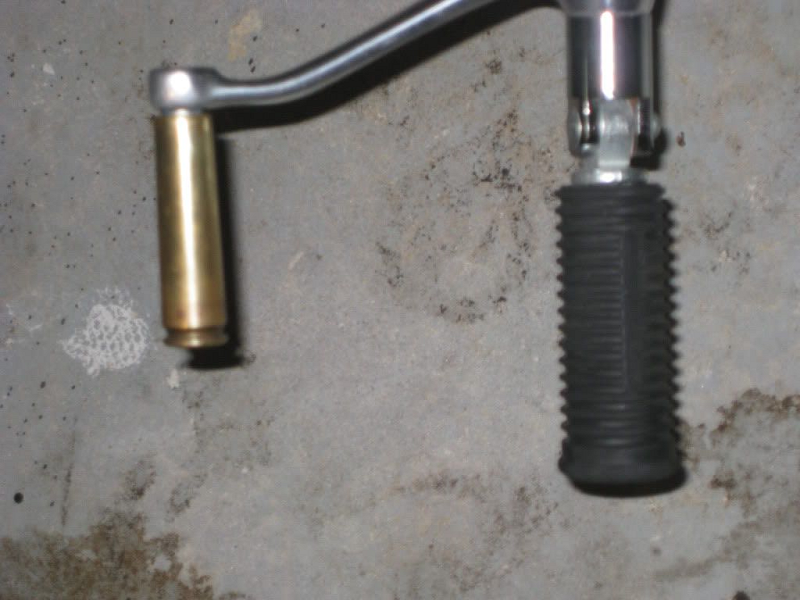 |
| Skateboard wheel mounted to the shift lever. 2) |
 |
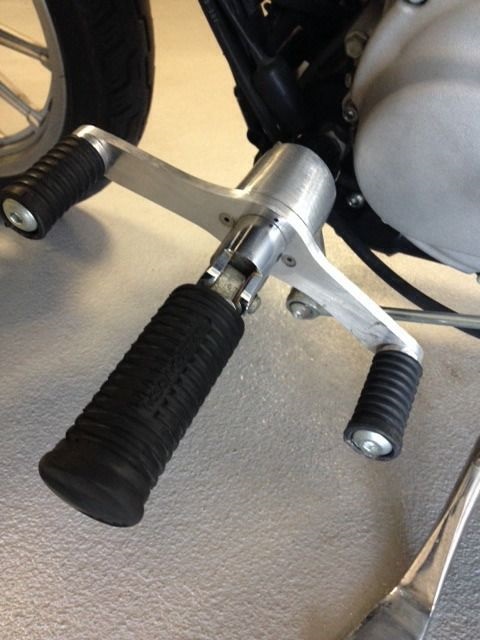
Heel / Toe Shifter
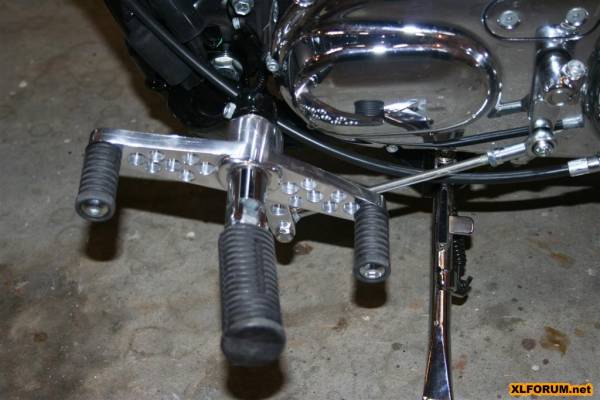
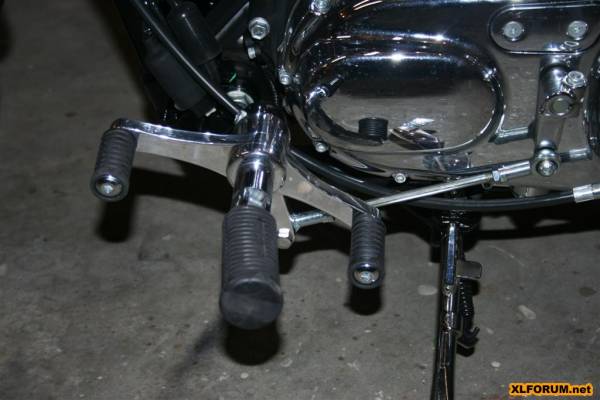
| Hand Built Heel / Toe Shifter 3) |
 |
Homemade Heel / Toe Shifter
Article by rasaine of the XLFORUM 4)
These were built for a 2009 1200C.
You may have to do some measurements and fitting on different year models but the concept is the same.
This design will not work on the Mid Controls as there is no connecting rod.
Mid mount controls have a shift lever that mounts directly on the splined shaft coming out of the transmission housing.
However, you may be able to study, measure and come up with a design.
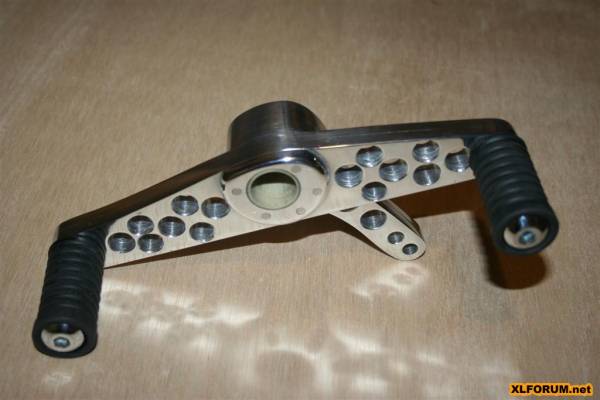
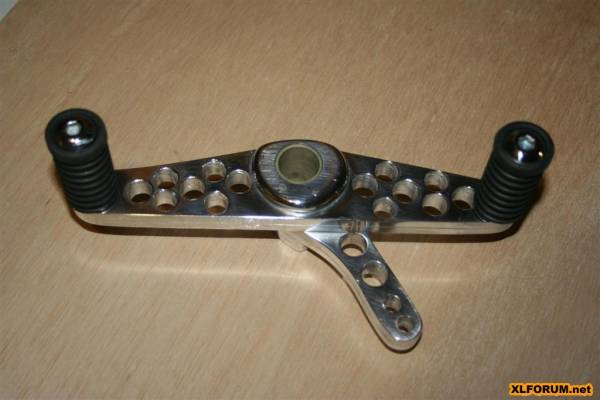
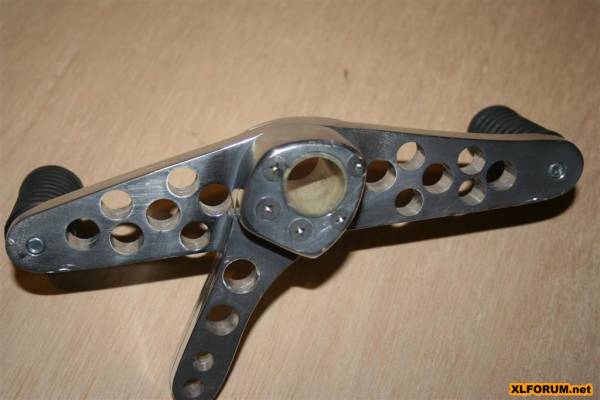
Below are 2 different versions of heel / toe shifters for forward controls homemade by rasaine.
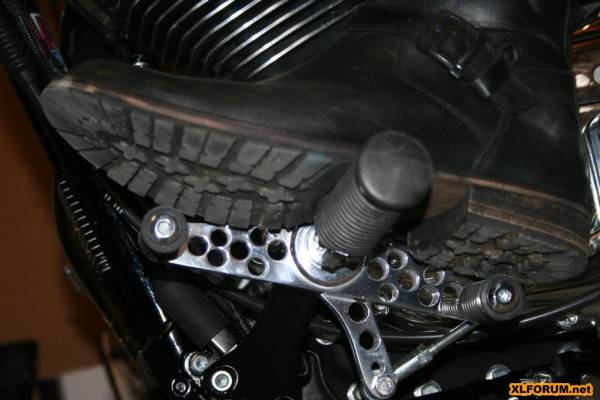
With the second version, the foot rests 100% on the foot peg and doesn't touch either the shifter peg.
To shift, you don't have to lift your foot at all.
You just rock down on the Toe (down shift) or Heel (up shift).
The Sportster foot pegs are wide.
So during normal riding, the foot is fully out on the foot peg.
And the shifter pegs do not interfere with any position you put your foot in.
When shifting I slide my foot to the inside of the foot peg and am actually resting partially on the chrome hinged area of the peg.
Download the full instructional PDF here: homemade_heel-toe_shifter_instructions_by_rasaine.pdf
These instructions are valid only for Forward controls on a 2004 – 2009 (2010??) Sportster.
The unit I made for Terp84Alum required some modification and redesign due to the different footrest shaft used on the non-rubber mount bikes.
Unfortunately when I converted the drawing to a PDF file, the templates do not print out true to size.
They are close, but will need to be enlarged slightly to be accurate.
The Shift Peg Rail is 8-1/2“ end to end.
The printed measurements are correct.
Tools:
Drill Press, Band Saw, and a bench mounted Belt Sander (other than common hand tools).
And a LOT of “elbow grease” (12 - 16 hours of labor.)
Parts:
The 1/4” aluminum was $12.22 - ordered from McMaster-Carr (#8975K713).
Bolts were less than $5.00. (Lowes).
Materials:
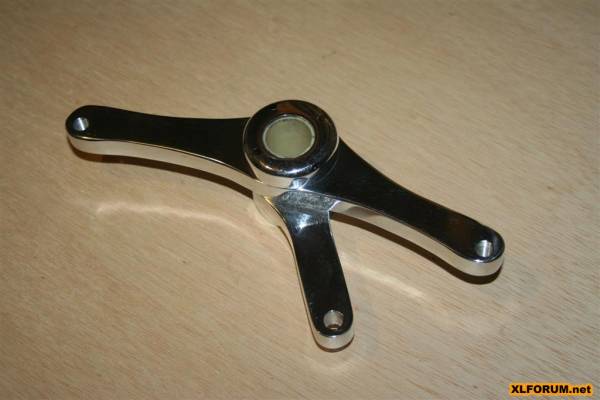
The shifter is constructed from a single piece of 6061 Aluminum, 2” wide, by ¼” thick by 36” long and cut it into 7 pieces.
- (2) at 8 ¾” for the main shift rail.
- (2) at 4 ½” for the shift rod lever.
- (3) at 2” for spacers.
I determined the correct pivot position for each piece and drilled a 15/16” hole through each of the 7 pieces.
This is the correct size hole to allow the Nylon bushing from the factory shift lever to slip into and line everything up.
The order of assembly:
- Outside spacer.
- Two Main shifter rails.
- Two shift rod levers.
- And two inside spacers.
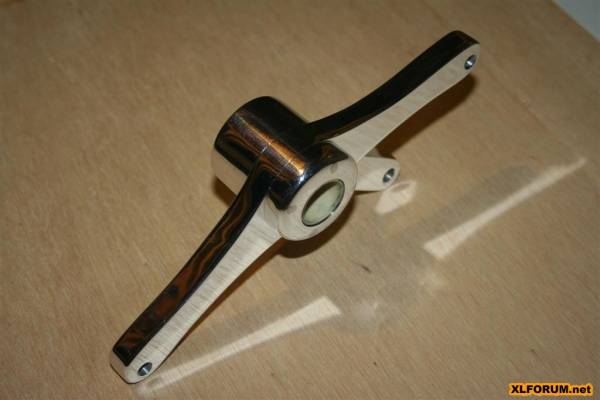
All pieces were cut to shape and sanded smooth before assembly.
I used a Band Saw with a metal cutting blade. The soft aluminum cuts very easily.
I matched the 2 main rails and the 2 shift rod levers to each other by clamping them and sanding the edges with a bench belt sander.
Then I matched the two inside spacers to the shift rod lever the same way.
Once I was satisfied with the shape, I sandwiched the pieces together by drilling holes for five 10-24 x2” Stainless Steel bolts, inserted from the rear. (See rear view).
I only threaded the two Main shifter rails and outside spacer.
All the other pieces are slip through for the bolts, and the inside spacer is countersunk to allow the bolt heads to be flush.
Bolts are inserted with Loctite.
The bolt ends slightly stuck out from the outside spacer, I cut them off flush with a Dremel cut-off wheel.
Then I drilled Lightening holes.
Finally everything was sanded with 220 wet sand, then polished. 5)
Version 2:
 |  |
 |  |  |
Here version 3 with refinements.
This is a more sleek and refined finish.
The shift peg rail and shift lever arm are now made of 1/2“ aluminum and are not laminated.
The overall laminations are reduced from 7 to 4.
The orientation of the shift pegs to the foot rest is the exact same as version 2. 6)
Version 3:
 |  |  |