REF: Service Procedures 9A
1975 XLCH Transmission Assembly
Article by scottericsonon of the XLForum 1)
I'm just snapping pics of everything along the way and writing captions for them when I take a break.
I'll be the first to admit that I don't really know what I'm doing, although, I've had some tips and instructions from people who HAVE done this before and my indy is but a phone call away if I get really jammed up. But that's it. So part of this is so that everybody else can see what's happening and hopefully catch me before I screw anything up.
And if nothing else, maybe it will help someone else, but like I said, I don't REALLY know what I'm doing SO with that being said, probably time for a little legalese. This is how I did things on MY bike. This is in NO WAY meant to be a “substitute” for a PROPER manual.
Neither the xlforum nor ANY of it's members (including me…scottericsonon) may be held in ANY WAY, SHAPE, or FORM responsible if you pull your bike apart and can't figure out how to put it back together.
In other words….DON'T TRY THIS AT HOME!!
A used transmission bought from Ebay was disassembled and the parts swapped over to the original trapdoor.
The used transmission had all Andrews gears as well as the mainshaft and countershaft.
I put new main and countershaft bearings in my trapdoor so I could reuse it so I know everything will line up with my case.
Empty trapdoor.
I should note that while it was empty, I DID punch out the countershaft oiler plug so I can set endplay later.

Clutch gear with new bearing loaded into trap.


Mainshaft loaded in. You WILL have to pull it back apart again but I wanted to get the trans loaded just so I could see how everything fit together before I put the shift forks in.

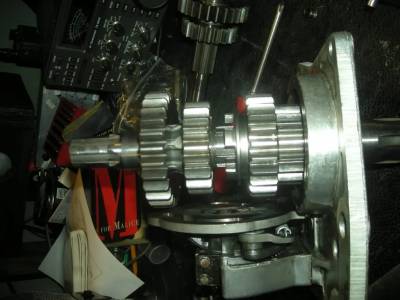
(L) Countershaft in too. Spin it a couple times and slide all the gears around to see that everything operates free.
Then tear it back down and then start reassembly WITH the shifter forks.
(R) Slip your C/S fork around it's gear (3rd) and get the finger roller in the cam.


(L) Then get your mainshaft fork in position and slip it's gear (2nd) in from the side.
(R) Slip your mainshaft into it's home thru 2nd and clutch gears and put low back on the countershaft not forgetting your washers (74 and up have 2).
Then go ahead and slide your fork shaft in and run her thru the gears a handful of times.

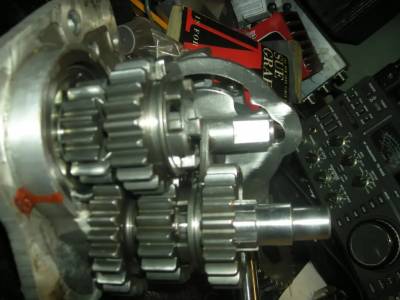
Here is the transmission completely assembled to measure clearances on the gears.

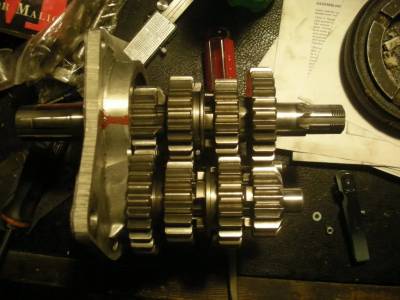
After you get it all together, run it back and forth thru the gears a handfull of times.
This is to get everything settled into where it's supposed to be (plus it's neat to see how everything works together)
Put it in neutral to measure your clearances.
(R) Measure spacing between C/S low and C/S 3rd like this. You want .038“-.058” here.


(L) You adjust clearance with these washers.
(R) Then measure between the dogs on C/S 3rd the face of C/S 2nd like this.
You want .038“-.058” here as well.


(L) Then check between M/S 2nd and M/S clutch gear .043“-.083” of clearance.
(R) M/S 2nd and M/S 3rd .043“-.083” here as well.


Checking C/S clearance. I have .006“
Don't mind my redneck setup. I'm just a poor bastard trying to do shit on a budget.
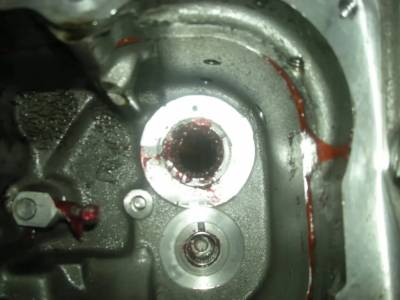

Putting some pressure on the M/S to emulate the clutch being there and engaged.


(L) Checking the M/S endplay. I have .006”
(R) Grab your shift shaft and slide it into its home making sure to have it level so it will go into it's pocket on the trans.


Grab your M/S rollers making sure to COUNT THEM so you know you have all 23.
Goo up the race and your C/S bearing and put all 23 rollers into place.
MAKE SURE you put the flat washer in between the circlip and your bearing rollers!!
Did you check that it was there? Good…now check again.


I greased up the rollers too so they would stick real well for me.
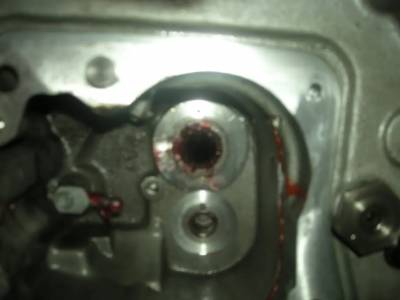

(L) Cross your fingers and slide the trans in. If it's in right it should ALMOST seat by hand.
At least it should start on the dowels. If not, try wiggling it some. It will line up.
Get your bolts in tightening each of them a little at a time so that your trapdoor goes in straight.
Then when they're all tight, pull them one at a time and put a dab of Loctite on them.
(R) Ok, next step. Grab all your kickstart stuff.


Slide the clutch shaft parts on with the collar first then the spring and the gear.
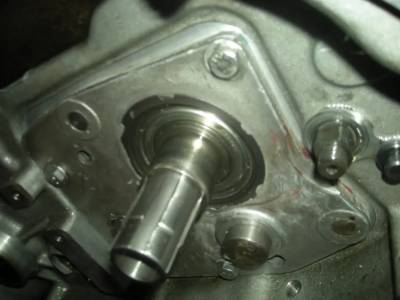

(L) I thought sure I took one with the starter crank gear too but can seem to find it now.
ANYHOW install that it's tabbed lock washer and the nut tighten it up and fold over one of the lock tabs.
Get your primary shoe in with one bolt just to hold it in place while you're putting the chain etc in.
(I put a new plastic shoe on mine obviously)
(R) Gather up your primary chain, crankshaft gear and clutch basket.


(L) This would be an EXCELLENT time to test your kickstarter to make sure it functions correctly.
Just put the clutch basket in place and hold in with your hand as your helper.
(or yourself if you can reach) cranks the kick thru one cycle.
Now get the basket back in along with the primary chain and crank sprocket.
Get the crank nut and the clutch hub in tightened up (150 lb/ft ).
Make sure you fold over a lock tab on your clutch hub nut.
Crank gear nut is 1-1/4“ while the clutch basket is 1-1/2”.
(R) gather up your clutch parts.


I had pulled the whole clutch as an assembly like this and left all the plates stacked while they were out.
Made the install VERY easy as all I had to do was flip the stack over and put in pieces one at a time.
Get the springs in the basket and grab your clutch release disk.
Then get your spring compressor started and sneak the clutch release disk down behind it.
(R) AS SOON AS you can get the locknuts started with 3 or 4 threads get them on there so the clutch isn't a loaded gun anymore.
Go ahead and get those all tightened up and remove your spring compressor.
It should be noted here that I have a 75 and as a result I have the spacers.
If you have a different year (I think pre74), you don't want to just tighten up those nuts.
There's a certain spacing they have to be at.
Once your compressor is out of the way, slap the bolt in the lower hole of the primary adjuster.

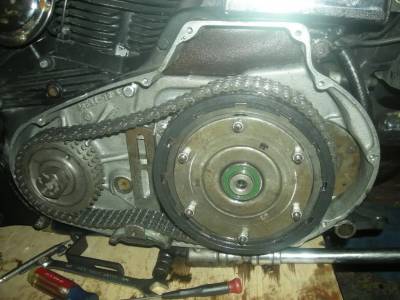
(L) Measure your primary chain slop and get that set to specs.
Then go ahead and button up the rest of the adjuster making sure you double check slack after all your pieces are in and tight.
(R) Ok, now let's move over to the right side of the bike for a bit.
Grab your drive sprocket, a tabbed washer for that and it's nut and a 1-1/4“ socket.


Get that stuff on and tightened up remembering to fold the lock tabs over.
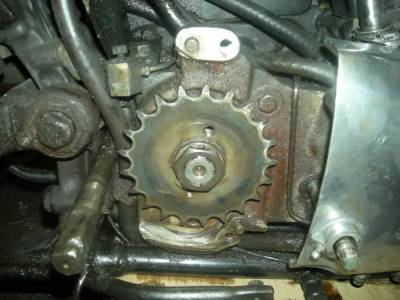
Well here we are with the last installment of the trans already. Getting the shifter on (I need to pull the peg out of my old one).
Get your drive chain around the sprocket loose. Yeah you can wait and install the cover first but you make more work for yourself??


Get the cover on swearing at yourself for getting fingerprints all over it. Get the bolts in and try to clean up the cover a little bit.


Kickstarter spring… just muscle it on….I grabbed the outer end with a pair of vice grips and the really helped a lot.
You want that spring under a little tension. Get the kickstarter on with the pinch bolt.


(L) Get the chain around your rear sprocket and hook your master link with the CLOSED ROUNDED end of the master IN THE DIRECTION OF TRAVEL.
That means if you hooked it on the bottom side of the sprocket the CLOSED END should be towards the REAR of the motorcycle!! Got it??.
(R) Adjust your chain etc. I shouldn't have to tell you how to do this…look in your manual.
Grab your coffee and go back over to the left side of the motorcycle.
Get your 2 threaded 1/4 rods that you used in your clutch compressor and put them in the cases like this.


Slip your new gasket over the rods.
Oh, before I forget, get your clutch cable threaded back into your primary cover and hook it up.
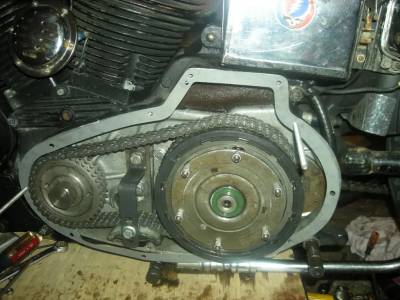
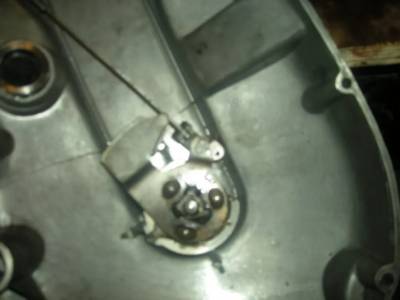
Slip your primary cover over your 2 threaded rods making sure you leave a tiny gap. In other words don't seat it all the way.
Get all your screws started using the gap to see that they go thru the gasket correctly..
Once they are all started, go ahead and GENTLY tap on the primary cover with the heel of your hand to seat it.
Once it's seated, snug up a couple screws and then replace the threaded rod with the proper screws.
Tighten these all up using a criss-cross kinda pattern so as to not warp the primary cover.

Adjust your clutch per the FSM, fill her up with oil, put your footpegs and pipes back on and go bang some gears!
You're done!!
Actually I'd take it pretty easy on the trans for your first couple rides and make sure I went back and retightened a handfull of bolts after a few hot/cold cycles of the motor. I hope you found this thread both entertaining and informative. I know I sure had a blast doing it as well as learning a lot. Maybe it will inspire some of you to write a little something about your own project. Now get out there and enjoy your ironhead whether you're going out for a ride…turning some wrenches…..planning some future mods or just daydreaming about past rides!!
Questions:
A few pertaining questions are noted below from this thread on the XLF.
You can Click Here to read the entire thread on the XLForum.
- LOOSEE THE 79 AMF: Is there any way you can do a price sheet w/ #'s of all the things you purchased to complete your rebuild? I know it's a lot to ask. But by the looks of it all you damn near replaced everything.
- scottericsonon: Well, I kinda fell into a deal on Ebay and was able to buy a COMPLETE trans with all the Andrews gears and shafts there. I reused the shift forks etc. out of that trans and only bought a couple bearings off of my local indy. I had him look over all the trans parts too and got the go-ahead from him on all the parts. Like I said, I just swapped everything onto my trap door so I didn't have any alignment issues with my cases. They were all line bored from the factory so you want to make sure that that's right. IF I wouldn't have lucked into this trans, the 4 gears that I had needed for my trans would have been almost $400 + shift forks bearings etc. To REALLY do it right with all new Andrews gears and shafts,new bearings etc figure about a thousand bucks. If you don't have a decent indy and have to order parts online, debrix cycles http://www.debrix.com/ are probably about the cheapest. There's different part numbers for 1973-1978 and 1979-1984 but everything in your V-twin catalog is available from debrix just punch in the VT part number in the search bar.
- bayshorecs: When you install the clutch plates, there are 3 (I think) “slots” in the steel disks. Should all of these slots line up throughout the clutch pack or does that not matter? Going through the clutch on my new project, they are not lined up. Not sure it that is right or not.
- scottericsonon: I'm not sure it matters. When I put mine back together, I just put em in and haven't had any trouble with it. They're probably just so oil can get into/drain out of the pack.
- Ferrous Head: No, it's mot necessary for them to line up in any fashion. Clutch packs get surprisingly hot during use. The metal plates will heat up quite a bit and the slots are “expansion joints” - much like you see in concrete. They stop the plates from warping which would eventually lock your clutch pack solid.
- K Beggs:Do you/can you stack the washers between the C/S low and C/S third to achieve the .038”-.058“ clearance? I have the .100” washer in there now and run only .011“-.012” clearance. If I stack a .066“ and a .075”, I can get the .038“-.058”. But, are there problems by doing this?
- Dr Dick: For 73-up, speedo drive cs 1st = 1 washer, no speedo cs 1st = 2 washers.


