Table of Contents

REF: Tools & Fasteners
Torque Wrench Field Calibration
Field Calibration Check
If you need to know for sure whether your torque wrench is calibrated correctly, you can take it to a professional to have it checked.
However, here’s a quick field check you can do yourself on a click type torque wrench: 1)
This is not to be considered a professional calibration. Reason being, there are several factors that can result in errors in testing.
The length measurement can be off depending on how you measure that.
The weight of the wrench can affect the reading.
Bouncing the weight on the handle will change the results.
The weight pulls differently on the handle if the wrench is allowed to turn sideways in the vise before or during the test, changing the results.
There is nothing scientific about the test value or weight used.
If you choose a weight lifting weight marked 20 lbs. Is it really 20 lbs or a little more or less?
If you weigh the subject weight beforehand, are your scales accurate?
If the calculation comes out to a decimal point, how will you set that on the analog scale?
You also have to trust your eyes when setting the torque value on the wrench. This can also be variable depending on your eyes.
All that said, below is the testing procedure.
- Exercise the wrench before testing.
- Turn the handle up and down the scale to allow internal lubrication to work on the moving parts before testing.
- This also aids in settling of components into their working position.
- You'll need a weight to hang on the torque wrench and a string / rope to hang it with.
- The more the weight, the higher torque range at which you can test the wrench. A 20 lb. weight seems to be an average (easier to handle).
- Be sure to weigh both the dead weight and the spring / rope together to get total weight hung on the wrench.
The more accurate that weight measurement is, the more accurate your test results.
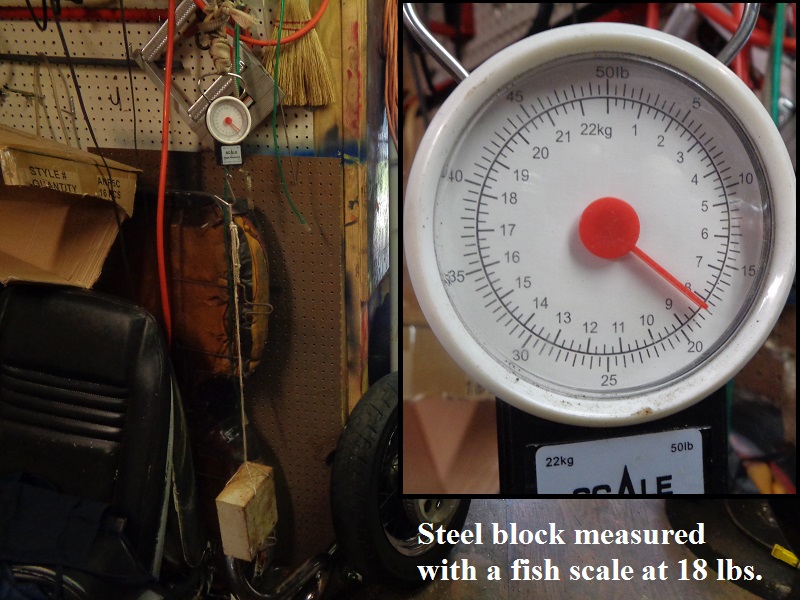
It'd be good to use a couple different weights in the average torque range you'll be using the tool. - An 18 lb. weight was used in the example below.
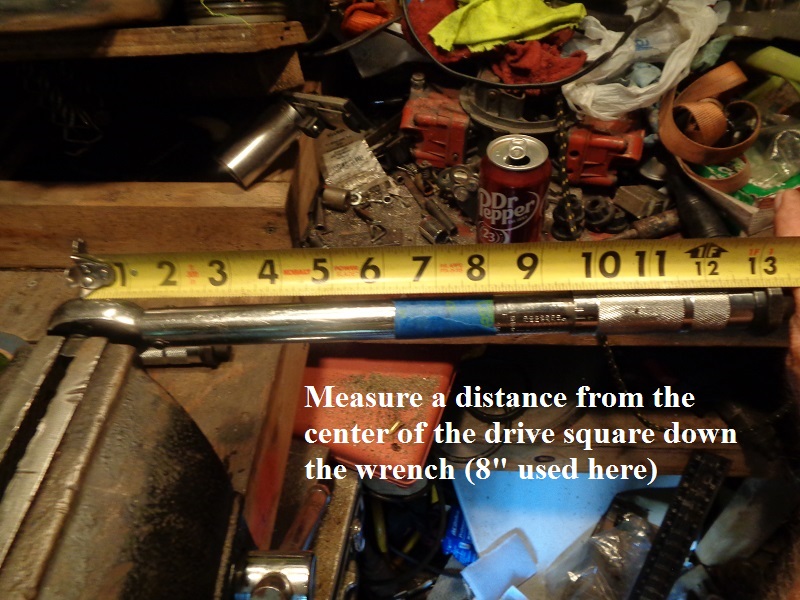
- Measure a length in inches on the wrench handle:
- You can measure the center of the wrench or find a measure farther down the handle.
The exact point of measure is not as important as the measurement number itself. - Measure the distance in inches from the center of the drive square down the handle.
Use a marker or a piece of tape to mark the handle for your test weight point.
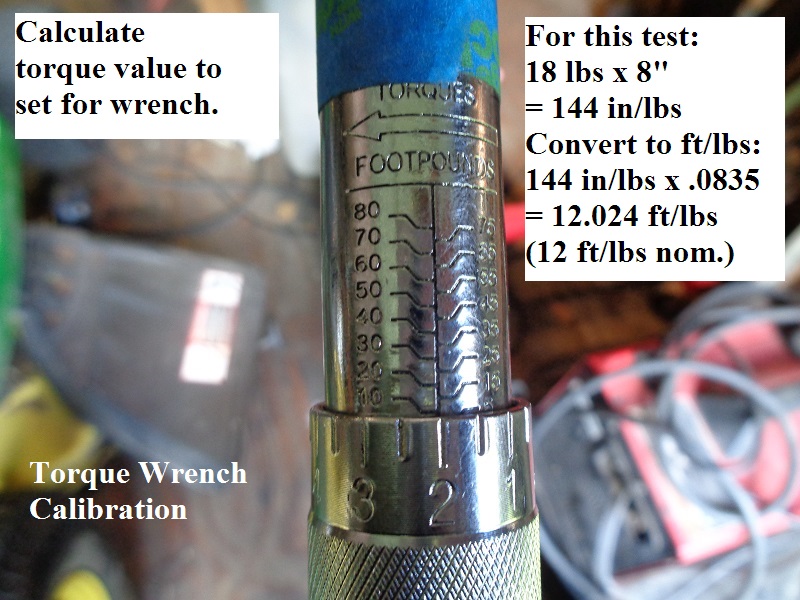
- Calculate the torque value and set the wrench:
- Set the torque wrench to the total weight of the objects you will hang on it multiplied by the number in length.
- In the example below, an 18 lb. weight was hung on a ft/lb torque wrench with a test length of 8 inches.
- Calculate: 18 lbs. of weight x 8“ of length = 144 in/lbs.
- Since this wrench measures ft/lbs, convert 144 in/lbs x .0835 to get 12.024 ft/lbs.
- So for this example, 12 ft/lbs will be used since the extra .024 will be impossible to find on the scale on the wrench.
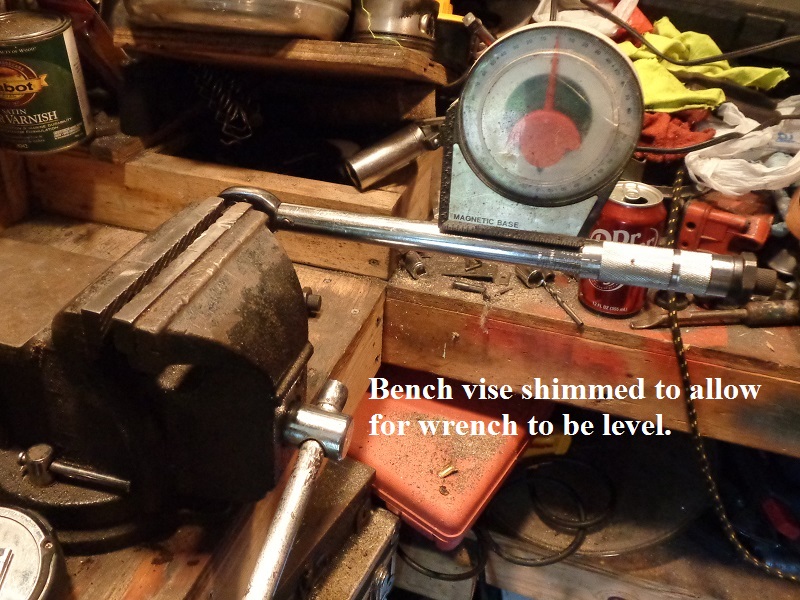
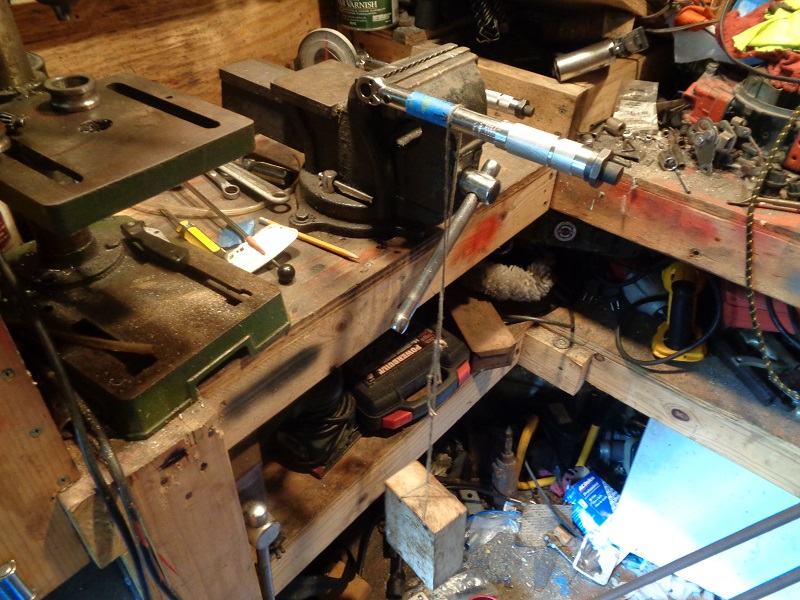
- Chuck the drive square in a vise:
- Let the handle hang (at 0 level position)
You can use a level to make sure the wrench is really parallel. - After clamping the square drive, you need to make sure that no other part of the torque wrench touches the vise.
- Make sure the wrench is straight up and down (leaning sideways will change the test results).
- Hang the weight over the mark you made in step 2.
- Don’t let the weight touch the ground.
- Set the weight slowly and easily on the wrench.
If you set it down hard, the jolt of weight on the handle will make it click in most conditions regardless of where you place it.
- Move the testing points:
- Your torque wrench is accurate if it clicks when you set the middle of the string / rope over the mark you made in step 2.
- Set the weight over the mark.
- If it clicks, ease the weight up and move it closer to the drive square.
It should not click there.
If it does, make a mark on the exact spot where it clicks. - If it doesn't click on the mark, ease the weight farther down the handle toward the end of the wrench until you find the exact point of click.
It should not click there.
If it does, make a mark on the exact spot where it clicks.
- Interpreting the results:
- If the wrench clicks on the mark you made in step 2, your wrench is within calibration.
- If the wrench clicks higher toward the drive end than your mark, your wrench adds more torque than what is on the handle's set value.
(you are putting more torque on a bolt than the value you set on the wrench) - If the wrench clicks farther down the handle than your mark, your wrench adds less torque than what is on the handle's set value.
(you are putting less torque on a bolt than the value you set on the wrench)
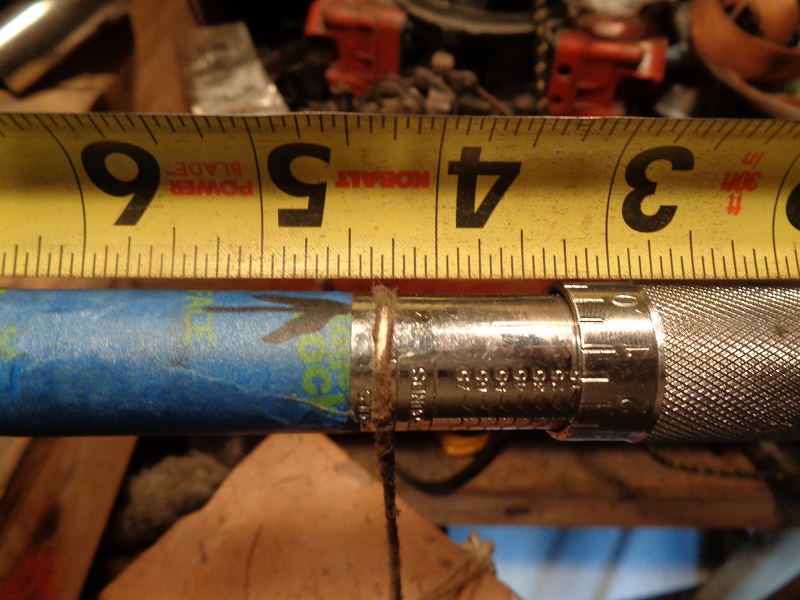
The test wrench below clicked 5/16” down the handle from the set mark.
The scale would have to be set to 12.518 ft/lbs to deliver 12 ft/lbs of torque to a fastener.
18 lbs weight x 8-5/16“ length (8.3125) = 149.625 in/lbs.
149.625 in/lbs x 0.0835 = 12.494 ft/lbs.
(12.494ft/lbs + .024 ft/lbs subtracted for testing = 12.518 needed to deliver 12 ft/lbs)
So in theory, with the test wrench set to deliver 12 ft/lbs of torque, it would have only delivered 11.482 ft/lbs of torque.
… Or, maybe the fish scale is out of calibration and the wrench is right.
| Don't allow wrench travel to touch vise 4) | Make a mark down the handle 5) | Calculate torque value for wrench 6) |
 |  |  |
| Gently place the weight on the wrench (don't let it bounce). Move the weight up and down handle to find point of click 7) | ||
 | 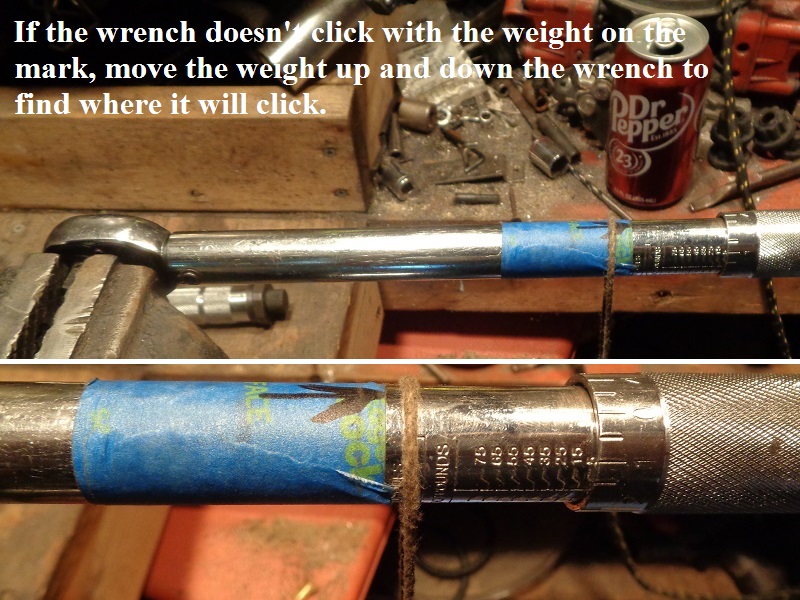 |  |
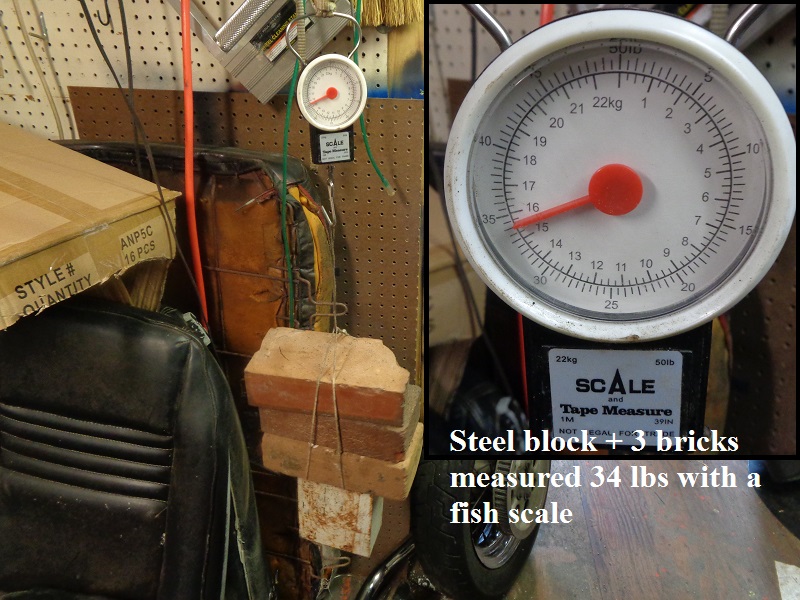
As a double check, more weight was added to test the wrench at a higher torque value of 22 ft/lbs.
The results were about the same. App 3/8” down the wrench is where it clicked using 34 lbs. and the same 8“ length.8)
 |  |  |
In regard to the accuracy of the weight, an in/lb clicker was tested with the 18 lb. steel block.
The wrench was set at 72 in/lbs. with a 4” test length.
The wrench clicked at exactly the end of the mark.
So which wrench is calibrated correctly still remains to be professionally tested but the results are here for your interpretation.
| In/lb clicker wrench testing. | |
 |  |
Field Calibration
Again, there is nothing scientific about this procedure. But it will get you close using the calibration check above.
If the internal spring has been compromised, the procedure below will not fix the problem.
The spring spreads the load over the entire wrench's torque scale.
So adjusting the tension on the low end will still throw off the torque on the mid to higher end if the spring is no longer functioning properly.
The procedure below is a simple adjustment to correct a situation where the end nut has been allowed to turn and change the tension.
This just helps to change the tension back. Some have used this procedure and seem to like it.
Use the information at your own risk.
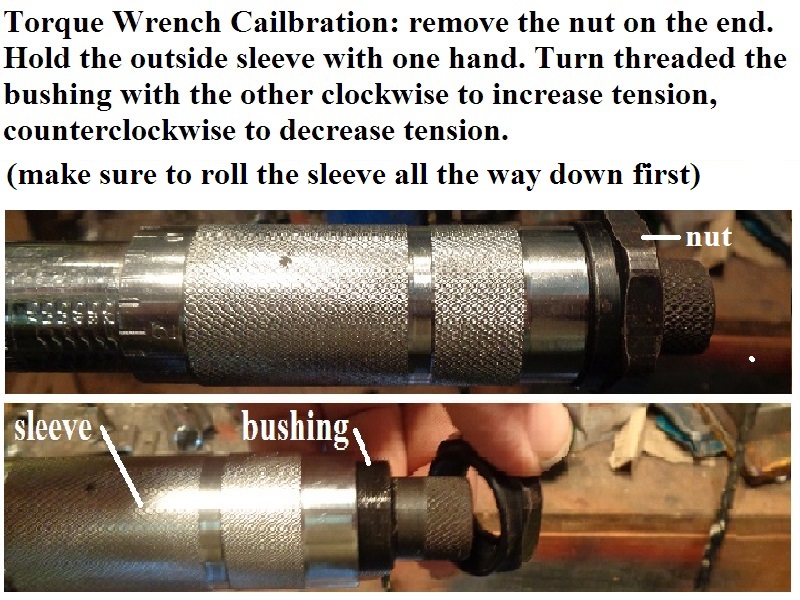
- Turn the adjusting sleeve down to the lowest setting.
- Remove the nut on the end of the handle.
- Adjust the tension on the handle sleeve.
- Basically this sets the point at which tension begins in relation to the handle sleeve.
- Hold the sleeve with one hand and turn the threaded bushing on the end clockwise or counterclockwise to adjust the the click point.
(you may have to turn the lock screw on the end periodically to keep it loose)
- After you've turned the bushing in/out a little, turn the sleeve to the test setting.
- The bushing should turn with the sleeve with the threads not moving in the sleeve.
- Perform the calibration check above to see where the wrench clicks now.
- Repeat this calibration procedure until you get the wrench to click on the length mark as in the test check above.
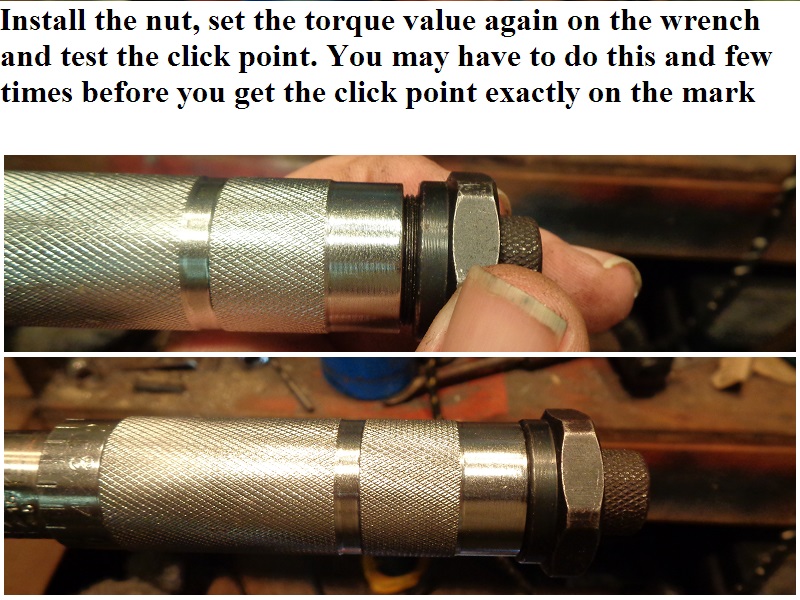
- Once done, install the nut on the end.
- Be careful not to allow the end nut to turn the bushing in the sleeve while tightening.
That would change wrench calibration.
- Once the wrench is back together, bushing tight, do a final calibration check.
- Tightening the nut on the end can throw calibration off. It just needs to be tight enough stay put.
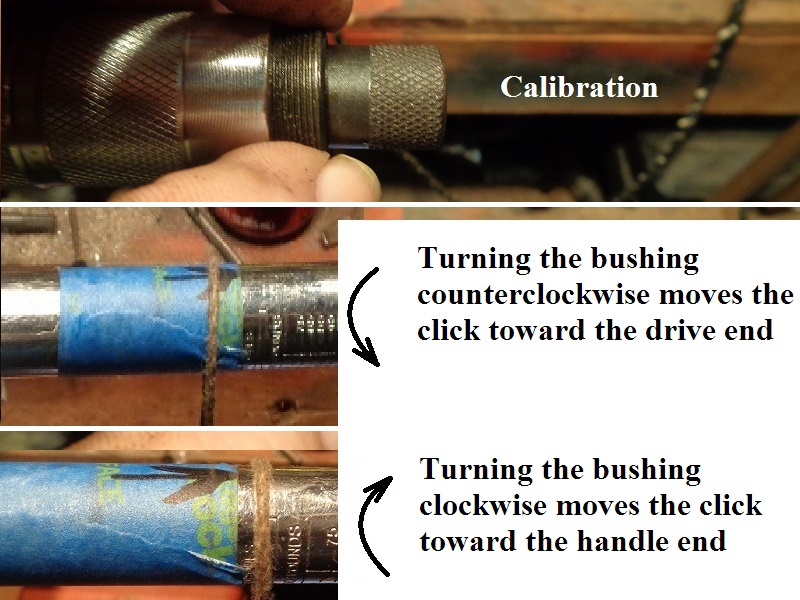
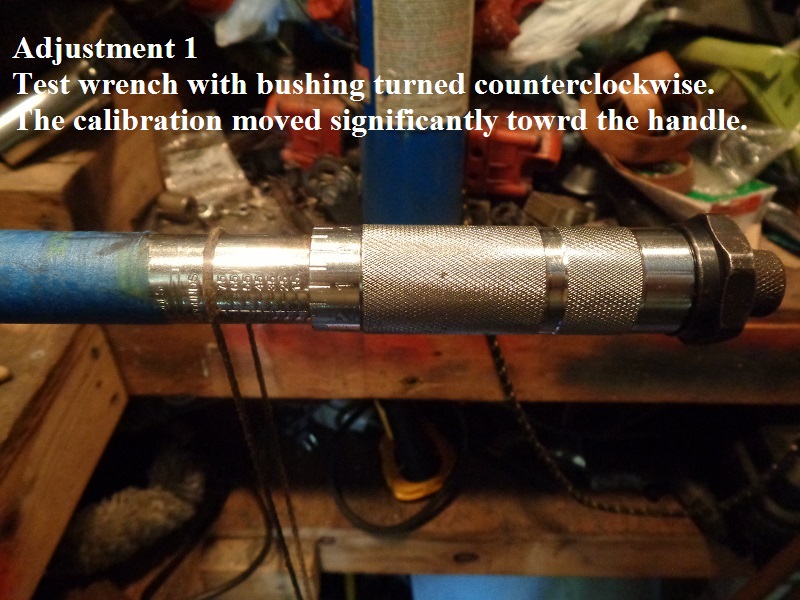
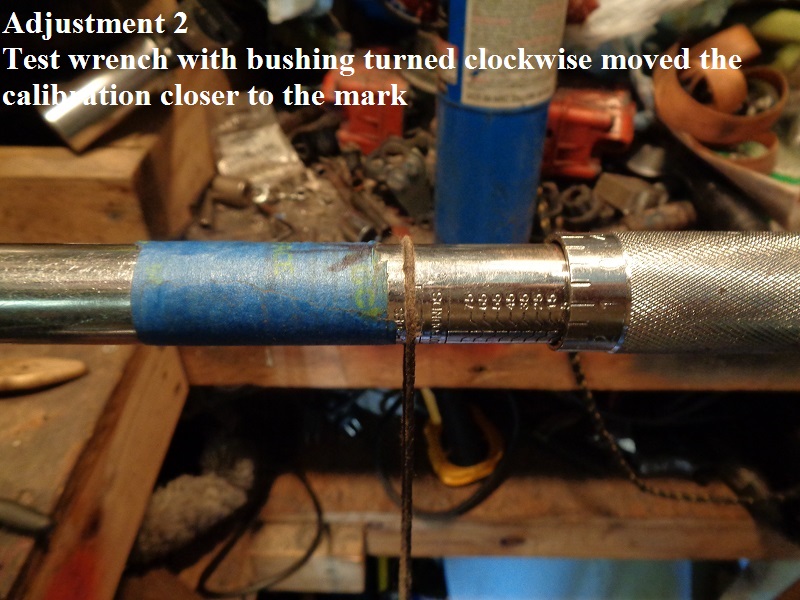
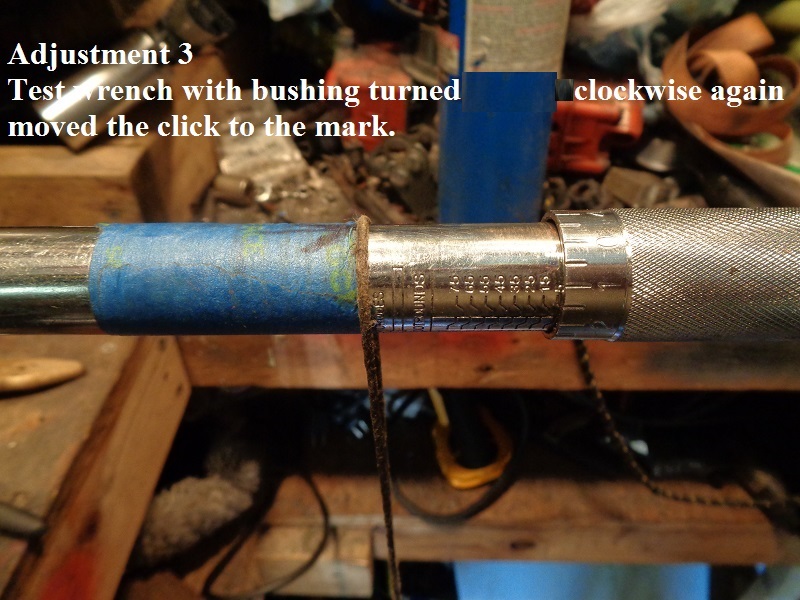
On the test wrench, the bushing was turned clockwise originally and the wrench clicked even farther toward the handle end once tested.
Subsequent adjustments and tests with the bushing turned counterclockwise put the test wrench back into calibration (as well as this test will do anyway).
Related videos: