Table of Contents
This is an old revision of the document!

EVO: Oiling & Lubrication - Sub-03C
5 Speed Oil Pump on 4 Speed Models (Conversion for 86-90 Evo engines)
Any 91 and up oil pump will bolt to a 77-90 case and is considered an upgrade.
However, the 07 and up pump has the largest scavenger gerotors to move the most oil back into the oil tank.
The stock 86-90 XL oil pump can flood the sump with oil and kill the power at high rpms.
5)
The oil pump acts as a pass through for the filter return line. 6)
Since XL motors just flood the motor with oil, the issue is on the scavenging side (trying to get the oil back out of the motor).
Hence the trend toward bigger scavenging sections and smaller pressure sections.
Many racers actually reduce their oil pressure trying to solve scavenge issues.
The last thing in the world you want to do is pump more oil into an XL engine. 7)
The line returning from the oil filter pad feeds oil into the bottom of the cam box. 8)
From there oil goes up through the cover, oiling the pinion, lower end, as well as going up to the lifters and valvetrain.
The oiling system changes that came with the introduction of rubber mounts were a huge step backwards.
There are a lot fewer problems with the 2008 and later bikes judging from previous years as they have they updated rocker boxes and breathers.
The oil pump is not the end all fix though.
On the 06 and Earlier bikes, just changing the oil pump was not the step that suddenly made the blow-by disappear.
Neither was correcting the ring end gap. 9)
You know what's ironic? The better the ring seal, the worse the problems with XL oiling are.
A little crankcase pressure actually helps the scavenging.
We saw it a LOT when using gapless rings. It just plays hell with the oiling. 10)
The 07 and up style pumps are a great upgrade to an 86-90 engine.
They made the scavenge section bigger and the pressure section smaller. 11)
Considerations
The 5-speed to 4-speed conversion is not a hard mod to accomplish. 12)
However, I would not put it on hoping it'll solve a wet sumping issue.
Wet sumping is more of a crankcase pressure issue in my experience.
I've never had any luck curing a wet sumping issue by changing the pump.
Specifically, the 2007 Buell and XL style oil pumps have the bigger and better scavenge gerotors.
It gets a little tight right there where the line from the oil filter pad feeds into the bottom of the cases.
Between the return line fitting on the pump and the feed line into the motor, the pump tries to hit the return line fitting on the pump.
(the feed line into the motor will normally be coming from the oil filter pad).
That's the only tight spot, the newer oil pump bolts right up otherwise. But, with a little grinding, it can be done. 13)
Internal vs external oiling features
86-90 model engines are fed oil internally; oil pump → filter → oil pump → gearcase inlet hole.
91 and up engines are fed oil externally straight from the filter pad so you'll have to adapt them for earlier 4 speeds.
When you take off the stock pump, it will expose a 1/8“ hole in the bottom of the gear case. 14) 15)
This is the oil's internal point of entry from the pump and where the 90° fitting goes.
91 and up engine cases do not have this hole.
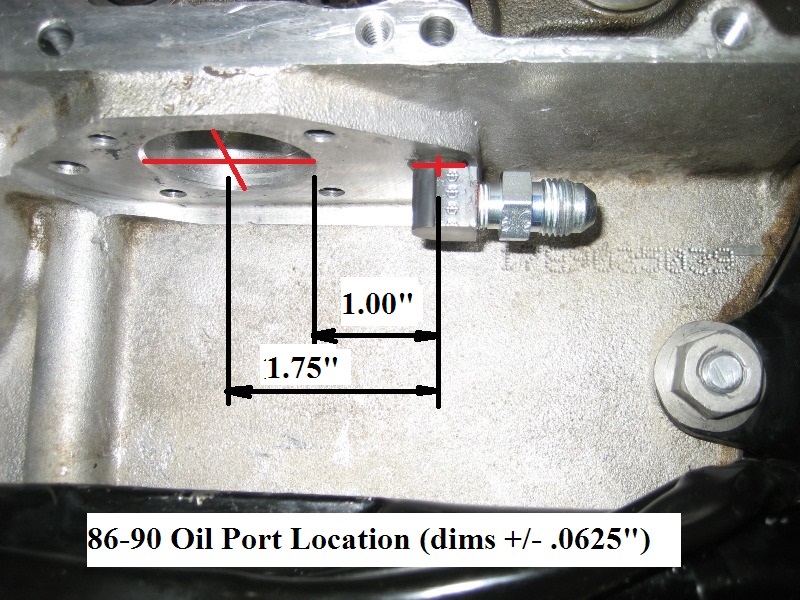 |
| 86-90 oil port location (app. dims) 16) |
Tapping a hole in the engine required
- You'll need to drill and tap the hole for a (1/8-27) 90° fitting before you put the newer pump on.
This will allow you to hook up the filter return line to the fitting and give you oil pressure.
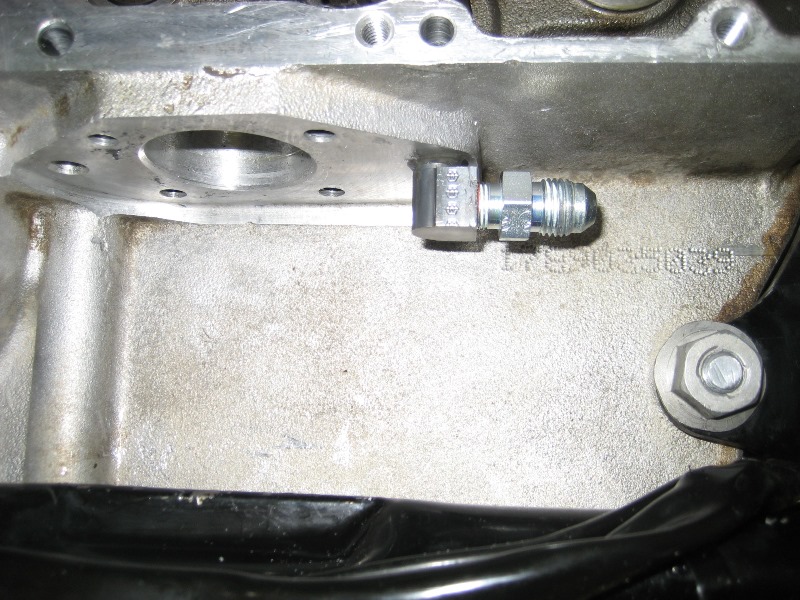 |
| Oil entrance hole tapped with a 90° fitting installed 17) |
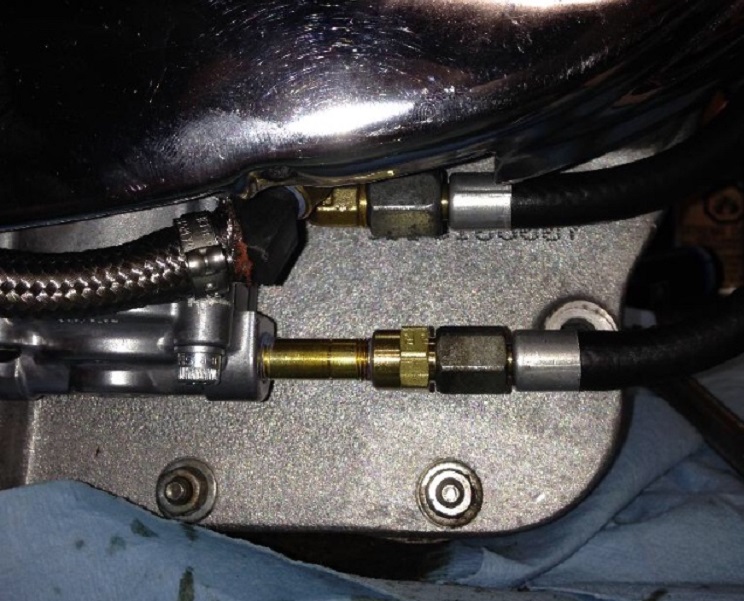
Fittings and routing
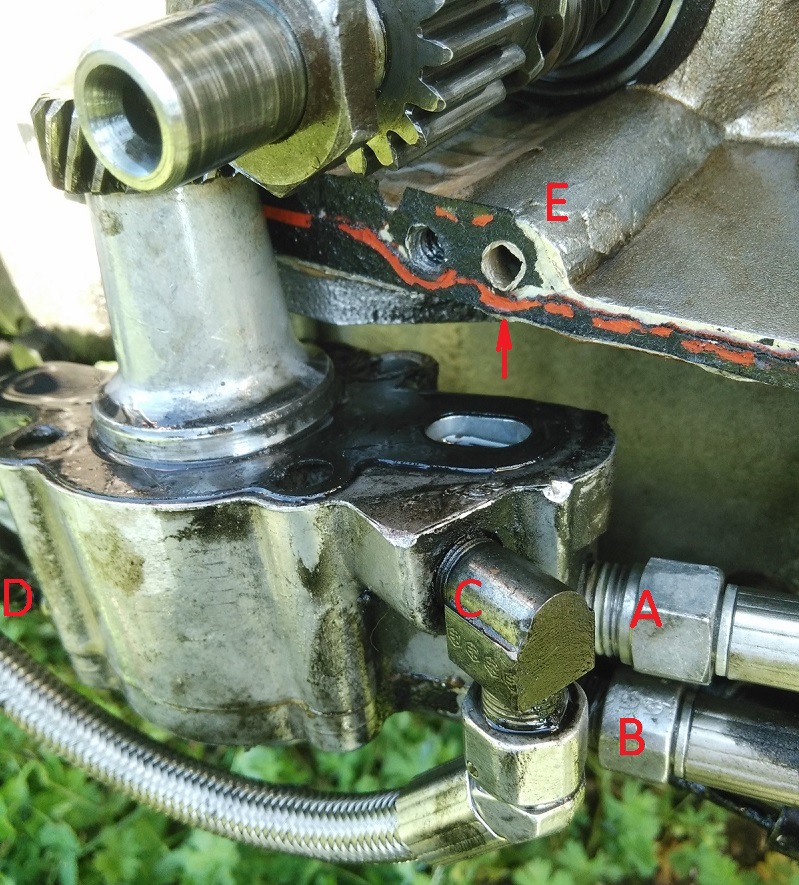
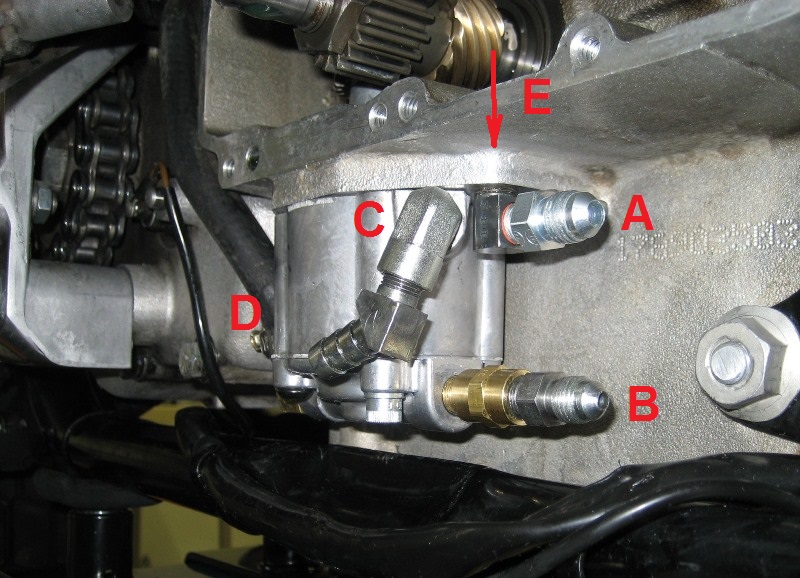
- In the pics below; 18)
- (B) is the same (to oil filter pad)
- (C) is the same (to oil tank)
- (D) is the same (to oil tank)
- (A) is the different one. It comes from oil filter pad.
It needs to be connected to the oil galley (E) with the 90° fitting.
- After tapping the existing oil port in the bottom of the case, you'll need to install a 90° 1/8” pipe fitting.
(the OEM 90° fitting on the original oil pump return side may be shorter aftermarkets but they're also available at auto parts or hardware stores)
The OEM hose fitting also has a rounded side to clear the installed new style oil pump.
A new straight oil hose fitting (with the rounded end) usually comes with the new style oil pump that will attach to the 90° fitting.
If upgrading to an 07 Buell oil pump, the straight fitting has different threads so you'll need to use your original fitting for that.
(conversion kits should come with the correct fitting, check with your supplier)
- If using the OEM feed hose to the filter pad, you'll need to install an extension on the outlet side of the pump.
The new style oil pump is not as wide so the (lower right or forward) fitting on the pump has to be extended to reach the original oil line to the oil filter mount. 23)
(else you can have another hose made to length)
- The barb fitting for the inlet hose from the tank can be re-used from the old pump or you can buy a new one.
- There are two common types of “barb” fittings;
- One is smooth along the shank with a single raised barb ring near the spigot end.
(these are easily removable/replaceable but placement of the hose clamp is fairly critical) - The other has multiple cone-shaped barb rings along the shank.
(more secure & clamp placement is not critical).
But you almost always have to cut the hose off to remove it. - Either type should work fine– it's much more critical to be sure the fitting and the hose size match exactly. 24)

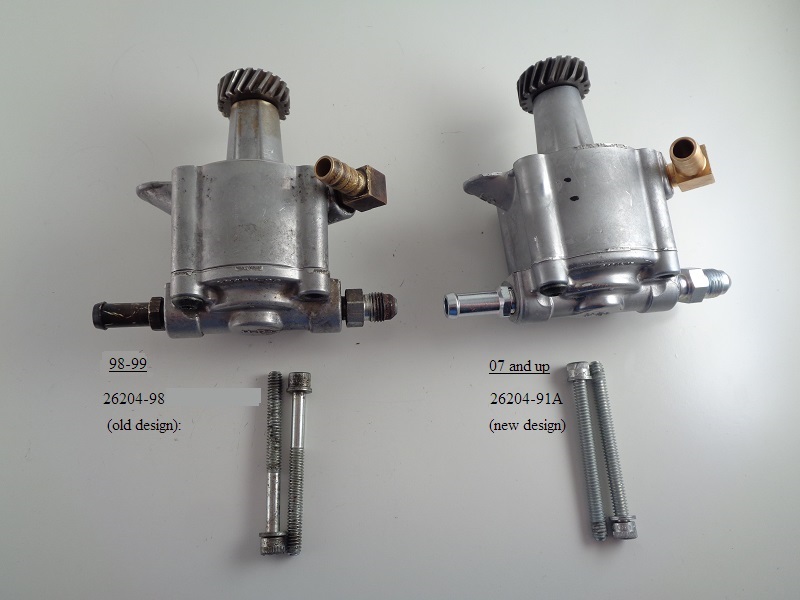
Oil pump mounting bolts and gaskets
- Along with the oiling system change in 1998, the oil pump and mounting screws were made longer.
The gearcase drain was then isolated from the crankcase a scavenge inlet was added in the gear case.
This change applied to both Sportster and Buell models, though there's no difference between the two.
The part number for the screws on a 2007 Buell and 2003 Sportster are (4765). 28) 29)
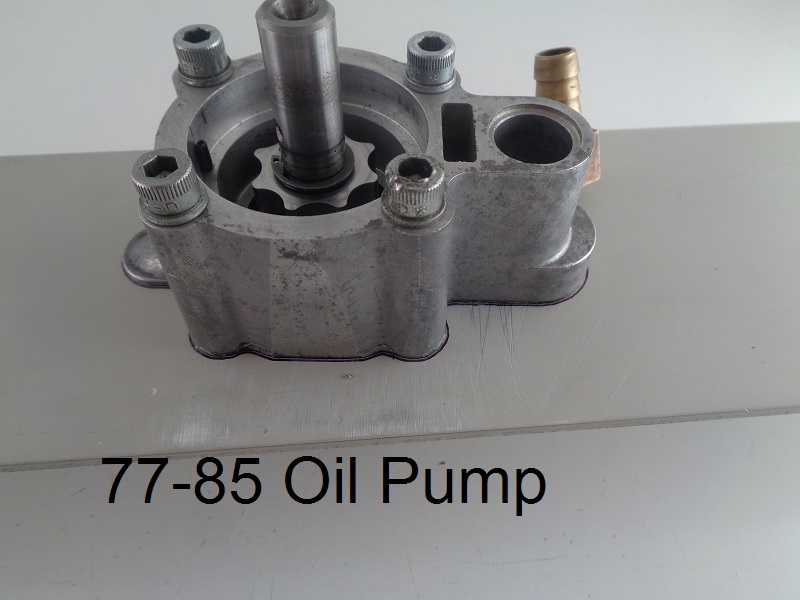
- The 86-90 style pumps use (4) - 1/4“ x 20 x 2-1/2” Allen head mounting bolts. 30)
- The 91-97 style pump body and it's mounting bolts are slightly shorter than the 98 version ( length? ).
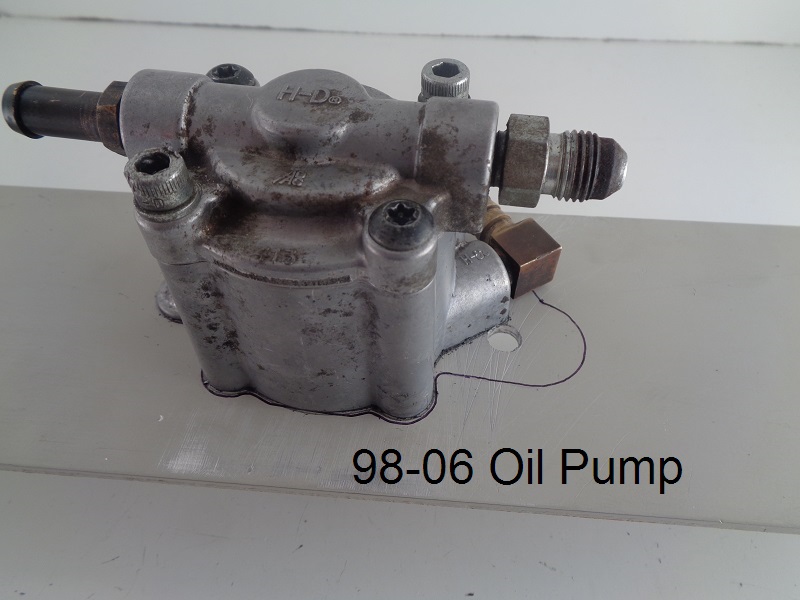
- The 98 and later pumps use (2) - 1/4“ x 20 x 2-5/8” Allen head mounting bolts (2.625“).
- The 07 style pump body was made app. (.018“) taller than the 98.
- Worse case, you can buy a couple 2-3/4” Allen head bolts from your local hardware store and cut them to length.
- The 77-90 oil pump to case mounting surface uses the same gasket.
In kind, the 90 and up oil pumps all use the same gasket. - The 86-90 pump mounting gasket is longer than the 91 up version due to the longer pump design.
However, the mounting bolt pattern and center bore in each of these different syle gaskets are the same.
So the 91 and up style gasket will fit to earlier engines and it will not interfere with the inlet hole in the case.
 |
| 26204-91A oil pump hardware kit. Fits 98 and up oil pumps & 77 and up engines (w / 98 up pumps). 31) |
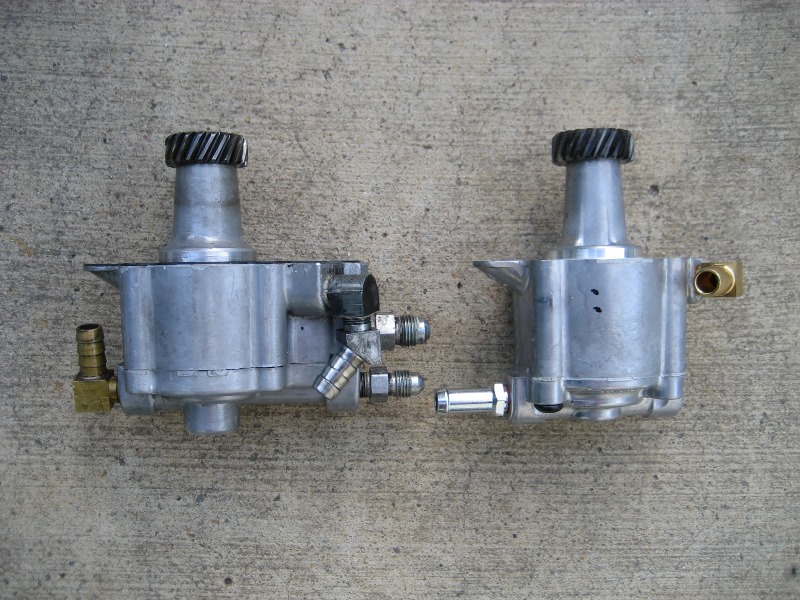
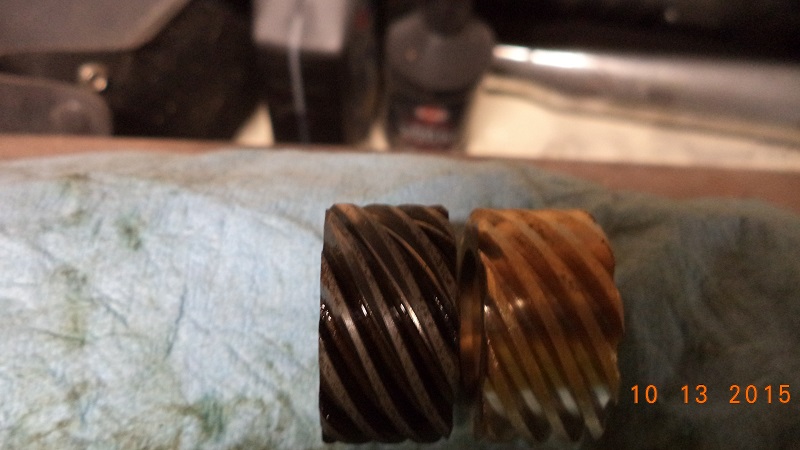
- Below is a comparison of the 2 different style gasket surfaces on pre and post 91 engines.
- A 1-1/2“ hole was cut into an aluminum plate and 4 holes were tapped to mount each pump.
- The hole to the right in the 3rd picture is where the oil exits the pump.
(not the hole in the engine case, which is further out)

Engine Prep
The pump to engine mounting holes will match up, you just have to tap the case for a 90° fitting.
The conversion mod can be done with the engine in or out the frame.
You'll need to drill the existing 1/4” oil port in the bottom of the case to 11/32“ and tap it for 1/8” NPT pipe threads.
(Pre-drill size letter “R” or 11/32“)
Drilling and Tapping the Engine Oil Feed Hole
Engine Removed
Obviously, this would be the easiest way to drill and tap the hole,
It'll keep the process from being awkward and allow you more control of the process.
The hole can then be drilled / tapped by hand or in a drill press.
With the rocker boxes off, you may be able to reposition, without removing, the engine to get the pump area away from the frame.
You can pull the mounting bolts, block up the right side of the engine with 2x4s to drill / tap the hole and bolt it back in when done.
Engine Installed
The maximum area available between the engine case and the frame is app. 2.75”. 35)
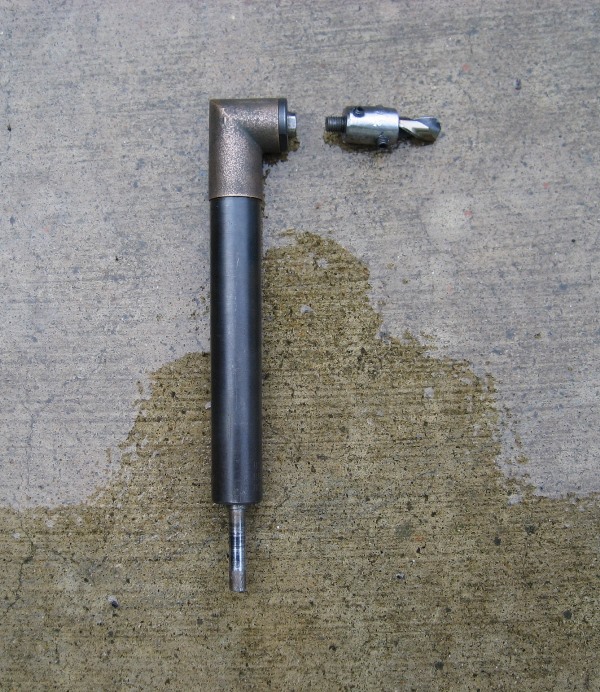
Drilling:
- You can buy a right angle drill attachment that is slim enough to get in between them to drill the hole.
- The drill attachment below has a 1/4“x28 thread chuck.
A 3/4” length collar can be fabricated and threaded with a 1/4“x28 stud threaded into the collar and locked in with 8/32” set screws.
It is inset 1/4“ into the collar.
The remaining 1/2” of the collar is drilled for the 11/32“ drill bit with the drill bit locked in place with 10/32” set screws.
A 'stubby' 11/32“ drill bit was shortened to 1.25” with a cutoff disc.
The #10×32 set screws lock into the twist recesses of the shortened drill bit to lock it in the collar.
The overall length of this setup (angle drill, collar, and drill bit) is app. 2.75“ (tight fit but works).
Tapping:
- An 1/8” NPT pipe tap (they are usually short in length) can be used along with a wrench to thread the 11/32“ hole for the installation of the oil hose fitting.
Tapping the Engine Case
Tap the oil galley for the 1/8”-27 fitting for the 07 pump.
- While tapping go slow.
- Every three to four turns of the tap, back it out and clean the chips off.
(1/2 to 1 turn may work out better. When it gets tight, back the tap out and then go back in with it) - Run the tap in about 3/4“, then check the new fitting for threading and fitment.
Figure about threading the new fitting in about 1/2-3/4 of useable thread in then your good.
- Compressed air will blow the chips out. 36)
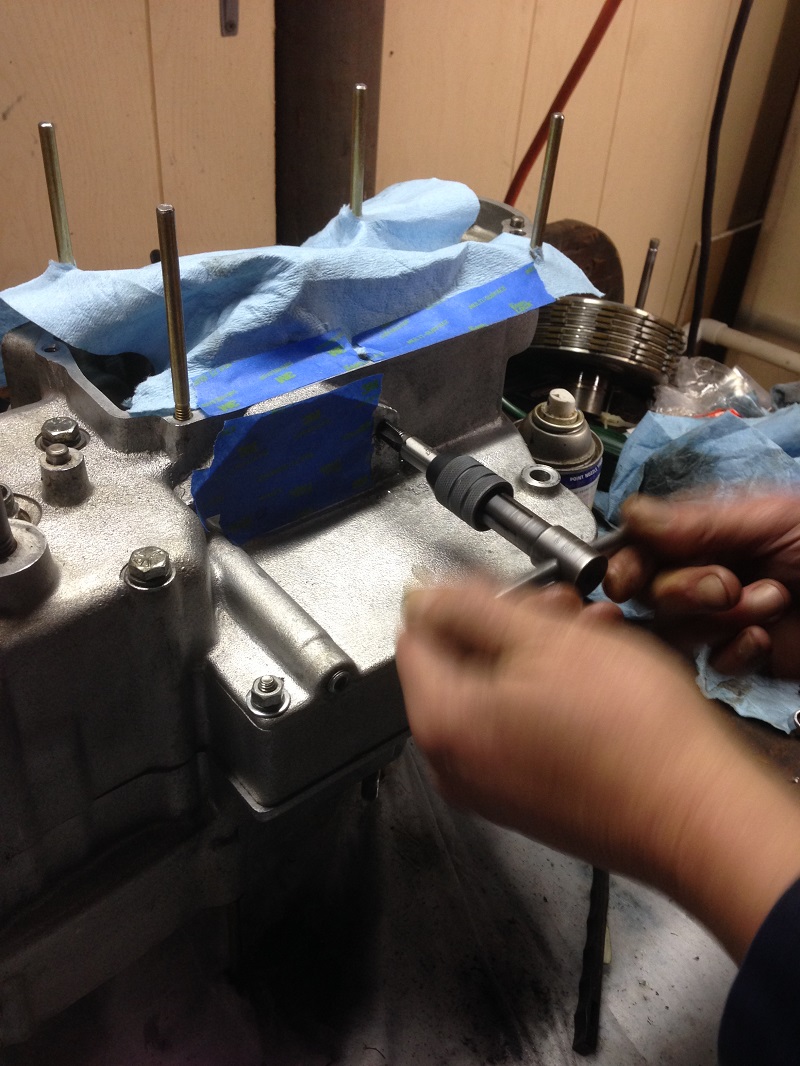
Installing the New Oil Pump
Before installing the oil pump,
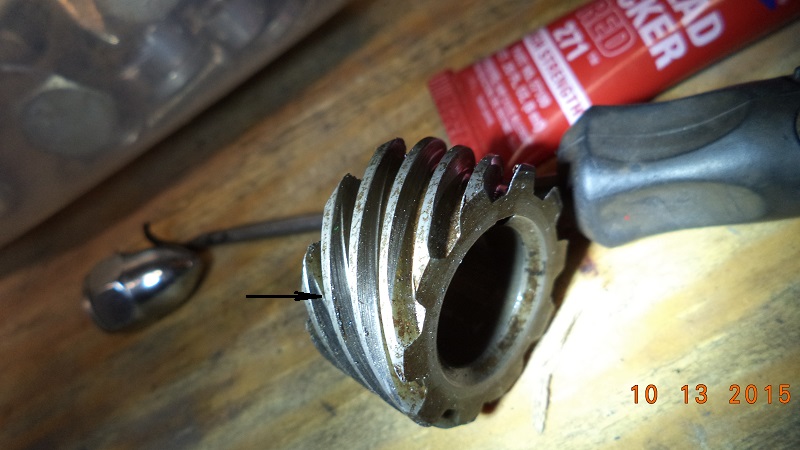
It'd be a good idea to check the condition of the oil pump drive gear on the pinion shaft for wear.
See also Known Drive Gear Failure in the Evo oiling section of the Sportsterpedia.
And the 1988 to present Bronze Oil Pump Drive Gear Upgrade (26391-06)
Check the mounting bolt lengths. The OEM bolts only have to extend into the engine flush with the inside hole.
You can also buy grade 8's or stainless from most hardware stores and cut them to length if needed.
With the newer pump being more slim in design and the mounting holes through the pump being a slightly smaller I.D.;
You have a slight fudge factor in positioning the pump before tightening if needed.
Install the hoses in their original locations and you're done.
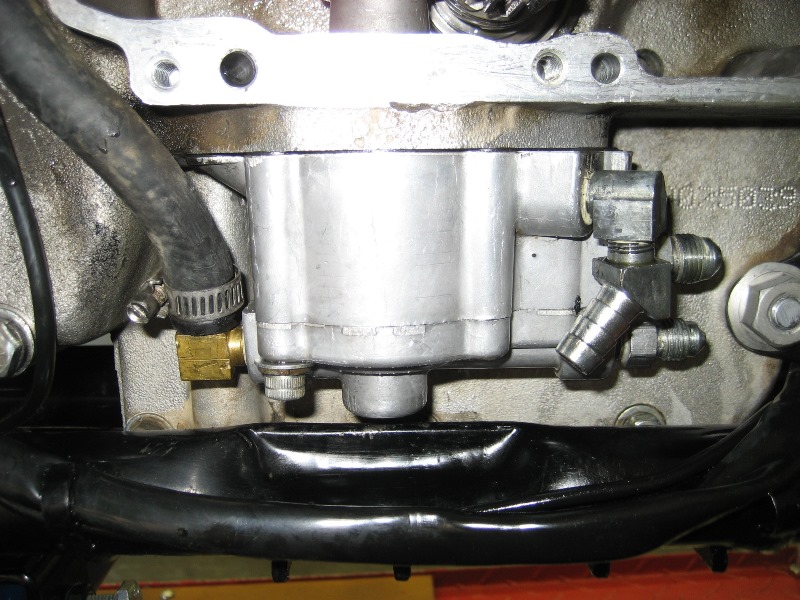
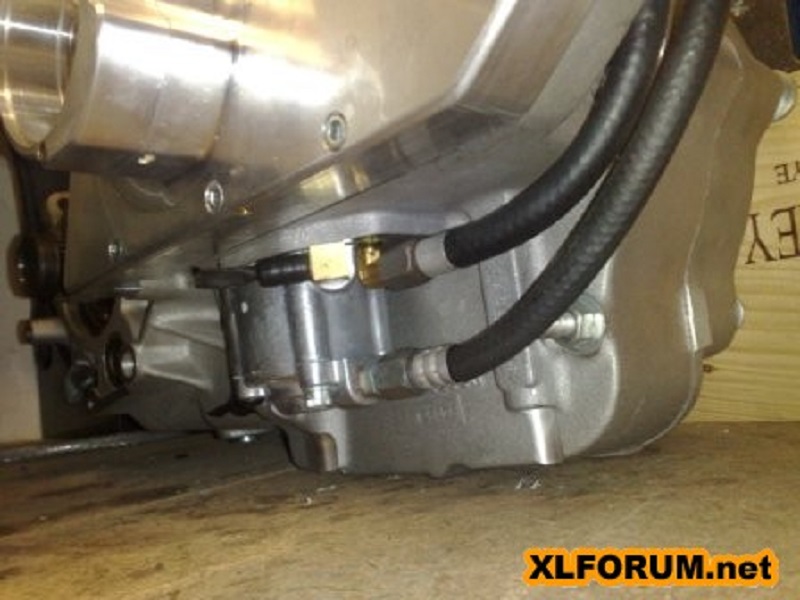
| 07 oil pump installed on 89 model engine. Fittings installed. 41) | This is an S&S motor which features 4-speed oiling. Now with a later oil pump and a 90° fitting added. 42) 43) |
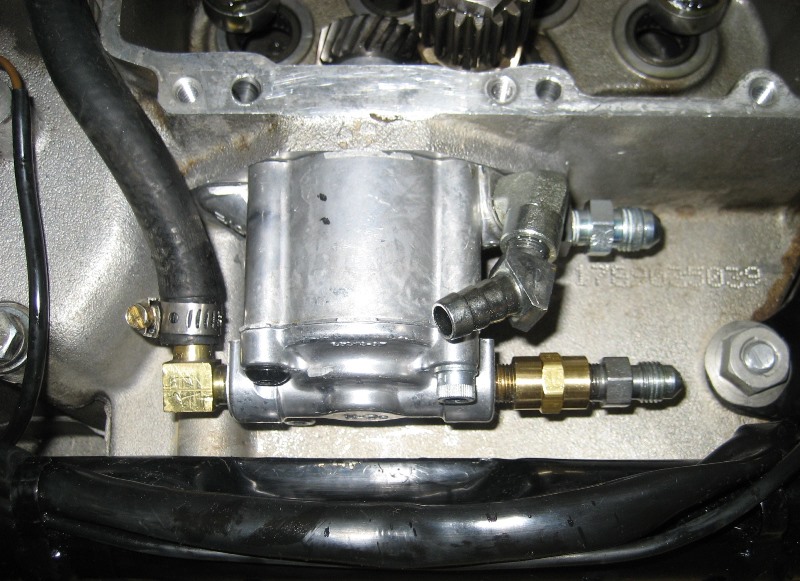
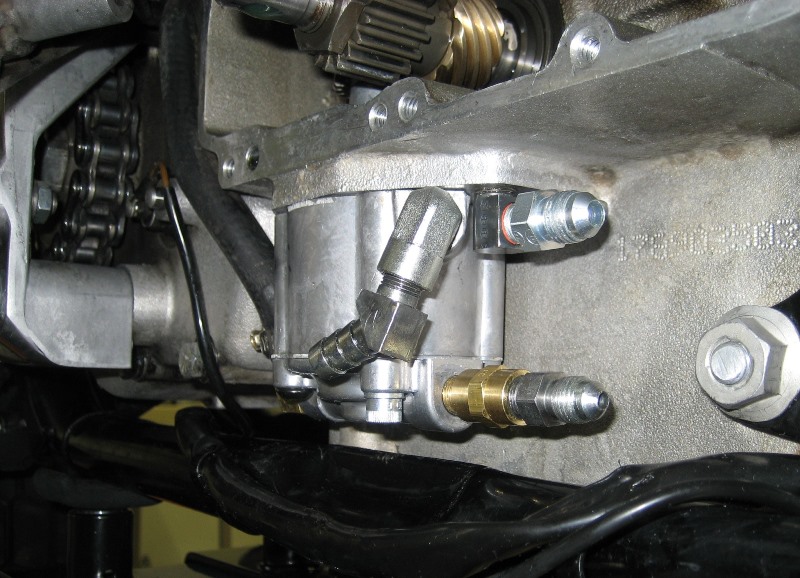 |  |
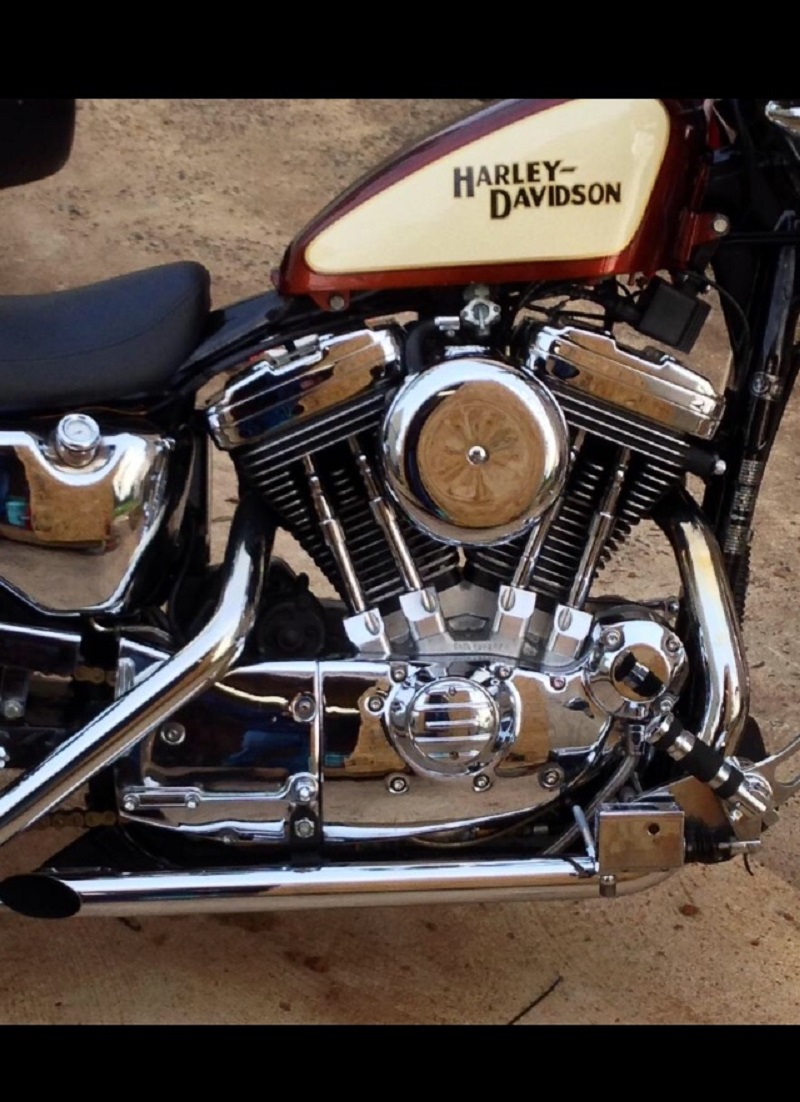
| Looks nice and tidy. 44) |
 |