Table of Contents
This is an old revision of the document!

IH: Engine Control
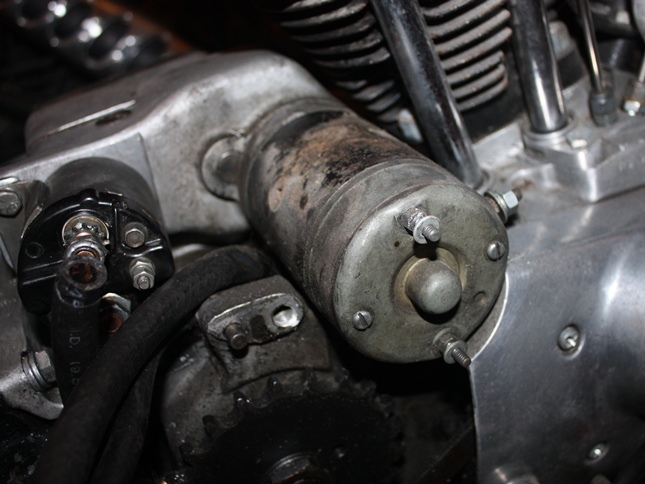
Starter/Solenoid
Starters
Sub-Documents
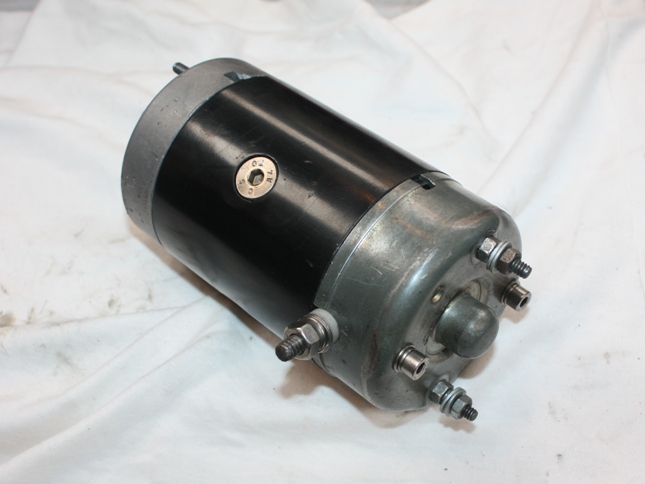
Starter Motor Variations
Prestolite starters have raised ridges running the circumference of the end cap (OEM).
Hitachi starters have a smooth surface on the end cap.
Nippon Denso starters have the solenoid attached.
| 67-73 | Prestolite only. | Separate Solenoid |
| 74-E76 | EITHER Prestolite or Hitachi. | Separate Solenoid |
| L76-80 | Prestolite only. | Separate Solenoid |
| 81-later | Nippon Denso | Solenoid Attached |
This means all 67-73 & L76-80 came with the Prestolite Housing and Starter Motor.
Its on the 74-E76 that things are muddied.
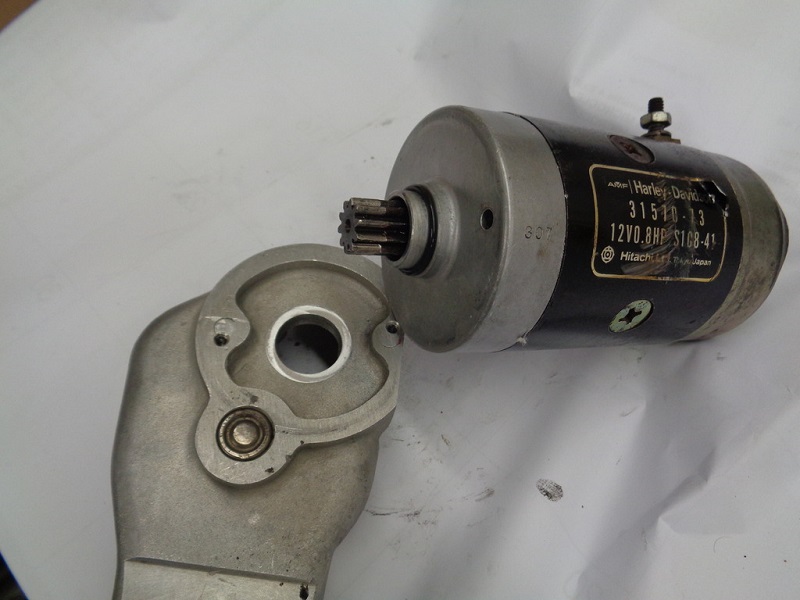
On 74-E76, there were 3 housings that may have been fitted.
Which one any bike got was a toss-up.
If you had a Prestolite motor you had a Prestolite matching housing.
If you had a Hitachi motor you had a Hitachi matching housing.
– On these, the motor, thru bolts, and housing were matched.
However, the 3rd possibility was a combination housing:
It had a Prestolite housing but with a set of Hitachi mounting holes added.
- It had both bolt patterns.
The Pretolite holes were at the 12:00 & 6:00 position (1/4-20 bolts).
The smaller Hitachi holes were skewed clockwise from those (6mm bolts).
This skew moved the Hitachi motor cable stud slightly below the 3:00 position.
For those who own a 74-e76 this means if you remove your starter motor and see only 2 holes in the housing - you need to use the same brand motor as removed, or you need to change the housing to match the replacement motor brand. If your housing has 4 holes, you can replace the old starter with either a Prestolite or Hitachi brand motor.
There is no mention of the 4-hole housing in the parts books. They came on some bikes, but with no known part number to order them.
Reference these threads:
http://xlforum.net/forums/showthread.php?t=1521782 - Dr. Dick Post#4 quoted above
http://xlforum.net/forums/showthread.php?t=1715008
http://xlforum.net/forums/showthread.php?t=1752598
The 1981-later starters are the same Nippon Denso version as used on the Evolution model engines.
For additonal information, see the Evo Section - Starter/Solenoid
| Prestolite Starter. 1) | |
 |  |
| 74-E76 Hitachi starter. 2) |
 |
Solenoid
A typical well-made solenoid as two windings connected to the small terminal. 3)
One coil (HOLD-IN) goes to solenoid case ground and the other (PULL-IN) goes to the big terminal for the starter lead.
When you hit the starter button, battery voltage goes thru the starter relay into the solenoid small terminal, then goes
·· thru the 'PULL-IN' windings (which are grounded thru the starter motor) and thru the 'HOLD-IN' windings (to case ground).
 When these coils are activated together, they pull the plunger in.
When the plunger pulls in, it brings the large contact disc in contact with the big battery and starter terminals.
When that disc connects with the starter terminal, it bypasses the PULL IN windings, while the small terminal
·· continues supplying power to the HOLD IN windings.
Make sure that your connections are to the proper large terminals!
IT IS IMPORTANT that you use the Large Long Terminal to connect to the Battery and the Large Short Terminal to connect to the Starter Motor. If the Large Terminals of your solenoid are not one Long & one Short, use a multimeter or test light to bench test which Large Terminal has some continuity to the Small Terminal. Whichever Large Terminal has some continuity to the Small Terminal is the one that is connected to the Internal PULL-IN Coil and is the one to be connected to the Starter Motor.
If the large terminal connections are swapped, with the battery cable connected to the output starter terminal of the solenoid, then the internal windings will be constantly conducting current.
That current isn't strong enough to actually pull in the plunger but the current flow is enough to make the solenoid get really hot.
If left this way, and not disconnected, it will eventually burn out either/both the PULL-IN windings and the HOLD-IN windings because they are wound together inside the solenoid.
So you don't want to hook up the battery to the terminal used for the starter.
The solenoid will still work at first, but left connected it will burn out either or both of the windings because the windings are constantly conducting.
Using an ohm meter would give really confusing readings because you'd see continuity to both case ground and the starter terminal from the solenoid windings connection.
67 and Up XLH Starter solenoid (71469-65)
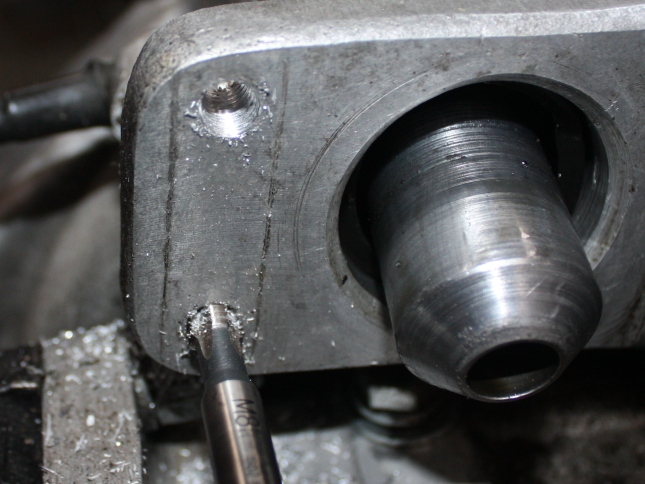
Below, the 1/4“ solenoid mounting threads were stripped (nut on the top bolt) so they were tapped out for 8mm cap screws. 4)
8mm x 1.25 threads have almost exactly the same thread pitch as the original 1/4” thread.
Then the mounting bracket and and spacer were drilled 8mm and the solenoid was installed using allen head cap screws and spring washers.
| Starter solenoid (71469-65) 5) | ||
 |  | 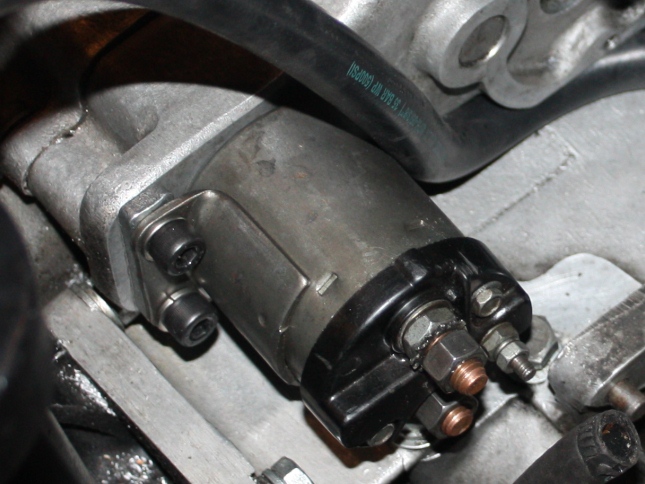 |
Check Solenoid Cover for Conductivity
- Some solenoid covers used from 1977 had the ability to conduct electricity. The pigment in the black paint contained excessive amounts of 'carbon black' mixed in the rubber compound which was the medium. The high concentration of carbon could cause a slow battery drain condition when left for extended periods. 6)
- This would be difficult to detect as the electrical charging system would test out OK.
- FL/FX models had an aluminum oxide paint color which could also create this problem.
- Inspection:
- Set a voltmeter to 10 scale.
- Connect a jumper wire to the outside solenoid cover and the battery positive (+) post.
- Then, connect the volt meter to the inside solenoid boot and battery negative (-) post.
- If the needle reads anything or even flickers while keeping solid contact, the cover is conductive.
- If the cover is found to be conductive, replace the cover (31457-77). Test the new cover as above before installing it.