
IH: Engine Mechanicals - Sub-01A
Sprocket Cover Dowel Hole (Case) Repair
Article by Hopper of the XLFORUM 1)
- This is a bit of an obscure one but a real pain to fix, requiring several special tools. This was also done with the cases assembled. If had split the cases I could have put them on my mate's milling machine and precision machined them. But because I was too lazy to split the cases and disturb that nice tight, factory original bottom end, I did it the hard way. 2)
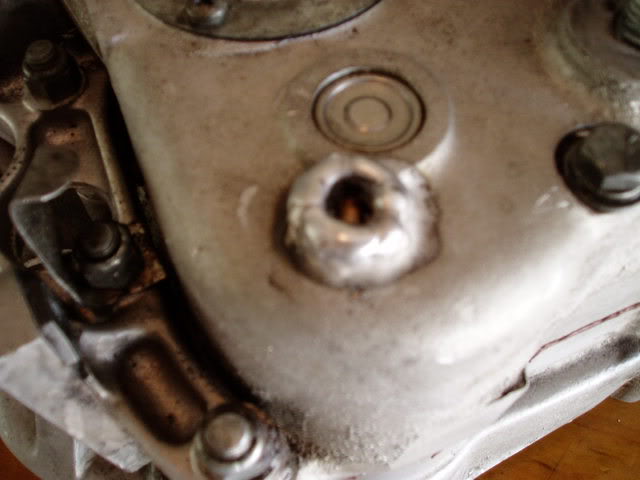
- When it came back from the aircraft welder it looked like the pics below.
- Amazingly, there was no big blob of weld but two tiny little rings, still with the (rough) hole in the middle. His TIG welder can weld aluminum .010“ thick.
- The gearbox shafts and bearings were left in place during welding to help stop distortion of the cases.
- He pre-heated the cases gently with a torch and then he would put a ring of weld on, let it cool off, repeat, repeat repeat etc.
- Notice how he welded around the screw next to the top hole but did not go over it. And the 1/4” threaded hole in the middle was still useable. 3)
 |  |
- Now all I had to do was re-machine those two 7/16“ dowel holes back where they should be within app. .001”.
- First thing was to file the flat surfaces back on again, using the sprocket cover with bearing blue on it as a guide. A couple of hours with a pair of 10“ bastard file and millsaw file did that.
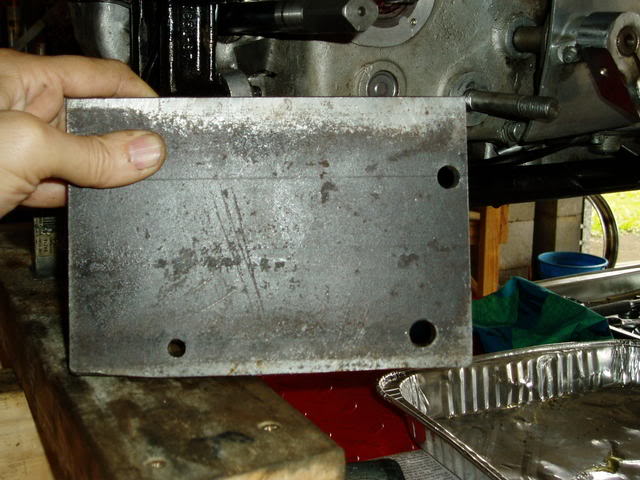
- This is to guide the drill bits while drilling thru the welded up areas, and to make sure the holes come out in the right place.
- I made the jig by first drilling the hole to match the blind lower dowel hole in the sprocket cover, put the dowel in place and then drilled the footpeg stud hole by putting the sprocket cover over the plate and drilling down through it. Then the same for the top hole.
- I also sleeved the sprocket cover down with a steel sleeve so the hole for the footpeg stud was a tight fit and would take most of the weight in future.
| Drill jig made from a half-inch steel plate to guide the drill 4) | |
 |  |
- Because the top hole has a 1/4 bolt running through it, and the weld was off centre, I made a special drill/cutter out of 7/16” silver steel. It had a 1/4 inch hole up the centre so it could fit over a threaded stud screwed in the hole. I cut two flutes on the end of it with an angle grinder so it is like a milling cutter, or flat-nosed drill. Finished it off on the pedestal grinder. I then flame hardened it with the oxy torch. Heated it cherry red then quenched in oil. Then tempered it to a light straw color and quenched again.
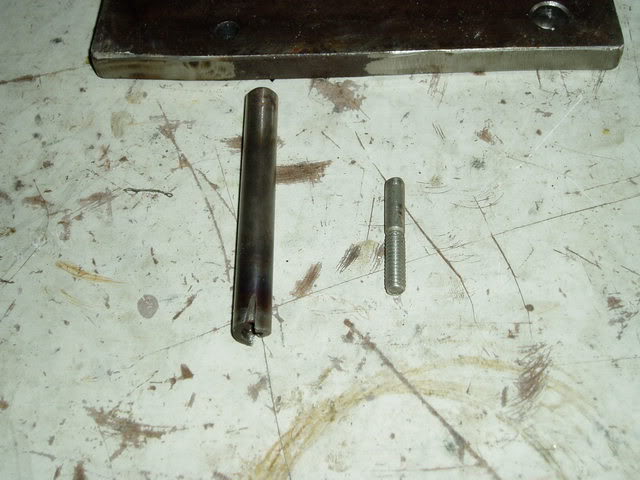
- In the final fit up, I made custom dowel pins and fitted them with a small file and some bearing blue so they are tight as tight and wont work loose again.
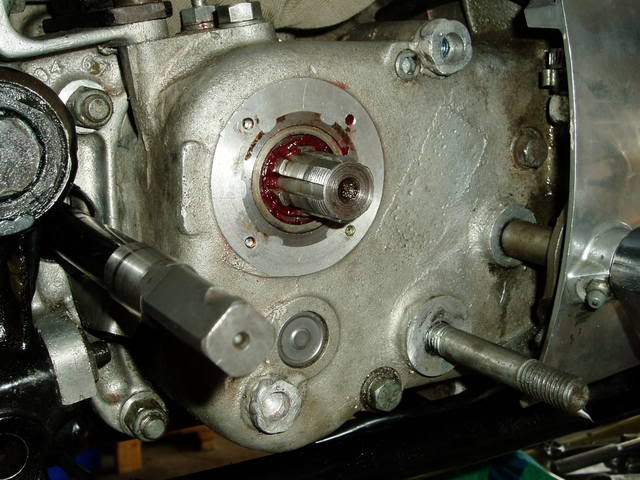
- I also drilled and tapped that top stud out to 5/16 for more strength and also plan to add a steel angle bracket from the top of the sprocket cover to the two bolts on the top of the gearbox near rear mounts. SOB will not move ever again!!
- I still had to strip the gearbox and replace those bearings that had been welded right next to.
| Using an electric drill (and proceeding very carefully), came up looking like this. 6) | |
 |  |