
REF: Carburetor, Intake Manifold & Exhaust - Sub-01B
Rebuilding a Mikuni HSR42
Article by rubine of the XLFORUM 1)
Some guys maybe do it a little differently but below is documentation of how he rebuilt his carb.
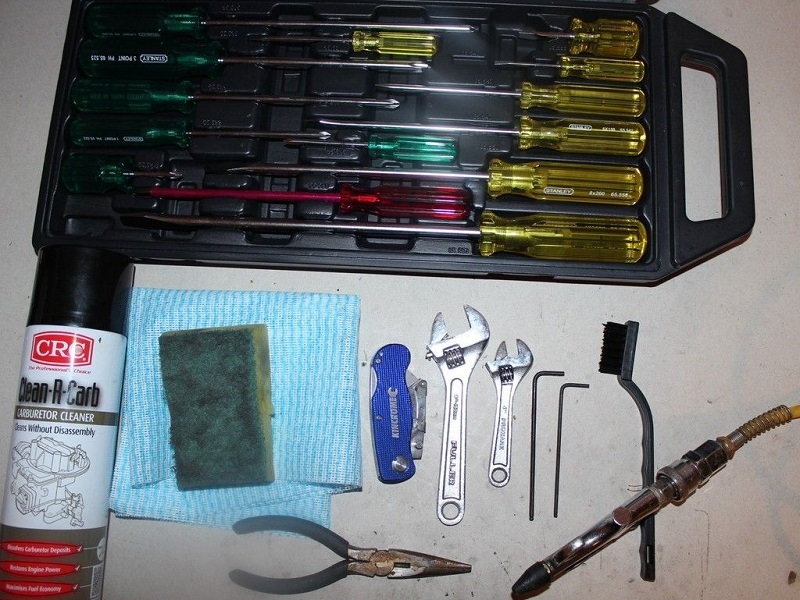
Tools that were used:
- A good set of screwdrivers
- Carb cleaner
- Chux cloths and Scotchbrite
- Stanley knife
- A couple of small crescents
- 3 and 2.5 Allen wrench keys
- A small nylon brush
- Compressed air
- Some nitrile gloves are a good idea as the carb cleaner will eat through nylon gloves pretty quickly, and also some good ventilation.
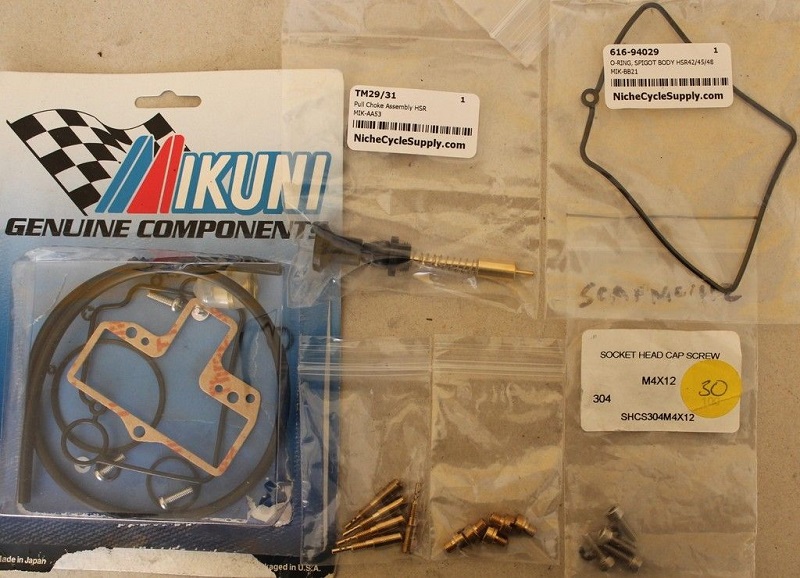
Parts:
- The rebuild kit
- A short choke cable and a spigot body seal that's not in the rebuild kit
- A selection of pilot and main jets for tuning
- Replace the 4 bottom float bowl Phillips head screws with 4mm (.7 pitch) x 12mm Allen head cap screws (esp if your changing jets a lot)
You may want to (carefully) use an impact driver to remove the old Phillips head screws from the bowl.
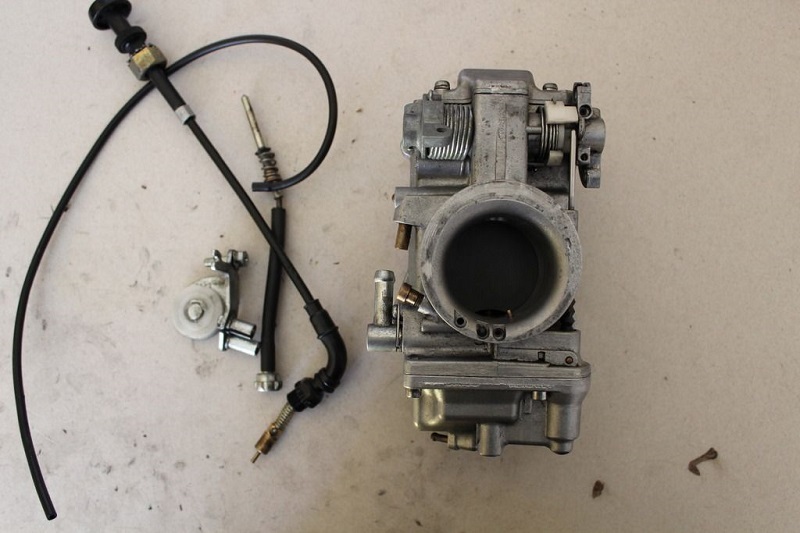
First up remove choke cable, cable pulley bracket and idle adjuster. Record a reference of the idle adjuster so you know where to put it back.
 4)
4)
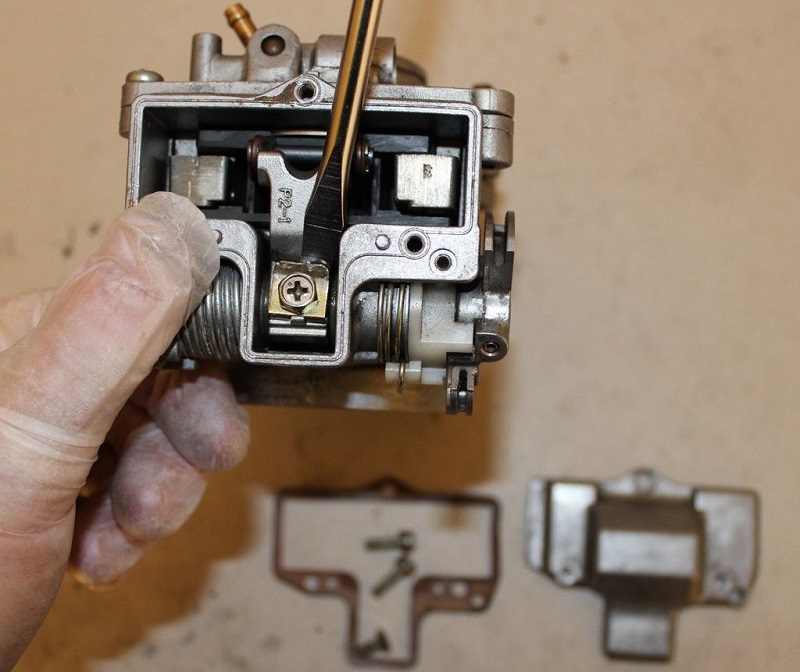
Undo the 3 Phillips screws and remove the top cover.
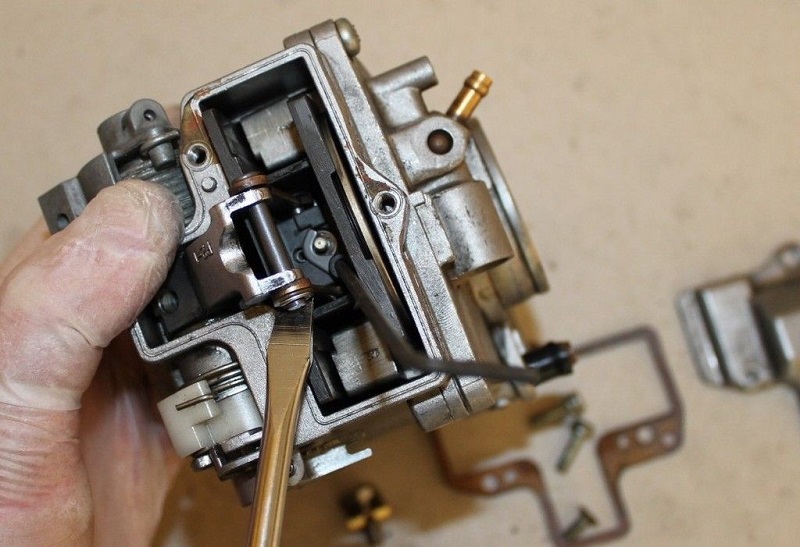
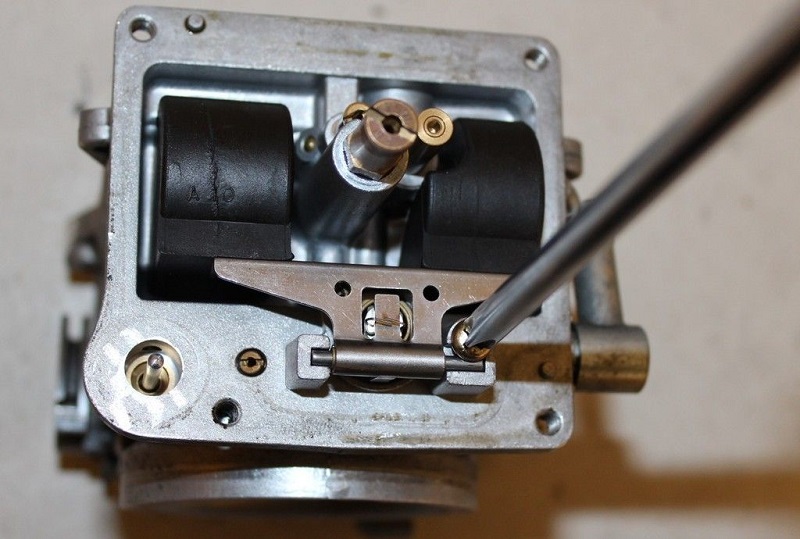
Position the throttle shaft so you can fold back the tabs locking the bolt in place, and remove the bolt.
The tabs have already been folded back in the first pic below.
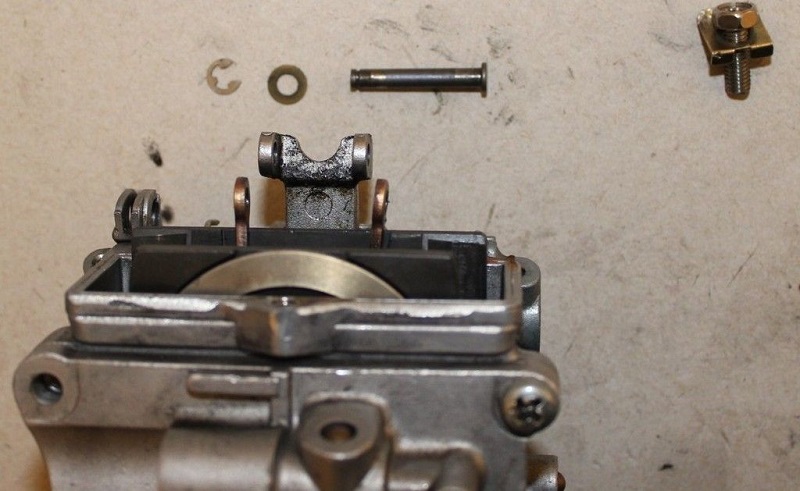
With the bolt removed, lift up the throttle slide, and remove the E clip, washer and slide out the link lever pin.
You can also see the top of the jet needle in the second pic held in place by the needle retainer clip and Allen head screw (with the Allen key in it).
This is what you undo to change the jet needle.
With the pin removed the slide assembly will slide out.
 5)
5)  6)
6)  7)
7)
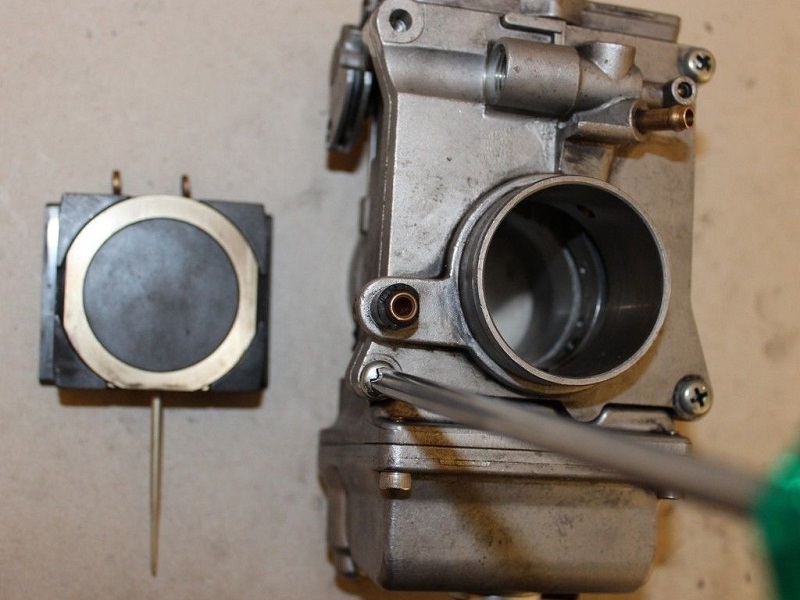
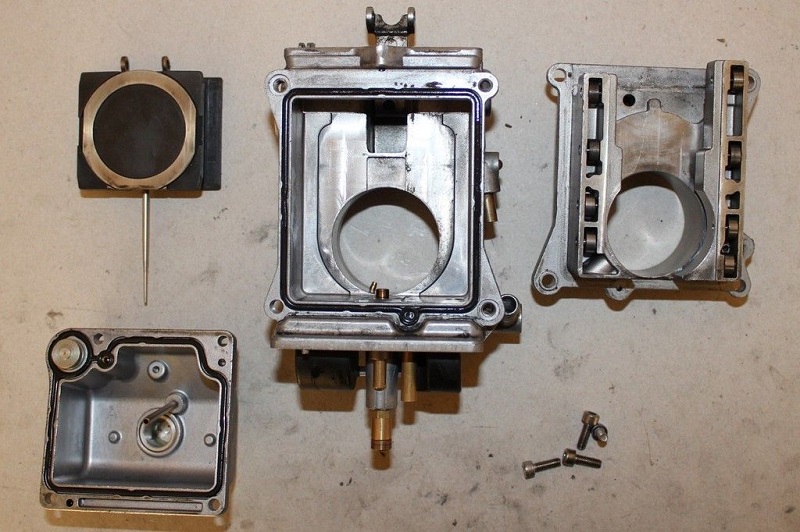
You can then remove the 3 remaining screws to remove the back carb body and 4 screws to remove the float bowl.
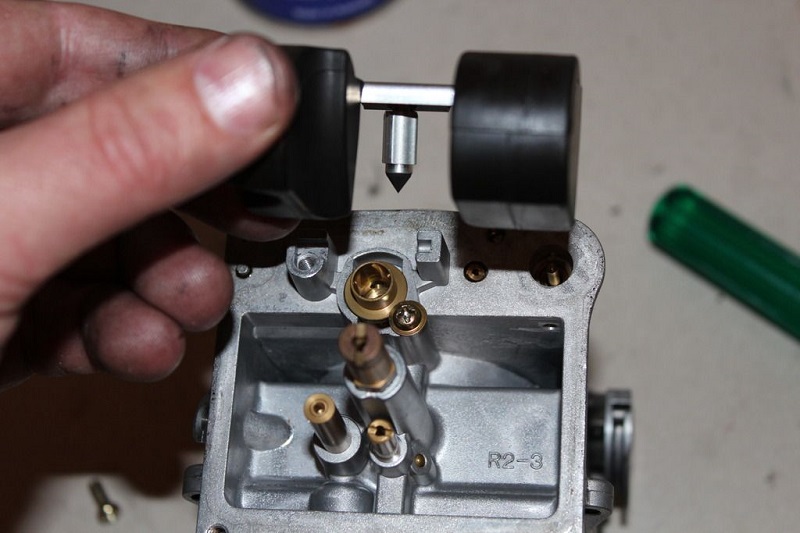
Carefully remove the gold colored throttle valve sealing ring from the black throttle valve slide and make a mental note of the seal behind it.
There is a replacement seal in the rebuild kit. Putting this back is probably the fiddliest bit.
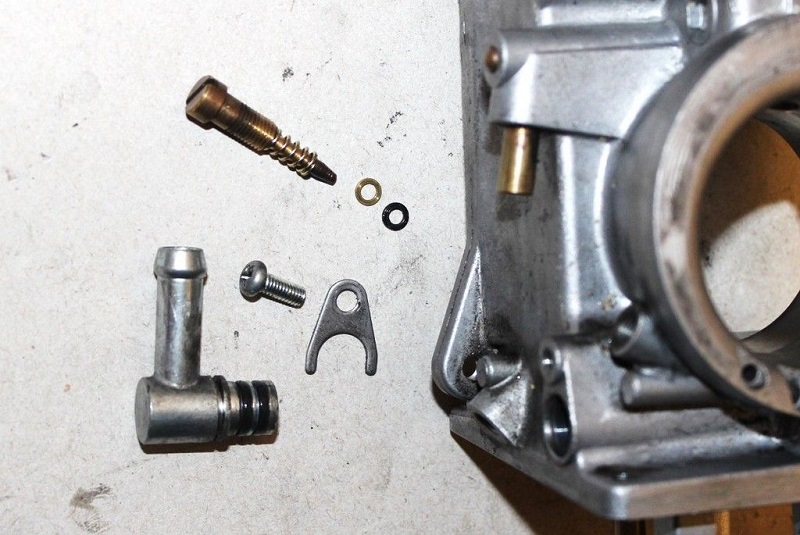
Remove the pilot air screw making sure the spring, washer and O-ring comes out with it. The O-ring has a replacement in the kit.
Also remove the fuel joint. The 2 O-rings also have replacements in the kit.
 8)
8)  9)
9)  10)
10)
Remove the float assembly by unscrewing the float pin screw. The plunger of the needle valve assembly will come out with it.
Be careful as it just slides off the tab. The whole needle valve assembly (plunger, seat and washer and seat screw) has replacement parts in the rebuild kit.
Then remove the seat screw that holds the needle valve seat.
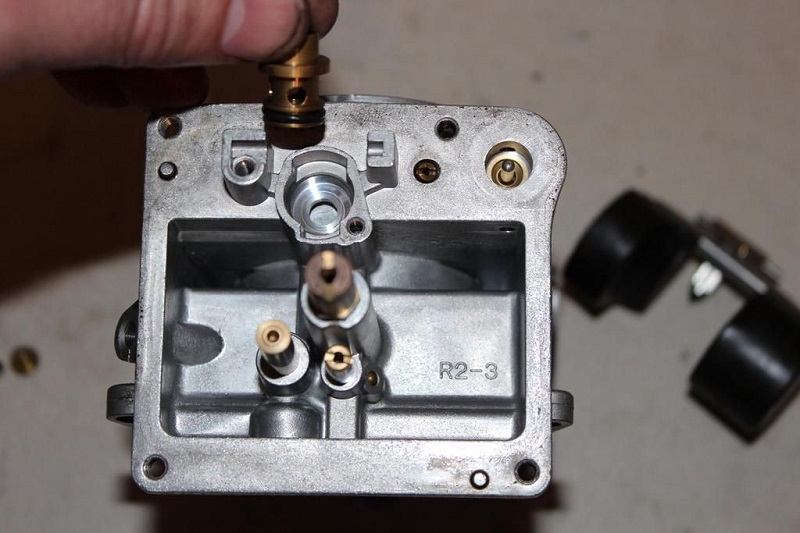
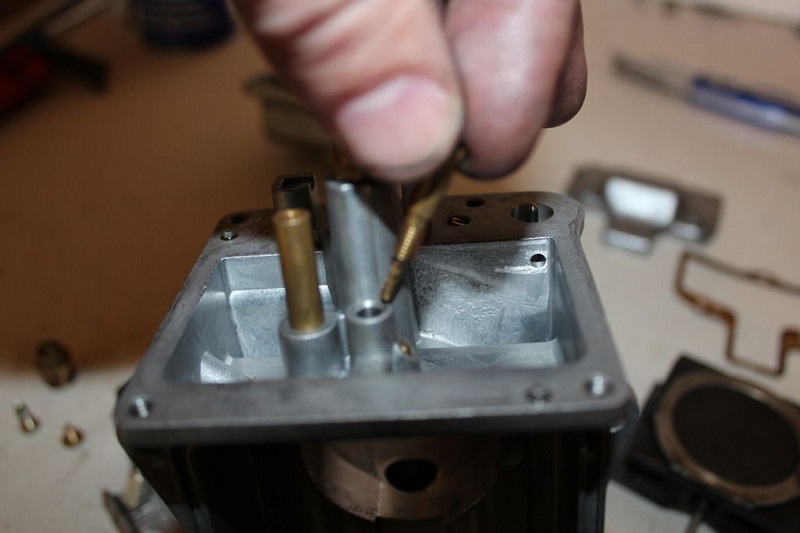
Unscrew and remove the main jet, main jet extender and the needle jet underneath should come out with a tap, as well.
Also in the bottom left of the pic you can see the accelerator pump rod just poking out.
Remove it and the rubber boot which has a replacement in the kit and the accelerator pump nozzle next to that.
That has a replacement O-ring in the kit.
Unscrew and remove the pilot Jet.
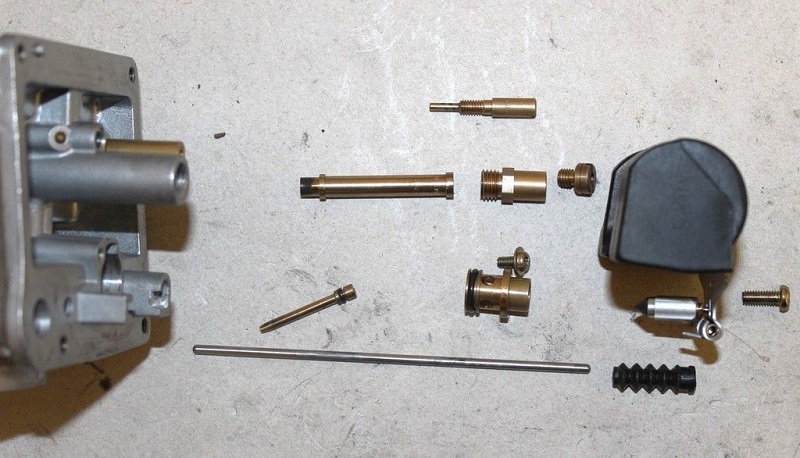
The 3rd pic below has all the bits laid out.
L to R, T to B:
- Pilot jet
- Needle jet
- Main jet extender
- Main jet
- Float
- Accelerator pump nozzle
- Needle valve assembly
- Float pin screw
- Accelerator pump rod
- Accelerator pump rod boot

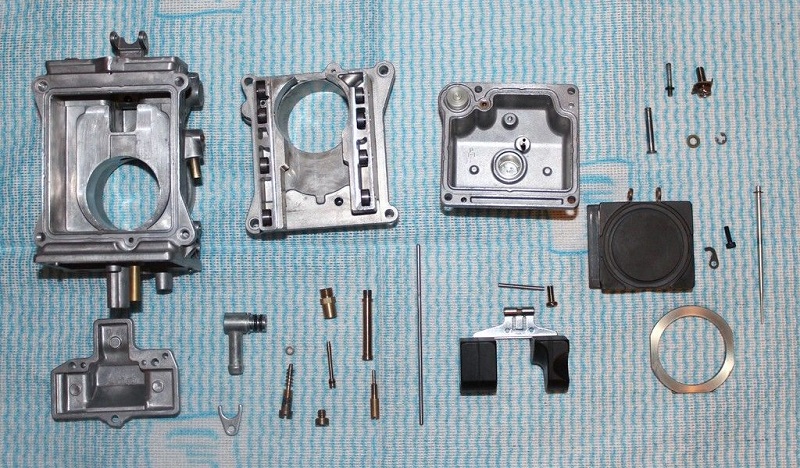
So now just clean the everything up.
Make sure to blow out all the passageways using compressed air. Clean clean and clean again.
The first pic below is all the bits not including what is the rebuild kit.
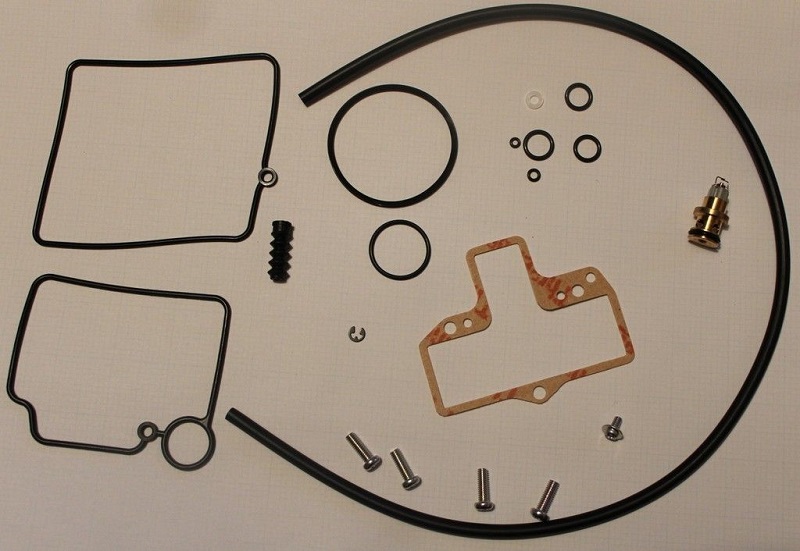
The second pic is the bits in the rebuild kit, including an extra spigot body seal.
So its as simple as putting it all back together in the reverse order.
 17)
17)  18)
18)