Table of Contents
This is an old revision of the document!

REF: Engine Mechanicals - Sub-01H
Clearancing for and Test Fitting Cams
Clearancing
| The underside of the lifter bosses often need a little grinding to keep the cam lobes from contacting. 1) | Big cam lobes also may try to hit the pinion race, which protrudes from the case slightly. It sticks out farther on 2000-up motors. 2) | If the lobe is contacting the pinion race, it's better to modify the lobe than the race (this is a Red Shift 567). Notice the chamfer on the lobe below. Modifying that race is difficult and risky. People have done it and trashed the bearing in the process. 3) |
Test Fitting
Factory fitting of the cams is (or rather was) all about noise control. 4)
By selecting the cam gears sized specifically for the engine they were going in, they could walk that fine line between noisy and too-tight.
The noise from the gears being a tad loose doesn't hurt anything. Too-tight however can cause localized tooth heating and failure.
So when you replace the cams with non-original cams, you just have to make sure you're not too-tight, which is why you should do a basic test fit.
Aftermarket cams are all made on the loose side and you rarely get into trouble when using them.
In 2000, they changed the tooth cut on the pinion connection to the #2 cam, to a “high contact ratio” design.
This tooth design apparently got the noise level down to an acceptable amount without having to deal with multiple gear sizes.
There's only one size for each.
In 2001, this change was propagated to all the cam interconnecting gears as well.
To do a basic test fit of your cams.
Install all 4 cams in the gearcase with the pinion gear removed.
Use a fair amount of assembly lube in the bushings and in the gear teeth.
Rotate them by hand and make sure they all spin freely without binding.
Then, install all 4 cams in the cam cover and make sure they spin freely without binding.
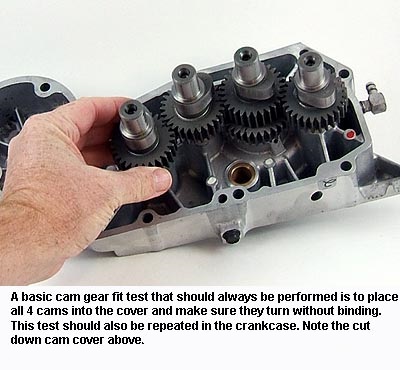 |
| Test fitting cams in the cam cover 5) |
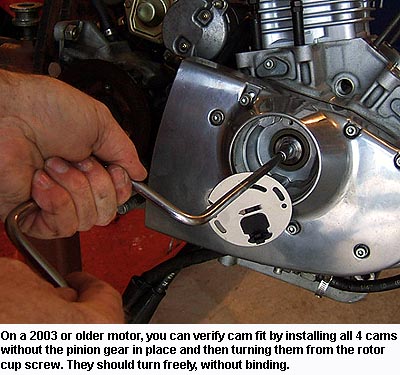 |
| Test fitting cams with the cam cover installed 6) |