REF: Oiling & Lubrication - Sub-05G
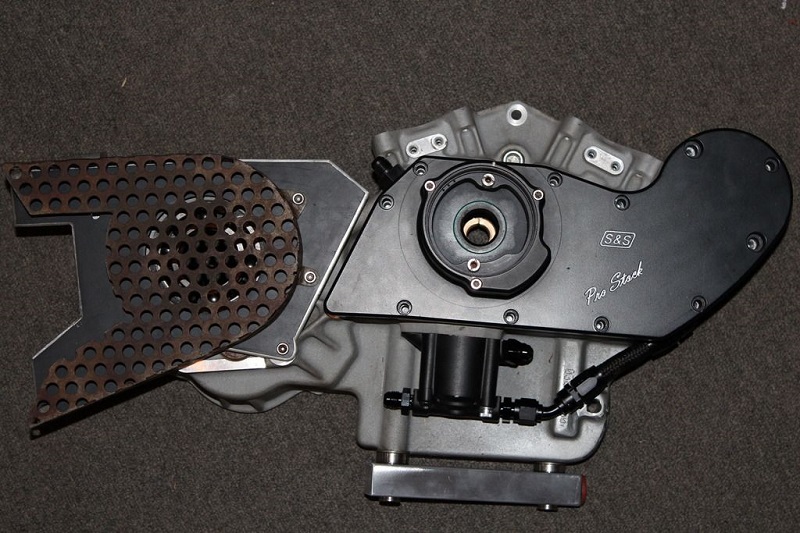
Rubine's Mod to Move Oil Scavenging to the Front on an S&S Pro Stock Case
Article by Rubine of the XLFORUM 1)
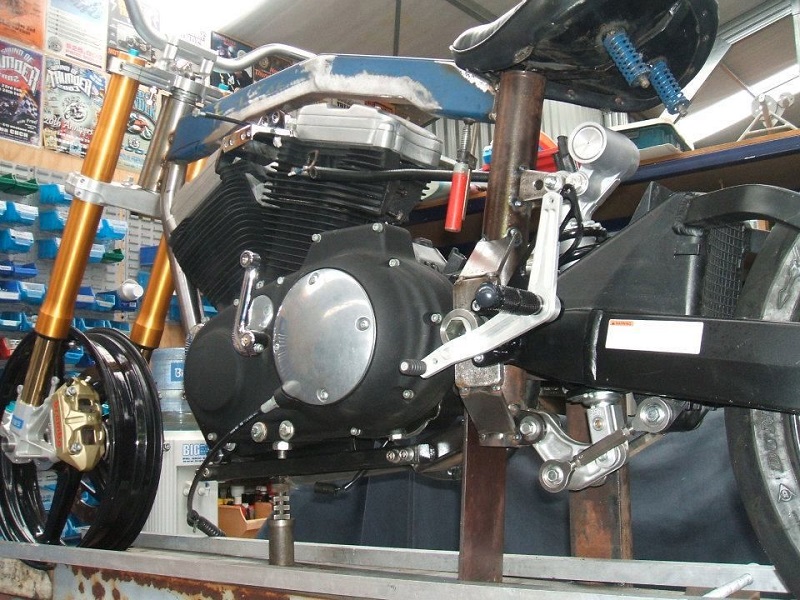
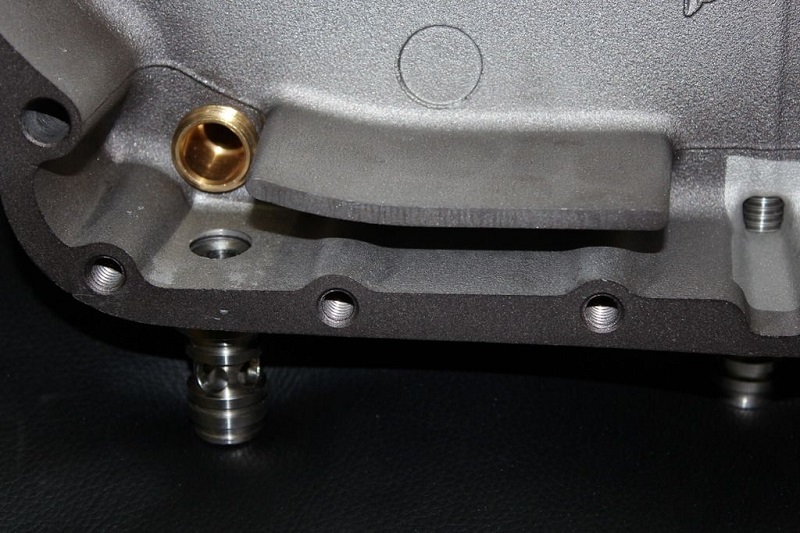
This is an upgraded oil return to change the oil scavenging to the front of the engine.
Also important to note is the engine was mounted on a 15 degree forward lean.
 2)
2)
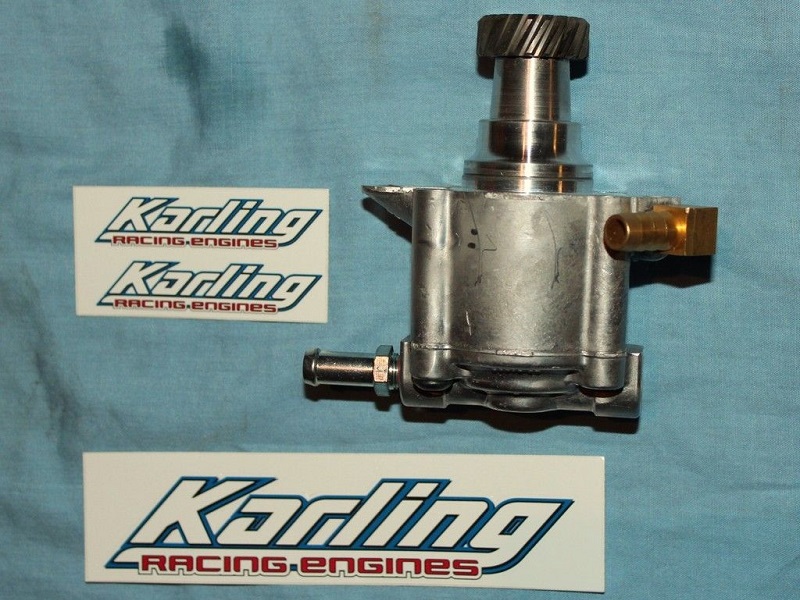
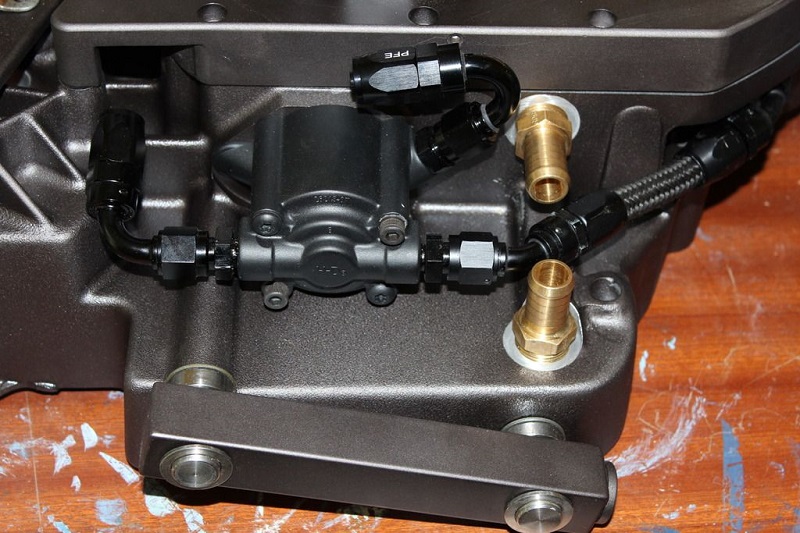
It also incorporates a modified 07 XL oil pump (modified by Charlie Karling of Karling Racing).
See more on the Karling Oil Pump Mod for the newer oil pumps here in the Sportsterpedia.
 3)
3) 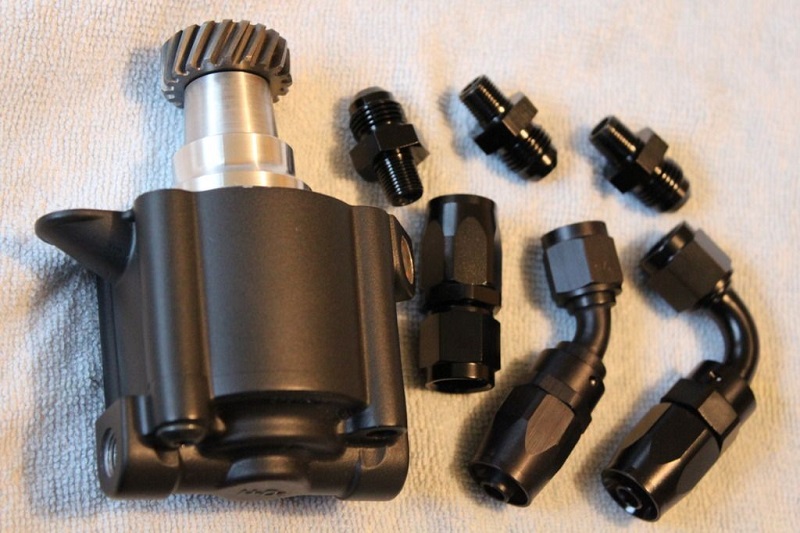
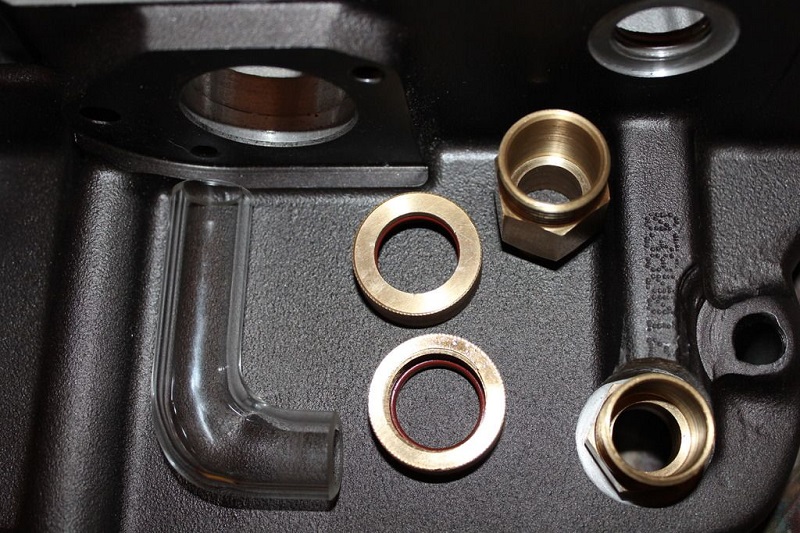
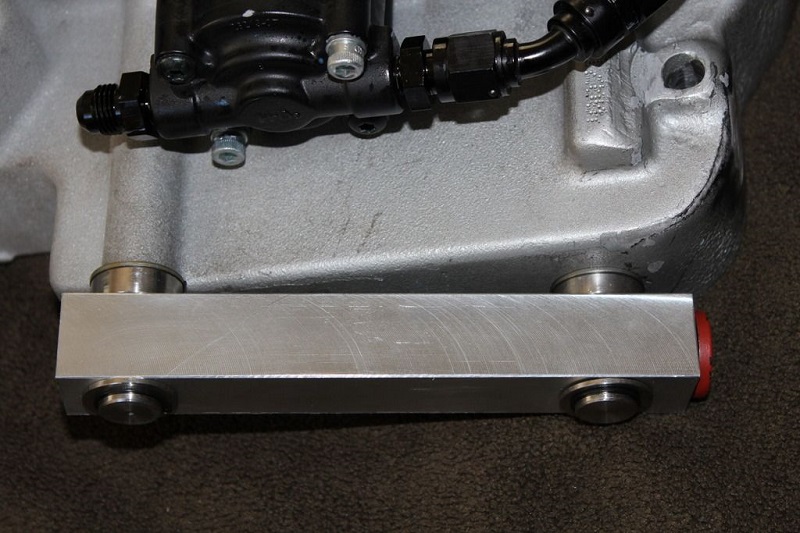
The fittings are all stainless and they're thin wall so no I.D. has been lost. Its actually been opened up a bit.
The bar is Aluminum - (4) O-rings missing from the fittings in the pic below that will make a good seal, which of course is crucial to this working.
There will be windage protection over the scavenge point as well.
The bar could also be tapped into for external drains such as from the heads.
A strong clear site tube will be installed from the cam chest drain to monitor drain oil.
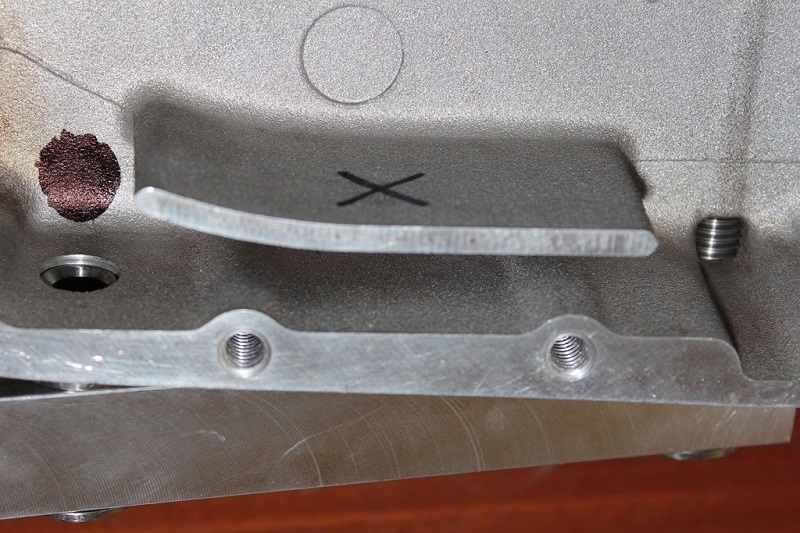
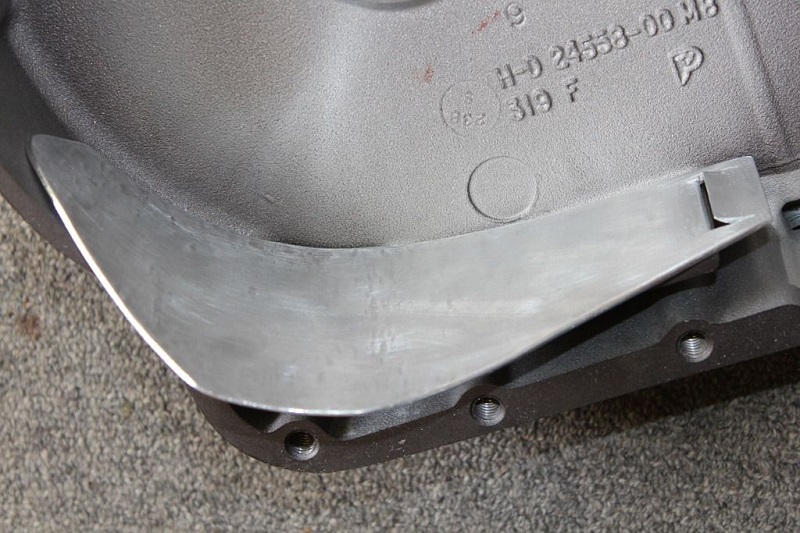
Black circle in the first pic below is where the cam chest drain will come out.

Scavenging is done by 2 separate things at the same time.
Oil is blown to the scavenge port in the sump by the flywheels while the oil pump sucks out what gets to the scavenge port.
So to make this work, a reversal of oil flow in the sump needs to take place.
A windage tray was built to fit in front of the wheels with an accompanying re-direction screen on the back of the wheels.
The plan is to drill and tap into the factory windage tray and the case at the front of the new tray with countersunk 1/4“ UNC cap screws and 243 Loctite.

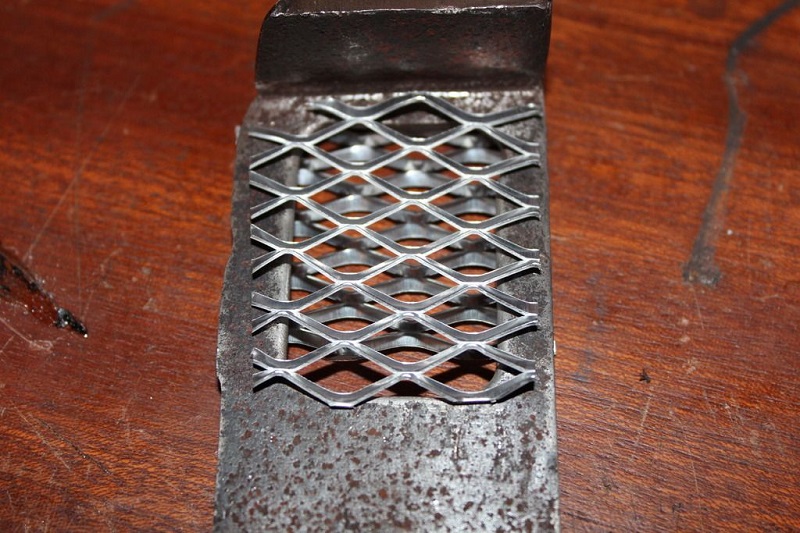
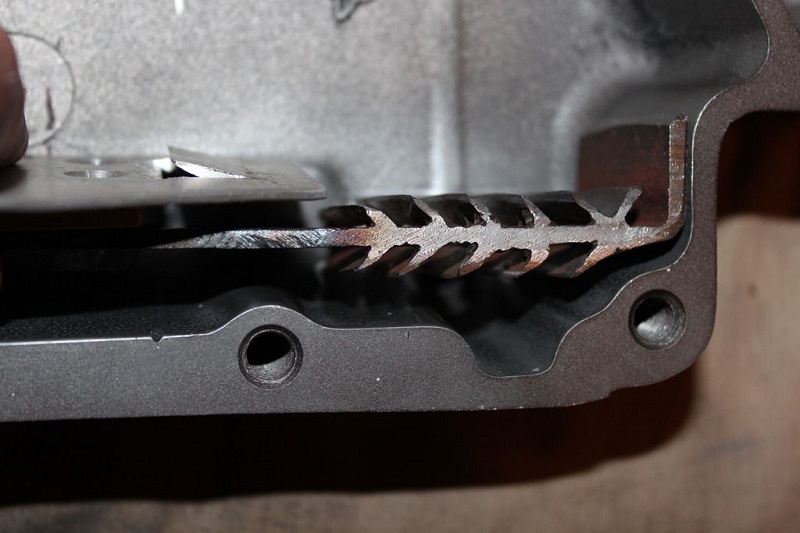
To re-direct the oil to the front of the sump, a raised expanded mesh was cut to make a pattern.
Then the actual piece was cut out of mild steel (so it can be welded).
This will act as a damper, have surface area to help the gas and oil separate, and act as a directional spoiler (to help get oil to where it's supposed to go).
The sample is 16 x 8 x 2mm.
With several attempts of trial and error and more tig welds, it's coming together.
You can blow air into it (the direction of the spinning flywheel) and the wind comes back at you from the underside.
(which should peel the oil and push it to the front where the new scavenge is.
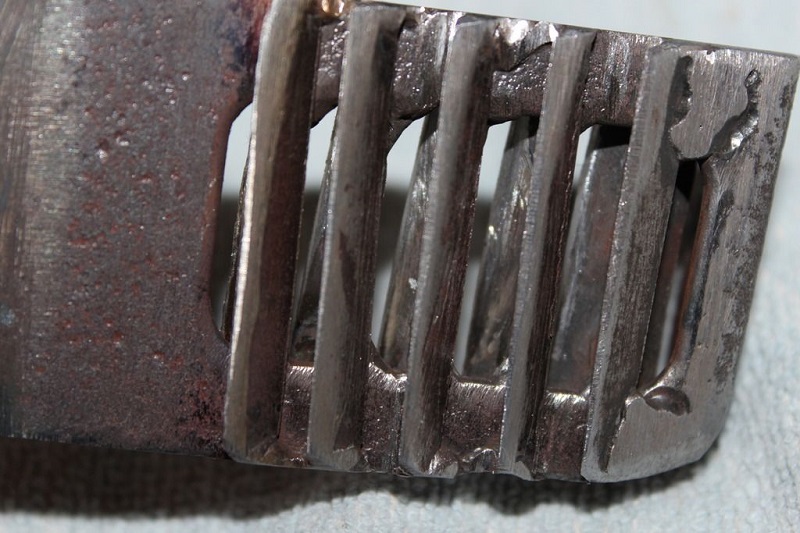
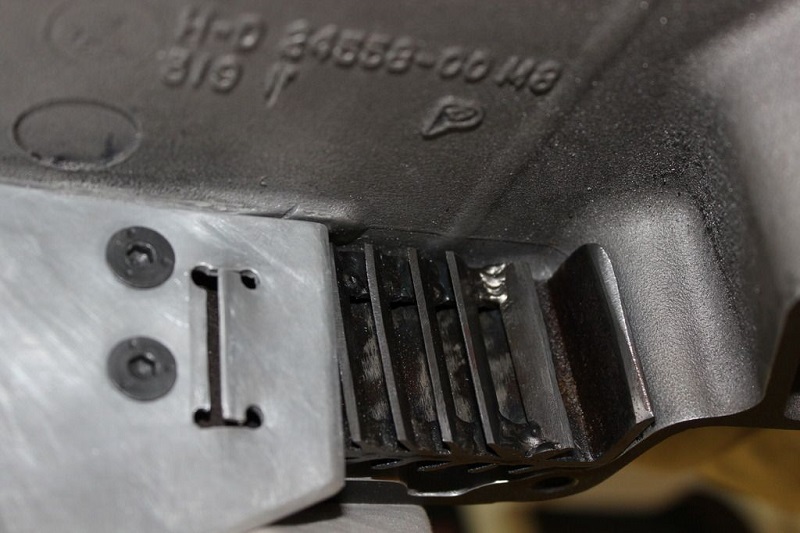
However, the welds weren't acceptable enough and the directional spoiler was remade.
You can see the difference from the first pic below and the other two.
The fins are more informed slightly thicker with consistent welds.


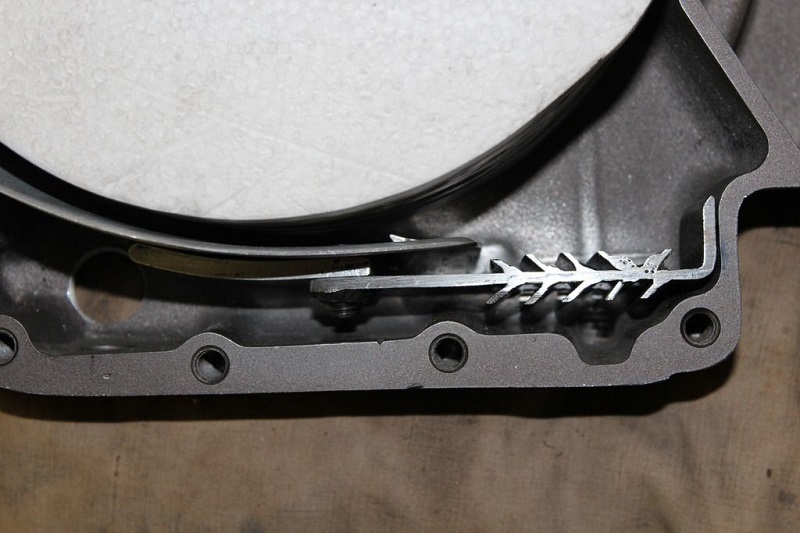
The windage tray was re-made also out of 3mm aluminum for a better countersink and the fin was redone based on arches are stronger than right angles.
Here the the pics after bolting it up.
Countersunk cap screws through the windage tray, through the factory tray, tapped into the mild steel underneath, where some extra material has been added to get a good ammount of thread area. And then at the back where the 90 degree bend is button head cap, threadded through the case out the other side, with a nyloc nut on the other side with plenty of Loctite 243.
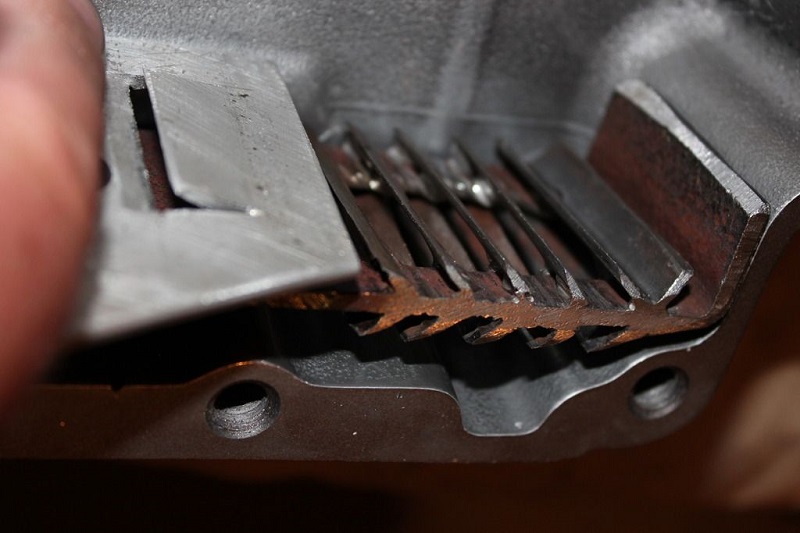
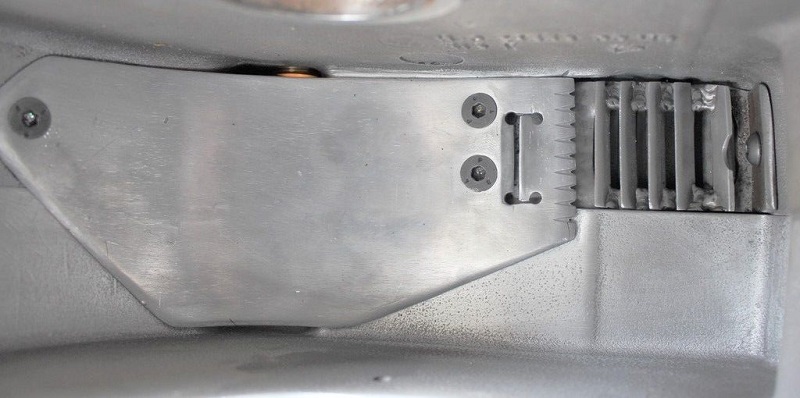
You can see the grooves cut into the trailing edge of the windage tray.
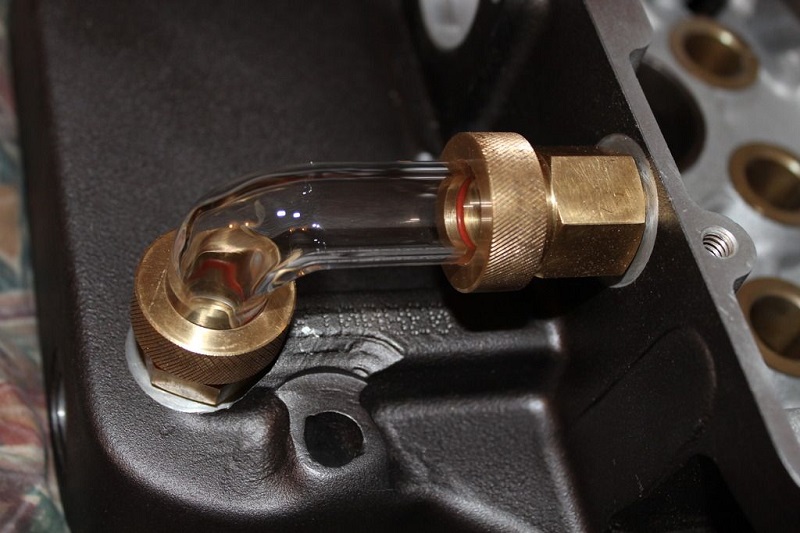
I was watching Discovery channel about the barn owl, fascinating creatures, anyway they hunt at night and their prey relies on sound as a warning, so the owls have had to adapt to become silent fliers. To do this their wings trailing edges are not smooth like most birds, they are jagged and the feathers at the edges are rough. This lessens turbulence and vibration, which means no noise, and silent killers! Anyway it took about 10 minutes to do and I think it helps. My main concern is the oil not draining from the cam case, but I've got the tie bar to tap into if I have to. I also met a guy who (who is a glass blower) and makes all kinds of stills and refiners and what not for high spec chemical experiments etc. He has made me some brass fittings with a rubber o ring to hold a glass tube in place that he is blowing for me. Making two, both 19mm OD, and one of 14mm ID, and one with 11mm ID. He reckons it will be strong enough. Not sure if I trust glass on the open road though. But… will you be able to see anything, or when the motor is running will it just turn cloudy brown? If you shine a torch you can actually see the scavenge point inside the cases, through the tube. That would be nice to see with the engine running. Doubtful though.

Below, the last bit for the cases is done includeing the glass drain.
A straight piece bent 90 degrees was tried but it meant the outside of the bend was thin.
So the guy got a straight piece of glass and cut it at 45 degrees then welded the two pieces together to make a 90 degree bend.
The flywheel scraper was originally set at .015” from the flywheels but it was later moved slightly farther away.