Table of Contents
This is an old revision of the document!

REF: Oiling & Lubrication
Remote Oil Filters
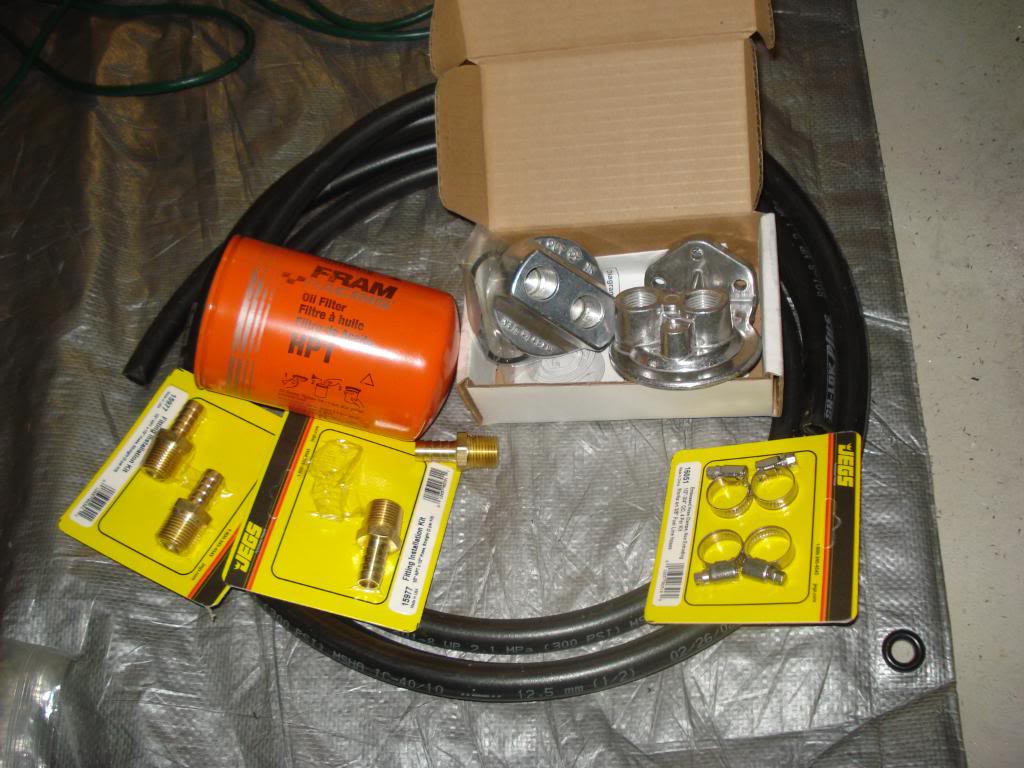
Below is a parts list for a remote oil filter setup although it's not a kit per say; 1)
Derale spin-on bypass adapter with dual 1/2“ NPT ports. 2)
Derale standard series remote single filter mount. 3)
Four 1/2” NPT to hose barb connectors and worm clamps.
A couple sections of 1/2“ oil hose (not fuel line).
And a standard oil filter.
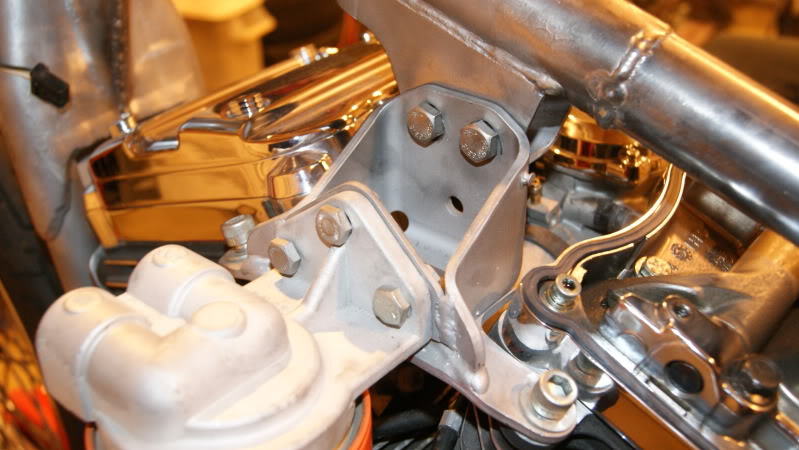
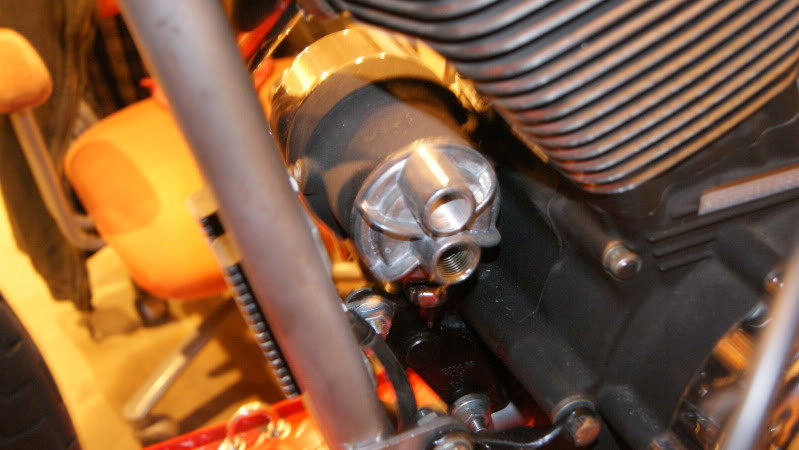
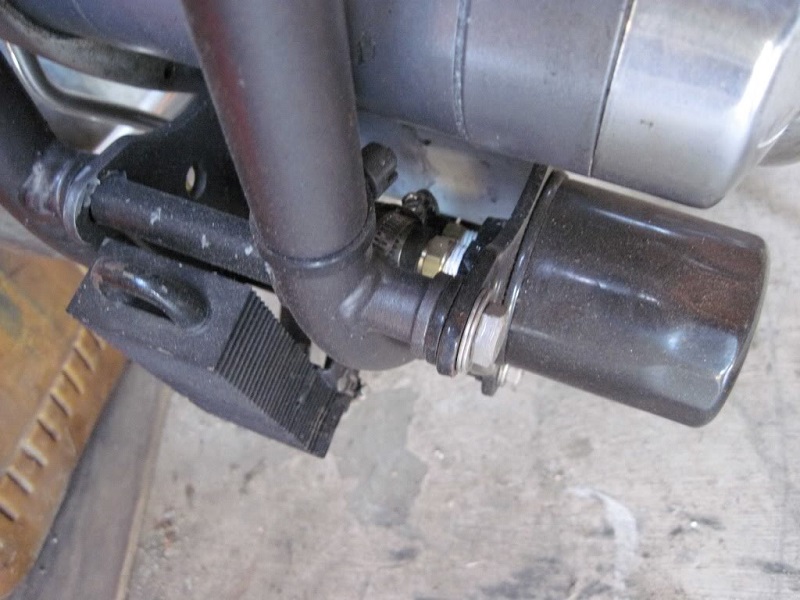
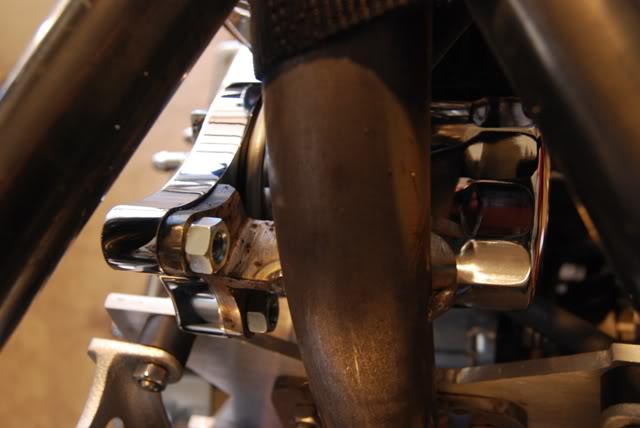
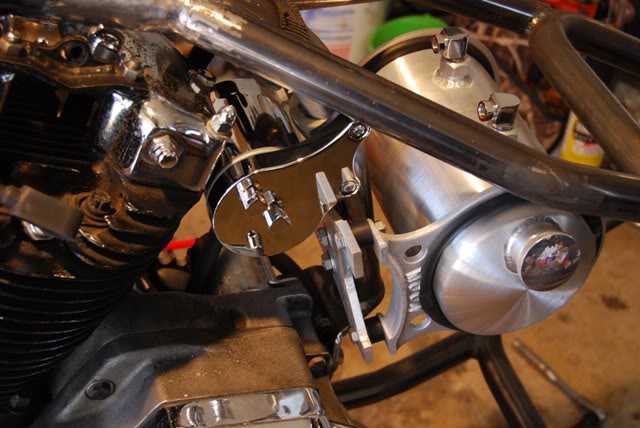
Here is another remote oil filter setup:
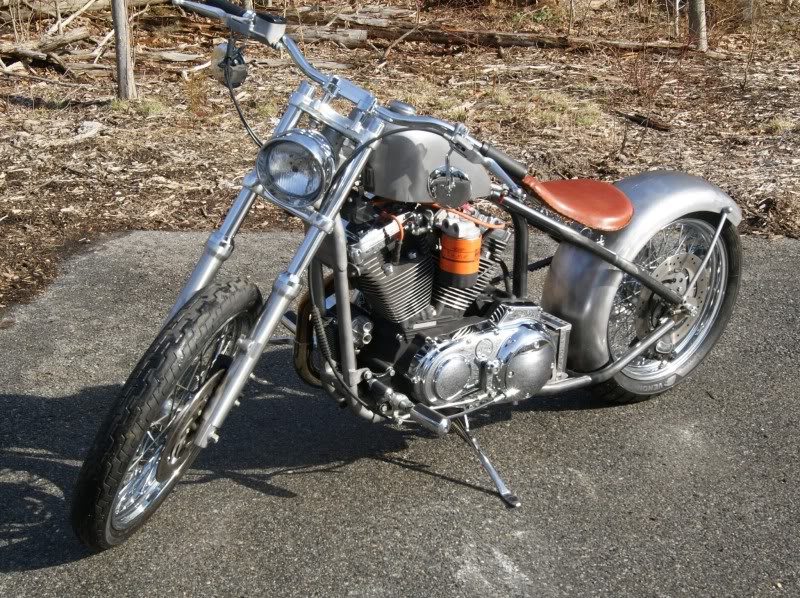
The remote oil filter bracket was welded to the upper motor mount.
The adapter that screws to the engine block was also purchaced separately.
 6)
6)  7)
7)  8)
8)
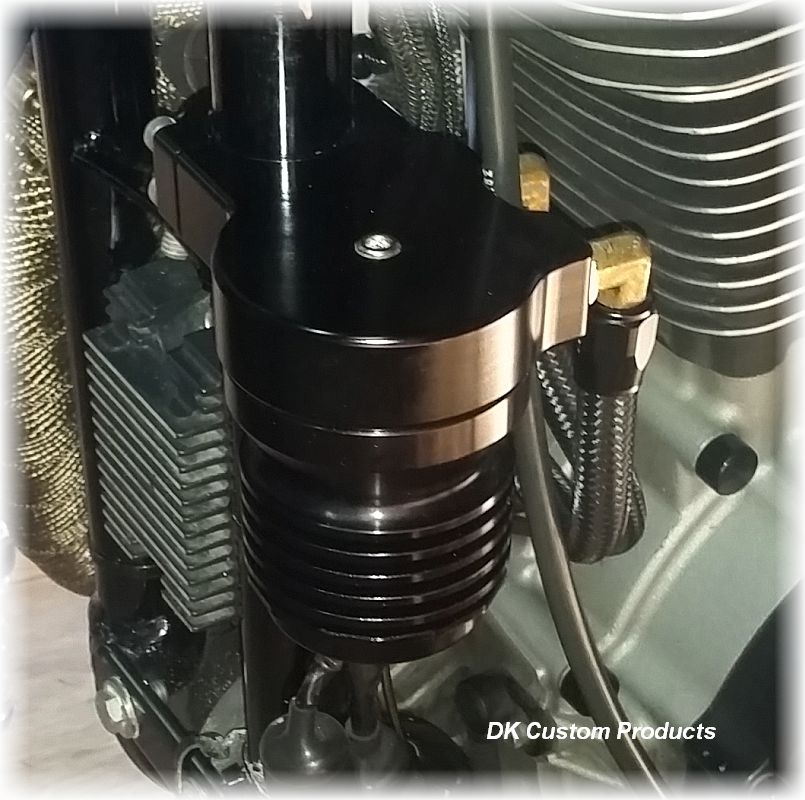
This adapter attaches to the downtube from DK Custom.
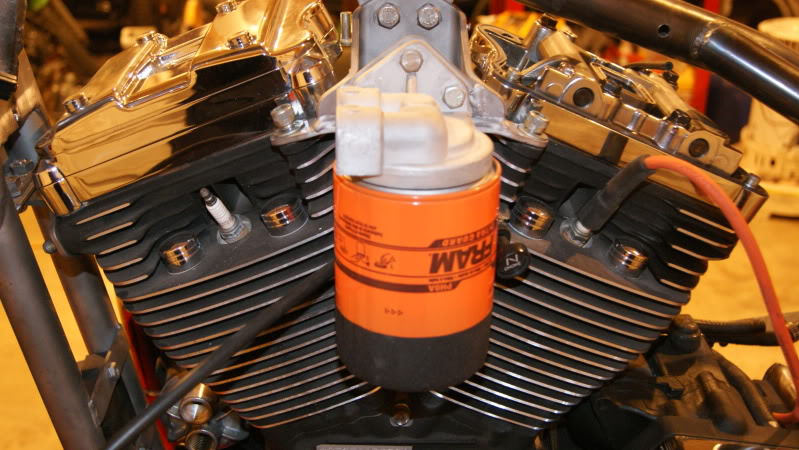
The Cool-n-Clean remote oil filter relocation kit. 9)
This kit places the filter in a vertical position so less oil spills during a filter change.
Features and Specs:
- No More Messy Oil Changes
- Cooler Running Motor
- CNC Billet Oil Filter Mount w/ Built-in Downtube Clamp
- Black Finish Engine Adapter & Hose Clamps
- Compatible with Oil Coolers
- Optional Braided Hose, Optional Clamps, & Optional Permanent Filter
- E-Z BOLT-ON INSTALL - Complete Oil Filter Kit w/ Everything supplied
- Step-by-Step Instruction Included
Ironhead Oil Filter Locations
Forward mounted filters
On the left motor mount
The OEM filter is mounted on the lower left front engine mount on 82-E84 models.
This has also been a popular practice on earlier bikes.
These aftermarket motor mount filter adapters are basically a sleeve with 1/8” pipe threads inside, and the filter threads outside. 11)
They are pressed in to the M/M plate, welded with just a 1/8“ pipe sleeve for the other side.
They are piped off the return hose to the tank.

Modifying a standard motor mount for use as a oil filter mount
- This can be done on the bike but it's easier to remove the motor mount and do the work on the bench. 17)
- Simplified version:
- Plug the existing small hole in the left motor mount.
- Drill and tap 2 holes in the mount:
- 1 for a feed line out (filter adapter / feed out line).
- 1 for a return line in.
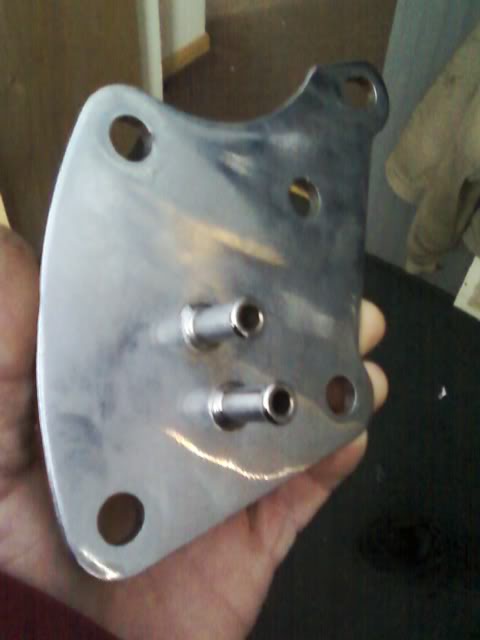
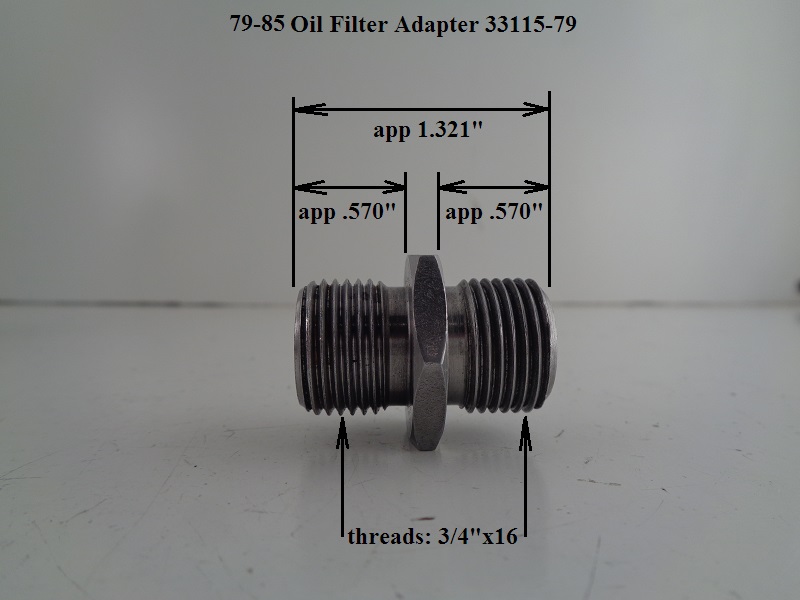
- Drill and tap the center of a 3/4”x16 bolt as a filter adapter / feed out line.
A 79-85 filter adapter is shown below for dims only.
However, it can't be used here due to the shoulder relief near the nut (not enough threads where needed).
For that reason, a bolt is used here instead with a hole drilled and tapped in the bolt head for dual use for the filtered oil outlet.
| Dims for 79-85 filter adapter (3/4“x16) | |
 | 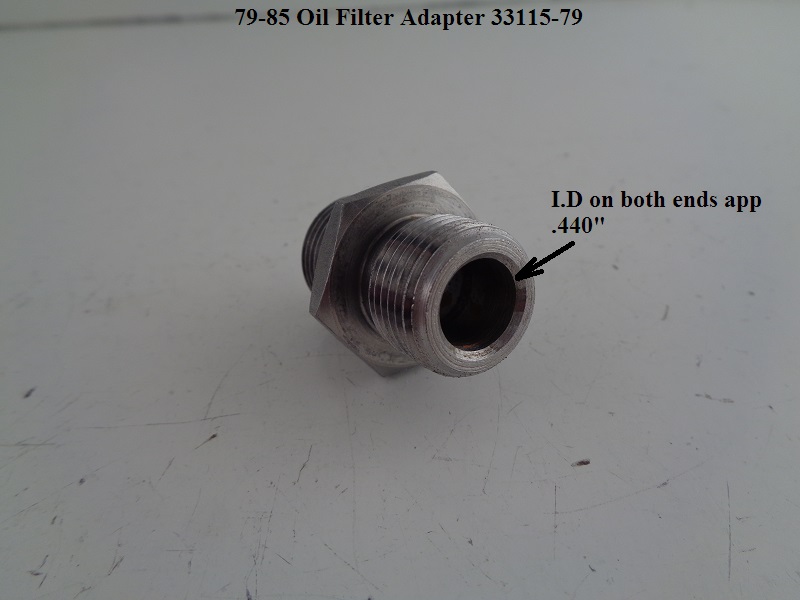 |
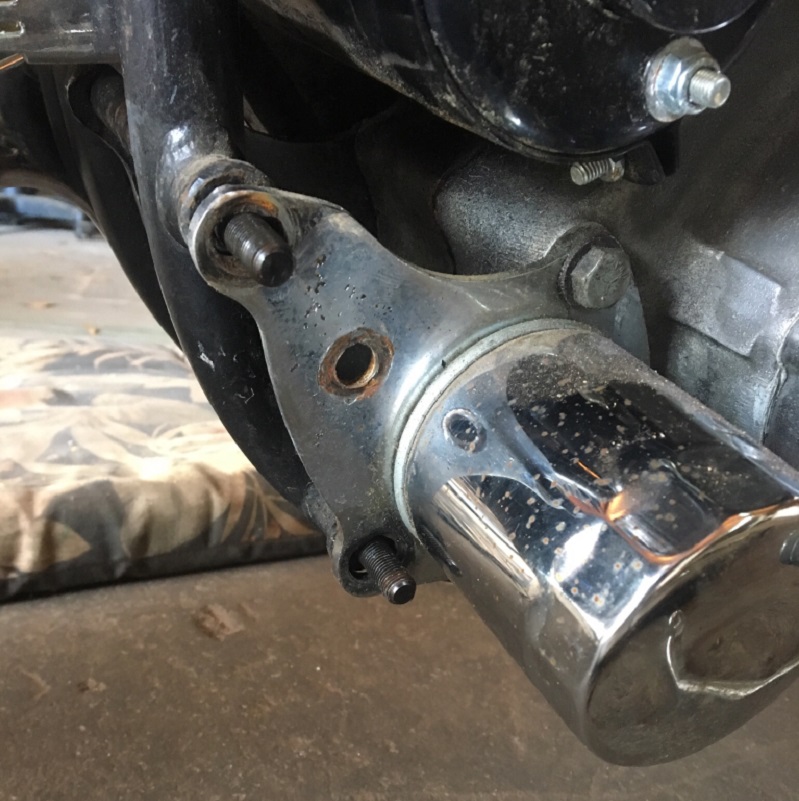
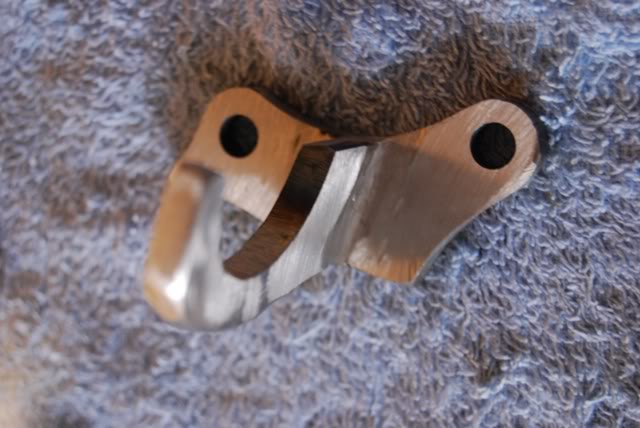
| Standard motor mount mod for addition of an oil filter 18) | Marking the center hole for the filter 19) | |
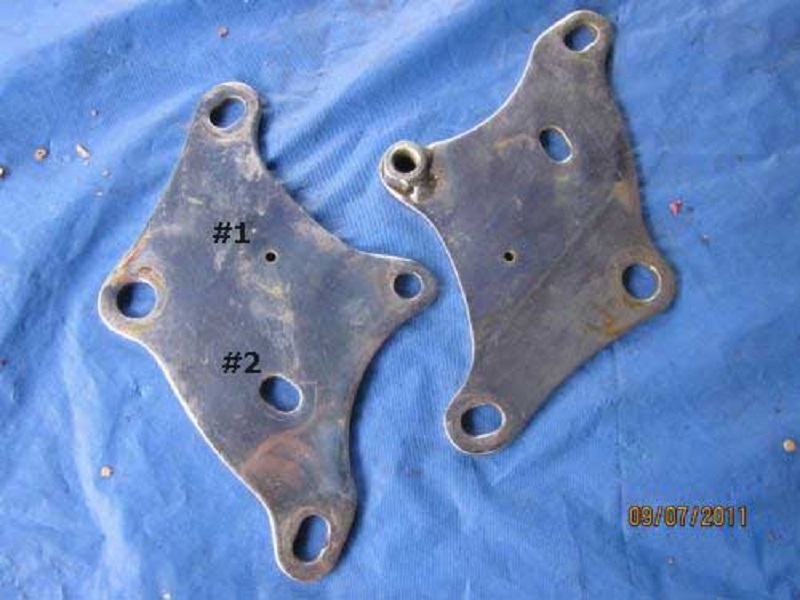 |  |  |
- Plug the small hole in the left motor mount:
(hole #1 in the pic above)- The small hole marked #1 must be welded over or tapped and a screw or bolt used to block the hole.
- You must use a sealer on the threads if using the tap method.
- You can also center punch the ends of the bolt threads to prevent them from backing out.
- The head must be on the inside (back side) of the mount.
- Then grind the outside smooth to the base metal.
- Drill and tap a hole for a 3/8” NPT hose barb for the return line input to the filter:
(hole # 2 in the pic above)- The hole marked #2 needs to be drilled to accept either a 3/8“ NPT hose barb or (in this case) a 3/8” x 1/4“ bushing.
(a 3/8” NPT fitting is largest you can use and not get into the center fitting) - Below, a 3/8“x18 MNPT to 1/4”x18 FNPT bushing is used to permanently thread into the motor mount with a 1/4“ NPT to 3/8” hose barb fitting threaded into the bushing from the back side.
(in case something happens to the hose barb threads, the threads in the mount will stay unharmed)- The pre-drill hole size for the 3/8“x18 tap is 37/64”.
- Tap using a 3/8“x18 NPT bit.
- The NPT threads are tapered so you only want to run the tap into the hole about 1/3 of the way so the bushing can have an tight interference fit when installed.
- Thread the bushing into the back side of the motor mount and tighten it with a wrench.
(leave any portion of this fitting sticking out the filter side for now)
- Drill and tap a 3/4”x16 hole in the mount for the filter adapter.
(this will be the threaded stud that attaches the filter) - Mark the center hole for the filter adapter threads:
- Position the filter over the 3/8“ bushing that now should be sticking out of the mount on the filter side.
(make sure the bushing is against the inside ridge of the filter next to the O-ring) - Now draw a circle around the outside of the filter and remove it.
- Find the center of the hole in the circle you just made as in the example drawing above:
- Place a ruler from one end of the drawn ring and rotate it until you get the highest reading on the other end and draw a line.
- Repeat this several times until there is a definite single intersecting point of all the lines in the middle of the circle.
- Where all of the lines drawn intersect is the middle of the circle (and your center drill point for the filter adapter threads).
- Use a center punch on this intersected point you just made.
- Then drill a 11/16” (.6875“) pre-drill size hole (in steps) for a 3/4”x16 bolt (filter adapter thread size).
- Tap using a standard 3/4“x16 bit.
- Make the filter adapter.
- Drill and tap a hole through the center of a 3/4”x16 bolt:
- This hole will be for filtered oil feed out to the oil tank:
- The bolt needs to be center drilled with a 7/16“ (.4375”) drill bit in steps.
(pre-drill hole size for another a 1/4“ NPT to 3/8” hose barb fitting for the feed hose to the oil tank).
- Then tap the hole (from the head side) 1/2“-3/4” deep using a 1/4“x18 NPT bit.
- Assembly:
- Grind the filter side of the 3/8”x1/4“ bushing flat to the base metal and re-tighten it after it cools.
- This will keep the bushing from interfering with the filter.
- Install the 3/4” bolt
- The bolt threads into the motor mount from inside to outside leaving just the threads on the outside for the filter to attach.
- Use a thread sealer and a copper washer on the bolt before installing it.
(if you can't find a washer, you can wrap the threads several times with Teflon tape to seal the threads)
- Install a 1/4” NPT to 3/8“ hose barb fitting into the bolt and the bushing.
- Use Teflon tape or a thread sealer on the threads and tighten them using two wrenches so as not to stress the threads in the motor mount.
- Install two 3/8“ hoses using hose clamps and route them as necessary.
- Line routing:
- The scavenge return line (from the case or oil pump respectively) goes onto the 3/8” hose barb (outside fitting).
- The feed line to the oil tank (or oil cooler if applicable) goes onto the 3/8“ barb fitting in the bolt (center fitting).
- If you use an oil cooler, the center fitting goes to the cooler inlet and the outlet goes to the oil tank.
- Select an oil filter:
(check the brand's tech information as the info below may be outdated)- 57-76: 3/4'x16 threads, 8-11 psi optimal and 20 - 30 microns for increased flow. 20)
- These filters run about 3 to 3-1/2” long, have 3/4“x16 threads and an 8psi by-pass valve:
- J&P 7400020 21)
- WALMART Supertech ST4967 OR ST4386
- PUROLATOR PL14476 OR PL1447, ML16822
- MOBILE1 M1-102
- BOSCH 3330
- AMSOIL 133, 134, 135
- BALDWIN B33, B37
- FRAM PH4967
- HASTINGS LF410, LF413
- NAPA 1394
- WIX 51395, 51396
Other forward positions
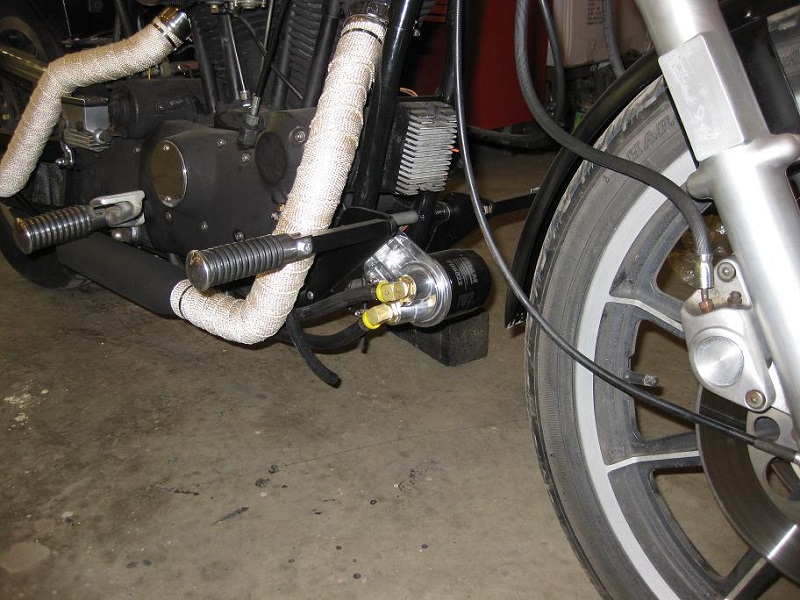
| This one sets the filter upside down. 22) | |
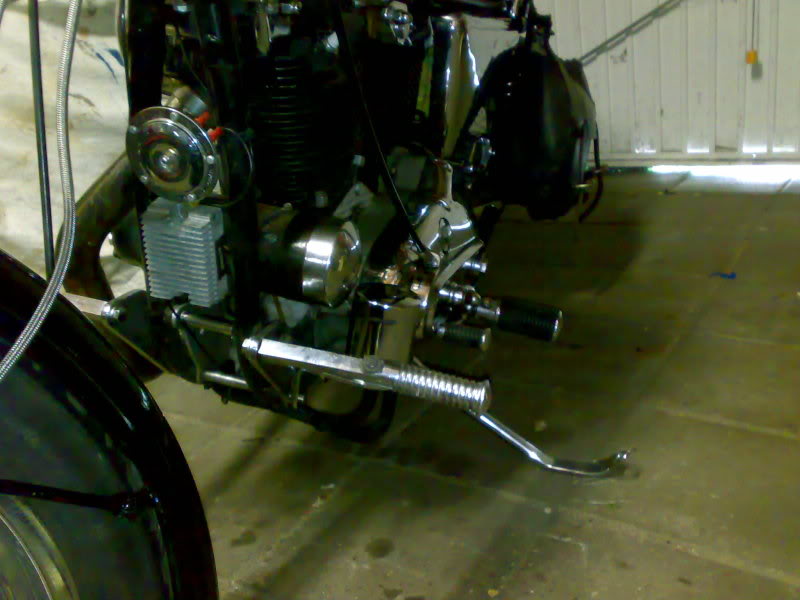 |  |
| A simple bracket with a piece of angle iron bolted to the right frame rail. An automotive spin on filter mount with a 3/4”-16 threaded stem was bolted to it. The PH6022 filter is Fram's cross reference with Harley 63805-80. 23) |
|
 |  |
This is an after market filter and cooler setup on a 77 model. 24)
The filter adapter is 5/“x24. However, you can buy adapters online to increase the adapter size to 13/16” or 3/4“.
 |
Rear mounted filters
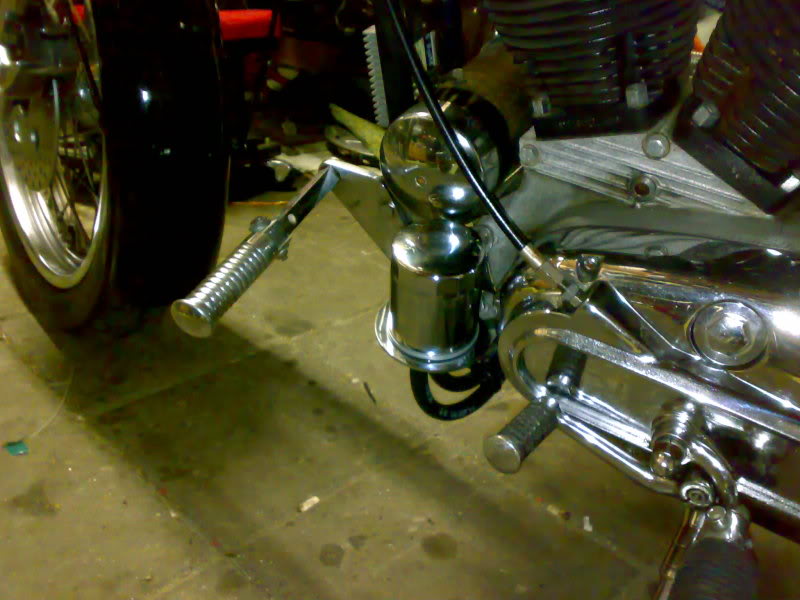
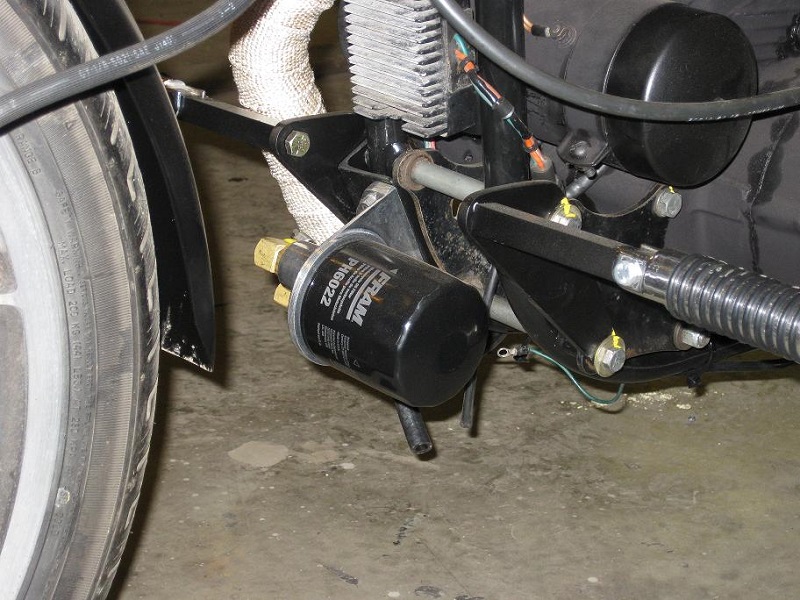
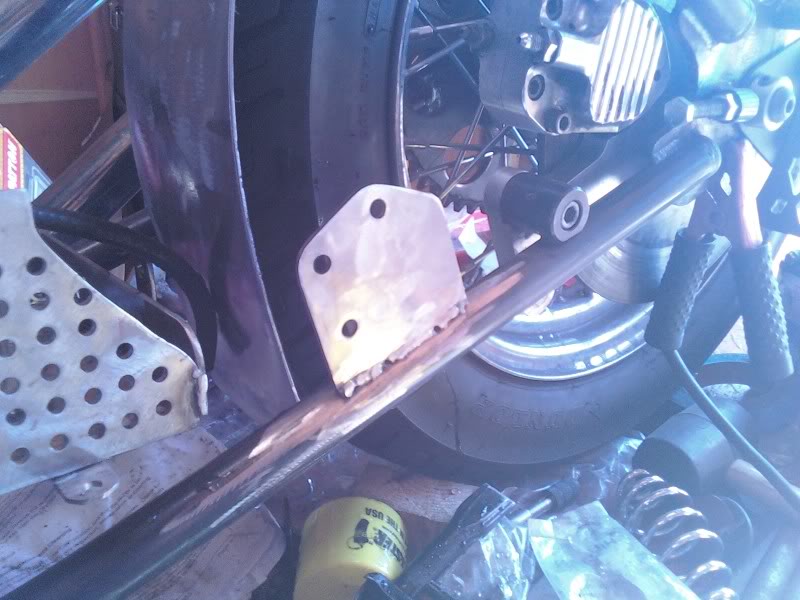
| Custom built oil filter mount. 25) | ||
 |  |  |
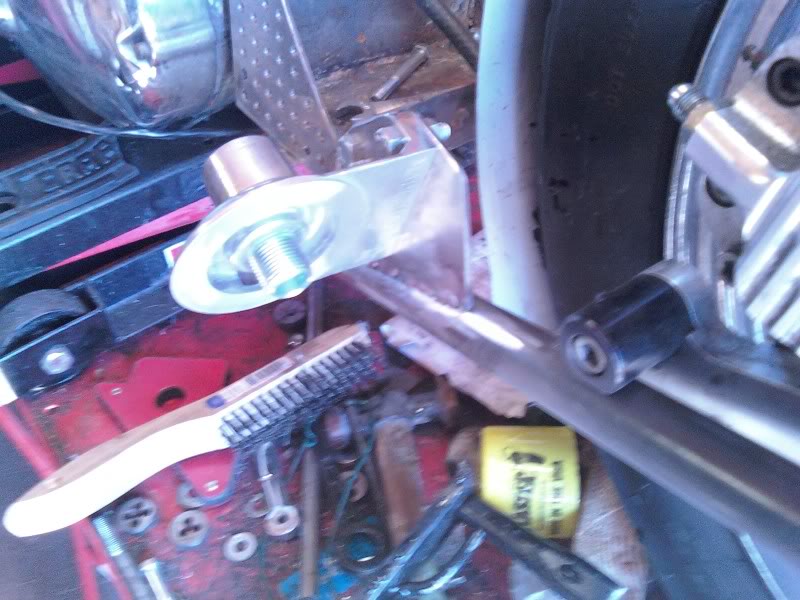
| Custom oil filter on 72 XLH build 26) | |
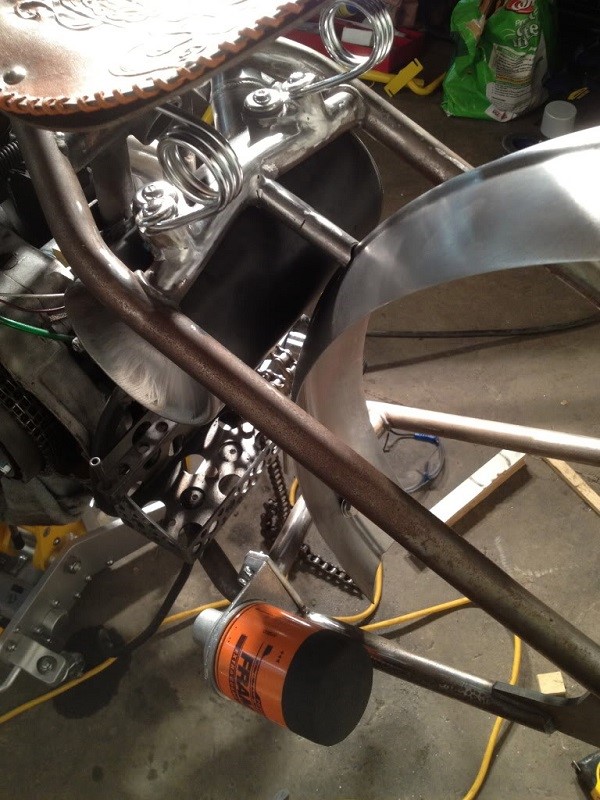 | 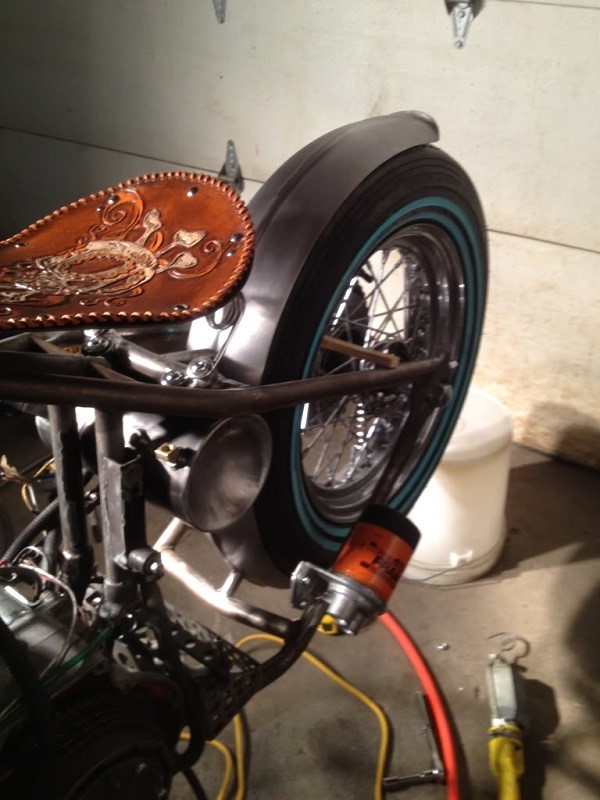 |
| Custom oil filter mount on an 81 XLH 27) | ||
 |  | 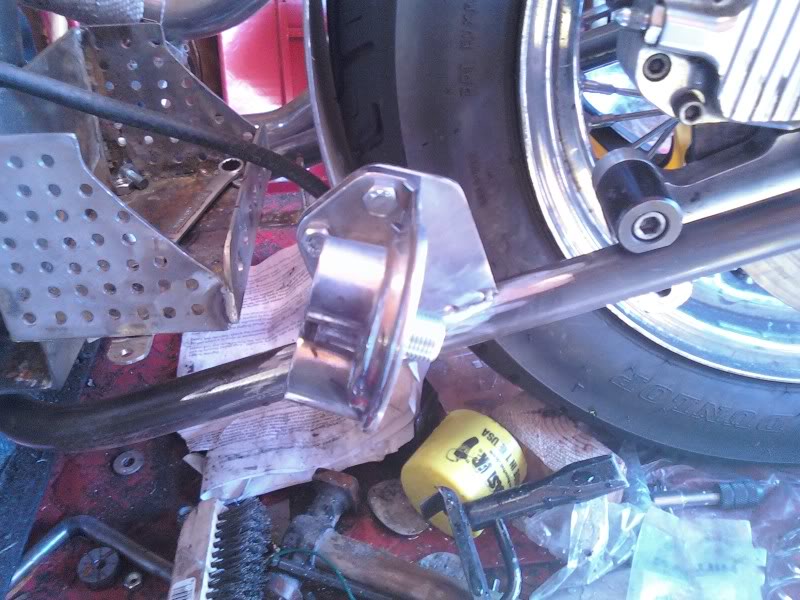 |
| As mounted 28) |
 |
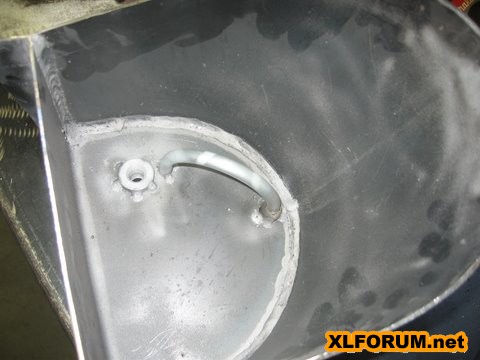
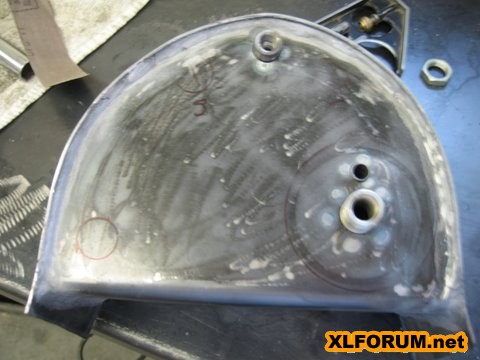
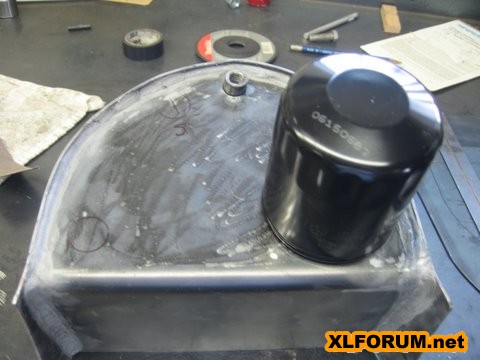
| 'Out of Tank' filter mount 29) |
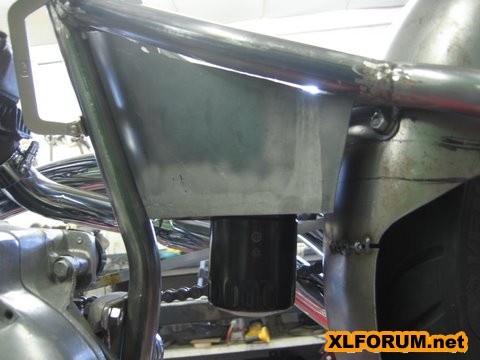 |
| Filter mounted onto oil tank. The return oil goes through a loop inside of tank, back out through filter and returns through center of filter. 30) | ||
 |  |  |