Table of Contents
This is an old revision of the document!

REF: Primary Drive & Clutch
Broken Rotor / Clutch Basket Magnets
If you look on the clutch of your late Ironhead to present Evo you'll see a warning. It says “Caution No Sharp Blows”. The BT rotor I obtained says the same thing. 1)
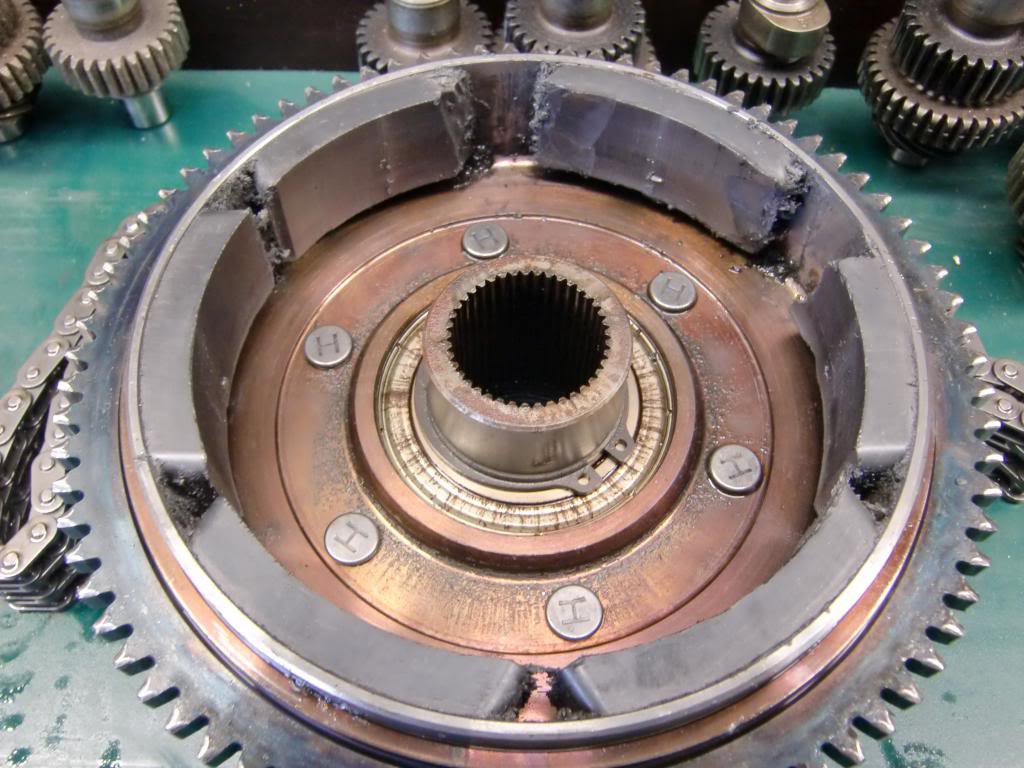
| This is what can happen when you use a hammer on the clutch basket / engine sprocket rotor (respectively to your year model) 2) | |
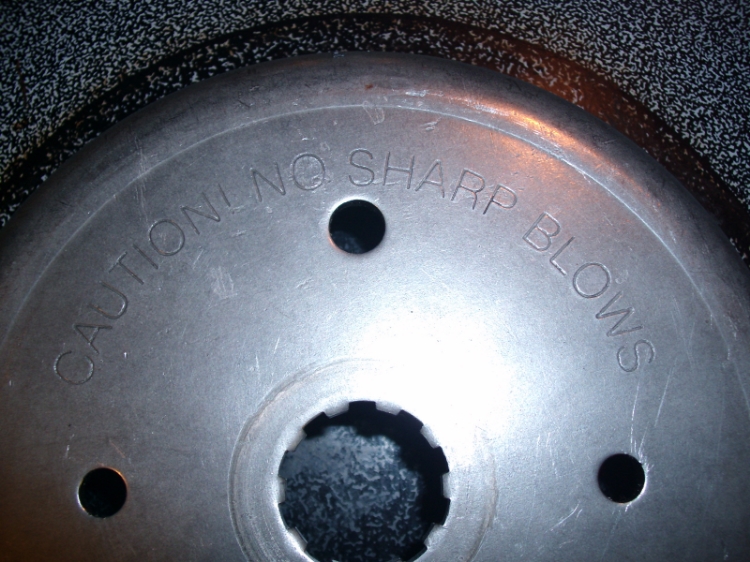 |  |
This was done on purpose as an illustration. “I started slow and then went a little harder until I heard a couple of the magnets drop out”. 3)
Repairing the Magnets
(L84-90 models)
- With a used clutch housing with good magnets, take all the magnets out first and re-glue them with epoxy (Loctite 3455 used in the pics below).

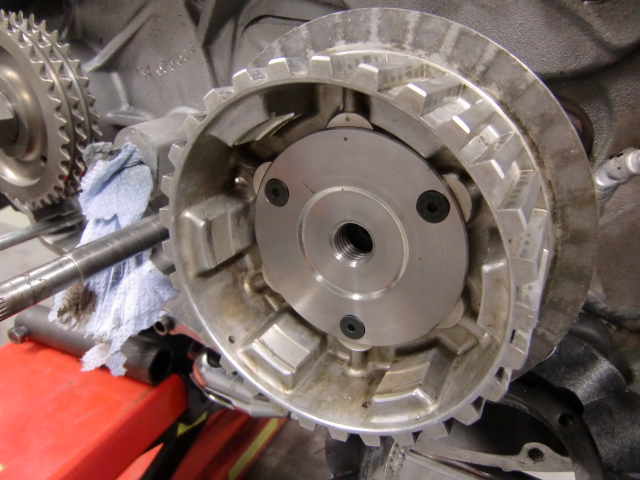
The Dreaded Clutch Basket Wobble (L84-90 models)
- This is a known issue:
- The late 84-90 sportster has the stator mounted behind the clutch shell, the problem is the stator needs a tight 0.060 clearance to operate right. A clutch shell wobbles even when the bearing in the trap door is good, but once it gets worn, it's enough for the magnets to start contacting the stator. Then it's catastrophic for the charging system. 6)
- Parts Repair: 7)
- The magnets so far have not been made available for purchase so one idea is to buy a used clutch shell on Ebay. You might go even cheaper if you can find one with a few bad magnets to remove the good ones and glue into your existing hub. Then get a new stator and trap door bearing. However, you haven't solved the problem. It will happen again.
- A solid solution:
- Replace the trap door with a Zipper's billet aluminum door with a double row bearing (around $350 and it removes the wobble).
 |  |
| Zippers Billet Trapdoor w / double row bearings. 8) | |
- Replace your factory clutch basket with a V-Twin charging kit (clutch shell with special encapsulated magnets, new stator, and regulator) which is around $550. You could just replace the parts you need but this way you know what your starting out with. And finally, you can fabricate “The Harton Fix” below (which takes some machining). It can be done on a new or existing hub shaft to add an extra bearing on the shaft and alleviate the pressure exerted on the non-bearing end.
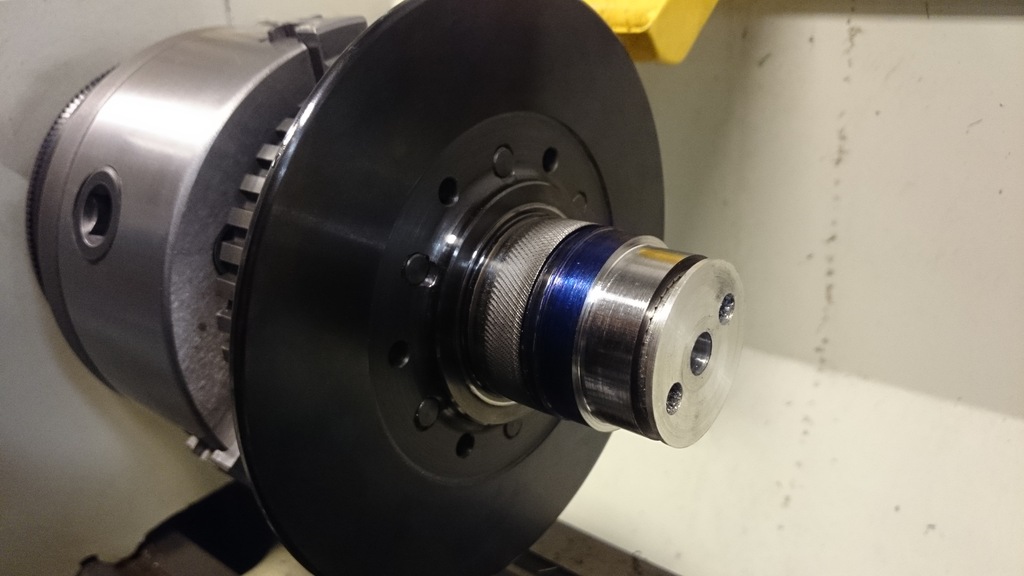
"The Harton Fix" (Late 84-90 Rotor / Clutch Shell Magnets)
Or, “How to fix the dreaded clutch basket wobble” 9) 10)
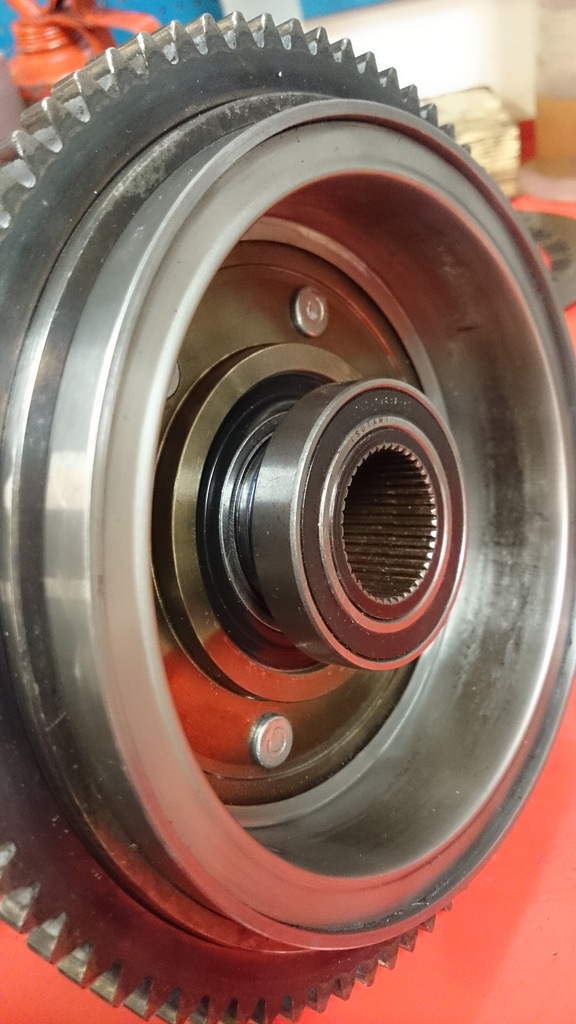
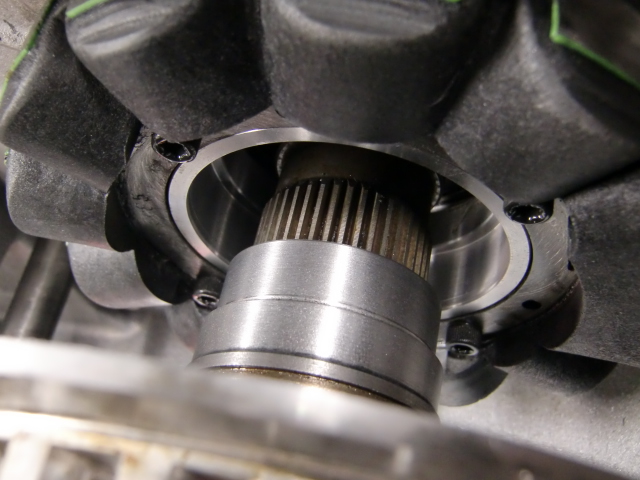
This is a fix for the famous clutch shell wobble breaking magnets & stator issues on the late 84-85 ironhead and 86-90 evo engines without going to aftermarket products. The V-twin clutch and the zippers trapdoor are nice parts but I don´t think that is where the problem started. The wobble on the clutch gear splines is what I think is the biggest problem to fix in most cases. If the clutch shell can´t wobble, the magnets will not hit the stator and the problem is fixed.
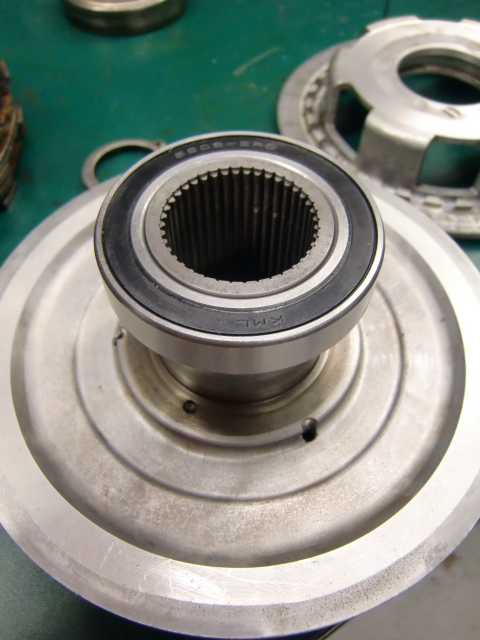
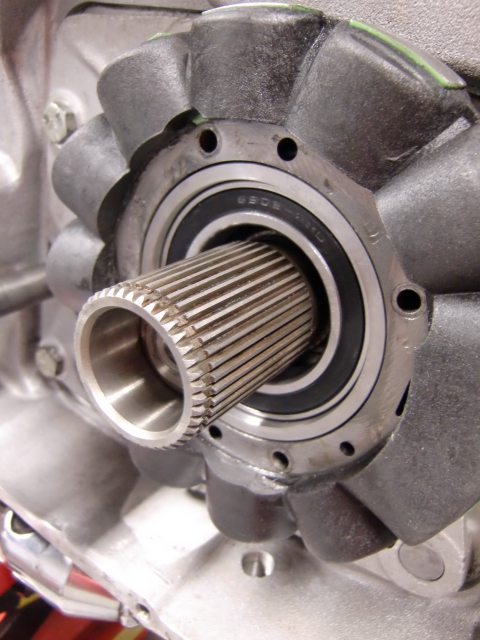
Mount an extra bearing at the back of the clutch
The bearing used in this example is a 6908-2RS ( 40 x 62 x 12mm ) to support the hub and fixed to the gear at the front of the clutch.
This way the clutch will not wobble on the splines.
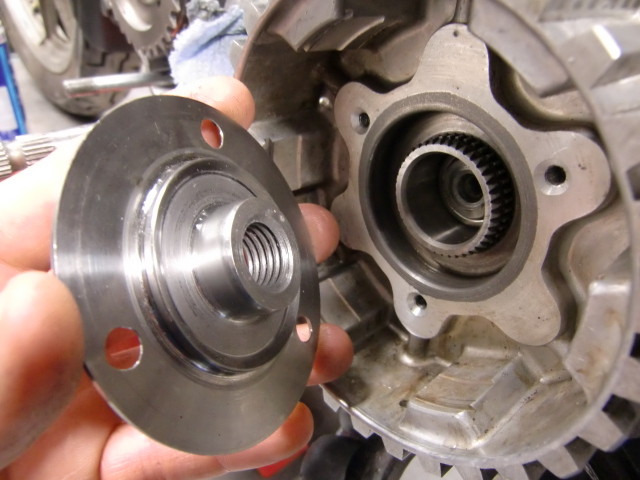
- You'll need to fabricate a sleeve to hold the bearing.
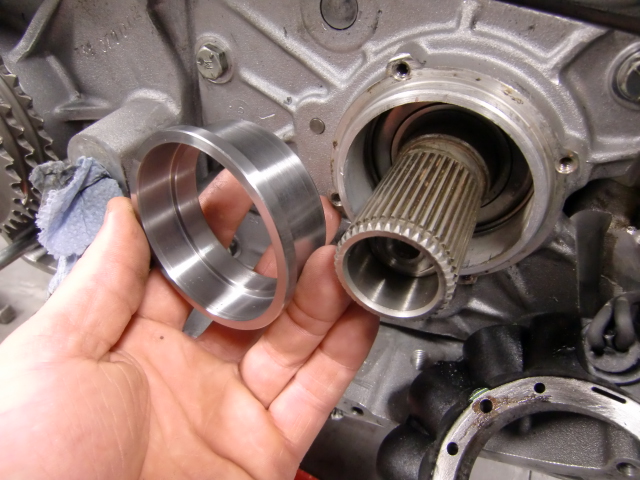

Calculating the sleeve
These dims are for reference comparison only. 13)
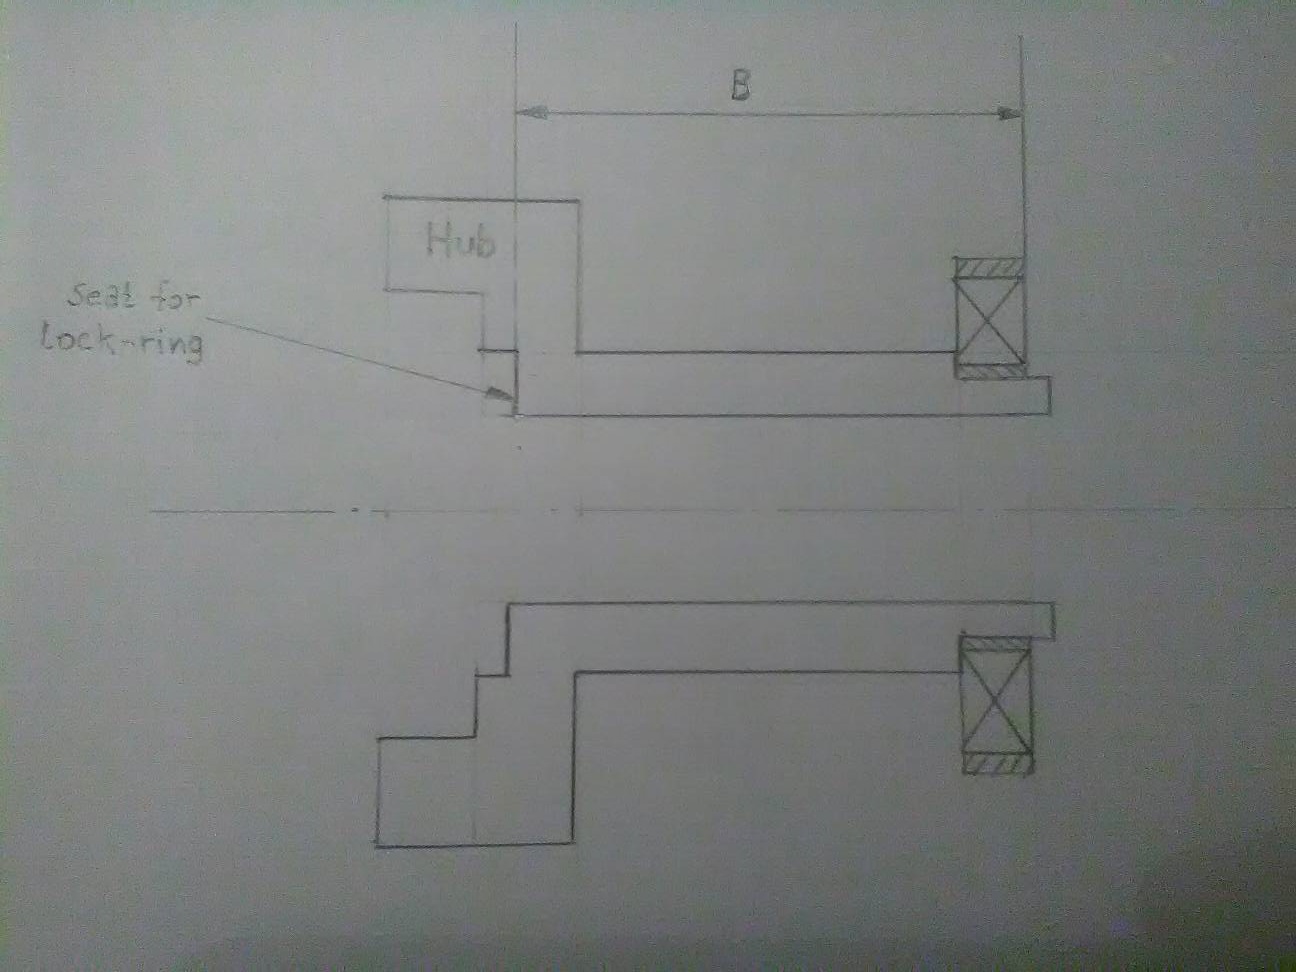
- Find distance A from the groove for the lock-ring to the start of the hole in the trap-door.
- Find distance B from the seat for the lock-ring in the hub to the far side of the bearing.
- Then, distance C = (B + the thickness of the washer under the circlip) - A
- In the image below, the bearing is drawn a little inwards from the end of the hub just to make a point it is the bearing that matters.
However one should try to make it flush with the end. - The distance 5.7mm is to make the sleeves outer protrusion flush with the stator. It can be made longer if needed.
- Ø1 = 70.6 mm (2.780“)
- Ø2 = 62.0 mm make slight press fit for bearing 6908
- Ø3 = 58 mm
- Ø4 = 63.5 mm (2.5”) make it to press fit into the trap-door.
 |  |  |
| App. dims for the bearing race (however, you must do the measuring for Your application). These were taken for an aftermarket hub. These are the updated pics by norseXL 14) |
||