Table of Contents

IH: Engine Mechanicals - Sub-09T
1977-1981 Top Mount Pics and Assembly
The order of installation written in the sections below can be adjust based on personal preference or ease of installation.
Use your own judgement but make sure all the top mounts are loose at once to allow the motor to be in it's relaxed position before tightening the top mounts.
Don't forget to shim as needed. The shimming is very important (for both the upper front and upper rear mounts). 1)
Shim these wherever so that when you tighten the fasteners there is no stress on any of the adjacent parts. Otherwise the mounts may break from vibration.
Click Here to read more on shims in the Sportsterpedia.
The rear and lower front mounts should be done and tight before installing the top mounts.
The top mounts need to be vertically flat with their mating points to make a good solid connection that won't vibrate loose or end up breaking a mount.
If need be, you can loosen off the front and rear engine mounts and jiggling the whole engine around until the cylinders are centered to and flat to the backbone. 2)
It would not take much movement at the bottom mounts to rotate the motor that tiny bit and get the top mounts out of line.
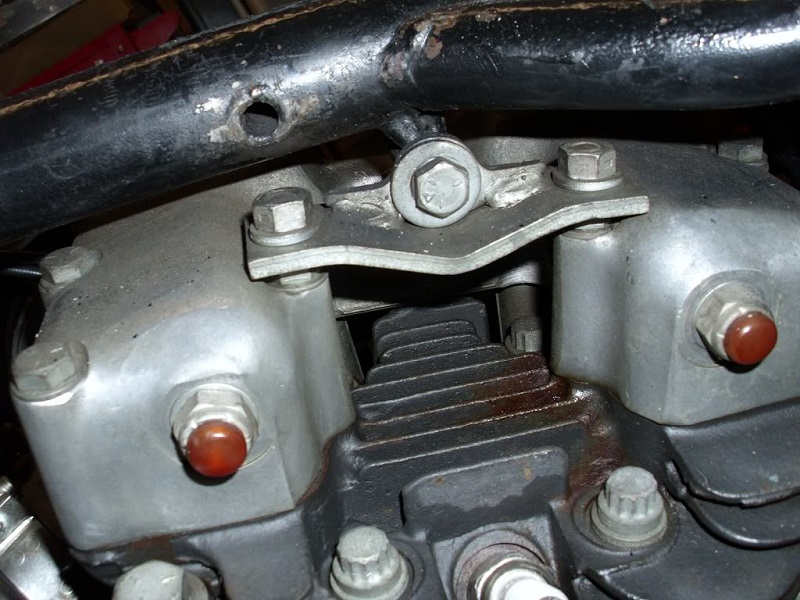
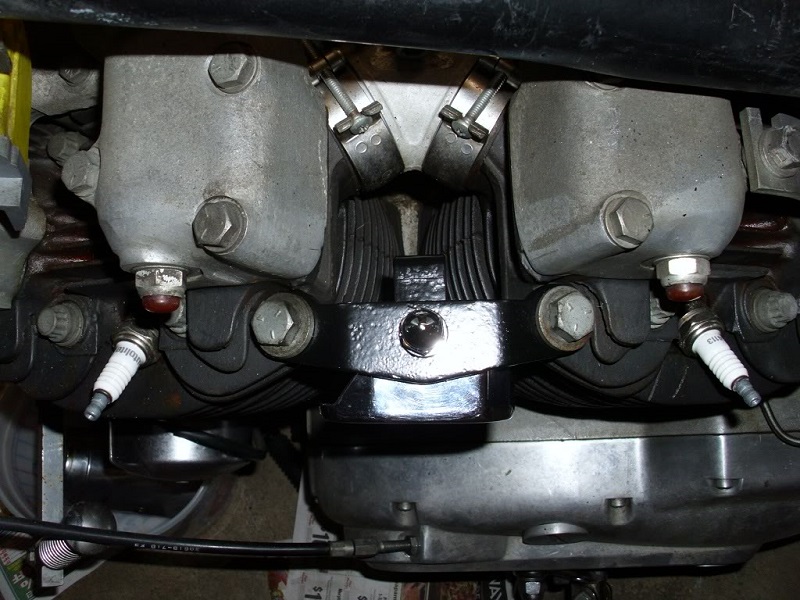
1977-1981 Head Strap
- The bracket attaches to the heads with a 7/16“ x 15/16” x 1/8“ thick washer under the strap and a 7/16” x 20 thru bolt on top (no washer under the bolt head).
1977 (only) Sportsters
Upper Front Mount
- Install the mount assembly into the front two rocker box holes.
Two 5/16“ x 24 x 2-3/4” bolts (4725) each with a 1/16“ washer (6316HW) under the head run thru the motor mount bracket.
A metal spacer sleeve (5760) goes on each bolt under the bracket to the mounting holes in the rocker box.
These bolts are used just for the motor mounts and are 1/2” longer than the regular mounting bolts for the rocker box.
Do not tighten or snug the bolts just yet. - Install the mounting bracket to the frame neck and tighten.
The mount attaches under the frame neck using a 5/16” x 18 x 7/8“ bolt (3991), lockwasher (7041) and a 1/16” thick washer (6702) in that order. - Shim if needed. Click Here to read more on shims in the Sportsterpedia.
Check to make sure there is no free space left under the mount (between the mount and rocker box) before tightening.
Don't allow any of the mounts to be “pulled” into position by tightening the bolts. 3)
It may be easier to shim at the rocker cover since everything has easier access.
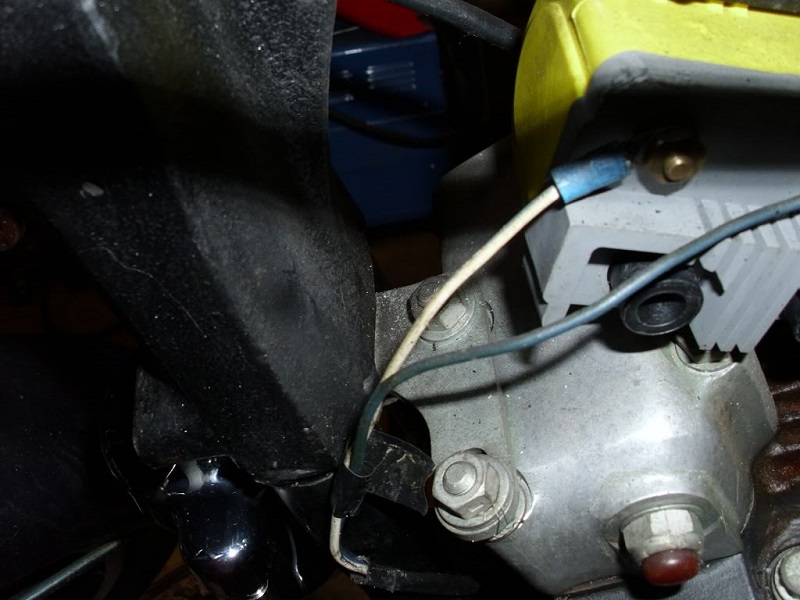
If your ignition coil is in the stock location, it's best to remove it so you can get to the bolts. 4) - With the bolts on the rocker box finger tight and “zero space” left over, go ahead and tighten the bolts.
You can also upgrade to the 78-81 type fasteners. H-D, they used different bolts between 77 and 78.
The same upper front motor mount is used with dual threaded studs into the rocker box instead of longer bolts.
The thread TPI and length into the rocker box holes is the same for both the bolts and the studs.
Both ways work fine, you just need a deep socket to clear the stud when you torque the 78 types.
Click Here to reference the 1982-1985 top mount assembly.
Upper Rear Mount
- Install bolt assembly through frame sleeve and top hole in the mount and tighten.
The rear top mount bolts to the frame with a 5/16“ x 18 x 2-1/2” bolt (4068). The bolt has a 7/8“ OD x 5/64” thick washer (6333) slid on under the head.
The bolt runs thru the sleeve welded to the frame from the right side with a 11/16“ OD x 1/16” thick washer (6702) added against the left side of the frame sleeve.
The bolt then runs through the hole in the top of the mount.
A 11/16“ OD x 1/16” thick washer (6702) is added against the mount with a 5/16“ x 18 locknut (7710W) on the end.
You can also add more washers to adjust (L-R) shifting of the mount or bolt length (mount has slots instead of holes at the rocker box). - Install the top rear mount assembly on the rocker box but leave it loose.
Two 5/16” x 24 x 2-3/4“ bolts (4725) each with a 1/16” washer (6316HW) under the head run thru the motor mount bracket.
The mounting holes in the rocker box are recessed to where the mount will not touch the top of them.
Therefore to keep from breaking the mount, washers (shims) should be installed on the bolts under the mount if needed to keep the mount off the rocker box.
Then the bolts go into the rocker box making up that assembly. - Shim if needed. Click Here to read more on shims in the Sportsterpedia.
Check to make sure there is no free space left under the mount (between the mount and rocker box) before tightening.
Don't allow any of the mounts to be “pulled” into position by tightening the bolts. 5)
- With the bolts finger tight and “zero space” left over, tighten the nuts on top of the bracket.
- You can also swap to the 78-81 type fasteners as the same upper front motor mount is used with dual threaded studs into the rocker box instead of longer bolts.
- The thread TPI and length into the rocker box holes is the same for both the bolts and the studs.
See below for more information.
1978-1981 Sportsters
Upper Front Mount
- Install the studs into the front two rocker box holes.
Two studs, (3412 except 79 XLS) (3417 for 79 XLS), install in the front rocker box to head holes instead of the normal bolts there.
A 1/16“ thick washer, (6316HW except 79 XLS) (6002 for 79 XLS), goes under each stud before installing into the rocker box. - Place the mounting bracket over the studs. Per the parts books, the mounting bracket goes on top of the stud with no washer between the stud and bracket.
See below. - Install and tighten the upper front mount to the frame.
The mount attaches under the frame neck using a 5/16” x 18 x 7/8“ bolt (3991), lockwasher (7041) and a 1/16” thick washer (6702) under the bolt head. - Shim if needed. Click Here to read more on shims in the Sportsterpedia. The built in stud hex nuts are faced (machined flat where the bracket sits) for a flush fit.
Check to make sure there is no free space left under the mount (between the mount and rocker box) before tightening.
Don't allow any of the mounts to be “pulled” into position by tightening the nuts/bolts. 6)
- With “zero free space” left over, install a 5/16“ x 18 x 1/4” locknut (7740) and 1/16“ washer on top of the each stud and tighten the assembly.
The length of the stud above it's (built in) hex nut is 1/2.
The top of the stud should end up no shorter than flush to the top of the nut with the assembly installed and torqued.
1978-1981 Upper Rear Mount
- Install top rear mount on the rocker stud assembly but leave it loose.
A threaded stud bolts to each rocker box under each motor mount bracket hole (slot) with a 1/16” thick washer between the stud (nut) and rocker box.
The mounting holes in the rocker box are recessed to where the mount will not touch the top of them.
Therefore to keep from breaking the mount, washers should be installed on the bolts under the mount to keep the mount off the rocker box.
Stud: (3412, zinc) used for 78-81 XL, XLCH and 81 XLS. Stud (3417, black) used for 79-80 XLS. Both are the same size.
Another washer can be placed on top of each stud (nut) if needed (raising the bracket off the rocker box), then the mounting bracket, a 1/16“ washer and a nut. - Install bolt assembly through frame sleeve and top hole in the mount and tighten.
The rear top mount bolts to the frame with a 5/16” x 18 x 2-1/2“ bolt (4068). The bolt has a 7/8” OD x 5/64“ thick washer (6333) slid on under the head.
The bolt runs thru the sleeve welded to the frame from the right side with a 11/16” OD x 1/16“ thick washer (6702) added against the left side of the frame sleeve.
The bolt then runs through the hole in the top of the mount.
A 11/16” OD x 1/16“ thick washer (6702) is added against the mount with a 5/16” x 18 locknut (7710W) on the end.
You can also add more washers to adjust (L-R) shifting of the mount or bolt length (mount has slots instead of holes at the rocker box). - Shim if needed. Click Here to read more on shims in the Sportsterpedia.
Check to make sure there is no free space left under the mount (between the mount and rocker box) before tightening.
Don't allow any of the mounts to be “pulled” into position by tightening the bolts. 7)
- With all the bolts finger tight and “zero space” left over, tighten the remaining nuts.
Ensure the space didn't change under the bottom two bolts after tighten them.
The length of the stud above it's (built in) hex nut is 1/2“.
The top of the stud should end up no shorter than flush to the final nut on top with the assembly installed and torqued.
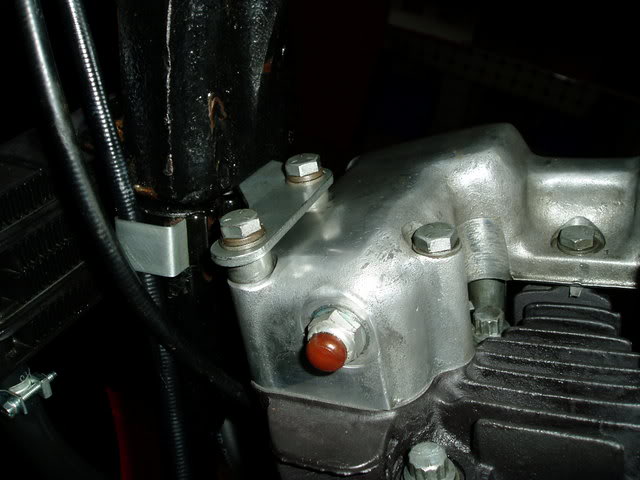
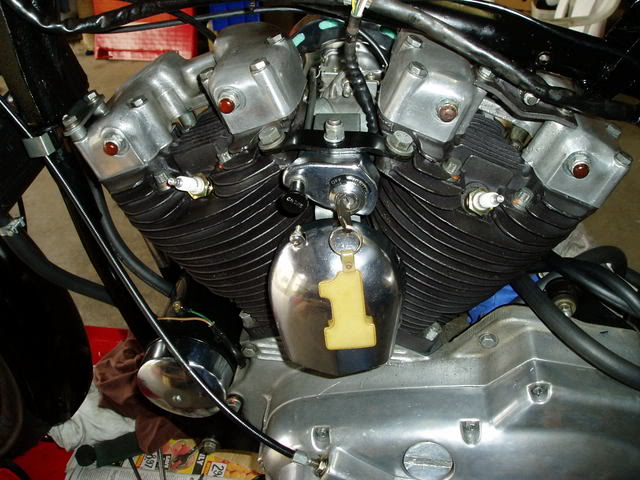
Pics of Top Mount Locations for 1977-1981 Models (as mounted)
The pics below are specifically for showing the location / orientation of the mounts. Washer count and placement may vary on used motors.
See the information above for washer specific information.
| 1977-1985 head strap and fasteners. (1979-E1981 XLS was chrome). 8) |
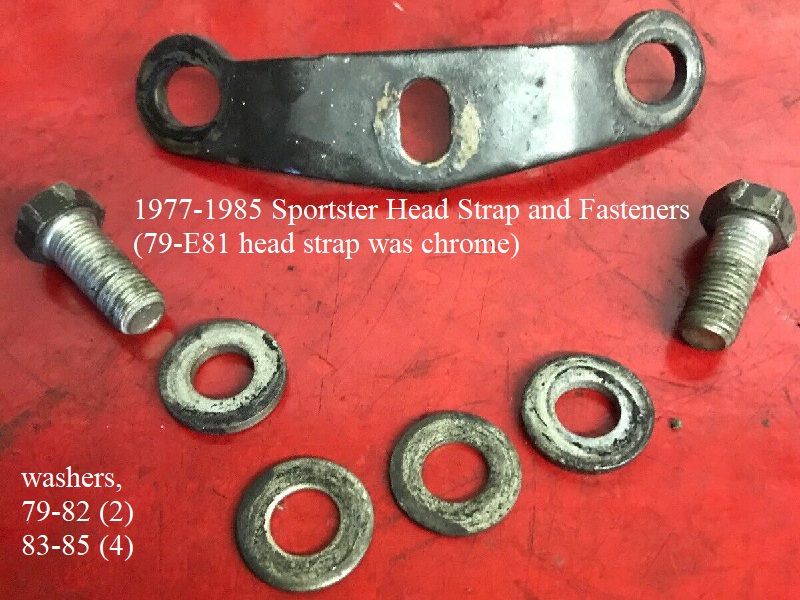 |