Table of Contents
This is an old revision of the document!
REF: Service Procedures 9
Ironhead 4 Speed Transmission Removal / Inspection / Installation
Sub-Documents
This section is not meant to be a replacement to the FSM.
It is meant as a compliment to the FSM with added information with pics that are not in the manual.
Always buy an Factory Service Manual AND a Factory Parts Catalog to help you along your maintenance path.
The Haynes and Clymer brand service manuals for the most part will suffice and they generally have more pics than the HD Service manual.
But the HD manuals will be the most accurate.
All in all, there are discrepancies in all of them including the HD parts and service manuals though.
Gear Inspection
With some of these parts, finding imperfections and cracks requires more than just glancing at them for obvouos damage.
Thoroughly cleaning the parts/gears from oil and debris and close attention to detail will do you well.
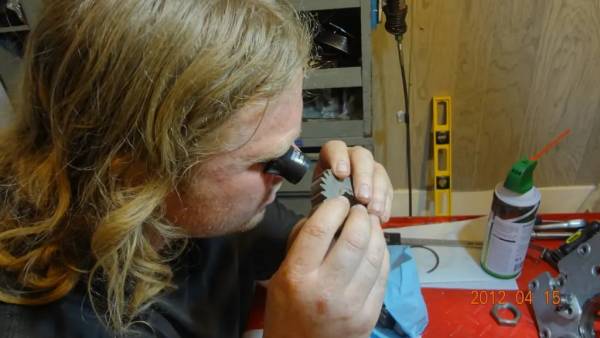
Inspect every tooth and dog on every gear with a magnifying glass or eye loupe. 1)
 2)
2)
Cracks
Any cracks found in a gear's teeth or body and the gear needs to be replaced.
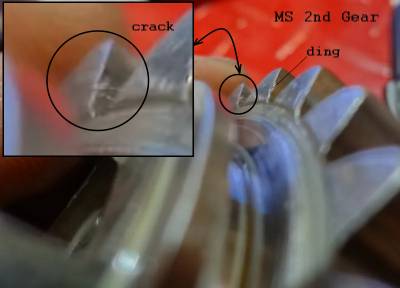
Some cracks are obvious and some are hard to see on a quick glance as shown below.
When finding damage to a gear's teeth, always check it's corresponding gear's teeth.
Replace both gears as a set when damage is found to avoid the old gear's teeth damaging the new gear's teeth.
Here is a MS 2nd gear with a crack on the lower side of 1 tooth and dings on it's other gear teeth.
 3)
3)
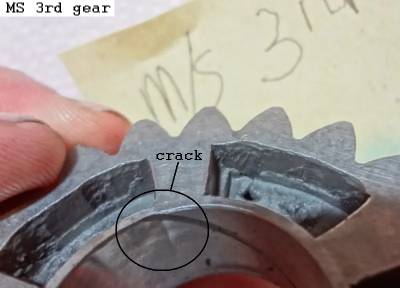
The dreaded exploding gears are OEM MS 3rd and CS 2nd (20T) gears: the other stock gears are up to stock use. 4)
For anyone using OEM MS 3rd and/or CS 2nd gears manufactured after 1972; 5)
These gears have a habit of cracking on the ID were the cross section changes thickness.
Cleaning with some 2000 grit emery revealed the crack better in the Left pic below. 6)
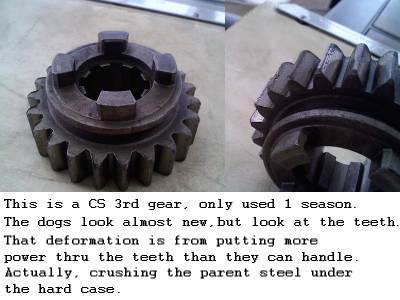
Teeth Wear
Replacing Gears
Dr Dick's rust covered opinion on what the order of Andrews upgrade should be if you got to do it bit by bit:
The first 3 are way more important than the last. 9)
- Mainshaft 3rd
- Countershaft 2nd
- Countershaft 3rd
- Mainshaft 2nd
- Clutch Gear
- Mainshaft
- Countershaft
- Mainshaft 1st
- Countershaft Drive
- Countershaft 1st


