REF: Service Procedures 9H
Clutch Gear Conversion - an answer to the obsolete 900 c-ratio
Article by Dr Dick 1)
If you got a 1957-1966 (all) or 1967-1969 XLCH and want that sweet c-ratio transmission, you been outta luck for the last 25+ yrs.
Andrews and HD discontinued them that long ago.
This conversion does not work for 67-70 XLH or 1970 XLCH.
The c-ratio sets are 18 clutch gear/26 countershaft drive gear tooth count. The standard ratio transmissions are 17/27.
The c-ratio set speeds up the 1-3 gear pairs by speeding up the counter shaft. This reduces the ratio jumps between gear changes. Especially the overly large 3-4 ratio gap. Top gear remains unchanged. The lower 3, as a group, get “moved closer” to top gear.
Those of us who have been spoiled by the c-ratio find riding the standard box very lacking. That's the reason for this thread.
Andrews still makes the 1971-E1979 and the L1979-E1984 c-ratio sets. Either of these can be converted for use in the earlier bikes. That's what I used here.
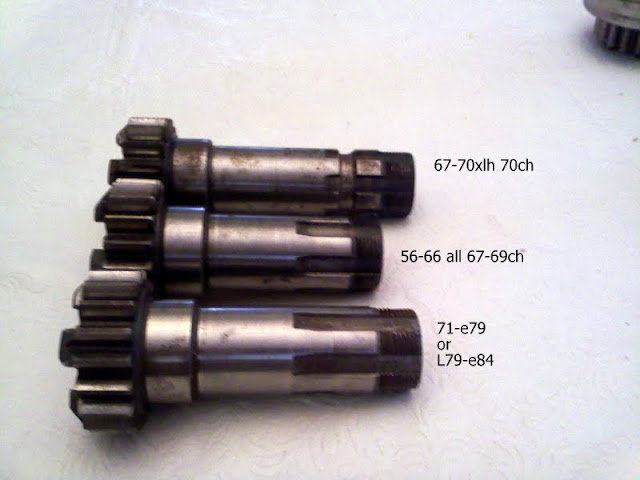
The players:
The gear on the top is the 67-70H/70CH. I included it for reference.
What gonna happin here is turning the bottom one into the middle one.
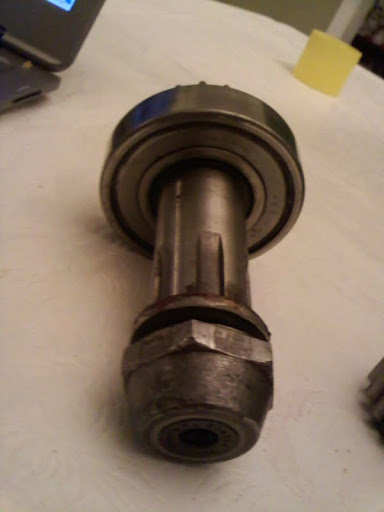
In this pic, I added a gear with the extension to the lineup.
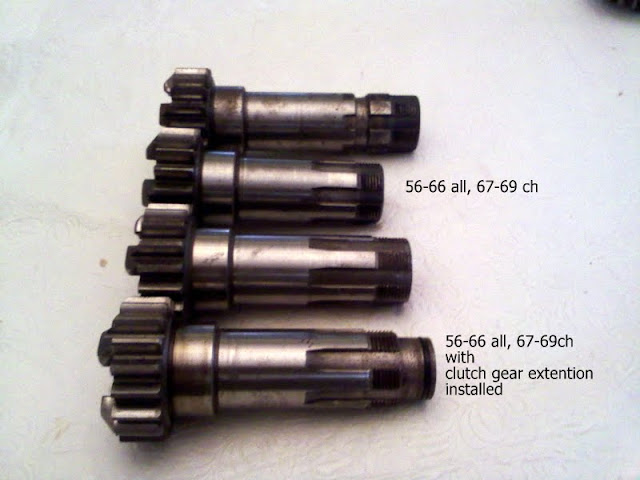
The extension is part of the dry clutch sealing system.
Those of you who use a wet kit in the dry drum can bypass the sequences that deal with the seal in the extension. You don't need the seal.
Step 1.
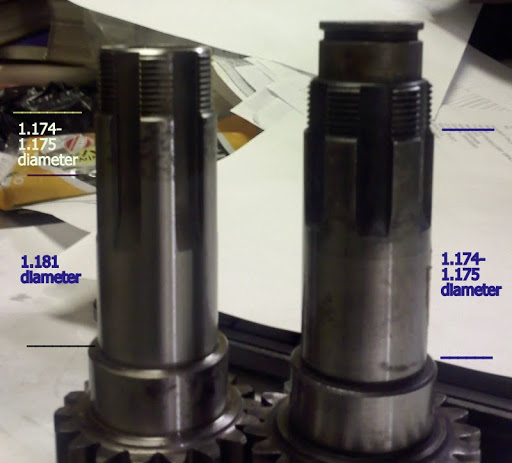
Reducing the OD of gear. In order for the kicker sleeve, drum bearing inner race, and dry hub to fit, a section of the late gear needs to be reduced to the early spec.
Late left, early right. The 1.181“ dia must go.
The AP gear is very hard. 60rockwell c scale.
At 1st I used to set gear up in lathe and use tool post grinder to remove the .007”. It worked fine.
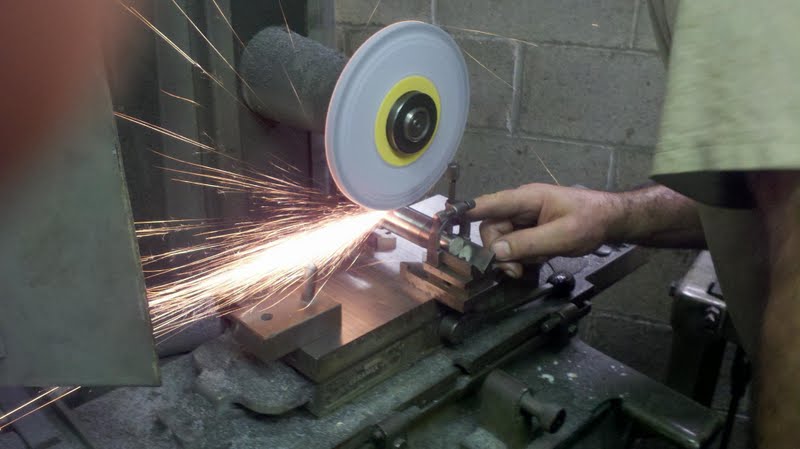
Now I do this this on the surface grinder. So much quicker.
What goin on here is using a matched set of vee blocks, one with a .750“ pin riding in the gear bush, the other with a .751” pin riding in the torrington. This operation is possible because the AP gear has excellent concentricity between inner bearings and OD.
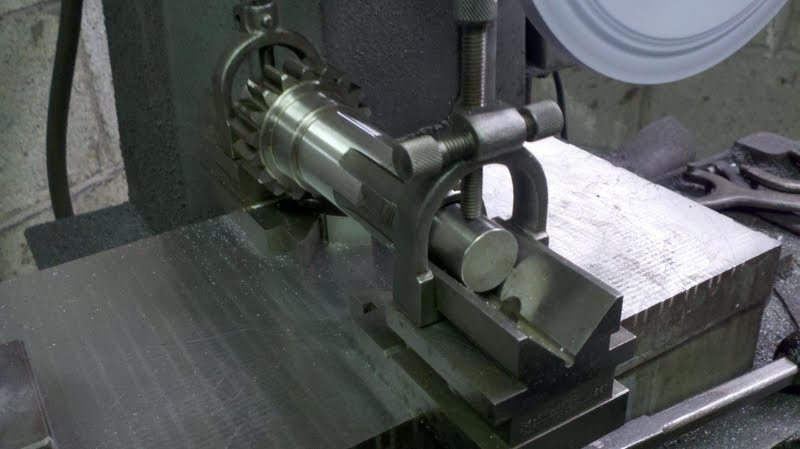
While grinding, the wheel will want to spin the gear. I use my hi-tech workpiece speed governor to keep things under control.
 2)
2)
Finished. Now the gear accepts the 900 kicker and clutch.

Step 2.
A spacer. The extra length of the late gear doesn't allow the clutch hub nut to clinch down on the hub. A steel spacer to go between the nut and the hub needs to be made. This spacer is 1.50“ OD, 1.135” ID, .190“ thick (if you're running the wet kit, you are done now. Don't use the 900 gear extension). The .190” thick needs to be parallel .001“ and have a good surface finish to seal against oil for dry use. Back to the surface grinder for this. Some of your favorite sealer on these surfaces when assembled.
Step 3.
Mounting the clutch rod seal. The old clutch gear extension cant be used, at least not in the stock length. The longer late gear screws up the deck height of the assembled nut/extension relationship. I haven't tried to shorten the extension, so I don't know if it's possible.
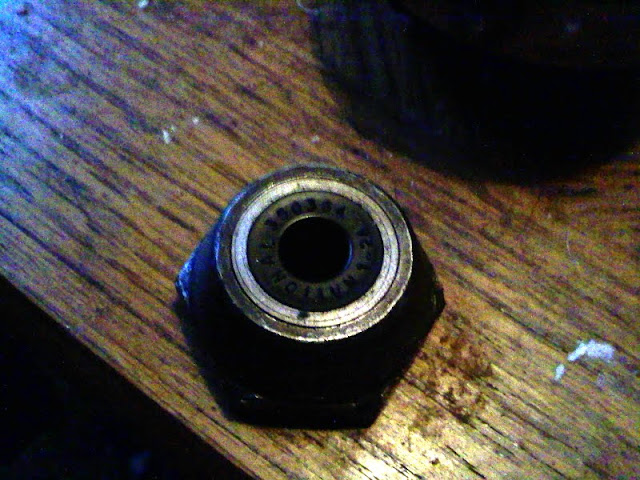
Instead of using the extension, I mount the seal in the dry hub nut. See the sleeve pressed (.002” interference) in the nut. Bore sleeve ID .749“-.750” thru for seal. This finishes the mods.

Step 4. This is optional.
Clutch rod guide. I do this because I think it eliminates seal weeping. (.25“ thick steel, .002” press in gear). Flush as shown. Bore ID concentric to OD. ID bore to rod clearance .002“. 4 notches in guide OD for oil relief.

Ready to go.