Table of Contents
This is an old revision of the document!

REF: Tools - 142
Swingarm Tools
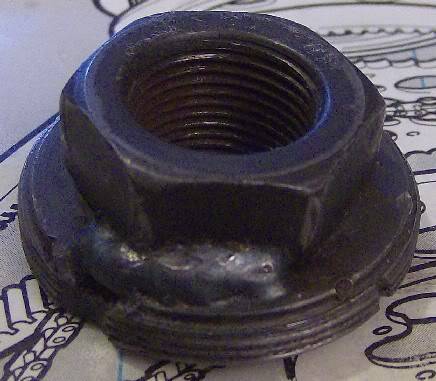
IH Swingarm Thread Repair Tool
A wrecked right side bearing locknut 47515-52 [52 to E74] with a fitting welded into it.
Slots were cut into the threads and it is used to chase / repair the threads in the swingarm. 1)
 |  |
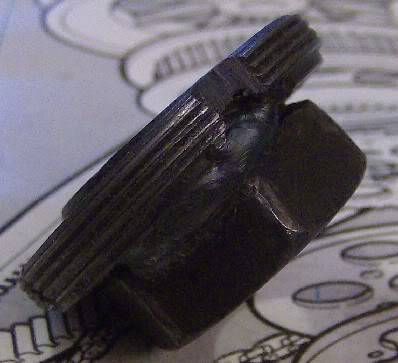
| Swingarm thread repair tool 2) | |
 | 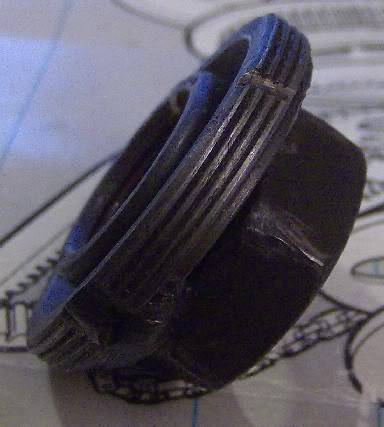 |
| Swingarm thread repair tool 3) | |
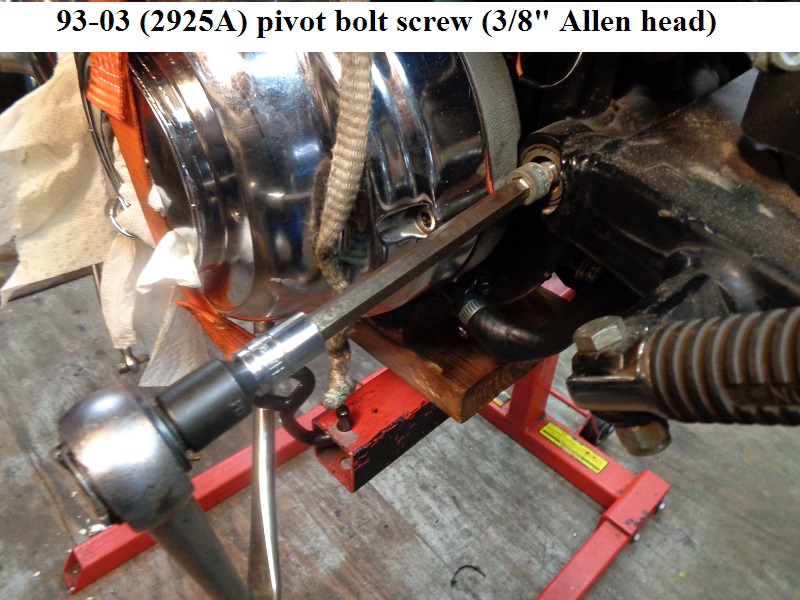
Pivot Bolt
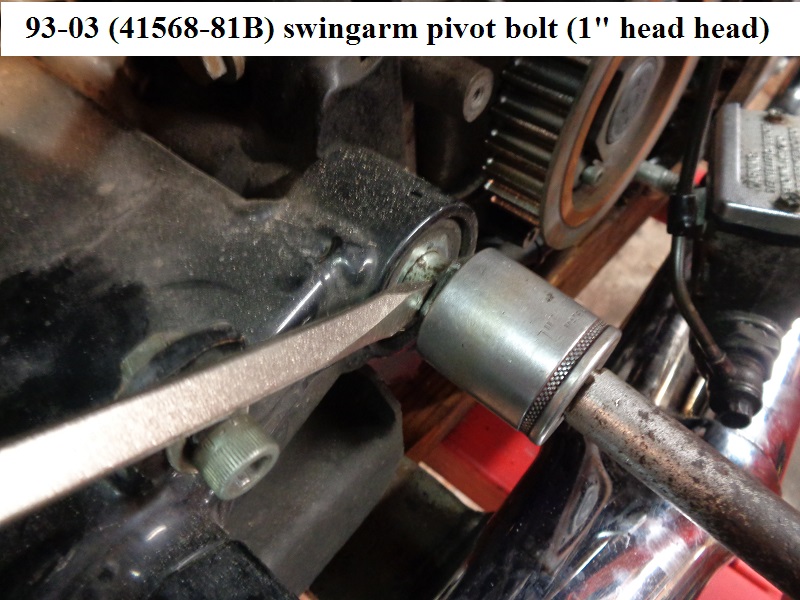
93-03 swingarm pivot bolt wrench sizes.
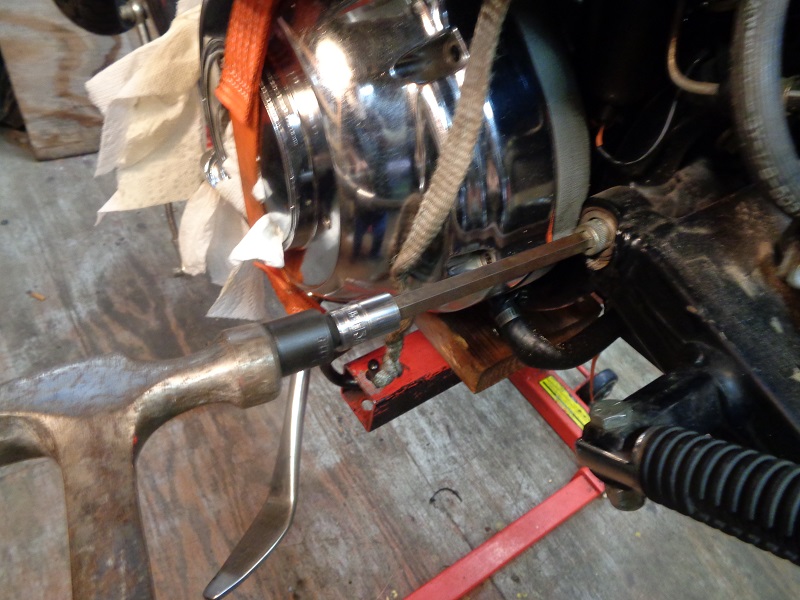
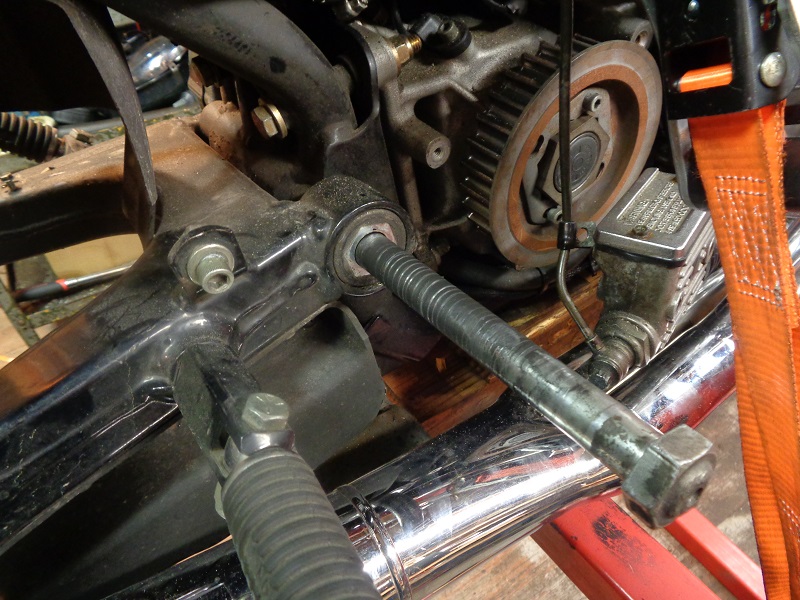
To remove the pivot bolt, remove the pivot bolt screw and turn the bolt a few turns to loosen it up.
Put the pivot bolt screw back in a few turns and whack it with a hammer to initially drive it toward the right side.
Then use a screwdriver to pry the bolt out while turning the screw. Continue turning while giving up pressure on the wrench to back the bolt out.
 4)
4)  5)
5)
Swingarm Bushing Removal / Installation
1982-2003 Sportsters with square tube swingarms
See also 1998 1200S Swingarm Bearing / Bushing Inspection and Replacement in the Sportsterpedia.
The bushing is pressed in and likewise will have to be pressed out. They make a special tool for removing / installing the bushing.
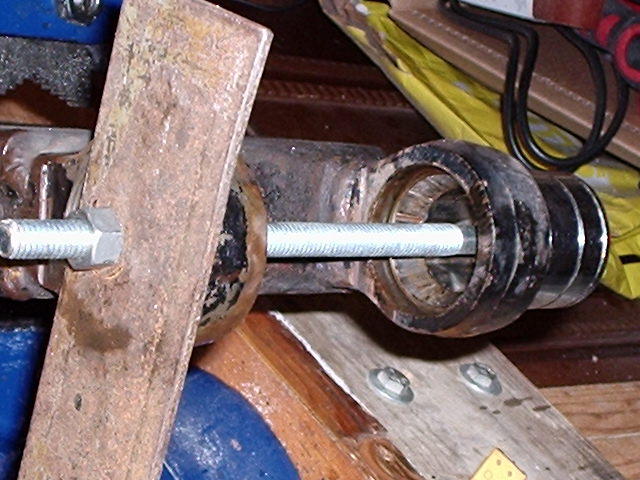
The rig below can also be used as a remover / installer tool.
- Parts:
- A length of 3/8“ threaded rod.
- (2)- 3/8” nuts and washers
- (2)- Sockets (you'll have to measure what you have on hand for proper fitment).
- 1 has to either fit inside (outer races removed) or outside (outer races installed) of the right pivot.
The one used below was set against the bearing lockring in the middle of the right pivot.
Caution, do not use a socket on the inside if the races are installed. That could mar the internal bearing surface. - The other has to fit inside the right pivot and only a few thousandths (preferably) smaller than the bushing O.D.
Too small and it will mushroom the inside of the bushing.
Too big and it'll get stuck in the pivot.
Caution, measure to make sure it's smaller than the I.D. of the pivot before using it.


A variation is to use a flat piece of metal as a backing plate for installing / removing bearing races.
Swingarm Race Removal / Installation
Installation
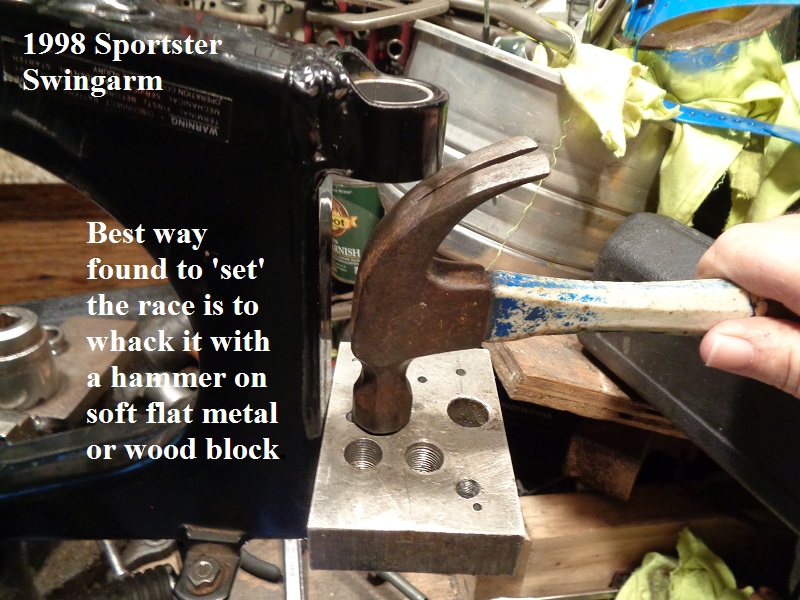
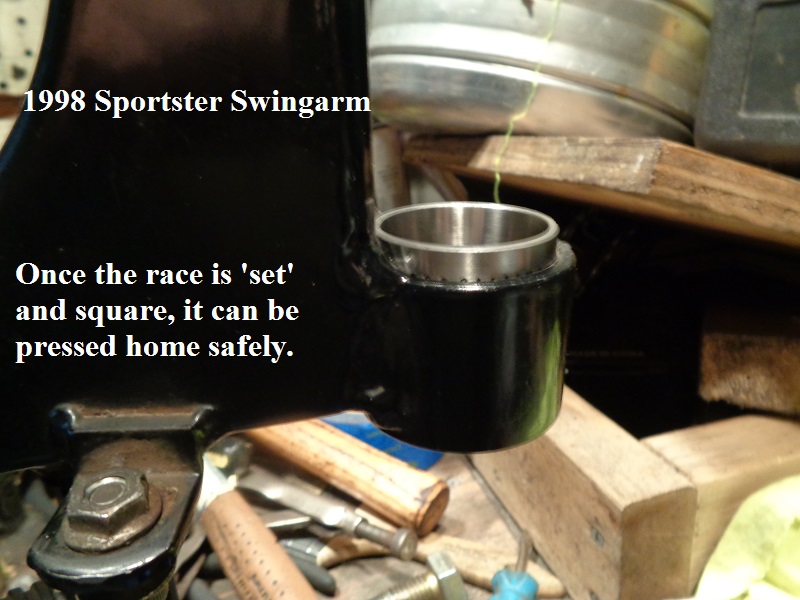
The race has got to be straight before a regime of pounding or pressing to install it.
By far, the easiest way to start the race straight into the bore is to use a wood block or soft flat metal like aluminum to smack the race in straight.
If the race gets sideways, use a drift or screwdriver and knock it out with a hammer and 'reset' the race in straight.
Once it gets sideways don't try to smack it with a hammer to straighten it back up.
And don't believe, if using a press, you can keep applying pressure until it does straighten up.
You can ruin the bore that way.
Do not use any grease / lubricant to lube the bore to make it easier to install the race.
It is, by design, a press fit installation. That means the ID of the bore is the same OD of the race.
Grease does not make it easier to install the race. It makes it harder by adding thickness to the wall of the bore.
There are two races back to back and separated to a lock ring.
Grease will end up being push against the lock ring and the race won't go all the way home.
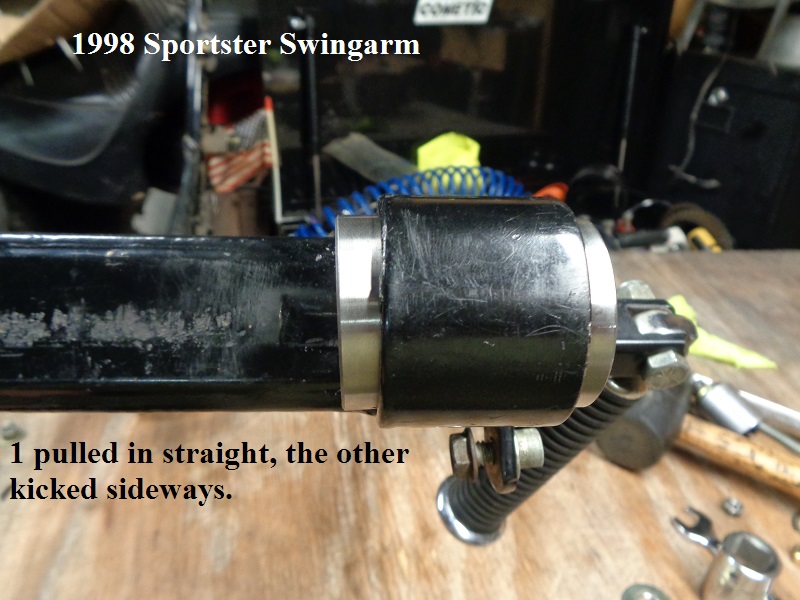
It's best to install one race at a time.
That way you only have to deal with one race getting sideways at a time.
Tools:
- Hammer and a wood block:
- You can use a wooden block on top of the race to initially to get it started in the bore.
Once started some, use the old race against the new one to pound it in.
But, if the race gets sideways while pounding, some will pound the high end down until the race is straight again.
While that is probably the fastest way to get the race in, it is not a good idea.
That wears against the side of the bore and can ruin the race surface.
- Bench vise:
- You can set the swingarm in a bench vise with a race against one side and the other side of the swingarm on the opposite jaw.
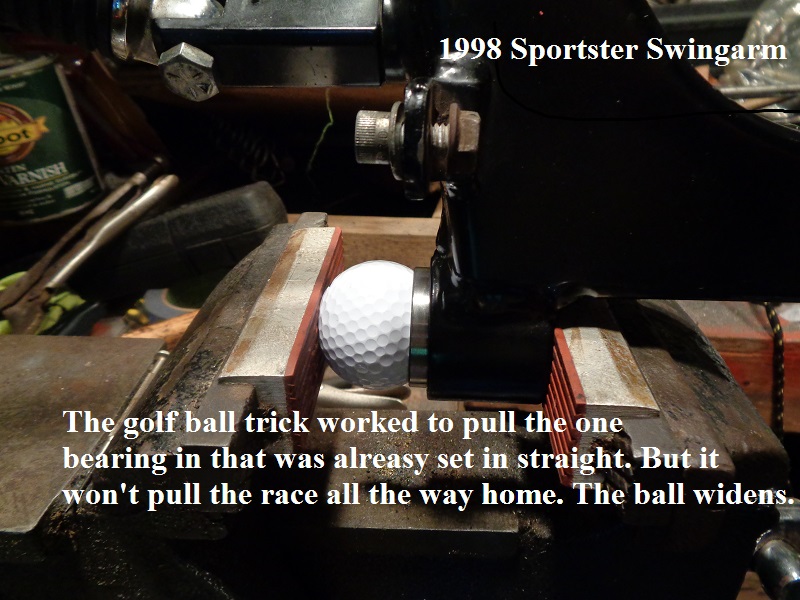
This works for some but it is easy to get the race sideways still and keep tightening the vise. - Some have opted to use a golf ball inside the race to press it in using a vise. This does work to a point (after the race was 'set' initially).
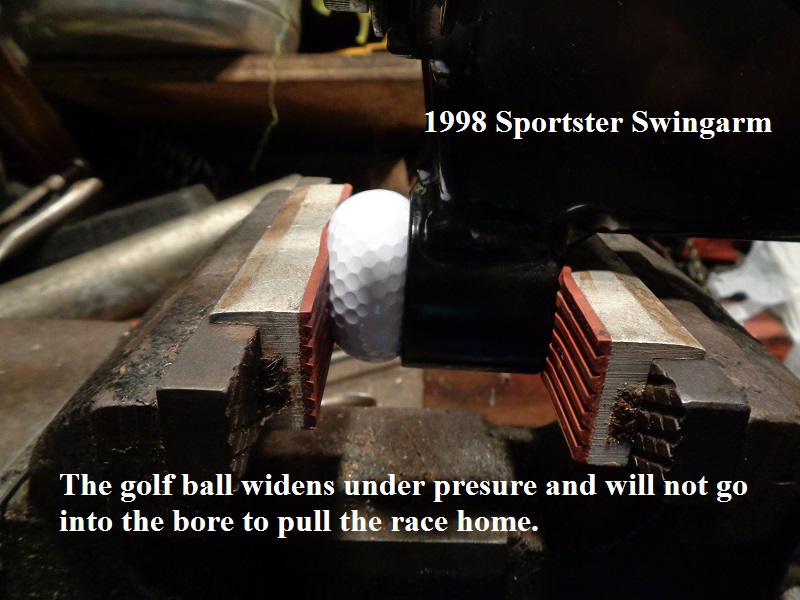
The golf ball widens however as pressure increases on the vise jaws and the race will pull in.
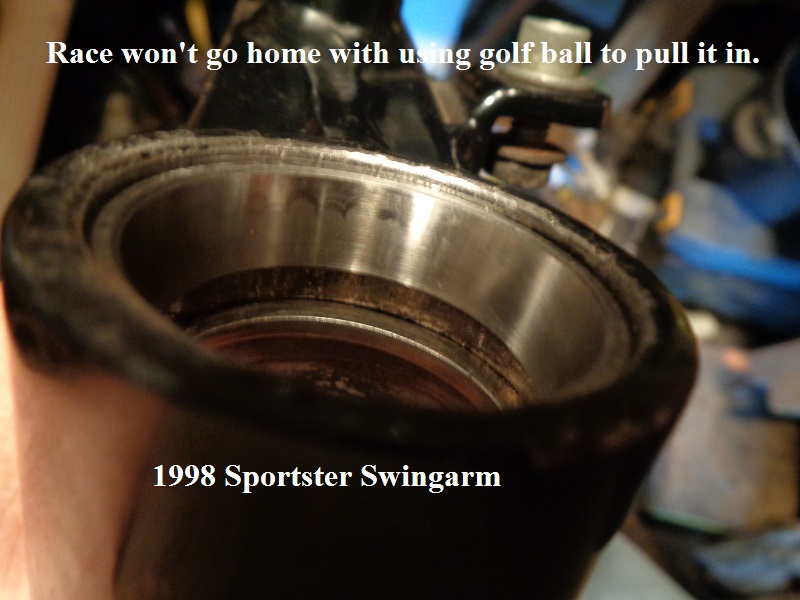
But due to the golf ball widening bigger than the pivot bore, you can not press the race home with it.
Then you still have to pound the race or press it in further to finish up.
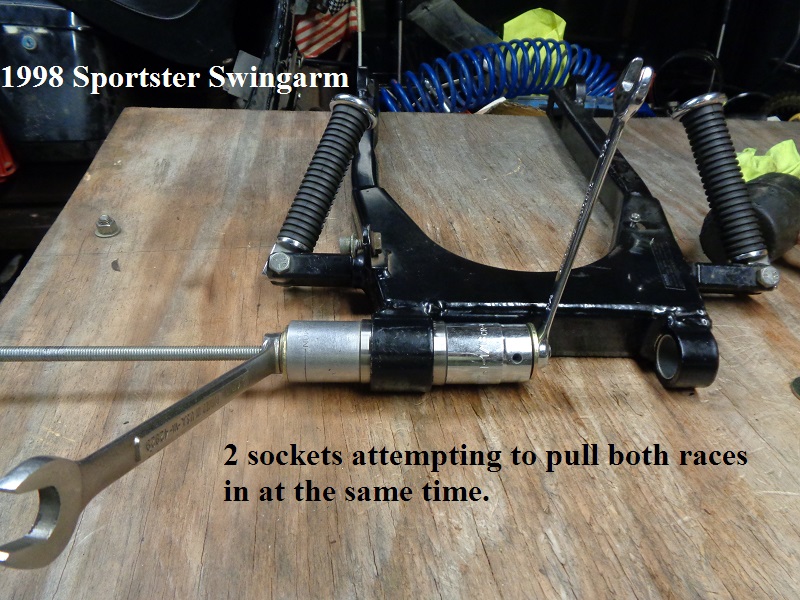
- Threaded rod press:
- You can use a wood block and hammer to 'set' the race in the bore and then use some 3/8“ threaded rod and a couple sockets to press the race in.
This is probably the safest way to do it.
If the race gets sideways, the nuts get hard to turn. At that point, knock the race out and try again.
While tightening, the race will be a little difficult to turn but you can feel it pulling in.
If it gets hard all of a sudden, the race is either stuck sideways or it has made it home.
| To start the race straight in the bore, use a hammer and a wooden block or soft aluminum block. 12) | |
 |  |
| Installing both races at the same time with a threaded rod. 13) | |
 |  |
| Using a golf ball to pull the race in. 14) | ||
 |  |  |